

Quick AnswerWhat Is Resin 3D Printing? Resin 3D Printing is a process that uses UV light to cure liquid photopolymer resin layer by layer into highly detailed objects. It is ideal for miniatures, collectibles, jewelry, dental models, and professional-quality prints with ultra-smooth surfaces that Filament (FDM) printers simply cannot match.
Who Is Resin Printing Actually For?
Before diving deep, let’s be honest about whether resin printing is the right fit for you.
✅ Best For:
- Miniature printing (tabletop gaming, Warhammer, D&D)
- Jewelry making and casting models
- Dental and medical models
- Figurines and collectibles
- High-detail prototypes and product design
- Professional-quality display models
❌ Not Ideal For:
- Large functional mechanical parts
- High-strength engineering components
- Users without access to ventilation space
- Beginners who want zero mess and zero chemical handling
If you saw yourself in that first list — you’re in the right place. Let’s get into everything you need to know.
📋 Table of Contents
1. What Is Resin 3D Printing and How Does It Work?
How the Resin 3D Printing Process Actually Works
At its core, Resin 3D Printing works by exposing liquid photopolymer resin to UV light. That UV light cures — or hardens — the resin in precise patterns, building your model one ultra-thin layer at a time from the bottom up.
Here’s what happens inside the resin 3D printing machine during a print:
- The UV light engine fires beneath a transparent resin vat
- An LCD screen acts as a mask, blocking UV light everywhere except where your model needs to solidify
- A single layer of resin cures in a matter of seconds
- The build plate lifts slightly, peeling the cured layer from the FEP film at the vat’s base
- The process repeats — layer by layer — until your model is complete
The result? Jaw-dropping surface detail that other technologies genuinely struggle to replicate.

Resin model being printing in Anycubic Photon 3D printer
Step-by-Step: The Full Resin 3D Printing Workflow
Understanding the complete workflow before you buy is one of the smartest things a beginner can do. Here’s the honest, full picture:
| Step | What You Do |
|---|---|
| 1. Find or create a model | Download an STL file from sites like MyMiniFactory or design your own in CAD software |
| 2. Import into slicer software | Load the model into Lychee Slicer, Chitubox, or your printer’s native slicer |
| 3. Add supports | Generate automatic or manual supports to prevent model collapse during printing |
| 4. Slice the file | Export the sliced file to a USB drive or send via WiFi to your printer |
| 5. Pour and level resin | Fill the resin vat and ensure the build plate is properly leveled |
| 6. Print | Start the print and let the machine run (prints often take 2–8 hours) |
| 7. Wash the print | Remove excess uncured resin using IPA or a dedicated Wash Station |
| 8. Remove supports | Carefully remove support structures with flush cutters |
| 9. UV cure the print | Post-cure under UV light for full strength and hardness |
| 10. Sand or paint (optional) | Finish your print to the desired level of detail |
It’s more steps than FDM — but the results speak for themselves.
Types of Resin 3D Printing Technology
Not all Resin 3D Printing Machines work the same way. There are three main resin 3D printing technologies:
MSLA (Masked Stereolithography) — The Consumer Standard
MSLA printers use an array of UV LEDs behind an LCD screen. The LCD acts as a pixel-level mask, exposing an entire layer at once. This is what virtually every consumer resin printer on the market uses today — including the Elegoo Saturn, Anycubic Photon, and Phrozen Sonic lines.
Why it dominates: Affordable, reliable, excellent detail, fast layer times, and a thriving ecosystem.
SLA (Stereolithography) — The Professional Laser System
The original resin technology. A laser traces each layer point by point. SLA produces exceptional accuracy, but machines like the Formlabs Form 4 cost several thousand dollars. This is the territory of dental labs, engineering firms, and serious professionals.
DLP (Digital Light Processing) — Projector-Based Printing
DLP printers use a digital projector to flash entire layers. The pixel size varies based on build area and projector resolution. DLP has a strong presence in the dental and jewelry industries but is less common in the hobbyist market.
Bottom Line for BeginnersMSLA is the technology you want. It offers the best balance of print quality, cost, speed, and community support. Every printer we recommend in this guide uses MSLA technology.
2. Resin 3D Printing Safety — What You NEED to Know
Let’s address this upfront because it’s the question that stops most beginners from pulling the trigger — and it deserves an honest answer rather than either dismissal or fearmongering.
The reality: Resin printing involves chemical handling. It requires a modest commitment to safety. But with the right setup, it is absolutely manageable for home users.
Thousands of hobbyists print safely in their homes every single day.
Are Resin Fumes Dangerous?
Uncured photopolymer resin contains monomers and photoinitiators that can cause skin sensitization, respiratory irritation, and in cases of prolonged unprotected exposure, more serious health effects.
Modern low-odor resins have significantly reduced VOC emissions compared to older formulations — but they are not odorless and should never be treated as completely harmless.
The key risks:
- Skin contact: Can cause sensitization (an allergic reaction that worsens with repeated exposure)
- Eye contact: Requires immediate rinsing
- Inhalation: Prolonged breathing of resin fumes without ventilation is the primary long-term concern
- Ingestion: Obviously — don’t.
The good news: Every single one of these risks is easy to manage with basic PPE and ventilation.
Essential PPE Checklist
Before your first bottle of resin arrives, have this ready:
- ✅ Nitrile gloves (not latex — resin can pass through latex)
- ✅ Safety glasses or goggles
- ✅ Respirator with organic vapor cartridges (not a simple dust mask)
- ✅ Silicone mat to protect your work surface
- ✅ Paper towels for cleanup — dedicated and disposable
💡 Pro TipBuy nitrile gloves in bulk. You’ll go through them fast. A box of 100 costs very little and is one of the best investments in your resin printing setup.

Safety Goggles
AVAILABLE ON AMAZON
Ventilation Setup Guide
Your ventilation setup matters more than your printer choice for long-term safety and enjoyment.
Option 1: Open Window + Fan
The minimum viable setup. Position your printer near a window, place a fan behind it blowing fumes out. Not ideal for winter but functional for short sessions.
Option 2: Enclosure + Carbon Filter
Many hobbyists enclose their printer in a modified IKEA Lack cabinet or dedicated printer enclosure fitted with an activated carbon filter. This significantly reduces ambient fume concentration.
Option 3: Dedicated Hobby Space
A garage, shed, or well-ventilated spare room is ideal. This is what serious hobbyists and small-scale Resin 3D Printing Service operators use.
Option 4: Desktop Air Purifier
A HEPA + activated carbon air purifier positioned near your printer helps capture both particles and chemical vapors.
Safe Resin Disposal
⚠️ NEVER pour uncured liquid resin down the drain.
It is harmful to aquatic life and illegal in many jurisdictions.
The correct disposal method is simple:
- Pour leftover liquid resin into a clear container
- Leave it in direct sunlight (or use a UV lamp) until it fully solidifies
- Dispose of the solid cured resin in regular waste
- Pour used IPA into a clear container, expose to sunlight to cure any suspended resin particles, then dispose of the clarified IPA according to local chemical disposal rules
❌ Do NOT Do This
- Pour uncured resin down any drain — sink, toilet, or outside
- Touch resin with bare hands, even “just for a second”
- Print in a bedroom with no ventilation overnight
- Dispose of IPA with suspended resin particles in household waste
🛡️ Free Resin Safety Checklist
Download our complete PPE, ventilation, and disposal checklist so you never miss a critical safety step. Print it out and keep it next to your printer.
3. Resin 3D Printing vs Filament (FDM): Which Is Better?
This is the single most searched question in the 3D printing world — and the honest answer is: it depends entirely on what you want to make. For a deeper dive, check out our full Resin vs Filament comparison guide.
Print Quality Comparison
| Feature | Resin (MSLA) | Filament (FDM) |
|---|---|---|
| Surface smoothness | ⭐⭐⭐⭐⭐ Exceptional | ⭐⭐⭐ Visible layer lines |
| Fine detail | ⭐⭐⭐⭐⭐ Miniature-level | ⭐⭐⭐ Good for larger features |
| Layer resolution | 0.01–0.05mm | 0.1–0.3mm (typical) |
| Best for | Miniatures, jewelry, faces, figurines | Functional parts, enclosures, cosplay armor |
Resin wins on detail. If you’re printing a D&D miniature, a face bust, or a ring casting model, there is no comparison. Resin produces results that filament printing simply cannot.
Filament wins on size and strength. Need a phone case, a bracket, or a drone frame? FDM is faster, cheaper per gram, and produces stronger functional parts.
Ease of Use: 2026 Reality Check
Here’s what nobody is being honest about: modern resin printers are dramatically easier than they were even three years ago.
In 2021, you needed to level your build plate manually with paper, deal with constant FEP failures, and nurse prints through cold nights. In 2026:
- Automatic leveling is standard on mid-range and premium printers
- Heated resin vats eliminate cold-weather viscosity failures
- Tilt-release mechanisms have dramatically reduced FEP wear and suction cup failures
- Smarter slicers auto-generate near-perfect supports with one click
Is resin still more involved than FDM? Yes. Is it the scary chemical nightmare it’s sometimes portrayed as? Not anymore.
Speed Comparison: The Batch Printing Advantage
Here’s a nuance that catches beginners off guard:
Resin printers expose an entire layer at once — the exposure time per layer is the same whether you’re printing one miniature or fifteen. This means:
- Printing 10 miniatures simultaneously takes almost the same time as printing one
- For batch production of small parts, resin dramatically outpaces FDM
- Large single objects will still take 4–10+ hours regardless
If you plan to print armies of miniatures, resin’s batch efficiency is a massive advantage.
Safety & Cleanup Comparison
| Factor | Resin | FDM |
|---|---|---|
| Post-processing | Wash + cure required | Minimal |
| Chemical handling | Yes (resin + IPA) | No |
| Mess potential | Medium-High | Low |
| Fume concern | Yes — ventilation required | Minimal (PLA), moderate (ABS/ASA) |
FDM is the easier, less messy workflow. Resin requires more discipline — but the results justify it for the right applications.
4. The Anatomy of a Modern Resin 3D Printer
Understanding what’s inside your Resin 3D Printing Machine helps you maintain it, troubleshoot it, and make smarter buying decisions.
Main Components Explained
LCD Screen
The masking layer that controls which pixels of UV light reach the resin. Higher resolution = finer XY detail. In 2026, 12K screens are the mainstream standard on mid-range high-resolution printers.
UV Light Engine
The array of UV LEDs beneath the LCD. Light uniformity across the entire build plate is more important than raw LED count. Uneven light causes inconsistent curing and wasted prints.
Resin Vat
The tray that holds your liquid resin. Lined at the base with FEP or PFA film — the transparent release layer that the cured resin peels from.
FEP/PFA Film
The consumable base of the resin vat. FEP is the older standard; PFA film (used in newer printers) is clearer, more durable, and reduces suction forces during peeling.
Build Plate
The metal plate your print adheres to. It lifts layer by layer during the print. Textured build plates dramatically improve first-layer adhesion without requiring adhesive sprays.
Z-Axis Rails
The linear rails guiding the build plate’s vertical movement. Dual linear rails are more stable than single-rail designs and reduce wobble in tall prints.
Air Filtration System
Increasingly built into modern printers — activated carbon filters capture VOCs before they escape into your room.
What Makes Modern 12K Resin Printers Better?
Let’s cut through the marketing noise.
12K resolution means more pixels across the build plate. Finer pixels = sharper edges, reduced “aliasing” (the staircase effect on curved surfaces), and more faithful reproduction of tiny details.
But here’s the honest take that most reviews won’t give you:
⚡ The Honest Truth12K resolution matters far less than your exposure settings, resin quality, and mechanical stability.
A well-tuned 8K printer with quality resin will consistently outperform a poorly tuned 12K printer running cheap resin. Resolution is the marketing number. Calibration is what produces great prints.
What 12K does meaningfully improve:
- Text legibility on miniature bases and nameplates
- Fine filigree on jewelry models
- Skin texture on high-detail busts
- Reduced post-processing work on curved surfaces
What matters equally or more:
- Light uniformity (even curing across the full plate)
- Heated vat (consistent resin viscosity regardless of temperature)
- Mechanical stability (rigid Z-axis for consistent layer thickness)
- Slicer quality (smart support generation, accurate exposure calibration)
This is the 2026 reality check: specs are one part of the story. Ecosystem and workflow matter just as much.
Heated Resin Vats: The Game-Changing Feature of 2026
If there’s one hardware development that has most improved resin printing reliability, it’s the heated resin vat.
Here’s why it matters:
Resin is a liquid — but its viscosity changes significantly with temperature. Cold resin (below 20°C/68°F) becomes thick and syrupy, leading to:
- Poor layer adhesion
- Print failures and delamination
- Supports that don’t properly bond
A heated vat maintains the resin at an optimal temperature (typically 28–35°C) regardless of your room’s ambient temperature. The results are:
- Dramatically fewer cold-weather failures
- More consistent resin flow and layer formation
- Better results with engineering resins that have strict temperature requirements
- Year-round reliability in unheated garages and cold workshops
In 2021, heated vats were a premium feature on $600+ printers. In 2026, they’re appearing on mid-range machines under $300. If your shortlisted printer doesn’t have one, it’s worth paying slightly more for one that does.
Tilt-Release Technology Explained
Standard MSLA printers peel each cured layer from the FEP by lifting the build plate vertically. This creates significant suction force — which stresses supports, can rip prints from the plate, and wears out FEP film.
Tilt-release (also called ACF or tilt-peel) systems solve this by tilting or sliding the vat at an angle during separation rather than pulling straight up. The benefits:
- Reduced suction force — gentler on supports and delicate features
- Faster print speeds — less time spent in the peeling sequence
- Reduced FEP wear — fewer vat replacements over time
- Better reliability on large flat surfaces — traditionally the hardest prints to peel cleanly
Printers featuring tilt-release technology include machines from Bambu Lab’s resin lineup, the Elegoo Saturn 4 Ultra, and the Anycubic Photon M5 Pro series.
5. Best Resin 3D Printers for Beginners in 2026
A note on how these are selected: we prioritize ecosystem, reliability, and beginner experience — not just raw specs. The “best spec” printer is useless if its slicer software is abandoned or its community is nonexistent. For our full lineup, see our Best Resin 3D Printer guide and Budget Resin Printer picks.
Best Budget
🥇 Elegoo Mars 5 Ultra
Who it’s for: Complete beginners who want to start without a large upfront investment and learn the workflow before committing to a larger machine.
Strengths:
- Excellent print quality for its price class
- Thriving community support and extensive tutorials
- Compatible with Chitubox and Lychee — the two best slicers available
- Compact footprint for small workspaces
Limitations:
- Smaller build volume limits batch printing
- No heated vat on base models — cold-weather printing requires care
- Manual build plate leveling on entry-level configurations
Best for: Miniatures, jewelry, small figurines, and learning the resin workflow.
Best Mid-Range — Top Pick
🥈 Elegoo Saturn 4 (12K)
Who it’s for: Beginners who are serious about the hobby and want room to grow — both in build volume and print quality.
Strengths:
- 12K mono LCD screen for exceptional detail
- Larger build plate for batch printing armies of miniatures
- Tilt-release mechanism for faster, more reliable prints
- Heated vat on current configurations
- Strong community, excellent slicer support, wide resin compatibility
Limitations:
- Larger footprint — needs a dedicated space
- Higher upfront cost
- More resin consumption per print run
Best for: Miniature armies, tabletop terrain, mid-size figurines, small production runs.
Best Premium
🥉 Anycubic Photon Mono M5S Pro
Who it’s for: Beginners who want a “buy once, cry once” printer that handles virtually anything they’ll throw at it for years.
Strengths:
- Premium build quality and mechanical stability
- Advanced automatic leveling — zero-frustration setup
- Air purification built in
- WiFi connectivity and app-based monitoring
- Excellent resin slicer integration
Limitations:
- Higher investment
- Feature-rich for a true beginner — some features won’t be used initially
Best for: Users who want a professional-grade result from day one, small business operators, and serious hobbyists.
Best Large-Format
🏆 Phrozen Sonic Mega 8K
Who it’s for: Advanced users printing large busts, full figures, or tabletop terrain at scale.
Strengths:
- Massive build volume for resin printing
- 8K resolution across a larger plate maintains excellent detail
- Proven reliability for large, complex prints
Limitations:
- Not beginner-friendly — assume you’ve already printed on a smaller machine
- Significant resin consumption per print
- Requires a dedicated, well-ventilated space
Best for: Large format prints, professional terrain, full-size busts.
Resin Printer Comparison Table
| Printer | Build Volume | Screen Resolution | Heated Vat | WiFi | Best For | Buy |
|---|---|---|---|---|---|---|
| Elegoo Mars 5 Ultra | Small | 12K | Some configs | Yes | Beginners, miniatures | Amazon Official |
| Elegoo Saturn 4 | Medium-Large | 12K | Yes | Yes | Batch miniatures, terrain | Amazon Official |
| Anycubic Photon M5S Pro | Medium | 12K | Yes | Yes | Premium beginners, hobbyists | Amazon Official |
| Phrozen Sonic Mega 8K | Very Large | 8K | No | No | Large format prints | Amazon Official |
🔥 Ready to start printing? Our top recommendation for most beginners is the Elegoo Saturn 4 — the sweet spot of price, features, and print quality.
6. Recommended Beginner Setup Bundle
This is the setup we’d hand to a friend starting from scratch. It’s not the cheapest possible combination — it’s the one that minimizes frustration and maximizes results.
🧰 Complete Beginner Resin Setup
Printer
→ Elegoo Saturn 4 (12K) — the sweet spot of build volume, features, and price for a serious beginner.
Resin
→ Siraya Tech ABS-Like Resin or Anycubic ABS-Like+ — beginner-friendly viscosity, low odor, excellent detail, and broad compatibility with pre-tuned profiles in Lychee and Chitubox. You can also check out Phrozen Aqua 8K resin for outstanding detail.
Wash & Cure Station
→ Elegoo Mercury Plus or Anycubic Wash & Cure 3.0 — automating the wash and cure step is one of the best quality-of-life upgrades you can make. Don’t skip this.
Elegoo Official Store
Anycubic Wash & Cure 3+ (Amazon)
Anycubic Official Store
Safety Kit
- Box of 100 nitrile gloves (Medium or Large)
- Anti-fog safety glasses
- 3M 6502 respirator with 6001 organic vapor cartridges
Essential Tools
- Resin filters (paper or nylon mesh — for straining resin back into the bottle)
- Metal scraper (for removing prints from the build plate)
- Flush cutters (for removing support nubs cleanly)
- UV flashlight (for spotting uncured patches and quick cleanup curing)
Ventilation Solution
- Desktop activated carbon air purifier positioned 30cm from the printer
- Window fan or vent setup for your workspace
💡 Pro TipThe single biggest beginner mistake is skipping the Wash & Cure Station. Manually washing prints in IPA tubs is messy, inconsistent, and uses more IPA than an automated station. Buy the station with your printer — not as an afterthought three months later.
🛒 Get everything you need in one go — here’s the complete bundle starting with our top-recommended printer:
7. Essential Resin 3D Printing Accessories
Once you have your printer and resin, these accessories directly determine the quality of your workflow and results.
Must-Have Accessories
Nitrile Gloves
Non-negotiable. Buy two or three boxes. You’ll change gloves frequently.

Disposable Safety Gloves
Silicone Mat
Protects your desk from resin spills and gives you a dedicated, easy-to-clean workspace. A silicone baking mat from any kitchen store works perfectly.
Resin Filters
Mesh or paper cone filters for straining resin back into its bottle after a print session. Removes cured debris that would otherwise contaminate your vat.
Funnels
For cleanly pouring resin back into bottles without spills.
UV Flashlight
For spotting uncured resin patches on prints, curing small drips on your vat, and spot-curing support marks.
Flush Cutters
The tool you’ll use most during post-processing. A good quality pair makes support removal fast and clean, reducing surface damage.
Metal Scraper
For safely removing completed prints from the build plate without damaging either surface.
Wash & Cure Stations
A dedicated Wash & Cure Station is arguably the most important accessory for a resin printer — more important than most beginners realize.
Here’s what it actually does:
- Wash cycle: A spinning IPA bath (or water for water-washable resins) removes uncured resin from all surface features, including recesses that a manual rinse misses
- Cure cycle: A rotating UV turntable exposes every surface of your print evenly, ensuring complete post-cure for maximum hardness and durability
Without proper post-curing, resin prints remain slightly soft, sticky, and prone to warping. A Wash & Cure Station closes the loop on print quality.
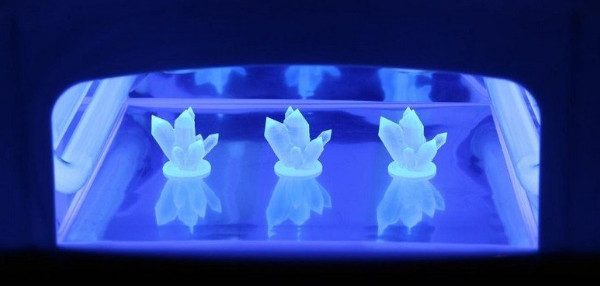
Resin models being cured in a UV camera station
Top Picks:
- Elegoo Mercury Plus — reliable, widely compatible, straightforward
- Anycubic Wash & Cure 3.0 — excellent UV coverage, handles larger prints
🧼 Don’t skip the Wash & Cure — it’s the #1 quality-of-life upgrade for resin printing:
Ventilation & Air Purification
For home users, a quality activated carbon desktop air purifier is the most practical ventilation solution. Combined with window ventilation, it addresses the primary fume concern effectively.
Look for purifiers with:
- HEPA filtration (particles)
- Activated carbon layer (VOCs and chemical odors)
- High CFM (cubic feet per minute) airflow rating for your room size
Resin Storage Solutions
Resin degrades when exposed to UV light — including ambient sunlight through windows.
Storage best practices:
- Store resin in its original opaque bottles, tightly capped
- Keep in a dark cupboard or opaque storage box
- Ideal storage temperature: 15–25°C (60–77°F)
- Most resins have an 18–24 month shelf life when properly stored
- Shake or stir resin before each use — pigments settle over time
Avoid storing resin in clear containers or leaving vats exposed to ambient light between sessions.
8. Choosing the Right Type of Resin
The Resin 3D Printing Models you can achieve depend heavily on the resin you choose. Here’s the honest breakdown.
Standard Resin
The baseline option included with most printers. Decent detail, moderate brittleness, and affordable pricing. Fine for calibration and learning — not ideal for final-quality display prints or anything that needs durability.
Elegoo Standard Resin V3 — Amazon
ABS-Like Resin — Best for Beginners
ABS-Like Resin is the category we recommend to virtually every beginner, and here’s why:
- Reduced brittleness compared to standard resin — prints won’t shatter if dropped
- Excellent detail — approaches standard resin quality without the fragility
- Lower odor formulations widely available
- Pre-built profiles available in all major slicers — no exposure guesswork
- Wide temperature tolerance — behaves consistently across seasonal temperature changes
For miniatures, figurines, display models, and general hobby printing, ABS-Like Resin hits the sweet spot of quality, durability, and ease of use.
Top Picks: Siraya Tech ABS-Like, Anycubic ABS-Like+, Phrozen Aqua 8K series
Water-Washable Resin
The appeal is obvious: wash your prints with water instead of IPA, reducing chemical handling complexity.
The honest pros AND cons:
✅ Pros
- Genuinely easier cleanup workflow
- Reduces IPA costs and disposal concerns
- Lower barrier for beginners nervous about chemicals
❌ Cons
- Slightly more brittle than ABS-like alternatives
- More sensitive to humidity — can absorb moisture and affect print quality
- Drain disposal still requires caution — uncured water-washable resin is still harmful to waterways
Water-Washable Resin is a solid choice for beginners focused on simplifying their workflow, with the understanding that print durability takes a slight hit.
Tough Resin
Engineered for mechanical applications — hinges, brackets, clips, and parts that need to flex or withstand stress without shattering. More expensive per litre and requires careful exposure calibration. Not a beginner starting point.
Siraya Tech Blu Tough Resin (Amazon)
Anycubic Tough Resin (Amazon)
Flexible Resin
Produces rubber-like prints with Shore A hardness in the 40–80 range. Useful for gaskets, grip surfaces, and wearable accessories. Notoriously challenging to print — high failure rates until you’ve tuned your settings. Intermediate to advanced territory.
Engineering & Dental Resins
Specialty resins validated for specific applications — biocompatible dental resins for temporary crowns and aligners, castable resins for jewelry, and high-temperature resins for mold-making. These belong in professional workflows with validated equipment and are beyond beginner scope.
Resin Comparison Table
| Resin Type | Strength | Flexibility | Odor Level | Ease of Use | Best Applications |
|---|---|---|---|---|---|
| Standard | Low | Very Low | Medium-High | Easy | Calibration, display models |
| ABS-Like | Medium | Low-Medium | Low-Medium | Very Easy | Miniatures, figurines, general hobby |
| Water-Washable | Low-Medium | Low | Low | Easy | Beginners, simplified workflow |
| Tough | High | Medium | Medium | Moderate | Functional parts, mechanical prints |
| Flexible | Low | Very High | Medium | Difficult | Gaskets, grip surfaces, wearables |
| Dental/Engineering | Application-specific | Varies | Varies | Advanced | Professional applications |
9. The Software Ecosystem: Slicers and STL Files
A Resin 3D Printing Machine without a good slicer is like a professional camera without a lens. The Resin Slicer Software you choose significantly affects your print quality, failure rate, and overall experience.
Best Resin Slicer Software
Lychee Slicer (Recommended for Most Users)
Lychee has become the go-to Resin Slicer Software for hobbyists, and for good reason:
- Intelligent automatic support generation that actually works well out of the box
- Island detection to catch unsupported sections before they fail
- Hollowing and drain hole tools for reducing resin consumption
- A massive library of pre-validated print profiles for popular printers and resins
- Free tier is functional; paid tiers add significant automation features
Chitubox
The long-standing standard that ships with most Chitu-based printers. Solid feature set, widely compatible, and extensive community documentation. The interface is showing its age compared to Lychee, but it remains highly capable.
Voxeldance Tango
A newer, increasingly popular option with strong automatic support generation and clean workflow design. Worth exploring once you’re past the beginner stage.
Photon Workshop
Anycubic’s native slicer, optimized for their printer lineup. Functional but more limited than Lychee or Chitubox for advanced users.
Essential Slicer Features to Learn First
Before worrying about advanced techniques, focus on mastering these core features:
- Hollowing: Reduces resin use by making prints hollow — essential for large models. Always add drain holes.
- Support Generation: Automatic support generation is your starting point. Learn to manually add or remove supports to critical areas once you understand the basics.
- Island Detection: Flags unsupported “islands” in your print that will fail mid-print. Run this check on every model.
- Resin Estimation: Shows you exactly how much resin a print will consume. Useful for cost tracking and pour planning.
- Exposure Calibration: The most important setting in your slicer. Proper exposure settings are the difference between perfect prints and soupy failures.
Best Sites for Resin 3D Printing Files
MyMiniFactory
The gold standard for high-quality, print-tested miniature and figurine STL files. Many of the best miniature sculptors sell and release files here. Includes both free and premium content.
Cults3D
Large marketplace with a wide range of free and paid STL files across categories — miniatures, decorative objects, functional parts, and more.
Printables
Prusa’s community file platform with a massive library of free files and an active rating system. Quality varies but high-rated files are generally well-optimized.
Thingiverse
The oldest major STL library. Enormous selection but increasingly cluttered with low-quality and outdated designs. Still worth checking for functional parts and accessories.
Best Beginner Models to Start With
Start your resin printing journey with these:
- Exposure calibration matrices (AmeraLabs Town, XP2 Validator) — tune your settings before wasting resin on real models
- Simple busts — low-complexity, forgiving of slight calibration errors, highly satisfying results
- Tabletop miniatures — the classic resin use case; start with stable, chunky designs before moving to fragile outstretched poses
- Terrain tiles — relatively flat, easy to support, and instantly useful for tabletop gamers
10. The True Cost of Resin 3D Printing
Let’s have the honest conversation nobody wants to have but everyone needs to hear before buying.
Startup Costs
| Item | Typical Cost Range |
|---|---|
| Resin Printer (Budget) | $150 – $250 |
| Resin Printer (Mid-Range) | $300 – $500 |
| Resin Printer (Premium) | $500 – $900 |
| Wash & Cure Station | $50 – $120 |
| Starter Resin (1 kg bottle) | $20 – $45 |
| IPA (1 litre) | $10 – $20 |
| PPE Kit (gloves, respirator, glasses) | $40 – $80 |
| Essential Tools (scraper, cutters, filters) | $20 – $40 |
| Silicone Mat | $10 – $20 |
| Total Beginner Setup (Budget) | ~$300 – $450 |
| Total Beginner Setup (Mid-Range) | ~$450 – $750 |
These are one-time startup costs. Ongoing costs are considerably lower.
Long-Term Maintenance Costs
| Consumable | Replacement Frequency | Cost |
|---|---|---|
| Resin (1 kg) | Depends on print volume | $20 – $45 |
| FEP/PFA Film | Every 3–6 months (typical use) | $8 – $20 per sheet |
| IPA (1 litre) | Monthly for active printers | $10 – $20 |
| Nitrile Gloves (box of 100) | 1–3 months | $10 – $18 |
| Activated Carbon Filter | Every 3–6 months | $15 – $30 |
| LCD Screen | Every 1,000–2,000 hours | $40 – $120 |
An actively printing hobbyist can expect $30–$80/month in consumables depending on print volume. Light users may spend considerably less.
Cost Per Print Examples
Small Miniature (28mm, 2g resin):
- Resin cost: ~$0.08
- IPA: ~$0.05
- FEP wear: ~$0.05
- Total: ~$0.18 per miniature
That’s essentially free once your startup costs are covered.
Medium Figurine (15cm tall, ~50g resin):
- Resin cost: ~$2.00 – $2.50
- IPA: ~$0.15
- FEP wear: ~$0.10
- Total: ~$2.25 – $2.75
Large Terrain Piece (40–80g resin):
- Resin cost: ~$1.60 – $3.60
- IPA: ~$0.20
- FEP wear: ~$0.15
- Total: ~$2.00 – $4.00
Is Resin Printing Expensive?
Compared to buying equivalent models commercially, resin printing is extraordinarily cost-effective. A high-quality 28mm miniature from a hobby shop costs $5–$20. Print the STL yourself for under $0.25.
Compared to FDM printing, resin has higher consumable costs (resin per gram costs more than filament, plus IPA costs) but lower print volume requirements — you’re printing smaller, more valuable items.
The real cost comparison: resin printing pays for itself quickly for miniature collectors and hobbyists who would otherwise be buying pre-printed or pre-painted models at commercial prices.
💰 Ready to invest? Start with the best value mid-range setup:
11. Common Resin Printing Problems & Fixes
Every resin printer will give you failed prints eventually. Knowing the common causes before they happen puts you ahead. For a comprehensive guide, see our 3D printing troubleshooting guide.
Troubleshooting Reference Table
| Problem | Most Likely Cause | Fix |
|---|---|---|
| Print sticks to FEP, not build plate | Exposure too low on bottom layers / dirty build plate | Increase bottom layer exposure; clean and roughen build plate |
| Supports failing mid-print | Supports too thin / exposure too low / cold resin | Increase support tip diameter; raise exposure; warm resin to room temperature |
| Layer separation / delamination | Cold resin, exposure too low, lift speed too fast | Warm resin; reduce lift speed; increase layer exposure |
| Sticky or tacky surface after cure | Insufficient post-cure time | Extend UV cure time; cure both sides |
| Hollow print cracking | Insufficient drain holes / pressure buildup | Add drain holes to all hollowed models |
| Suction cup failure on large flat surfaces | Slow peel, inadequate lift distance | Enable tilt release; increase lift height; add drain holes or relief channels |
| Milky/cloudy prints | IPA wash with too much dissolved resin | Replace IPA; wash in stages (dirty IPA first, clean IPA second) |
| Strings or wisps between supports | Over-exposure | Reduce normal layer exposure time |
Prints Sticking to FEP Instead of Build Plate
This is the most common beginner failure and is almost always an exposure issue. Your bottom layers need enough exposure to firmly bond to the build plate before anything else happens. If bottom exposure is too low, the first layers cure but don’t adhere — and the next layers peel them off as the FEP releases.
Fix: Increase bottom layer exposure time significantly. Start at 35–50 seconds for bottom layers and tune from there.
Supports Failing
Failed supports usually trace back to one of three causes:
- Support tip too fine — the small tip point cures so weakly it snaps on peel
- Resin too cold — viscous resin doesn’t fill support tips properly
- Lift speed too fast — aggressive peeling snaps thin supports before they’re ready
Fix: In your slicer, increase support tip diameter and top ball diameter. Ensure resin is at room temperature (>20°C). Reduce lift speed in print settings.
Hollow Print Cracking
Hollow prints trap liquid resin inside. As UV light penetrates the walls during post-curing, the internal resin cures and expands — cracking the shell from inside.
Fix: Always add at least two drain holes to hollowed models, positioned to drain completely when inverted. Drain excess resin before washing and curing.
12. Frequently Asked Questions
Is resin 3D printing safe?
Yes — with proper precautions. The key requirements are nitrile gloves, eye protection, a respirator with organic vapor cartridges, and adequate ventilation. Uncured resin requires careful handling and proper disposal. Once cured, resin is inert and safe to handle bare-handed.
Is resin printing hard for beginners?
In 2026, resin printing is significantly more beginner-accessible than it was even three years ago. Automatic leveling, heated vats, smarter slicers, and improved resin formulations have removed many of the traditional pain points. Expect a learning curve of a few print sessions, not a few months.
What is the best resin printer for beginners?
For most beginners, the Elegoo Saturn 4 (or equivalent current mid-range 12K printer) offers the best balance of build volume, features, and price. If budget is the primary constraint, the Elegoo Mars 5 Ultra or equivalent is an excellent starting point.
Is 12K resin printing worth it?
Yes — 12K is now the mainstream standard and doesn’t carry a significant price premium over 8K machines. For detail-focused applications like miniatures and jewelry, the finer pixel pitch produces noticeably cleaner curves and edges.
How much does resin printing cost?
A complete beginner setup costs $300–$750 depending on printer tier. Ongoing costs are approximately $30–$80/month for active hobbyists. Individual miniatures cost under $0.25 each in materials.
Can resin printers print functional parts?
Yes, with the right resin. ABS-Like and Tough resins can produce functional clips, brackets, and mechanical parts. However, standard resin is brittle and not suited for stress-bearing applications. For most functional parts, FDM remains the more practical choice.
Is resin stronger than PLA?
It depends on the resin type and the specific stress being applied. Standard resin is more brittle than PLA — it resists compression but shatters under impact. Tough and ABS-like resins close the gap considerably. For impact resistance and flexibility, PLA (especially PLA+) or PETG still hold the advantage.
How long do resin prints last?
Properly cured resin prints are extremely durable and long-lasting. The primary degradation concern is UV yellowing from prolonged sunlight exposure. Indoor display models can last decades. Models stored in direct sunlight will yellow and may become brittle over years.
Does resin printing smell?
Yes — all current photopolymer resins produce some level of odor. Modern low-odor formulations are dramatically improved over resins from even three or four years ago, but they are not odorless. Adequate ventilation remains necessary.
Can I use resin printers indoors?
Yes — with the right setup. A window, a fan, nitrile gloves, a respirator, and ideally an activated carbon air purifier make indoor printing safe and comfortable. Many thousands of hobbyists print safely in spare rooms, garages, and home offices.
13. Final Verdict
If you’ve read this far, you already know whether resin printing is right for you.
Here’s the 2026 reality, plainly stated:
Modern Resin 3D Printing is dramatically easier, more reliable, and more accessible than it was just a few years ago. The combination of 12K screens delivering exceptional detail, heated vats eliminating cold-weather failures, tilt-release mechanisms reducing print failures, better resin chemistry producing easier-to-use materials, and mature slicer ecosystems handling the complexity — it all adds up to a technology that’s genuinely approachable for the right beginner.
But success still depends on a few things you can’t skip:
- Proper ventilation and safety habits — not optional, but genuinely manageable
- Choosing the right ecosystem — your printer, resin, and slicer need to work together
- Investing in proper accessories early — especially a Wash & Cure Station
- Starting with the right resin — ABS-Like Resin for most beginners, full stop
The hobbyists who struggle with resin printing are almost always the ones who cut corners on one of those four areas. The ones who love it set up properly from day one and never look back.
If you’re printing miniatures, figurines, jewelry models, or any detail-critical work — there is no better technology available to a home user at this price point. Not even close.
Ready to Start Your Resin Printing Journey?
Here’s your path — from complete beginner to producing stunning, high-detail prints at home.
Where to Start
Ready to get started? Here’s your path:
- Browse our full Resin 3D Printer buying guide → — in-depth reviews of every major 2026 model
- See our Best Resin for Miniatures guide → — the specific resins that top miniature printers use
- Read our complete Wash & Cure Station reviews → — why this matters more than most beginners expect
- Check our Resin Accessories guide → — every tool you need for a clean, safe workflow
Last updated: 2026. All printer and resin recommendations reflect currently available models. Prices are approximate and subject to change.
