

If you’ve ever pulled a beautifully detailed miniature off a resin printer only to have it fall apart because you touched it with bare hands, or watched a failed print ruin your FEP film because you didn’t have the right tools—you already know the truth about resin printing: the printer is just the beginning.
Resin 3D printing delivers jaw-dropping detail that FDM simply can’t touch. We’re talking sub-millimeter accuracy, smooth surfaces, and prints that look like they came straight from a mold. But here’s what nobody tells you when you’re unboxing that shiny new Elegoo Saturn or Anycubic Photon: resin printing is messy, it involves chemicals that demand respect, and without the right accessories, you’re going to have a bad time.
The good news? Getting properly set up doesn’t have to be complicated or expensive. In 2026, the ecosystem of Resin 3D Printer Accessories has matured massively. Wash and cure stations are now considered standard equipment. Air filtration is rising fast as more people print indoors. Heated resin workflows are becoming the norm for anyone serious about consistency. And there are smarter, safer ways to handle everything from cleanup to waste disposal.
Whether you’re just getting started or looking to upgrade your existing workflow, this guide covers every tool, consumable, and upgrade worth knowing about—organized by how urgently you actually need each one.
👉 QUICK STARTIf you want the easiest possible setup, skip to our recommended starter kits below.
📑 On This Page
Best Resin 3D Printer Accessories: Quick Picks for 2026
| Category | Product | Why It Stands Out | Best For | Price Range |
|---|---|---|---|---|
| Wash & Cure | Elegoo Mercury Plus V2.0 | Dual-function, reliable, widely compatible | Most users | Check Price |
| Wash & Cure (Large) | Anycubic Wash & Cure Max | Bigger basket, handles larger builds | Mono X / Saturn users | Check Price |
| Air Filtration | Elegoo Mini Air Purifier | Compact, effective activated carbon filter | Desktop printing | Check Price |
| Air Filtration (DIY) | Nevermore Micro | Open-source, high-performance | Tinkerers | View Project |
| Flexible Build Plate | Wham Bam PEX System | Magnetic pop-off removal, reusable | Anyone tired of scraping | Check Price |
| Resin Heater | Thermal VatBand | Maintains consistent resin temp | Cold climates | Check Price |
| Ultrasonic Cleaner | Magnasonic Professional | Faster, deeper clean | Pro workflows | Check Price |
| Resin Filter | 100-Mesh Stainless Funnel | Removes cured chunks, reusable forever | Everyone | Check Price |
🔥 Don’t miss out on the essential upgrades that make resin printing safe and enjoyable.
Essential Resin 3D Printer Accessories: The Complete Workflow
1. Safety Equipment — Non-Negotiable
Let’s get something out of the way before we talk about any piece of hardware: resin is a chemical, not a craft supply. Uncured photopolymer resin is a skin sensitizer and potential irritant. With repeated unprotected exposure, people develop allergies that can end their printing hobby permanently. That’s not a scare tactic—it’s chemistry.
Nitrile Gloves (NOT Latex)
This is the most important single purchase on this list. Nitrile gloves are chemically resistant to photopolymer resins. Latex gloves are not—they degrade quickly on contact with resin and can actually increase skin absorption. Buy nitrile, buy them in bulk, and change them often.

Respirator with Carbon Filters
A basic dust mask does absolutely nothing against resin VOCs (Volatile Organic Compounds). You need a respirator with activated carbon cartridges—something like a 3M 6502QL half-face respirator with 6001 organic vapor cartridges.
⚠️ Safety Myth You Need to HearLow-odor resin does not mean low-VOC resin. Some “low-odor” formulations actually off-gas more than standard resins—the scent masking agents just cover the smell. VOCs can be completely odorless. If you’re printing in an enclosed space without proper ventilation, you’re breathing in chemicals whether you smell them or not.
For serious users or enclosed printing spaces, a VOC meter (like the Temtop M2000) can give you real data on air quality. It sounds like overkill until you see the readings spike when you open your printer.

Safety Goggles
Splash protection for your eyes. Resin in the eyes is a medical emergency. Standard glasses don’t provide side protection—you want wraparound chemical splash goggles. These cost about $10–$15 and are absolutely worth it.

Safety Goggles
Silicone or Plastic Protective Mat
A silicone mat on your workspace catches drips and makes cleanup dramatically easier. Resin doesn’t stain silicone—it peels right off once cured. This $10–$20 purchase will save your desk, your floor, and your sanity.
🛡️ Protect yourself before your first print. Safety is non-negotiable.
2. Cleaning Supplies — Where Prints Are Won or Lost
After your print comes off the build plate, it’s still covered in liquid, uncured resin. This is the “wash” stage, and how you handle it determines whether your print ends up crisp and clean or sticky, tacky, or deformed.
Isopropyl Alcohol (IPA) — 91% or Higher
IPA is the standard cleaning solvent for most resins. You want 91% concentration minimum—the higher the better. Lower concentrations contain too much water, which can cause print swelling and weaken layer adhesion. Buy IPA in gallon jugs rather than small bottles. You’ll use more than you think, especially during multiple wash cycles.
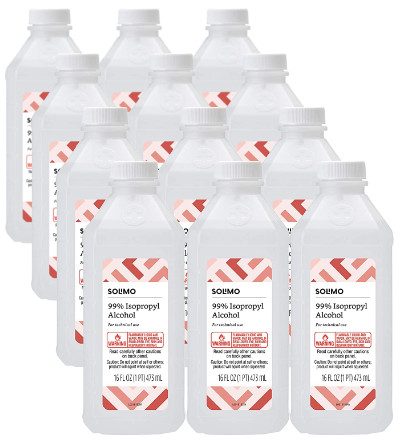
Isopropyl Alcohol
Water-Washable Resin Caveats
Water-washable resins sound convenient—and they are, up to a point. But the wash water is still contaminated with uncured resin, which means it can’t go down the drain. You still need a disposal plan. Some printers find water-washable resins slightly more brittle than standard formulations. Learn more in our Resin Types Guide.
Soft Brushes
For getting resin out of small details and crevices, a soft brush makes a huge difference. Pro tip: makeup brushes (blush or kabuki style) work better than toothbrushes. They’re softer, have more bristles, and won’t scratch delicate details. A pack of cheap makeup brushes from the drugstore is one of the best-value investments a resin printer can make.
3. Wash and Cure Stations — The Biggest Single Upgrade
If there’s one purchase that transforms the resin printing experience from “manageable chaos” to “smooth workflow,” it’s a dedicated wash and cure station.
Modern wash and cure stations automate all of this. You drop your print in, set a timer, and walk away. The wash stage uses a motorized basket that agitates the print in IPA. The cure stage uses a UV turntable that ensures even exposure on all sides. The whole process takes maybe 10 minutes total—versus 30+ minutes doing it manually with questionable results.
Elegoo Mercury Plus V2.0
This is the go-to recommendation for most people. It’s reliable, widely compatible with printers up to 192 x 120mm build volume, and has been refined over several iterations. The wash basket design is well-thought-out, the UV coverage is even, and it’s genuinely plug-and-play. At $45–$65, it’s one of the best value purchases in the resin printing ecosystem.
Anycubic Wash and Cure Max
For anyone printing on larger machines—the Anycubic Mono X, Elegoo Saturn series, or similar—the Wash and Cure Max handles significantly larger prints with a bigger wash basket and more powerful UV array. At $80–$100, if you’re printing larger builds regularly, the smaller station will frustrate you.
✨ Ready to upgrade your workflow? See our full guide to the Best Resin Wash and Cure Stations.
4. UV Curing Tools — The DIY Alternative
If a wash and cure station isn’t in the budget right now, here’s how to set up a functional alternative:
UV Nail Lamps (405nm)
The same UV lamps used for gel nail curing work at the right wavelength for most resins (check your resin spec—most are 405nm). A decent UV nail lamp costs $10–$20 and does a reasonable job for small prints.

UV Resin Curing Light with Solar Turntable 360°Rotating Stand
Rotating Turntable + DIY Curing Box
A cheap kitchen turntable placed inside a reflective container (line it with aluminum foil) gives you even, all-around UV exposure. It’s clunky but functional. A cardboard box lined with foil, a turntable, and a UV lamp is a legitimate curing setup that many experienced printers use as a starting point.

A motorized turntable helps with even curing.
5. Resin Handling and Filtering
Every time you pour unused resin back into its bottle, you should be filtering it. Even resin that looks clean often contains micro-cured particles that contaminate your vat and ruin future prints.
Stainless Steel Mesh Funnels (100-Mesh)
This is the upgrade that every experienced resin printer swears by. Standard paper paint strainers are floppy, tear easily, and can’t be cleaned. Stainless steel 100-mesh funnels filter at the same level, are rigid and easy to hold, and last indefinitely. You wash them in IPA, cure the residue, and they’re ready for the next use. At $8–$15 for a set, they pay for themselves after just a few uses.

Silicone Funnels and Proper Storage Bottles
For pouring filtered resin back into bottles, a silicone funnel is easier to clean than plastic. Keep resin in its original opaque bottles or in UV-resistant amber containers. Label with the resin type, color, and date opened.
6. Build Plate and Removal Tools
Plastic Scrapers — Start Here
Always start with a plastic scraper. Metal scrapers will scratch your build plate surface over time, reducing adhesion. Plastic scrapers give you plenty of leverage for most prints without the scratch risk.
Flexible Build Plates — The Game Changer
The Wham Bam PEX Flexible Build System is the kind of upgrade you buy once and wonder how you ever lived without it. Instead of scraping prints off a rigid plate, you remove the magnetic flexible sheet, flex it slightly, and the print pops off with minimal effort. This is especially valuable for flat-bottomed prints and for fragile, detailed pieces that would break under scraping pressure. At $35–$55, it dramatically improves the print removal experience and reduces accidental print damage to near zero.
7. Post-Processing Tools
Flush Cutters
Essential for removing supports. Don’t use scissors or wire cutters—flush cutters (also called side cutters or sprue cutters) allow you to cut support nubs flush with the surface. A decent pair costs $10–$15.
 Tools Kit on Amazon Flush Cutter Only
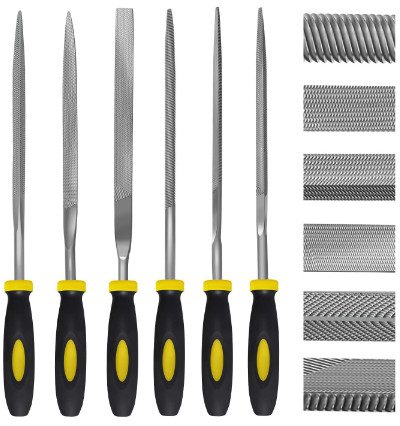
Needle Files and Wet/Dry Sandpaper
A set of needle files lets you smooth support attachment points and refine edges on small details. For prints that need a smooth finish, wet sanding progressively through grits (400 → 800 → 1200 → 2000) removes layer lines and produces a surface that paints or primes beautifully.
8. Consumables — Always Running Out
FEP / nFEP / PFA Release Films
The release film on the bottom of your resin vat is a consumable. Most manufacturers recommend replacement every 15–20 liters of resin. Replace your FEP when it becomes cloudy, if you see scratches or pinholes, or if you notice unexplained print failures.
- FEP (Fluorinated Ethylene Propylene) — Standard, affordable, good for most applications
- nFEP — Softer, more flexible, reduces suction forces, generally improves success rates
- PFA (Perfluoroalkoxy) — Premium option, more transparent, longer lifespan, ideal for 8K printers
Also budget for: nitrile gloves (buy in bulk—seriously), and paper towels. Yes, paper towels are a legitimate resin 3D printer accessory. Buy shop rolls or heavy-duty paper towels. And remember—contaminated paper towels cannot go in regular trash. More on that next.

FEP foils are available individually, together with a frame or permanently installed in plastic tanks.
Waste Management and Resin Disposal — Critical for 2026
This section doesn’t get enough attention in most accessory guides, but it’s increasingly important—both legally and environmentally.
🚯 The Core RuleUncured liquid resin is hazardous waste. It cannot go down the drain, in the trash, or on the ground.
Contaminated Paper Towels
Paper towels soaked in liquid resin are classified as hazardous waste in many jurisdictions. The correct procedure: collect contaminated towels in a transparent container or bag, leave them in sunlight (or under your UV lamp) until the resin fully cures, then dispose in regular trash. Fully cured resin is inert and generally safe for landfill disposal.
IPA Disposal
IPA saturated with dissolved resin should not go down the drain. The correct method is to pour it into a clear container and leave it in sunlight. UV light cures the suspended resin particles, which sink to the bottom. You can then pour off the relatively clean IPA for reuse or dispose of it through local hazardous waste collection.
Advanced: IPA Recycling Systems
For heavy printers, an IPA recovery/distillation system pays for itself relatively quickly. These units evaporate and recondense IPA, leaving the resin residue behind. The recovered IPA can be reused for washing. The upfront cost ($100–$200 for quality units) is offset by significant ongoing IPA savings.
Screen Protection — The $10 Upgrade That Saves $500
Your mono LCD screen is one of the most expensive components in your printer. Replacement screens run $50–$200+ depending on the machine. FEP film failures allow liquid resin to contact and cure directly on the screen surface. Removing cured resin from an LCD screen typically means replacing the screen.
A screen protector (either tempered glass or high-clarity optical film) sits between your FEP and the screen. If resin gets through the FEP, it cures on the screen protector instead. You replace a $10 protector instead of a $150 screen. This is arguably the highest ROI purchase in resin printing. Buy a screen protector cut for your specific printer model before you print your first test.
🛡️ Don’t risk a $150 screen replacement. Get a $10 protector today.
Build Plate Leveling Tools
Proper build plate leveling is foundational to print success. A plate that’s even 0.1mm off level can cause first-layer adhesion failures on one side while crushing the other side into the FEP.
The “paper method” (using a sheet of standard copy paper as a thickness gauge) is the classic approach and works reasonably well for most printers. For machines that are difficult to level consistently, purpose-made leveling shims with known thickness provide more precise control. Spending five minutes getting your leveling right at the start of a print session saves hours of troubleshooting later.
Digital and Calibration Accessories
Your prints are only as accurate as your calibration—and calibration requires some simple tools that most guides overlook.
Cones of Calibration (Ameralabs)
The Ameralabs Town and similar calibration prints are specifically designed to test and tune your exposure settings. They reveal issues with over-exposure, under-exposure, support adhesion, and fine detail reproduction. Running a calibration print when you change resin brands, colors, or after changing your FEP is good practice.
R_E_R_F Exposure Test Prints
The R_E_R_F (Resin Exposure Range Finder) test print is a single file that tests multiple exposure times simultaneously, helping you dial in the optimal exposure for a specific resin quickly. Most slicing software includes this as a built-in option.
Digital Calipers
A $15–$20 digital caliper lets you measure your calibration test prints against known dimensions, confirming your printer is hitting the right scale. Essential for functional prints where tolerances matter.
Advanced Resin 3D Printing Accessories: The Pro Workflow
Once you’ve got the basics covered, these upgrades genuinely elevate your output quality and consistency.
Air Filtration Systems
Elegoo Mini Air Purifier
Designed specifically for resin printers, this compact unit fits inside most printer enclosures or can be positioned directly beside an open printer. It uses an activated carbon filter to absorb VOCs at the source. At $30–$45, it’s an accessible upgrade that makes a real difference in enclosed printing environments. Replace the carbon filter every 2–3 months depending on print volume.
Nevermore Micro
The Nevermore is an open-source air filtration project from the 3D printing community. Its activated carbon bed is extremely effective and the design can be customized for specific enclosures. You print the housing yourself and source the activated carbon pellets separately (total material cost: $15–$25). The performance-to-cost ratio is exceptional for anyone who likes DIY solutions.
Resin Heating Systems
Resin viscosity changes dramatically with temperature. Cold resin (below about 20°C/68°F) is thick, flows poorly, and prints inconsistently. If you’re printing in a cold garage, basement in winter, or anywhere that drops below room temperature, a resin heater is not a luxury—it’s a necessity.
Thermal VatBand
The Thermal VatBand is a purpose-built heating element that wraps around your resin vat and maintains the resin at a user-set temperature. It’s compatible with a wide range of printers, draws minimal power, and has proper thermal controls to prevent overheating. At $25–$40, the improvement in print consistency during cold months is substantial.
Ultrasonic Cleaners
Magnasonic Professional Ultrasonic Cleaner
Ultrasonic cleaners use high-frequency sound waves to create microscopic cavitation bubbles that reach into every crevice and detail. The result is cleaner prints in less time, with particularly dramatic results on prints with deep details, hollow sections, or complex geometry. The Magnasonic is the most-recommended consumer-grade ultrasonic cleaner in the resin printing community. At $50–$80, it’s a meaningful upgrade for anyone doing detailed work or running a studio workflow.
Resin Mixing Tools
Resin separates in storage, with pigments settling to the bottom. A laboratory magnetic stirrer maintains resin in suspension without introducing air bubbles (which hand-stirring can do). This is particularly useful during long print sessions or returning to partially used resin after storage.
Best Resin 3D Printer Accessories Kit: Beginner to Pro
🔴 Tier 3: Pro / Lab Setup
$400–$700 total
For makers, small studios, or anyone printing regularly for clients or selling prints. Everything in Tier 2, plus:
- Heated vat system (Thermal VatBand)
- Air scrubber / filtration (Elegoo Mini Air Purifier or Nevermore)
- Ultrasonic cleaner (Magnasonic)
- IPA recycling system
- VOC meter
- Digital calipers
- Full sanding kit (wet/dry, multiple grits)
At this level, you have a professional-grade setup. Print failures drop significantly. Output quality is consistent. And you’re handling materials safely and responsibly.
The Hidden Costs of Resin 3D Printing (Monthly Reality Check)
Let’s talk about what this hobby actually costs to maintain each month—to set realistic expectations.
| Item | Estimated Monthly Cost |
|---|---|
| Isopropyl Alcohol (IPA) | $15–$30 |
| FEP/nFEP Film Wear | $5–$10 |
| Nitrile Gloves + Paper Towels | $10–$15 |
| Resin (variable, not counted here) | — |
| Total Consumables | ~$30–$55/month |
The good news: if you invest in an IPA recycling system, your IPA costs drop by 50–70%. If you’re careful with your FEP (no metal scrapers, proper filtering), you’ll replace it less often. These are manageable ongoing costs for a hobby that produces genuinely impressive results.
Where to Buy Resin 3D Printer Supplies Near You
Sometimes you need Resin 3D Printer Supplies fast—between sessions, you’ve run out of IPA or gloves, and waiting for delivery isn’t an option.
Hardware Stores: Home Depot, Lowe’s, and similar stores typically stock isopropyl alcohol (check the paint aisle or cleaning supplies), nitrile gloves, and sometimes basic respirators. Not the most economical option, but it works for emergency restocking.
Pharmacy / Drug Stores: IPA is commonly available at pharmacies, though usually in smaller bottles and lower concentrations (70% rather than 91%+). Check health and beauty aisles.
Online (Primary Source): Amazon, Elegoo’s official store, Anycubic’s store, and specialty retailers like MatterHackers carry the full range of resin 3D printer accessories. Amazon is often fastest for consumables; official brand stores sometimes offer better pricing on specific products.
Common Resin Printing Accessory Mistakes — Avoid These
❌ Top Mistakes
- Using Latex Gloves: Latex is not chemically resistant to photopolymer resin. It’s not a safe substitute. Nitrile only, always.
- Skipping Ventilation: “I’ll just crack a window” is not a ventilation strategy. VOCs require either real airflow (fan pulling air out) or active filtration. The combination of both is better.
- No Filtering System: Pouring unfiltered resin back into your bottle contaminates your supply with micro-cured particles. A mesh funnel is $10 and takes three seconds to use.
- Ignoring Screen Protection: Screens fail eventually regardless. But they fail much faster without a protector. This is the single highest-ROI purchase relative to its cost on this entire list.
- Cheap FEP Films: Generic, unbranded FEP films are a false economy. Stick to OEM or reputable aftermarket brands for your film.
📥 Want a Printable Checklist?
Download our free Resin Setup Checklist to ensure you never miss a critical step or supply.
Resin 3D Printer Accessories FAQ
What accessories do I need for a resin 3D printer?
At minimum: nitrile gloves, a carbon filter respirator, safety goggles, IPA for washing, a UV light source for curing, stainless steel mesh funnels for filtering, and a plastic scraper for print removal. For a properly functional setup, add a wash and cure station and a flexible build plate.
Do I need a wash and cure station?
You don’t technically need one—prints can be washed in IPA by hand and cured under sunlight or a UV lamp. But a wash and cure station makes the process faster, more consistent, and less messy. Most people who buy one call it the best upgrade they made. See our guide to wash and cure stations.
Can I use water instead of IPA?
Only if you’re using water-washable resin specifically formulated for water cleaning. Standard photopolymer resins do not clean effectively in water, and the contaminated water still requires proper disposal. Don’t use water with standard resin. Check out our resin types guide for more details.
How often should I replace FEP film?
Every 15–20 liters of resin as a general guideline, but inspection matters more than a fixed schedule. Replace your FEP when it becomes cloudy or hazy, if you see any scratches or pinholes, or if you notice unexplained print adhesion failures.
Are resin fumes dangerous?
Yes, with nuance. Cured resin is generally safe and inert. Uncured liquid resin and its fumes are skin sensitizers and contain VOCs that shouldn’t be inhaled in concentration. Good ventilation, a proper carbon-filter respirator, and nitrile gloves manage this risk effectively.
What is the best resin 3D printer accessories kit for beginners?
The most practical combination most experienced printers recommend: a wash and cure station (Elegoo Mercury Plus V2.0), a box of nitrile gloves, a gallon of IPA, a set of stainless mesh funnels, and a screen protector for your printer. That combination covers the most important needs without overspending.
Final Verdict: What Should You Buy First?
Here’s the honest, friend-to-friend summary after everything above.
- Start with Safety: Nitrile gloves, an activated carbon respirator, and safety goggles are the absolute first purchase—before your first print.
- Add a Wash and Cure Station: The Elegoo Mercury Plus V2.0 is the single upgrade with the most impact on day-to-day printing quality and convenience.
- Protect Your Screen: A $10 screen protector before your first print protects a $100–$200 component. Do this immediately.
- Then Get Your Consumables Right: Bulk IPA, stainless mesh funnels, and nitrile gloves in quantity.
- Upgrade as You Print More: The flexible build plate, air filtration, and resin heater are all meaningful upgrades—but they’re upgrades, not necessities.
The difference between a frustrating resin printing experience and a genuinely enjoyable one often comes down to having the right tools for each stage of the process. The accessories in this guide aren’t extras—they’re the system that makes the whole thing work.
Start with the essentials, then upgrade your workflow as you print more.
Looking for more guidance? Check out our related guides: Best Resin 3D Printers, Best Wash and Cure Stations, Resin Printing Beginner Guide, Resin Types Explained, and our Elegoo and Anycubic Printer Reviews.
RECOMMENDED GUIDES
window.addEventListener('scroll', function() { var scrollPos = window.scrollY; var percent = (scrollPos / docHeight) * 100; if (progressBar) progressBar.style.width = percent + '%';
if (scrollPos > 600) { if (stickyBar) stickyBar.style.display = 'flex'; } else { if (stickyBar) stickyBar.style.display = 'none'; } });
// Smooth scroll for anchor links document.querySelectorAll('a[href^="#"]').forEach(anchor => { anchor.addEventListener('click', function (e) { e.preventDefault(); var target = document.querySelector(this.getAttribute('href')); if (target) { target.scrollIntoView({ behavior: 'smooth' }); } }); }); })();
