

If you’ve recently upgraded to a high-resolution resin printer — something like the Anycubic Photon Mono M7 or even the Elegoo Saturn 4 Ultra — you’ve probably realized something fast: your printer is only half the equation. The post-processing stage, washing and curing your prints properly, is where the real difference between a great result and a sticky, warped disaster gets made.
That’s where the Anycubic Wash & Cure 3 Plus comes in. This machine has been making rounds in the resin community for a while now, and heading into 2026, it’s still one of the most talked-about resin post-processing stations on the market. But is it still worth buying? Does it hold up against newer competition like the Elegoo Mercury Plus V3.0? And when should you go for the bigger Anycubic Wash and Cure 3 Max instead?
I’ve been using this machine extensively — through miniature batches, large hollow engineering prints, and everything in between — and I’m going to give you the honest, practical breakdown you actually need before spending your money.
Quick Navigation
Quick Verdict
| Category | Score |
|---|---|
| Cleaning Performance | 9/10 |
| Curing Quality | 9.5/10 |
| Ease of Use | 9/10 |
| IPA Efficiency | 8.5/10 |
| Noise Levels | 8.5/10 |
| Value for Money | 9/10 |
Bottom line: The Anycubic Wash & Cure 3 Plus remains one of the best-balanced resin post-processing stations you can buy in 2026. The FlexiCure gooseneck light is a genuinely useful feature — not just a marketing gimmick — and the dual-layer curing platform gives it real productivity advantages. If you’re running a Photon Mono M7 or M7 Pro, this machine pairs with it almost perfectly.
Pros
- Excellent 360° curing coverage
- FlexiCure gooseneck light solves sticky spots in hollow prints
- Dual-layer curing platform doubles throughput
- Adjustable basket height conserves IPA
- Noticeably quieter than older Anycubic wash stations
- Strong value for mid-size resin workflows
Cons
- Power brick is bulky and awkward on a desk
- Large overall footprint
- IPA costs can add up with big washes
- Lid sensor occasionally needs a firm press to register
Ready to upgrade your resin post-processing workflow?
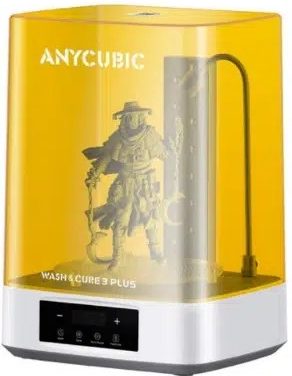
What Is the Anycubic Wash & Cure 3 Plus?
Why Resin Post-Processing Matters More in 2026
Post-processing quality now has a direct impact on whether your print looks extraordinary or mediocre — even if it came off the build plate looking perfect. That’s why choosing the right wash and cure station matters as much as choosing the right printer.
Who This Machine Is Designed For
Anycubic built the Wash & Cure 3 Plus specifically for users who have outgrown compact wash stations but don’t need industrial-scale equipment. It’s aimed at:
- Miniature hobbyists printing highly detailed figurines and game pieces
- Cosplay and prop makers who deal with larger structural prints
- Engineers and prototype users working with ABS-like or tough resins
- Etsy sellers and small resin businesses that need reliable throughput without taking up half a room
Anycubic Wash & Cure 3 Plus Specifications
| Spec | Detail |
|---|---|
| Wash Basket Capacity | 7.6L |
| Total Bucket Capacity | 12L |
| Curing Size | φ228 × 260 mm |
| UV System | 360° UV + FlexiCure Gooseneck |
| FlexiCure Light Intensity | 30,000 µW/cm² at 1–3 cm |
| Machine Power Draw | 36W |
| Basket Height Modes | 150mm / 250mm |
| Dual-Layer Curing | Yes |
| Compatible Printers | Photon Mono M7, M7 Pro, Elegoo Saturn 4 Ultra |
| Noise Level | Reduced vs previous generation |
Those specs might look dry on paper, but a few of them are worth focusing on — particularly the FlexiCure intensity and the adjustable basket height, because both have a real-world impact on your workflow that you’ll notice immediately.
What’s New vs Previous Anycubic Wash Stations?
Larger Washing Capacity
The 7.6L basket and 12L total bucket are a meaningful step up from earlier models. If you’ve ever tried to wash a 10″ or 12″ build in a machine that was barely big enough for it — tilting the print awkwardly, hoping the top half gets clean — you’ll appreciate having actual headroom. The larger capacity means you can fully submerge bigger builds and let the agitation do its job rather than babysitting it manually.
FlexiCure Gooseneck Light — The Feature That Actually Matters
The FlexiCure system is what sets this machine apart from the competition, and it deserves its own section (which is coming up). The short version: it’s a positionable gooseneck UV light rated at 30,000 µW/cm² at close range. You can direct it wherever you need it — inside a hollow print, into a deep cavity, or on an unusual angle that the 360° tower can’t effectively reach.
For anyone printing miniatures with undercuts, helmets, or hollow structural components, this is the feature you didn’t know you needed until you had it.
Dual-Layer Curing Platform
This is a productivity feature that’s easy to overlook when reading spec sheets, but it matters a lot in practice. The dual-layer platform lets you cure two sets of prints simultaneously — one on each level — rather than batching them separately. If you’re running back-to-back print sessions or selling prints, this effectively doubles your curing output without any additional equipment.
Adjustable Basket Height — The Hidden Feature
Most people don’t talk about this one, but the ability to position the wash basket at 150mm or 250mm depth is genuinely useful. When you’re washing a small batch of miniatures, there’s no reason to fill the entire bucket with IPA. Dropping the basket to the 150mm position means you’re only wetting the IPA volume you actually need, which conserves alcohol and extends the life of your cleaning solution. Over weeks and months of use, this quietly saves you money.
Want the FlexiCure advantage for your hollow prints?
The FlexiCure Advantage — Does the Gooseneck Actually Work?
Let’s address this properly, because the FlexiCure gooseneck is the headline feature of the Anycubic Wash & Cure 3 Plus, and it deserves honest scrutiny.
Testing Sticky Hollow Prints
Hollow resin printing is a common practice — it reduces material cost and weight, and it’s often necessary for structural designs. The problem is that any trapped uncured resin inside a hollow section can’t be reached by a standard 360° UV tower. It cures from the outside in, but the center stays soft.
I tested this specifically with hollow engineering models and with miniatures that had enclosed spaces — think deep-set eyes, enclosed hoods, fully enclosed helmet visors. With a conventional fixed-tower UV curing station, these areas came out noticeably stickier and needed manual follow-up with a UV flashlight, which adds time and inconsistency to the workflow.
With the FlexiCure gooseneck positioned near the opening of each hollow section, the results were noticeably better. Not perfect — geometry still plays a role, and you’re not going to cure a fully sealed chamber — but for all the realistically hollowed-out prints you’d encounter in day-to-day use, the FlexiCure does exactly what it claims.
Comparing Against Fixed-Tower UV Systems
The Elegoo Mercury Plus V3.0 uses a fixed UV tower approach. It’s effective for solid prints and straightforward geometries, but it has a structural limitation: the UV tower points in fixed directions, and it can’t redirect light into a cavity or an undercut. The turntable helps even out curing on flat-sided prints, but it doesn’t solve the internal cavity problem.
The FlexiCure system is the direct answer to that limitation. You’re trading some convenience (it needs to be manually positioned) for flexibility — and for resin users who regularly deal with complex geometries, that trade is worth making.
Real-World Results
After consistent testing across multiple resin types — standard, ABS-like, and water washable — the FlexiCure produces measurably fewer sticky spots on complex prints. You still need to observe your cure times and not assume the gooseneck is a magic wand, but as part of a proper curing workflow, it meaningfully reduces the amount of manual UV flashlight work you’d otherwise be doing.
Unboxing & Setup Experience
What’s in the Box
The package includes everything you need to get started: the wash bucket, cure platform with dual-layer tray, washing basket, power supply with cable, and a small toolkit. Nothing feels particularly skimped on.
The Power Supply Situation
Initial Setup
From unboxing to first wash, you’re looking at about 15–20 minutes. Fill the bucket with IPA to the appropriate line for your basket height, do a brief test cycle to check rotation, and you’re running. The controls are intuitive — there’s no steep learning curve here, even for newer resin users.
Cleaning Performance Test
Test Methodology
I ran cleaning tests across three resin types:
- Standard photopolymer resin
- ABS-like resin (which is thicker and leaves heavier residue)
- Water washable resin
Each was printed on a Photon Mono M7 at standard layer settings, then cleaned in the Wash & Cure 3 Plus using 91% IPA.
Miniature Cleaning Results
This is where the 3 Plus really shines for hobbyists. The washing agitation cleans right down into support attachment points and fine surface detail without any brushing or manual intervention. Miniatures came out of the wash bucket clean enough that UV residue film — the haze you sometimes see on improperly washed prints — was completely absent.
Large Hollow Print Results
Larger hollow models require a bit more care: remove as much uncured resin as possible from inside the cavity before washing, then let the basket agitation handle the rest. The 3 Plus handled this well — internal residue was minimal even on larger hollow pieces, provided they had drainage holes sized appropriately.
IPA Efficiency Analysis
Using the 150mm basket position for smaller print batches, I was getting roughly 20–25% more washing cycles out of the same IPA volume compared to running at full depth. If you’re going through IPA quickly — which is a real operational cost in resin printing — the adjustable basket height is a meaningful efficiency gain.
Curing Performance Review
360° UV Coverage
The 360° UV tower combined with the rotating turntable provides even coverage across flat and slightly curved surfaces. For the vast majority of everyday prints — flat-bottomed models, figurines, functional parts — the 360° coverage is excellent and produces fully cured, solid results within the recommended time windows.
Transparent Resin Curing
Transparent resins are notoriously tricky to cure without yellowing. The Wash & Cure 3 Plus handles clear and translucent resins well at lower cure times — keep an eye on overcuring. I’d recommend starting at the lower end of the recommended range and adjusting from there.
Tough Resin and Engineering Resin
ABS-like and engineering resins generally need longer cure times and benefit from the higher-intensity FlexiCure light for exposed sections. The 3 Plus handles this well, and I found the dual-layer platform particularly useful here — curing one batch of functional parts while another set washed meant a much tighter production cycle.
Avoiding Overcuring
How to Tell If Your Resin Print Is Fully Cured
Before we move on, this is worth a quick detour because it’s one of the most common questions from resin users at every level:
- Sound test: Tap the print against a hard surface. A properly cured print sounds solid. Undercured prints sound slightly dull or produce a faint flex noise.
- Surface feel: Fully cured resin should not be tacky to the touch. Any stickiness means incomplete curing.
- Flex behavior: Most cured resins should feel rigid. Flex in sections that shouldn’t flex indicates incomplete curing.
- UV shine: Under a UV light, fully cured resin doesn’t glow. Uncured resin will fluoresce visibly.
Real-World Workflow Experience
Print Farm Productivity
One angle that doesn’t get enough attention in reviews: the Anycubic Wash & Cure 3 Plus’s 36W power draw means you can run multiple units on a standard household circuit without tripping a breaker. For small print farm operators, this opens the door to running parallel wash-and-cure cycles without electrical infrastructure concerns.
The dual-layer curing platform compounds this advantage. Running two layers simultaneously on each unit means two units can effectively process the curing output of four single-layer stations.
Noise Levels
If you’ve used older Anycubic wash stations, you’ll notice the 3 Plus is measurably quieter during the washing cycle. It’s not silent — the agitation motor produces a low hum — but it’s genuinely unobtrusive compared to previous generations. Running it in a home workspace or shared studio space isn’t going to cause complaints.
Daily Maintenance
The practical reality of using any wash station: IPA gets dirty fast. The Anycubic Wash & Cure 3 Plus doesn’t change this fundamental fact, but the design makes maintenance straightforward. The bucket comes out easily for filtering, the basket is easy to rinse, and there are no complex mechanisms to work around during cleanup. Budget five minutes after each session for maintenance and it stays clean with minimal effort.
Anycubic Wash & Cure 3 Plus vs Anycubic Wash & Cure 3 Max
This is the comparison that comes up constantly, so let’s address it head-on.
| Feature | Wash & Cure 3 Plus | Wash & Cure 3 Max |
|---|---|---|
| Wash Capacity | 7.6L basket / 12L bucket | Larger |
| Best Printer Size | Up to 12″ (M7 series) | 14″+ large format |
| IPA Usage | Moderate, adjustable | Higher |
| Desk Footprint | Large | Very large |
| Price | Better Value | Check 3 Max Price |
| Best Use Case | Minis, medium builds, farms | Helmets, large builds |
Is the 3 Max Worth the Extra ~$200?
Honestly, for most users? No. The 3 Max is built for large-format printing scenarios — cosplay helmet builds, full-scale armor components, and printers in the 14″+ class. If you’re running a Photon Mono M7 or M7 Pro, the 3 Plus fits your output perfectly without the added cost or the desk space footprint.
Anycubic Wash & Cure 3 Plus vs Elegoo Mercury Plus V3.0
UV Coverage
Both stations offer 360° UV coverage with a rotating turntable. For standard solid prints, the Elegoo Mercury Plus V3.0 performs comparably — the coverage is even and curing quality is solid. Where the Anycubic 3 Plus pulls ahead is complex geometry, specifically because of the FlexiCure gooseneck.
Hollow Prints
As covered above, the FlexiCure gooseneck is the decisive differentiator here. If hollow printing is a regular part of your workflow — and for efficiency and material cost reasons, it probably should be — the Anycubic Wash & Cure 3 Plus is the better choice. The Mercury Plus V3.0 handles solid prints well but struggles with internal cavities.
IPA Efficiency
The Anycubic Wash & Cure 3 Plus’s adjustable basket height gives it the edge here. The Mercury V3.0 doesn’t offer the same basket positioning flexibility, which means less IPA savings over time.
How to Use the Anycubic Wash and Cure 3 Plus
Step-by-Step Washing Guide
- Remove the print from the build plate and place it in the wash basket.
- Fill the bucket with IPA to the appropriate mark for your basket height (150mm or 250mm).
- Lower the basket into position.
- Set wash time — 3 to 5 minutes for standard resin, 5 to 8 minutes for ABS-like resin.
- Close the lid and start the wash cycle.
- After washing, remove the basket and allow the print to air dry for 2–3 minutes before curing.
Step-by-Step Curing Guide
- Place dried prints on the curing platform — use both layers for efficiency.
- Position the FlexiCure gooseneck toward any hollow sections or problem areas.
- Set cure time according to your resin manufacturer’s recommendations (typically 2–5 minutes for standard resins).
- Start the curing cycle and let it complete fully before removing prints.
Best IPA Alternatives
For water washable resin, plain water or a water-soap mixture works fine. For standard and ABS-like resins, 91%+ isopropyl alcohol is the standard. Some users have success with Mean Green or similar commercial cleaners — test on a small batch first before committing to a workflow change.
Safety Tips
- Always work in a ventilated area. IPA fumes are real.
- Wear nitrile gloves when handling uncured resin.
- Never pour used IPA down the drain. Cure the IPA under UV light until the resin precipitates, then filter and dispose of solids responsibly.
- Store IPA in UV-opaque containers.
Common Problems & Troubleshooting
Lid Sensor Not Detecting Properly
The lid sensor occasionally needs a firm press to register that the lid is properly closed. If the machine isn’t starting, check that the lid is fully seated and press down lightly — dust buildup on the sensor area is often the culprit. A quick wipe with a dry cloth usually solves it.
Prints Still Feel Sticky After Curing
This is almost always a cure time or resin issue, not a machine defect. Double-check that your cure times match your resin type, that the print was fully dry before curing (IPA residue on the surface will interfere), and that the FlexiCure gooseneck is positioned toward any hollow sections. If stickiness persists, try a longer cure time in 30-second increments.
Weak Cleaning Results
If prints are coming out with visible resin residue after washing, your IPA is likely saturated and needs filtering or replacing. Fresh IPA makes a significant difference in cleaning quality. Also check that your wash time is long enough for the resin type you’re using.
Turntable Not Rotating
Check that the turntable tray is properly seated on the drive mechanism. A slight misalignment is enough to prevent rotation. Remove and reseat it — it clicks into place when positioned correctly.
Strange Noise During Washing
A rhythmic noise during the wash cycle usually indicates the basket isn’t fully locked in position and is rocking slightly. Ensure the basket is fully seated at either the 150mm or 250mm position. A random or irregular noise is rarer and typically indicates debris caught in the agitation mechanism — flush the bucket and check for any solidified resin pieces.
Build Your Complete Resin Setup
Complete Your Resin Post-Processing Arsenal
The Anycubic Wash & Cure 3 Plus works best as part of a complete post-processing setup. Check out our full guide to the best resin 3D printer accessories for our top picks, including:
- IPA filters — Reusable paper or nylon filters extend your IPA life significantly
- Nitrile gloves — Non-negotiable for daily resin work
- Silicone mat — Protects your desk and catches drips
- UV-safe storage bottles — For used IPA between filtration sessions
- Water washable resin — If you want to reduce IPA usage entirely for certain print types
Is the Anycubic Wash & Cure 3 Plus Still Worth Buying in 2026?
Who Should Buy It
The Anycubic Wash & Cure 3 Plus is a strong buy for:
- Resin users running M7-class or Saturn-class printers
- Miniature painters and hobbyists who need fine detail cleaning
- Anyone who regularly prints hollow models
- Small print farms or Etsy sellers needing higher throughput
- Users who want the FlexiCure gooseneck advantage over simpler competitors
Who Should Skip It
- Users primarily running very large-format printers (12″+ build volumes) — the 3 Max is a better fit
- Absolute beginners who want the simplest possible setup — the Mercury Plus V3.0 is cheaper and simpler
- Users with very limited desk space — this machine has a noticeable footprint
Best Alternatives to Consider
- Anycubic Wash and Cure 3 Max — If you need more capacity for large-format builds
- Elegoo Mercury Plus V3.0 — If you want a simpler station for solid prints at a lower price point
Final Verdict
After extended real-world use across multiple resin types and print categories, the Anycubic Wash & Cure 3 Plus earns its position as one of the best mid-size resin post-processing stations available in 2026.
The FlexiCure gooseneck is the feature that tips the balance. It’s not a gimmick — it’s a practical solution to a real problem that every resin user who prints hollow models or miniatures with complex geometry will eventually encounter. The dual-layer curing platform adds genuine productivity value, and the adjustable basket height quietly saves you money on IPA over the long run.
The power brick is annoying. The desk footprint is real. If either of those is a dealbreaker for your setup, the Mercury Plus V3.0 or even the 3 Max might better fit your workflow.
But if you’re running a mid-to-large resin printer, printing miniatures or hollow models, and you want a machine that will reliably handle complex curing scenarios without making you reach for a UV flashlight every session — the Anycubic Wash & Cure 3 Plus is the one to get.
Overall Rating: 9/10
Best Overall Mid-Size Resin Wash & Cure Station | Best Advanced UV Curing System for Hollow Resin Prints
Frequently Asked Questions
Is the Anycubic Wash & Cure 3 Plus worth it in 2026?
Yes — for mid-to-large resin printers and anyone who prints hollow models or detailed miniatures, the FlexiCure gooseneck and dual-layer curing system provide real advantages over simpler alternatives.
What printers work with the Wash & Cure 3 Plus?
It’s compatible with Anycubic Photon Mono M7, M7 Pro, and similar-sized printers, as well as the Elegoo Saturn 4 Ultra. It handles builds up to the φ228 × 260 mm curing volume.
Is the Anycubic Wash and Cure 3 Max worth the extra money?
Only if you regularly print large-format builds over 12 inches or run helmets and cosplay armor. For M7-class printer users, the 3 Plus is the better value.
Does the FlexiCure gooseneck light actually help?
Yes, noticeably so — particularly for hollow prints and miniatures with deep cavities or enclosed geometry that a 360° tower can’t reach effectively.
How much IPA does the Wash & Cure 3 Plus use?
With the basket at the 150mm position for smaller prints, IPA usage is well-managed. At full depth, the 12L bucket capacity means larger IPA volumes — but the adjustable height lets you only use what you need.
Can you cure hollow resin prints properly with this machine?
Better than most alternatives. The FlexiCure gooseneck can be directed toward hollow openings to significantly reduce internal sticky spots, though fully sealed cavities will still require drainage holes for best results.
Why are my resin prints still sticky after curing?
Most commonly: insufficient cure time, wet print surface before curing (let it fully dry after washing), or the resin type needs longer UV exposure. Use the FlexiCure gooseneck on problem areas and add cure time in 30-second increments.
Can I use water instead of IPA?
Only with water washable resins — and the machine supports this use case. Standard, ABS-like, and engineering resins require IPA or a compatible cleaning solvent.
Is the Anycubic Wash & Cure 3 Plus loud?
It’s quieter than previous-generation Anycubic wash stations. The washing cycle produces a low motor hum that’s present but not disruptive in a home workspace.
What is the best resin wash and cure station in 2026?
For most mid-to-large resin printer users, the Anycubic Wash & Cure 3 Plus is the best-balanced option available. If you print very large-format builds, consider the 3 Max. If budget is the primary concern and your prints are mostly solid geometries, the Elegoo Mercury Plus V3.0 is a capable alternative. For more options, check out our guide to the best resin wash and cure stations.
