

✓ Updated for 2026
Let’s be honest — when most people first hear “3D printer,” they picture a complicated machine surrounded by tangled wires, requiring an engineering degree just to get it running. A few years ago, that wasn’t entirely wrong. But here’s the thing: 3D printing in 2026 is dramatically easier than it was even a few years ago.
Today’s beginner printers practically set themselves up. They auto-level their own beds, auto-calibrate their filament flow, and come with slicer profiles ready to go right out of the box. If you’ve been putting off getting into 3D printing because it seemed too technical, this is genuinely the best time to start.
This guide is going to walk you through everything — from unboxing your first printer to pulling off a successful print — in plain language that actually makes sense. We’ll cover how to use a 3D printer step by step, what equipment you’ll need, how to avoid the most common rookie mistakes, and yes, even how some people are turning their machines into a real income stream.
Later in this guide, we’ll also cover how people use 3D printers for side hustles and small businesses. But first, let’s make sure you walk away feeling like you can actually do this — because you absolutely can.
Quick Answer: How Do You Use a 3D Printer?
If you’re just here for the fast version, here it is. Using a 3D printer involves:
- Setting up the printer
- Loading filament
- Downloading or creating a 3D model
- Preparing the model in a slicer
- Sending the file to the printer
- Starting the print
- Removing and finishing the object
Modern beginner 3D printers now automate much of this process with auto-bed leveling, pre-configured slicer profiles, and smart calibration systems. What used to take a full weekend of frustrated tweaking now takes under an hour for most people.
Bambu Lab A1 Mini
Jump Ahead
- What Is a 3D Printer & How It Works
- What You Need to Start 3D Printing
- Recommended Beginner Printers
- Best Beginner Filament
- Essential Accessories
- Step-by-Step Guide
- Understanding Slicer Settings
- How to Print Without Failing
- Common Problems & Fixes
- Using a 3D Printer at Home
- 3D Printing for Kids
- How Much Is a 3D Printer?
- How to Make Money
What Is a 3D Printer and How Does It Work?
Before we get into the “how,” it helps to understand the “what.” You don’t need a deep technical education here — just enough context to make smart decisions and not feel lost when people start throwing around jargon.
What Is 3D Printing?
3D printing is a process known as additive manufacturing. Unlike traditional manufacturing — where you take a block of material and cut away what you don’t want (called subtractive manufacturing) — 3D printing builds objects from scratch by adding material one thin layer at a time.
Think of it like building with LEGOs, except the machine is placing hundreds of layers thinner than a human hair, one on top of another, until your object appears. The result can be anything from a replacement part for your dishwasher to a custom phone case or a miniature figurine.
The practical upside? Almost zero material waste, and the ability to create shapes that are impossible to machine by hand. It’s why industries from aerospace to healthcare are betting big on it — and why it’s become increasingly accessible to everyday people.
How Does a 3D Printer Work Step by Step?
Here’s the 30,000-foot view of what actually happens from file to finished object:
- A 3D Model Is Created or Downloaded: Every print starts as a digital file. You can design your own model using CAD software, or — much more commonly for beginners — simply download a ready-made model from sites like MakerWorld, Printables, or Thingiverse.
- The File Is Prepared in a Slicer: A slicer takes your 3D model and converts it into instructions your printer can understand. It “slices” the model into hundreds of horizontal layers and tells the printer exactly where to move and how much material to deposit.
- The Printer Heats Up: Your printer’s nozzle heats to the right temperature for your material (usually around 200–220°C for PLA). The print bed also heats up to help the first layer stick.
- The Printer Builds the Object Layer by Layer: The nozzle moves in precise patterns, depositing molten filament that cools and hardens almost instantly. Layer after layer builds up until your object is complete.
- The Finished Print Is Removed: Once the print cools, you pop it off the build plate — usually with a satisfying flex of the magnetic PEI sheet — and you’re done.
Simple, right? The process hasn’t changed much in years. What has changed dramatically is how painless each step has become.
FDM vs. Resin Printers for Beginners
You’ll quickly notice there are two main types of consumer 3D printers: FDM (Fused Deposition Modeling) and Resin (MSLA/LCD). They produce very different results and suit very different needs.
| Feature | FDM Printer | Resin Printer |
|---|---|---|
| Ease of Use | Easier | Harder |
| Best For | Functional parts, household items | Miniatures, high-detail models |
| Safety | ✓ Safer | ✕ Requires PPE (gloves, ventilation) |
| Material | Filament (plastic spools) | Liquid photopolymer resin |
| Cleanup | Minimal | Messier (IPA wash, UV cure) |
| Print Time | Larger objects take longer | Entire layers cure at once — but small minis still take hours |
| Beginner Recommendation | ✓ Best starting point | Better after learning the basics |
Important Nuance on ResinA lot of beginners assume resin printers are faster because they cure entire layers at once instead of tracing them line by line. That’s true — but don’t let it fool you. A small detailed miniature can still take 4–8 hours on a resin machine because the layers themselves are thinner, and there are far more of them. Resin is also messier, more hazardous, and more expensive to operate.
If you’re brand new to 3D printing, start with an FDM printer. Once you understand the workflow, the troubleshooting logic, and what makes a good print, moving to resin is a much smaller leap.
Curious about resin? Check out our guide to the best resin 3D printers and learn about resin printing safety before making a decision.
What Do You Need to Start 3D Printing?
Here’s the thing: the startup gear list is shorter than you’d think, and the prices have come down significantly. Let’s break it down.
A Beginner-Friendly 3D Printer
This is your biggest investment, and it’s also where most beginners make their biggest mistake — buying the cheapest possible machine and then spending weeks fighting it. The best 3D printer for beginners isn’t necessarily the most expensive, but it’s the one that works reliably right out of the box.
Good NewsThe era of spending 4–6 hours assembling and tuning a beginner printer is largely over. The machines available today are in a completely different league from the early Ender 3 generation that defined beginner 3D printing for years.
Here’s what to look for in a beginner printer:
- Auto-bed leveling — non-negotiable in 2026; don’t buy a printer without it
- Direct drive extruder — better filament control, especially for flexible materials
- PEI flex plate — prints pop off cleanly when the bed cools; no more scraping
- Filament runout sensor — pauses the print automatically if you run out of filament
- Wi-Fi connectivity — send files from your computer or phone without an SD card
- Reliable slicer profiles — pre-dialed settings that work well without manual tweaking
- Good beginner ecosystem — community, documentation, tutorials, available parts
Recommended Beginner FDM Printers
Best Overall
Bambu Lab A1 / A1 Mini
Plug-and-Play Simplicity
If you want the most beginner-friendly 3D printing experience available today, the Bambu Lab A1 or A1 Mini is the answer. The calibration is hands-free — the machine runs through bed leveling, vibration compensation, and flow calibration automatically before every print. The integration with MakerWorld means you can go from “I want to print this” to “it’s printing” in under five minutes.
Best Budget Bed-Slinger
Creality Ender 3 V3 KE
The V3 KE is a completely different story from the old Enders. It uses a CoreXZ motion system, includes automatic bed leveling, a direct drive extruder, and is capable of high-speed printing. For the price, it punches well above its weight.
Best Budget Enclosed
Elegoo Centauri Carbon
This CoreXY enclosed printer maintains a more stable temperature, reducing warping — especially useful if your workspace gets drafts. The enclosure also makes it better suited for materials like PETG and ASA down the road.
Premium Hobbyist
Prusa CORE One / MK4S
Prusa’s reputation for long-term reliability, exceptional customer support, and a mature open-source ecosystem is unmatched. If you’re thinking long-term, this is the machine that will still be running perfectly three years from now.
Beginner Resin Printers (Quick Sidebar)
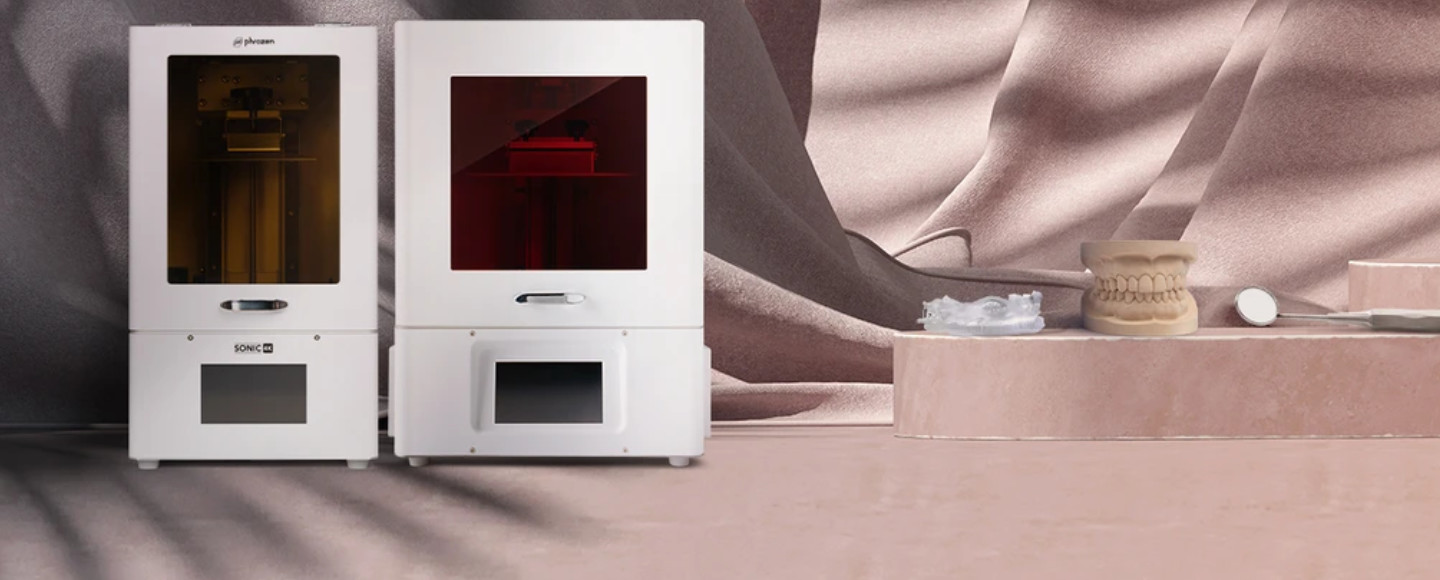
If you’ve decided resin is what you want — usually for tabletop miniatures or highly detailed jewelry — the two machines worth knowing about for beginners in 2026 are:
⚠️ Resin Safety WarningAlways use nitrile gloves when handling uncured resin. Always ensure adequate ventilation — a window open isn’t enough; consider a dedicated filtration system. Uncured resin is a skin irritant and potentially harmful with prolonged exposure.
Best Beginner Filament
Your filament choice matters more than most people realize. Cheap, unbranded filament is one of the biggest causes of ghost clogs, inconsistent layer adhesion, and failed prints. You’ll spend more time troubleshooting than printing.
Start here:
- eSUN PLA Basic/PLA+ — one of the most reliable mid-range options on the market
- Bambu Lab PLA Basic — if you’re running a Bambu printer, their own filament is dialed in perfectly for their machines
About material choice: PLA (Polylactic Acid) is the right starting point. It prints at lower temperatures, doesn’t warp easily, smells relatively inoffensive, and works reliably on almost any printer. It’s not the toughest material, but for learning the workflow and making most everyday objects, it’s ideal.
Once you’ve got a few dozen prints under your belt, PETG is a natural next step — it’s more flexible, more heat-resistant, and still beginner-friendly. Avoid ABS for now. It warps aggressively, requires an enclosure, and produces unpleasant fumes. There’s genuinely no reason a beginner needs ABS when better materials exist.
Essential Accessories
Flush Cutters
You’ll use these every single day. Flush cutters (also called side cutters or snips) are used for trimming filament when loading or switching materials, removing supports from prints, and cleaning up rough edges.
Quick note: most printers include hex keys and basic tools in the box, but some printers — including the Bambu Lab A1 Mini — do not include side cutters. Budget for a pair separately. The Hakko CHP-170 micro cutters are the industry-standard recommendation for a reason.
Adhesion Helpers
Even with a PEI flex plate, some prints benefit from a little extra adhesion help — especially large flat prints that are prone to warping at the corners.
💡 Pro Tip: Glue is Both Sticky AND SlipperyGlue stick on a PEI surface acts as both an adhesion helper and a release agent. It helps the print stick during printing, but it also creates a sacrificial layer between your print and the PEI coating — so when you flex the plate to remove the print, it comes off cleanly without damaging the coating. This saves you from costly PEI replacements.
Other Useful Gear
- Digital calipers — for measuring prints against spec; you’ll want these sooner than you think
- Filament dryer — moisture in filament causes popping, stringing, and rough surfaces; essential in humid environments
- Plastic scraper — for prints that won’t flex off; use plastic, not metal, on PEI
- Deburring tool — for cleaning up edges and hole openings on functional prints
Ready to gear up? Grab the essentials and start printing right.
Top-rated gear for first-time makers
How to Use a 3D Printer Step by Step
Okay, this is the core of it. Let’s walk through the full workflow from unpacking to a finished print.
Step 1: Set Up the Printer
Modern printers are partially or mostly pre-assembled. The “assembly” process for something like a Bambu A1 is attaching the print head arm and plugging in cables — maybe 10 minutes. Even more involved kits like the Prusa MK4S are designed to be assembled in 2–3 hours, not an entire weekend.
Here’s what to check during setup:
- Remove all shipping foam, tape, and zip ties. Manufacturers often secure moving parts for transit. Check the bed carriage, print head, and any axes for anything that shouldn’t be there.
- Check belt tension. Belts should feel firm like a guitar string — not loose and saggy, not so tight they’re difficult to press.
- Inspect the frame. Give it a gentle push and make sure nothing wobbles or creaks in a way that suggests a loose bolt.
- Connect power and power on. Most modern printers walk you through initial setup via a touchscreen interface.
Step 2: Level the Print Bed
Bed leveling is the process of ensuring your nozzle is the right distance from the build plate across the entire surface. If it’s too close, the filament gets squished and won’t adhere properly. Too far, and the filament just droops with nothing to grab.
The good news: virtually every recommended beginner printer in 2026 includes automatic bed leveling. The printer uses a probe (or the nozzle itself) to measure the bed surface at multiple points and automatically compensates for any unevenness.
For most modern printers, “leveling the bed” means running the auto-level routine from the menu and watching it do its thing. That’s it.
Manual LevelingFor older or very budget machines without auto-level, you’ll adjust four corner knobs until a sheet of paper can slide under the nozzle with slight resistance. It works, but it’s tedious and needs to be checked regularly. If your printer doesn’t have auto-leveling, this is worth upgrading for.
The first layer is everything. Print quality lives or dies by the first 0.2mm of filament. Watch it closely the first few times — you’ll quickly learn to read whether it looks right or needs adjustment.
Step 3: Load Filament
This is simpler than it sounds. Here’s the general process:
- Heat the nozzle to your filament’s printing temperature (for PLA, typically 200–220°C)
- Cut the end of your filament at a 45° angle — this helps it enter the feed mechanism cleanly
- Feed the filament into the extruder inlet until you feel it catch
- Purge the material — most printers have a “load filament” function that feeds filament through until fresh, clean material is extruding from the nozzle
When switching filament colors or materials, run the purge process until no trace of the old material remains.
⚠️ Wet Filament AlertIf you hear popping or crackling sounds while printing, see steam or fog near the nozzle, or notice excessive stringing and rough surface textures, your filament is probably wet (it has absorbed moisture from the air). This is incredibly common, especially in humid climates. The fix is a filament dryer. Pop the spool in, let it run for a few hours, and those symptoms disappear.
Step 4: Download or Create a 3D Model
You don’t need to design your own models to start — and you almost certainly shouldn’t for your first several prints. Start with files other people have already designed and tested.
Best places to find free 3D models:
- MakerWorld (Bambu’s platform) — growing fast, excellent community ratings, many profiles pre-optimized
- Printables (Prusa’s platform) — massive library, community-tested, reliable quality
- Thingiverse — the original, still enormous, though quality varies more widely
File formats you’ll encounter:
.STL— the universal standard; works with every slicer.3MF— newer, better format; stores print settings alongside the geometry; increasingly preferred
When you’re ready to design your own models, beginner-friendly options include Tinkercad (browser-based, genuinely easy for simple parts), Fusion 360 (free for hobbyists, powerful), and Blender (for organic and artistic models). Check out our guide to the best free CAD software for 3D printing.
Step 5: Learn How to Use a 3D Printer Slicer
This section deserves more attention than most guides give it. The slicer is where 80% of your control over print quality lives — and understanding how to use a 3D printer slicer is the skill that separates people who consistently get great results from people who keep getting frustrating ones.
What Is a Slicer?
A slicer is software that converts your 3D model into printer instructions. It “slices” the model into hundreds or thousands of horizontal layers, then generates the G-code — a file containing precise movement coordinates, speeds, temperatures, and material flow rates your printer executes line by line.
Best Beginner Slicers in 2026
Bambu Studio
Best for Bambu Printers
Polished, simple, and the integration is seamless if you have a Bambu printer.
OrcaSlicer
Community Favorite
Open-source fork of Bambu Studio with more advanced features; works with virtually any printer.
PrusaSlicer
Best for Prusa
Excellent choice for Prusa machines; clear interface, great documentation.
Ultimaker Cura
Most Established
Long-established, wide machine support, large library of community extensions.
For most beginners, starting with the slicer recommended by your printer’s manufacturer is the right move. They’ve tuned the default profiles for their hardware.
Most Important Beginner Slicer Settings
Layer Height
This is the thickness of each horizontal layer. Standard is 0.2mm — a good balance of speed and quality. Dropping to 0.1mm gives smoother surfaces but doubles print time. Increasing to 0.3mm speeds things up but produces more visible layer lines. Start at 0.2mm; adjust from there.
Infill Percentage
“Infill” is the internal structure of your print. Most prints work fine at 15–20% infill (a lightweight grid pattern). Functional parts under stress may need 40–50%+. Decorative items might only need 10%. Higher infill = stronger and heavier, but much longer print times.
Supports
Some models have overhanging sections that need temporary structures printed underneath them to prevent drooping. Slicers can add these automatically. For your first prints, choose models that don’t require supports — it simplifies the process significantly.
Print Speed
Modern printers advertise 500–600mm/s+ speeds, which is technically true but practically misleading for beginners. Fast printing introduces more vibration artifacts and increases the risk of under-extrusion. Start at 100–150mm/s and optimize for reliability before chasing speed.
Nozzle Temperature
For PLA, a range of 200–220°C covers most situations. Higher temperatures give better layer adhesion but can increase stringing. Lower temperatures reduce stringing but can cause under-extrusion. Your slicer’s default profile is usually a good starting point.
Bed Temperature
For PLA on a PEI build plate, 55–60°C is typical. This helps the first layer stick properly. Too cold and the print won’t adhere; too hot and it may stick too well.
Walls / Perimeters
This controls how many times the printer outlines the outside of your model before filling the interior. The standard is 2–3 walls. More walls = stronger, more solid-looking exterior. Fewer = faster print.
Brim vs. Raft
A brim is a flat ring printed around the base of your object to increase surface area gripping the build plate, which dramatically reduces warping. A raft is a full platform printed under the entire object. Brims are more common and leave less of a mark. Use a brim for your first few prints with any model that has a small footprint.
💡 Expert TipGive yourself permission to use the slicer defaults for your first 5–10 prints. The slicer sounds complicated at first. It’s genuinely not — especially with modern slicers that handle most settings automatically and let you focus on the few parameters that matter most.
Free Beginner Slicer Cheat Sheet
Get our printable 1-page PDF with the exact slicer settings you need for PLA, PETG, and TPU — no guesswork required.
Step 6: Start the Print
Once you’ve sliced your model and generated a G-code file, you need to get it to your printer. You have a few options:
- Wi-Fi — most modern printers support wireless transfer; use the slicer’s built-in “send to printer” button
- USB drive / SD card — copy the file, insert it into the printer, select it from the menu
- USB cable — direct connection from computer to printer; less common but still available
Once the file is transferred and you’ve started the print from the printer’s interface, here’s the most important advice in this entire guide:
⚠️ Critical RuleWatch the first layer. Always. The majority of 3D print failures happen in the first few minutes. If the first layer isn’t sticking properly, the print is going to fail — sometimes immediately, sometimes 6 hours later when you’re asleep. Learn to recognize what a good first layer looks like: the filament lines should be slightly squished, bonded to each other, and uniform in width. No gaps between lines. No curling at the edges.
If the first layer looks wrong, stop the print, adjust your bed level or Z-offset, and start again. Catching problems early saves hours of wasted filament.
Step 7: Remove the Print Safely
We’ve all gouged a build plate with a metal scraper at least once. Don’t be that person. Here’s how to safely remove your finished print:
- Wait for the bed to cool. This is the single most important step. PEI build plates work by changing adhesion with temperature — the print grips during printing, and releases when cold. Give the bed at least 5–10 minutes after the print completes, ideally until it’s below 35°C. The print will often pop off on its own.
- Flex the build plate. Most modern printers use magnetic spring steel PEI sheets. Grab the edges, flex it gently, and the print releases. This works 90% of the time without any tools.
- Use a plastic scraper if needed. If the print still won’t release after cooling, a thin plastic scraper applied gently at the edge will do it. Metal scrapers on PEI coating are a fast way to permanently damage your build surface — use plastic.
For prints that are still not releasing, try placing the plate in the freezer for 5 minutes. The thermal contraction usually does the trick.
Step 8: Post-Processing
For many prints, you’re done when the print comes off the plate. But some projects benefit from a little finishing work.
- Support removal — if your print had supports, use flush cutters and needle-nose pliers to remove them. Work carefully near fine details. Most modern slicers offer “tree supports” which are designed to be easier to remove than traditional grid supports.
- Sanding — PLA sands easily. Start with 200–400 grit to knock down layer lines, work up to 800–1200 grit for a smoother finish. Wet sanding with high-grit paper produces excellent results on display pieces.
- Painting — acrylic paints work well on PLA. A primer coat first (spray primer made for plastics) gives paint much better adhesion. Once primed, any acrylic hobby paint works.
For more depth on finishing your prints, see our guide on 3D printing for cosplay to take your post-processing to the next level.
How to Use a 3D Printer for Beginners Without Failing
Beyond the step-by-step workflow, here are the habits that separate beginners who succeed quickly from the ones who give up in frustration.
Start With PLA
We’ve already said this, but it’s worth repeating because beginners constantly ignore it. PLA is easier than PETG. PETG is easier than ASA. ASA is easier than ABS. The difficulty ladder is real.
PLA prints at lower temperatures, doesn’t warp, doesn’t require an enclosure, and forgives a wide range of settings. When you’re learning, the last thing you want is a finicky material adding variables to an already-new process. Give yourself at least 20–30 prints on PLA before you experiment with anything else.
Don’t Print Too Fast Initially
Modern printers can technically run at 500–600mm/s. That’s genuinely impressive, and eventually you might use those speeds. But when you’re still learning, print at moderate speeds — 100–150mm/s — and focus on consistency.
Slow, reliable prints teach you what good results look like. Fast, variable prints teach you nothing because you can’t isolate what changed. Prioritize quality now; optimize for speed once you’re consistently happy with your output.
Watch the First Layer Every Time
Yes, we said this already. It bears repeating because it’s so often ignored. Even experienced makers check the first layer. Conditions change — temperature, humidity, bed cleanliness, filament moisture. A 90-second observation of the first layer is the highest-ROI habit in all of 3D printing.
Keep Filament Dry
In many parts of the world (and especially in humid climates like coastal areas), filament absorbs moisture from the air within hours of being opened. Wet filament produces rough surfaces, excessive stringing, popping noises during printing, and reduced layer adhesion.
The solution is simple: store filament in sealed bags or containers with desiccant when not in use. For filament that’s already wet, a filament dryer fixes the problem in a few hours. Budget for this — it pays for itself quickly in filament you don’t waste.
Stop ruining prints with wet filament. These dryers pay for themselves in weeks.
Top-rated filament dryers for any budget
Learn One Setting at a Time
The #1 mistake beginners make when troubleshooting is changing multiple settings simultaneously. You end up with no idea which change actually fixed (or caused) the problem.
When you notice an issue, change one variable, run a short test print, and observe the result. This is slower in the moment but dramatically faster in terms of actually building knowledge. After 20–30 prints of deliberate experimentation, you’ll genuinely understand your machine — and that understanding will serve you for years.
Common Beginner 3D Printing Problems and Fixes
Let’s talk about the issues you’ll almost certainly encounter, and exactly what to do about them.
Symptoms: First layer lifts at the corners or edges, print detaches entirely during the print, filament just scoots around on the surface without adhering.
Causes: Nozzle too far from the bed, bed surface contaminated with oils (from fingers), bed temperature too low, or a worn-out PEI coating.
Solutions: Re-run auto-leveling and adjust your Z-offset slightly lower (closer to the bed). Clean the bed with IPA (isopropyl alcohol) — fingerprints from handling the plate are a common culprit. Increase bed temperature by 5°C. Apply a thin layer of glue stick as an adhesion aid.
Prevention: Handle PEI plates by the edges, not the surface. Clean regularly. Recalibrate if you’ve bumped or moved the printer.
Symptoms: Fine threads of filament stretch between separate parts of the print, like a spider’s web.
Causes: Nozzle temperature too high, print speed too slow during travel moves, insufficient retraction settings.
Solutions: Lower nozzle temp by 5°C increments. Increase retraction distance or speed in your slicer. Increase travel speed. Run a “retraction tower” test print from Printables to dial in the perfect settings for your specific filament.
Prevention: Dry filament strings far less than wet filament — keep your rolls stored properly.
Symptoms: Under-extrusion (thin, gappy lines), no filament coming out at all, clicking sound from the extruder as it slips.
Causes: Filament burned inside the nozzle from printing too hot or sitting at temperature too long without printing, debris in the filament, or a partial jam.
Solutions: Try a “cold pull” — heat the nozzle to printing temp, insert filament, cool to ~90°C, then pull sharply. This often extracts the clog. If that doesn’t work, heat to full temp and use an acupuncture needle or dedicated nozzle cleaning needle to clear the obstruction from below.
Prevention: Don’t leave the nozzle at printing temperature for extended periods without printing. Use quality filament from reputable brands.
For detailed procedures, see our guides on how to clean a 3D printer nozzle and how to unclog a nozzle.
Symptoms: Gaps or holes in the surface of prints, visible layer lines where there shouldn’t be, weak layer adhesion.
Causes: Nozzle temperature too low, print speed too fast for the flow rate, partially clogged nozzle, or wet filament.
Solutions: Increase nozzle temp by 5°C. Reduce print speed. Check for partial clog. Dry your filament. For a deep dive, check out our under-extrusion troubleshooting guide.
Symptoms: One section of the print appears shifted horizontally relative to the layer below — like someone bumped the print mid-way through.
Causes: Belt too loose, print speed too high causing the motion system to skip steps, or something physically obstructing the movement.
Solutions: Check belt tension. Reduce print speed. Clear any debris from the motion rails.
Symptoms: Corners of the print lift off the bed during printing, causing the base to curl upward.
Causes: Insufficient bed adhesion, large temperature differential between the printed object and the ambient air (drafts), or material that’s inherently prone to warping (like ABS).
Solutions: Increase bed temperature. Apply glue stick. Use a brim in the slicer (a flat ring of extra material around the base that increases adhesion area). Reduce drafts around the printer — even a nearby air vent can cause warping.
Prevention: This is one of the main reasons enclosed printers are valuable — they maintain a stable ambient temperature. For PLA, warping is much less common than for materials like ABS or nylon.
Struggling with print failures? Our ultimate troubleshooting guide covers every error code and bad print scenario.
How to Use a 3D Printer at Home
The good news: 3D printing at home is genuinely practical for most living situations. Here’s what to consider.
Space Requirements
A typical beginner FDM printer occupies roughly the footprint of a large microwave. The Bambu A1 Mini, for instance, is compact enough for a desk. The A1 or larger bed-slingers need a bit more space. You’ll also want room to access the front and sides during printing and maintenance.
A dedicated table or shelf works well — somewhere the printer won’t be disturbed and isn’t at risk of getting knocked.
Noise Levels
Modern printers are quieter than older generation machines, but they’re not silent. Expect something similar to a quiet desktop fan or a slightly louder computer. Bambu printers are notably quieter than older bed-slingers. Running overnight prints in a shared bedroom isn’t ideal, but a dedicated room, garage, or basement is perfectly fine.
Ventilation
For PLA printing, ventilation requirements are minimal — PLA fumes are considered relatively benign compared to other materials, and the smell is faint (many people describe it as slightly sweet). Standard room ventilation is fine.
For PETG, ABS, and especially resin, ventilation becomes genuinely important. ABS and ASA produce styrene fumes that you don’t want to breathe long-term. Resin printers require dedicated ventilation — a window isn’t enough; consider a HEPA/carbon filter system designed for 3D printing.
Fire Safety
⚠️ Take Fire Safety Seriously3D printers are electrical devices with heating elements that run for hours or days. The risk is low but real. Don’t run unattended prints overnight or when you’re away from home until you’ve established the printer is reliable. Keep the area around the printer clear of flammable materials. Confirm your printer has thermal runaway protection enabled. A smoke detector in the room is a basic precaution worth having.
Child and Pet Safety
The nozzle runs at 200°C+. The bed runs at 60°C+. Treat the printer like any other hot appliance during operation — don’t let young children or curious pets get close to the active printing area.
For resin printing specifically: uncured resin is toxic and should be stored securely away from children and pets. Never leave resin or IPA (used for washing resin prints) in accessible containers.
How to Use a 3D Printer for Kids
3D printing and kids is a genuinely great combination — it builds spatial reasoning, introduces manufacturing concepts, and produces tangible results that keep engagement high. The key is matching the approach to the child’s age and the supervision available.
Recommended ages: With active adult supervision, ages 10+ can engage meaningfully with FDM printing — loading filament, selecting models, understanding the slicer basics. For independent operation, 14+ with a safety orientation is reasonable.
What kids can do: Browse and choose models on Printables or MakerWorld, help set up print jobs, watch the process and learn about the technology, and engage in finishing work like sanding and painting.
Educational benefits: STEM skills, problem-solving, understanding manufacturing and design, iterative thinking (design → print → test → adjust).
Safe beginner projects for kids: Phone stands, pencil holders, custom bookmarks, small figurines, dice towers for board games, cable clips. Keep early prints small and fast so the feedback loop stays tight and engagement stays high.
Firm RuleChildren should never handle the hot end or build plate when at printing temperature, and should not handle resin at any age without full PPE and direct adult supervision.
Looking for the right machine? See our dedicated guide to the best 3D printers for kids for safe, educational picks.
How Much Is a 3D Printer for Home Use?
Let’s talk real numbers. This is one of the most common questions from people considering getting started, and the answers vary wildly depending on what you include.
Realistic Startup Budget
| Item | Options |
|---|---|
| Beginner FDM Printer (Plug-and-Play) | Bambu A1 ($399) |
| Beginner FDM Printer (Budget) | Ender 3 V3 SE ($199) |
| Premium Option | Prusa MK4S ($799+) |
| PLA Filament (1kg spool) | eSUN PLA+ ($18–$25) |
| Flush Cutters | Hakko CHP-170 ($10) |
| Adhesion Helper | Bed Weld / Glue ($5–$15) |
| Filament Dryer | Sunlu S2 ($30–$60) |
Realistic Total (mid-range entry): ~$350–$500
Hidden Costs Worth Knowing
- Filament is an ongoing expense. A 1kg spool lasts anywhere from a few prints to dozens depending on size. Budget $25–$40/month if you’re printing regularly.
- Nozzle replacements — brass nozzles are cheap ($5–$10 for a multi-pack), but they wear out faster with abrasive materials. Hardened steel nozzles last much longer but cost $15–$30 each.
- Build plate wear — PEI sheets last a long time but eventually wear out. Replacements run $15–$40.
- Electricity — A mid-size FDM printer running a 10-hour print draws roughly 100–200Wh, similar to a desktop computer. Not a significant cost for most households.
The overall cost of entry has never been lower. A $300 printer today delivers results that would have required a $1,500+ machine just five years ago. For a curated list, check out our best 3D printers under $500.
How Do You Learn How to Use a 3D Printer Faster?
The learning curve has shortened dramatically. Here’s how to accelerate it further.
Modern printers dramatically shorten the learning curve — most beginners are producing prints they’re proud of within their first week. That’s a genuinely dramatic change from even a few years ago, when weeks of tinkering before a clean first print was normal.
How to Use a 3D Printer to Make Money
Here’s the section some of you have been waiting for. Let’s be direct about this: yes, people do make real money with 3D printers. The key word is people — not everyone, not automatically, and not without thought and effort.
Sell Functional Prints
There’s genuine demand for small, practical items that would cost a fortune to produce through traditional manufacturing in small quantities. Think: custom brackets, replacement parts, specialized tools, mounting hardware, adaptive devices.
The best approach here is finding a niche — a specific problem, community, or use case where your printer can produce something that’s hard to find elsewhere. Generic items you can find for $3 on Amazon won’t generate margin. Specific, hard-to-source items for specific communities can.
Etsy and Online Marketplaces
Etsy has a substantial and growing 3D printing market. Custom items tend to sell better than generic ones — personalized name tags, custom gaming accessories, unique home decor, custom cosplay components.
⚠️ Licensing MattersMany models you download from free sites like Thingiverse or Printables are licensed for personal use only — selling prints made from them is a violation of the license terms. Always check licensing before selling prints of downloaded models.
Cosplay Props and Custom Items
The cosplay community is a natural market for 3D printing — custom armor, weapons, accessories, and prop replicas. This is typically higher-margin work that requires finishing skills (sanding, painting, weathering) alongside printing ability.
Local Business Prototyping
Small businesses and entrepreneurs regularly need prototypes, custom fixtures, product mock-ups, and small-batch parts. Local connections are often the best path here. Services like this can command significantly higher rates than selling finished consumer products.
Print-on-Demand Platforms
Platforms like Treatstock connect customers who need prints with local printers who fulfill the orders. You set up your machine capabilities and pricing; the platform handles finding customers. It’s a lower-effort path to revenue but also lower-margin.
Realistic ExpectationsCompetition exists. Margins vary. Shipping adds complexity. A single printer can generate meaningful supplemental income with the right approach, but replacing a full-time income requires scale — multiple machines, smart product selection, and real business effort. The people doing this successfully treat it as a business, not a passive income stream.
Ready to turn your printer into a side hustle? You’ll need a reliable workhorse. Here are our top picks for small business printing.
Beginner Projects to Try First
Before you go chasing complex prints, build confidence and learn your machine with simpler projects. Here are some of the best first prints:
The Benchy
The unofficial mascot of 3D printing. This little tugboat is designed to test a wide range of printer capabilities — overhangs, bridges, curves, fine details. Print one early, print one after you’ve dialed in settings, compare them.
Cable Clips
Practical, fast to print, and genuinely useful. Custom-sized cable management clips for your desk or entertainment center are a great entry-level functional print.
Phone Stands
A classic beginner project. Tons of design options on Printables; pick one that suits your phone size, knock it out in 30–60 minutes, and have something immediately useful.
Drawer Organizers
Especially satisfying because they’re immediately functional. A custom organizer sized exactly for your tool drawer or kitchen junk drawer is something you can design yourself in Tinkercad.
Tool Holders
Pegboard hooks, tool holders for specific instruments, wall-mounted holders for scissors or tape — quick, practical, and great early functional prints.
Small Figurines
Once your print quality is consistent, try a simple figurine or decorative piece. These push your slicer settings in different ways than functional parts and teach you different lessons.
Frequently Asked Questions
With a modern beginner printer, genuinely not. The setup process is dramatically simpler than it was even three years ago, and the default settings in current slicers produce good results without manual tuning. Most beginners can produce a successful first print within a few hours of unboxing.
Absolutely. 3D printing is one of the more self-teachable technical hobbies available. YouTube tutorials, community forums, and the increasingly detailed documentation from printer manufacturers mean the answers to virtually any question are a search away.
The Bambu Lab A1 Mini is the most consistently recommended option for pure ease of use. Hands-free calibration, seamless slicer integration, and the MakerWorld ecosystem make it the lowest-friction entry point available in 2026.
Yes, you’ll need a computer for slicing — converting 3D models into printable files. Most slicers run on Windows, macOS, and Linux. Once the file is sliced, some printers can operate from a phone app for monitoring and control, but the initial slicing step requires a computer.
It varies enormously. Small items (like cable clips or keychains) can take 15–30 minutes. Medium objects take 2–8 hours. Large or detailed prints can run 10–30+ hours. Print time is influenced by object size, layer height, infill percentage, and print speed.
The startup cost is a meaningful investment — $300–$500 for a solid beginner setup. Ongoing costs (filament, occasional consumables) are relatively modest for a hobby. For someone who uses the printer regularly, the cost per print quickly becomes very low.
Yes, for FDM printing with PLA — the noise is manageable and the fumes are minimal. Resin printing in an apartment requires more careful ventilation management and is generally trickier. An enclosed FDM printer is slightly better for apartment use due to reduced noise and particulate output.
With appropriate supervision and safety orientation, yes. The main hazards are the hot components during operation. For younger children, supervised model selection and watching the process is appropriate. For teens, with a safety briefing, supervised independent operation is reasonable.
With a modern machine, most people feel comfortable with the basic workflow within a week or two. Reaching a point where you understand troubleshooting, slicer settings, and material behavior takes a few months of regular printing. Mastery — being able to dial in any material and consistently produce high-quality results — is an ongoing journey that keeps the hobby engaging for years.
PLA. It prints at lower temperatures, doesn’t warp easily, doesn’t require an enclosure, and forgives a wide range of settings. It’s the undisputed best starting material for learning the workflow and making most everyday objects.
You’re Ready to Start 3D Printing
3D printing in 2026 is dramatically easier than it was even a few years ago. Beginners should focus on workflow consistency: PLA + good slicer profiles = the fastest path to success. You have the knowledge — now go print something awesome.

