

You’ve spent hours dialing in your print settings. The first layer looks perfect. You hit print, walk away, and come back to find… stringing, bubbling, rough surfaces, or worse — a failed print halfway through.
Sound familiar? Here’s the thing most people don’t realize until it’s too late: it’s probably not your printer, your slicer, or your settings. It’s your filament.
Moisture is the silent killer of 3D printing quality. It sneaks into your filament spools while they sit open on a shelf, degrades the material at the molecular level, and turns what should be a clean, precise print into a messy, frustrating mess. The good news? This is one of the most preventable problems in 3D printing — and the solution doesn’t have to be expensive or complicated.
In this guide, you’ll learn exactly how to store 3D printer filament the right way: how to keep it dry, tangle-free, and print-ready whether you’re printing every day or storing spools for months. We’ll also cover the best products that make this dead simple, so you can spend less time troubleshooting and more time printing.
Let’s get into it.
📌 Jump to Section
- Quick Answer
- Why Proper Storage Matters
- Step-by-Step Storage System
- Best Way by Use Case
- 2026 Buyer’s Guide
- Budget to Pro Setups
- Critical Drying Tips
- Preventing Tangling
- Material-Specific Guide
- Storage vs. Drying
- AMS Storage Considerations
- Common Mistakes
- How to Tell If Filament Is Wet
- FAQ
- Final Verdict
Quick Answer: Best Way to Store 3D Printer Filament
If you’re in a hurry, here’s the short version:
- Store filament in airtight containers with desiccant (silica gel or molecular sieves)
- Keep humidity below 20–30% RH inside your storage container
- Use a Filament Dryer for moisture-sensitive materials like PETG, TPU, and Nylon
- Avoid sunlight, heat, and open air — all three degrade filament over time
- For long-term storage (6+ months): vacuum seal with silica gel packs in a cool, dark location
That’s the core system. Now let’s dig into why this matters and how to set it up properly.
Why Proper Filament Storage Matters
Moisture Destroys Print Quality
Most 3D printing filaments are hygroscopic — meaning they actively absorb moisture from the air around them. This isn’t a flaw or a cheap material problem; it’s just the chemistry of the polymers involved. Even high-end filaments from premium brands will absorb humidity if left exposed.
When filament absorbs moisture, the water molecules become trapped inside the material. Then, when the filament is fed into your hot end and hits temperatures of 200°C+, that moisture instantly vaporizes. You hear it as a popping or crackling sound. You see it as stringing, bubbling, rough surface texture, layer delamination, and weak, brittle parts.
The more moisture, the worse the print — it’s that direct.
The Financial Cost Is Real
A quality spool of PETG, Nylon, or Carbon Fiber filament can cost anywhere from $25 to $80+. If poor storage renders even a portion of that spool unusable, you’re throwing money away. Multiply that across a few spools per month, and proper storage pays for itself very quickly.
Even “New” Filament Can Be Wet
Here’s something that surprises a lot of people: filament can arrive from the manufacturer already containing moisture. Long shipping times, poor warehouse storage, or a damaged vacuum seal can all result in wet filament out of the box. If your first print with a new spool has quality issues, always consider moisture before blaming your printer.
How to Store 3D Printer Filament (Step-by-Step System)
1. Use an Airtight Filament Storage Box
The foundation of any good filament storage setup is an airtight container. The goal is simple: cut off the filament’s access to ambient air (and the humidity it carries).
A good Filament Storage Box doesn’t need to be fancy. It just needs to seal reliably. Look for containers with rubber gaskets or locking lids that create a true seal — not just a press-fit lid that can pop off or breathe.
What to look for:
- Rubber or silicone gasket for an airtight seal
- Large enough to fit a standard spool (most are ~200mm diameter)
- Transparent so you can see what’s inside without opening it
- A port or notch for feeding filament directly to the printer (optional but very convenient)
👉 Top Pick for Everyday Storage
The Wildone 21-Cup (5L) Airtight Container is a favorite in the community for good reason — it fits most standard spools perfectly, has a reliable locking lid with a silicone seal, and it’s genuinely affordable. Stack a few of these and you have a solid, modular storage system without spending a fortune.
2. Add Desiccant (Smart Moisture Control)
An airtight box alone isn’t quite enough — you also need something inside the box actively absorbing any residual moisture. That’s where desiccant comes in.
The two main types you’ll encounter:
Silica Gel is the classic choice — those little packets you find in shoe boxes and electronics. It’s inexpensive, effective, and widely available. Orange-indicating silica gel is particularly useful because the beads change color (orange to green or colorless) when they’re saturated and need recharging.

Molecular Sieves are a step up — they adsorb moisture at lower humidity levels and hold it more tightly. They’re better for extremely moisture-sensitive filaments like Nylon or PA-CF, but they cost more and don’t have a convenient visual indicator.
For most users, good quality silica gel is all you need.
Sustainability Note (This Is Important): Please don’t throw away saturated silica gel. It’s completely rechargeable and reusable, which makes it one of the more eco-friendly consumables in the hobby. Simply spread it on a baking sheet and heat it in your oven at around 120°C (250°F) for 1–2 hours. The moisture evaporates, and the beads are ready to use again. You can recharge the same silica gel dozens of times.
👉 Recommended Desiccant
Dry & Dry Orange Indicating Silica Gel packets are a popular, safe choice. The orange-to-green color change is easy to monitor, and they’re food-safe rated. Buy a bag, portion them into your storage containers, and recharge as needed.
How much desiccant do you need? A general rule of thumb: about 50–100g of silica gel per storage container. More doesn’t hurt, but those amounts are sufficient for most sealed setups.
3. Store in a Cool, Dark Environment
Heat and UV light are filament’s other two enemies, after moisture.
Heat accelerates chemical degradation in polymers and can cause spools stored near a window or on a warm shelf to warp slightly over time. The ideal storage temperature range is 15–25°C (59–77°F) — basically room temperature, away from any heat sources like printers, direct sunlight, or heating vents.
UV Light is particularly damaging to certain filaments — PLA and ABS can become brittle and discolored with prolonged UV exposure. This is why opaque or UV-resistant storage containers are worth considering, especially if your storage space gets any sun.
A closet, a cabinet, a shelf away from windows — all of these work perfectly. You don’t need a special room, just somewhere climate-controlled and dark.
4. Label & Rotate Your Filament
This sounds basic, but it makes a real difference once you have more than a handful of spools.
Label every spool with:
- Material type (PLA, PETG, TPU, etc.)
- Brand and color
- Date opened
- Any print settings notes you found helpful
Use a FIFO system (First In, First Out) — the spool you opened first gets used first. This prevents older filament from sitting at the back of a shelf and quietly absorbing moisture or degrading while newer spools get all the use.
A simple piece of masking tape and a marker on each spool is all you need.
Best Way to Store 3D Printer Filament (By Use Case)
Different situations call for different approaches. Here’s how to think about it:
Everyday Use: Dry Box with Feed-Through
If you’re printing regularly and going through spools quickly, a dry box with a feed-through port is the ideal setup. The spool stays sealed inside a desiccant-loaded container, and the filament feeds directly to the printer through a small PTFE tube or port in the lid.
This way, your filament is always in a controlled environment — even while printing. It never sits exposed on a spool holder in open air.
Several commercial options include built-in rollers and feed ports, or you can DIY one with a basic airtight container and a Bowden coupling or simple hole.
Not in Use (Short-Term Storage: Days to Weeks)
If a spool is partially used and you’re setting it aside for a week or two, the minimum you should do is:
- Clip or tape down the loose end of filament so it doesn’t tangle
- Slide the spool into a resealable ziplock bag (preferably the heavy-duty, gallon-size type)
- Throw in a desiccant pack before sealing
- Squeeze out as much air as you can before closing
This isn’t a perfect solution, but it’s much better than leaving it sitting on a shelf. For materials like PETG or TPU, spring for the full airtight container even for short-term storage.
Long-Term Storage (6+ Months): Vacuum Sealing
For spools you’re putting away for the long haul, vacuum sealing is the gold standard. Removing nearly all the air from the package dramatically reduces the moisture the filament is exposed to, even if the seal isn’t completely perfect over months.
The setup:
- Add desiccant packs to the bag alongside the spool
- Use a vacuum sealer (or a manual pump bag kit) to remove the air
- Store in a cool, dark location
- Check the seal every few months if possible
👉 Recommended for Long-Term
Look for vacuum storage bags with a USB pump — these are inexpensive, easy to use, and work with standard bag sizes that fit most spools. It takes about 60 seconds per spool and makes a huge difference in longevity.
With proper vacuum sealing and desiccant, filament can remain print-ready for 1–3+ years.
Filament Storage Solutions: 2026 Buyer’s Guide
Now let’s talk products. There’s a range of solutions out there — from dead-simple and cheap to sophisticated and zero-maintenance. Here’s how to think about each category.
Filament Dryers: The Gold Standard
If storage boxes are about prevention, filament dryers are about correction and active maintenance. A filament dryer applies controlled heat to drive moisture out of filament — either before printing or continuously during a print.
Passive vs. Active Drying:
- Passive drying = a sealed container with desiccant and no heat. Good for storage, not for rescuing already-wet filament.
- Active drying = a heated chamber (the filament dryer) that circulates warm air to drive out moisture. Necessary for seriously wet filament and moisture-sensitive materials.
When do you need a filament dryer?
Honestly, if you’re printing PETG, TPU, Nylon, or any Carbon Fiber blend regularly, a dryer isn’t optional — it’s essential. These materials absorb moisture so aggressively that even a few hours of exposure can compromise print quality. A dryer lets you rescue wet filament and keep sensitive spools in active-use condition without worrying.
👉 Top Pick — SUNLU S4 Filament Dryer (4-Spool Capacity)
In 2026, multi-spool drying has become the standard for anyone with more than a couple of machines or material types. The SUNLU S4 can dry up to 4 spools simultaneously, has precise temperature control, and supports a wide range of materials. If you’re serious about print quality and you regularly use moisture-sensitive materials, this is the upgrade that will make the biggest immediate difference to your results.
Filament Storage Boxes
For budget-conscious setups or for materials that are less moisture-sensitive (like PLA), a good airtight storage box with a built-in or separate hygrometer is all you need.
The hygrometer is important — it lets you monitor the relative humidity inside the container without opening it. If you open the box and check, you’ve already let in fresh ambient air. A small digital hygrometer inside the box gives you a constant readout through the transparent lid.
👉 Best Value Pick — Wildone 5L / 21-Cup Airtight Container
These containers have become a community staple. They’re affordable, they fit standard spools, the locking lid creates a reliable seal, and you can buy them in multipacks to set up a whole wall of organized, protected filament storage. Add a mini hygrometer and some silica gel, and you’re set.
3D Printer Filament Storage Cabinets
For more advanced setups — multiple printers, a large filament collection, or a professional/workshop environment — a 3D Printer Filament Storage Cabinet is worth serious consideration.
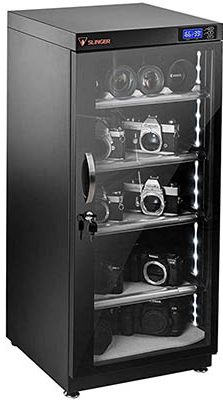
The premium option here is an electronic dry cabinet, similar to what photographers use for camera lenses. These use thermoelectric modules to actively maintain a set humidity level inside the cabinet, typically down to 30–40% RH or lower. No desiccant to recharge, no monitoring required — just set your target humidity and walk away.
Options range from:
- Camera-style dry cabinets (40–100L capacity, designed for electronics but work perfectly for filament)
- Creality Dry Cabinet and similar 3D-printing-specific options that are designed with filament spools in mind
👉 Pro Recommendation
If you have 20+ spools and you’re tired of managing desiccant, an Electronic Dry Cabinet is genuinely worth the investment. The zero-maintenance operation alone saves hours over the course of a year, and your filament stays in optimal condition at all times.
PLA Filament Storage Containers
PLA is the most forgiving of the common filaments — it has lower moisture sensitivity than PETG, TPU, or Nylon, and it’s more tolerant of brief exposure to ambient air.
That said, PLA is not immune to moisture damage. In humid climates or for long-term storage, the same rules apply. A good PLA Filament Storage Container doesn’t need to be a heated dryer — a simple airtight box with silica gel works perfectly for most PLA storage scenarios.
For PLA specifically, a basic sealed container is the minimum, and it’s all most people need.
Filament Storage Ideas: Budget to Pro Setups
| Setup Level | Cost Range | Best For | Get Started |
|---|---|---|---|
| Budget | $10 – $30 | PLA printers, beginners, small collections | Shop Silica Gel |
| Mid-Range | $30 – $100 | Multi-material home users, PETG/TPU printers | Shop Storage Boxes |
| Advanced Best | $100+ | Professionals, Nylon/CF printers, 20+ spools | Shop Dryer S4 |
Budget Setup ($10–$30): The Ziplock + Silica System
This is where most people start, and honestly, it’s not bad:
- Heavy-duty ziplock bags (gallon size or larger)
- Silica gel desiccant packs (rechargeable)
- Squeeze out air before sealing
Upgrade: Add a small digital hygrometer inside each bag so you know when the silica needs recharging.
Sustainability reminder: Recharge your silica gel in the oven — don’t throw it away. It’s reusable for years.
Mid-Range Setup ($30–$100): Airtight Boxes + Hygrometers
This is the sweet spot for most home users:
- 2–4 Wildone or similar airtight containers per material type
- Mini digital hygrometers inside each container
- Rechargeable silica gel (50–100g per container)
- Optional: feed-through port for the containers you’re actively printing from
At this level, your filament is genuinely well-protected, you can monitor conditions at a glance, and the whole system scales easily as your collection grows.
Advanced Setup ($100+): Dryer + Cabinet Combo
For the serious hobbyist or professional:
- SUNLU S4 or similar multi-spool filament dryer for active drying and in-use storage of moisture-sensitive materials
- Electronic dry cabinet for long-term storage of the full collection
- Vacuum sealer for archival storage of materials you won’t use for months
This setup requires almost no ongoing maintenance and keeps every spool in optimal condition at all times. It also looks great on a shelf, which is a legitimate bonus.
🖨️ Free Filament Storage Checklist
Stop guessing if your filament is dry. Download our printable checklist to set up the perfect storage system and never ruin a spool again.
How to Keep 3D Printer Filament Dry: Critical Tips
A few non-obvious things that make a big difference:
1. Recharge your desiccant on a schedule. Don’t wait until you notice print quality issues — by then, your filament may already be affected. Set a calendar reminder every 4–6 weeks to check hygrometers and recharge any saturated silica gel.
2. Use hygrometers inside every container. The ambient humidity in your room tells you nothing useful about the conditions inside your sealed containers. A $5 mini hygrometer inside each box gives you real data.
3. Keep storage containers sealed. This sounds obvious, but it’s easy to get lazy — pulling a spool out, leaving the container open while you’re fiddling with the printer, then forgetting to reseal it. Make a habit of resealing immediately every time.
How to Keep 3D Printer Filament from Tangling
Moisture gets most of the attention, but tangled filament is the other common storage-related problem — and it’s entirely preventable.
The main causes of tangling:
- Leaving the free end of the filament loose on the spool
- Letting the filament go slack and loop over itself
- Rough handling when removing spools from storage
How to prevent it:
- Always secure the filament end before storing — thread it through one of the holes in the spool flange, or use a dedicated spool clip
- Don’t let the filament go slack — keep tension on it when removing from the printer
- Store spools upright or flat — avoid positions where the filament could shift and cross over itself
- Use spool clips — these small clips (printable or purchasable) grip the filament end reliably without creating a kink
A tangle mid-print is one of the most frustrating failures in 3D printing because it happens after you’ve already invested time in a print. Prevention takes 5 seconds; untangling can take 20 minutes and still end in a failed print.
Material-Specific Storage Guide (2026 Update)
Different materials have very different moisture sensitivity. Here’s what you need to know for each:
| Material | Moisture Sensitivity | Storage Recommendation | Shop Top Filaments |
|---|---|---|---|
| PLA | Low to Moderate | Ziplock + Silica Gel or Airtight Box | Polymaker PLA eSUN PLA |
| PETG | High | Airtight Box + Desiccant. Dryer recommended. | Overture PETG Official Store |
| TPU | Very High | Dry Box with Feed-through. Dryer mandatory. | Overture TPU |
| Nylon / PA | Extremely High | Active Drying before EVERY print. Sealed storage. | Overture Nylon eSUN ePA-CF |
| CF Blends | Extremely High | Active Drying. Vacuum seal when not in use. | Polymaker PA6-CF |
| ABS / ASA | Moderate | Airtight Box + Desiccant. Dry if brittle. | eSUN ABS+ |
PLA
Moisture Sensitivity: Low to Moderate
PLA is the most forgiving. It can handle brief exposure to ambient air and doesn’t degrade as quickly as engineering-grade filaments. For storage under a week, a sealed ziplock with silica gel is fine. For longer storage, use an airtight container with desiccant. A filament dryer is rarely necessary for PLA unless you’re in a very humid climate or the filament has been sitting open for an extended period.
PETG (Including PETG HF)
Moisture Sensitivity: High
PETG is notoriously hygroscopic. It can absorb enough moisture in just a few hours to cause stringing and bubbling. PETG HF (High Flow) variants are particularly susceptible. Always store PETG in an airtight container with desiccant, and consider actively drying it before any critical print. A filament dryer is strongly recommended if you use PETG regularly.
TPU (Flexible Filament)
Moisture Sensitivity: Very High
TPU is extremely hygroscopic — arguably the worst of the common consumer filaments. Even a few hours of air exposure in a humid room can ruin print quality. If you’re printing TPU, it should go directly from sealed storage into the printer, ideally through a dry box with a feed-through. A filament dryer is essentially mandatory for anyone printing TPU regularly in any climate with >40% ambient humidity.
Nylon (PA6, PA12, CF Blends)
Moisture Sensitivity: Extremely High — Requires Active Drying
Nylon absorbs moisture faster than almost any other common printing material, and wet Nylon prints are notoriously difficult — severe warping, poor layer adhesion, and surface roughness. If you’re printing any type of Nylon (PA6, PA12, PA6-CF, PA12-CF), you should be drying it in a filament dryer before every print, even if it looks fine. A few hours of drying at the correct temperature is standard practice.
Carbon Fiber Filaments (PA-CF, PETG-CF) ⚠️ 2026 Note
Moisture Sensitivity: Extremely High
This is worth calling out specifically because CF blends have become much more popular in 2026 with the proliferation of enclosed, hardened-nozzle printers. Here’s the issue that many people don’t expect: the carbon fibers in CF blends act as moisture wicks, drawing moisture into the filament faster than the base material alone would.
PA-CF and PETG-CF often absorb moisture faster than their non-CF equivalents. If you’re printing any Carbon Fiber filament, treat it at minimum like Nylon — active drying before every print, immediate sealed storage after use, and a filament dryer as a standard part of your workflow.
ABS / ASA
Moisture Sensitivity: Moderate
ABS and ASA are less hygroscopic than Nylon or PETG, but they’re not immune. ABS in particular can become brittle with prolonged moisture exposure. ASA is designed for outdoor UV resistance, but it still benefits from dry storage. Standard airtight container with desiccant storage is appropriate; active drying is only necessary if the filament has been left open for an extended period or you suspect moisture contamination.
Filament Storage vs. Filament Drying: What’s the Difference?
These two things are related but distinct, and understanding the difference helps you set up the right system:
Most users need both. Storage prevents ongoing moisture absorption; drying rescues filament that’s already compromised (from poor previous storage, humid shipment, or just being left out during a long print session).
If you only have storage but no drying capability, you’re protected against future moisture but have no way to rescue wet filament. If you only have a dryer but no proper storage, you’ll dry your filament and then re-wet it before you even finish a spool. The two work together.
AMS / AMS Lite Storage Considerations (2026 Optimization)
With multi-material systems like the Bambu Lab AMS and AMS Lite now widely used, filament storage has a new dimension to consider.
The AMS and AMS Lite include internal desiccant trays — a good start, but often not sufficient for humid environments or moisture-sensitive materials like PETG, TPU, or Nylon. The built-in desiccant works best as a supplement to proper external storage, not a replacement for it.
Popular community modifications include:
- Hydra mods — after-market upgrades that improve the AMS’s moisture protection
- Spool mods — modifications to how spools sit inside the unit to reduce moisture exposure
- Replacing the stock desiccant more frequently than the default schedule
When to use an external dry box instead of the AMS for a material:
- Any Nylon, PA-CF, or TPU filament
- Any spool that’s been sitting in the AMS for more than a few weeks without being used
- Any material showing print quality degradation despite the AMS desiccant appearing fresh
For moisture-sensitive materials in a multi-material setup, consider a dry box with a feed-through that routes directly into the AMS input, bypassing the internal storage entirely.
Common Filament Storage Mistakes
Here are the most common mistakes — and they’re all easily avoided once you know about them:
1. Leaving filament exposed on the spool holder. This is the single most common mistake. A spool sitting in the open air, even in a low-humidity environment, is slowly absorbing moisture. Always return filament to sealed storage when it’s not actively printing.
2. Not using desiccant. An airtight container is significantly less effective without desiccant inside. Even sealed containers have some residual air and humidity — the desiccant handles that.
3. Storing in bathrooms, garages, or basements. These spaces tend to have much higher ambient humidity than main living areas. If you’re printing in a garage workshop, pay extra attention to your storage setup.
4. Ignoring the hygrometer. If you have a hygrometer inside your container and it’s reading >30% RH, your desiccant needs recharging — do it before your next print, not after.
5. Buying cheap filament and storing it in premium conditions, while storing premium filament carelessly. Treat all filament by the same standard based on material type, not price.
How to Tell If Filament Is Wet
These are the telltale signs that moisture has gotten into your filament:
- Popping or crackling sounds from the hot end during printing — this is steam escaping
- Excessive stringing between parts of your print
- Rough, textured, or foamy surface finish instead of smooth layers
- Brittle filament that snaps when you try to bend it (particularly noticeable in PETG and Nylon)
- Poor layer adhesion or visible voids between layers
- Discoloration of the extruded material (particularly in Nylon, which can turn yellowish)
- Difficulty maintaining consistent extrusion — under-extrusion that seems to come and go
If you’re seeing two or more of these symptoms, moisture is almost certainly the culprit. Dry the filament before troubleshooting anything else — it will save you hours of slicer settings adjustments that won’t fix a moisture problem.
FAQ: Filament Storage Questions Answered
What is the best way to store 3D printer filament?
The best overall system is an airtight container with desiccant and an internal hygrometer, stored in a cool, dark location away from heat and UV light. For moisture-sensitive materials (PETG, TPU, Nylon, CF blends), add an active filament dryer to your setup and dry before printing.
Do I need a filament dryer?
If you only print PLA occasionally, you can probably manage with just sealed storage and desiccant. But if you regularly print PETG, TPU, Nylon, or any Carbon Fiber filament, a filament dryer isn’t a luxury — it’s a necessity. The print quality difference is significant and immediate.
How long can filament be stored?
With proper sealed storage and desiccant, most filaments remain print-ready for 1–3 years or more. Vacuum-sealed filament can potentially last even longer. Filament left in open air in a humid environment can degrade in quality within days to weeks.
Can filament go bad?
Yes. Moisture causes hydrolytic degradation (breaking down of polymer chains), which makes filament brittle, reduces its strength, and creates print quality issues. UV exposure causes photooxidation, which can change the material’s color and mechanical properties. Both are preventable with proper storage.
How do I keep filament dry long term?
The most reliable method is vacuum sealing with silica gel packs, stored in a cool, dark location. Check the seal periodically, and plan to redry the filament before printing after extended storage.
Is silica gel or molecular sieves better for filament storage?
For most materials and most users, rechargeable silica gel is perfectly adequate and more cost-effective. Molecular sieves work better at lower humidity levels and are worth considering for extremely hygroscopic materials like Nylon, but they’re not necessary for everyday storage of PLA, PETG, or ABS.
Final Verdict: The Best Filament Storage Setup for You
Here’s the bottom line, matched to different types of users:
Best Budget
Airtight Container + Silica Gel
If you’re starting out or primarily printing PLA, this setup costs under $30 and handles 95% of what most hobbyists need. Get a few Wildone airtight containers, load them with rechargeable orange-indicating silica gel, add a mini hygrometer inside, and you’re set.
Best Overall
Filament Dryer + Airtight Boxes
This is the recommendation for anyone who prints a variety of materials, especially PETG, TPU, or Nylon. A SUNLU S4 or equivalent multi-spool dryer handles your active material, and airtight boxes with desiccant handle everything in reserve. You’ll notice the difference in your prints immediately.
Best Professional
Electronic Dry Cabinet + Active Dryer
For workshop environments, multi-printer setups, or anyone with 20+ spools and no interest in managing desiccant, the combination of an electronic dry cabinet (zero maintenance humidity control) and an active filament dryer is the ultimate setup. Set it and forget it — every spool is always in optimal condition.
Stop Losing Prints to Wet Filament
Proper filament storage is one of those things that seems like a minor detail until the moment it isn’t — and then it’s the only thing standing between you and a perfect print. The investment in a solid storage system is small compared to the cost of wasted filament and failed prints.
At the end of the day, proper filament storage is one of those things that seems like a minor detail until the moment it isn’t — and then it’s the only thing standing between you and a perfect print. The investment in a solid storage system is small compared to the cost of wasted filament, failed prints, and the frustration of chasing print quality issues that were never about your printer in the first place.
Start with what you have, improve as you go, and your prints will thank you for it.
For the best results, it is important to properly store your 3D printer filament. Read on to find out how to store 3D printer filament and the storage box solutions available on the market.
