
The Raise3D Pro 2 Plus made it on our list of the best large format 3D printers this year. Find the nitty-gritty of this printer in our in-depth review.
Raise3D Pro 2 Plus Review
If you are looking for a professional large format 3D printer under $10,000, the Raise3D Pro 2 Plus should be in your list. This printer has a build volume of 305 x 305 x 305mm, which puts it in the same league as the Modix Big 60 and the Zortrax M300 Plus professional 3D printers. The only consumer 3D printer with such a large build volume is the Creality CR-10 S5.
The Raise3D Pro 2 Plus is perfect for prototyping companies, manufacturing companies, entrepreneurs and labs. This pro machine simply delivers results.
Read our Raise3D Pro 2 Plus review to find out the specs, features, quality of print and more of the machine.

AVAILABLE ON TOP3DSHOP
Raise3D Pro 2 Plus Specs
[su_table responsive=”yes”]
| Make | Raise3D |
| Model | Pro2 |
| Technology | FDM |
| Frame | Cartesian |
| Year | 2017 |
| Category | Professional, industrial |
| Print area | 305 × 305 × 605 mm (12 x 12 x 23.8 in) |
| Max. bed temp | 110℃ |
| Nozzle size | 0.2mm to 0.8mm |
| Max. nozzle temp | 300℃ |
| Max. Z-axis resolution | 0.1mm |
| Max. travel speed | 30 – 150 mm/s |
| Printable materials | PLA, PLA derivatives, ABS, HIPS, PC, TPU, TPE, Nylon, PET-G, ASA, PP, Exotics |
| Filament diameter | 1.75mm |
| 3rd party material compatibility | Yes |
| Interface | 7 inch TFT touchscreen, Wifi remote control via Ideamaker software |
| Connectivity | Wifi, USB, LAN |
| Printer size | 620 × 590 × 760 mm |
| Printer weight | 52kg |
| Power input | AC 100-240V |
| Features | Removable print bed, auto bed-leveling, HEPA Filter, camera, power outage resume, 32-bit mainboard, filament runout sensor, dual extrusion system |
[/su_table]
Raise3D Pro 2 Plus Overview
The Pro2 series (Pro 2 and Pro 2 Plus) printers have been designed with feedback from users of the N series printers, such as the Raise3D N2.
The frame of the Pro2 printer remains the same, and even externally, the printer looks almost the same as the Raise3D N2. However, the printer has some nice upgrades. For example, the door now does not snap into place but can be easily closed and fixed with magnets.

There are also some small holes with plugs on the door behind where the coils are located.
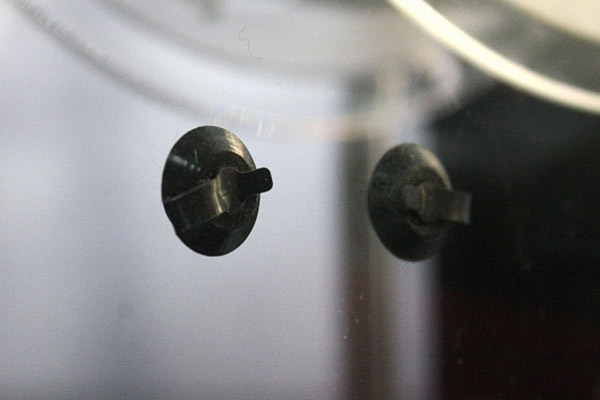
Now, with the Raise3D Pro 2 Plus, when using non-standard spools, you won’t have to wonder how to load the filament and leave the printer case closed. This seems like a small thing but for a printer with a large print area, it is important to be able to print with large spools.
Another upgrade in the Pro 2 Plus printer is the addition of a HEPA filter.
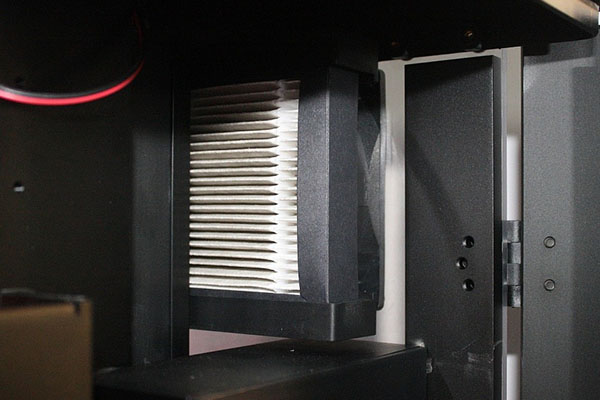
The air filter helps to reduce the odor produced when printing ABS material.
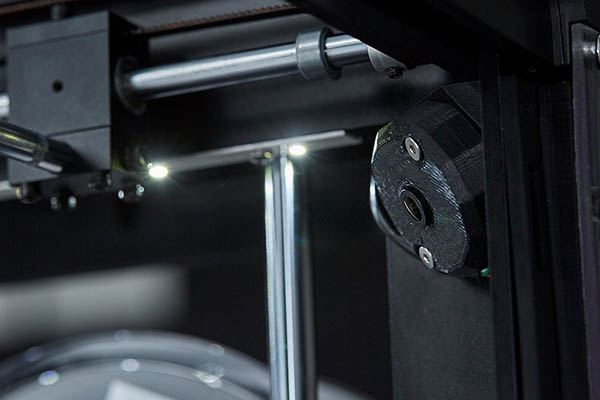
The mechanics of the printer have remained almost unchanged – the same win-win kinematics. In this arena, only the limit switches have changed. The Pro 2 Plus 3D printer uses optical limit switches.

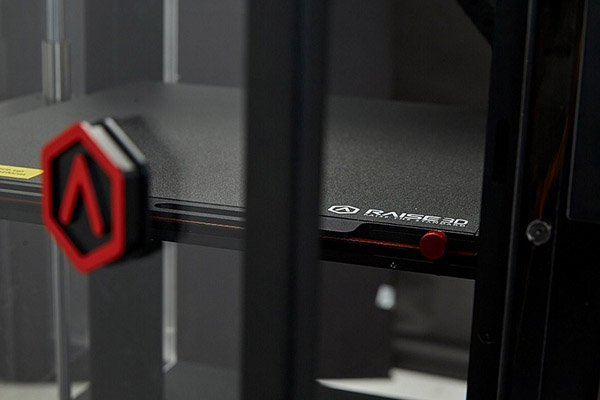
The print bed is now aluminum with a proprietary BulidTalk surface sticker for better adhesion.
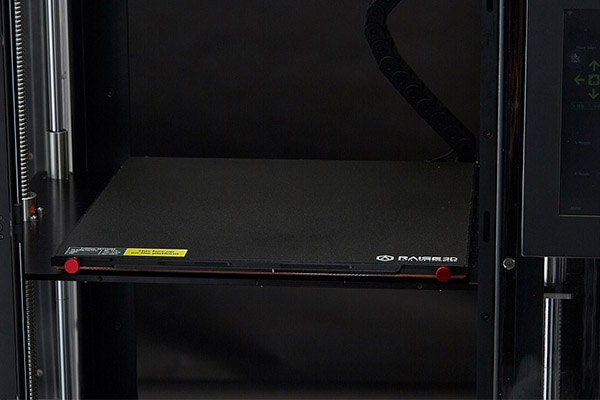
And the table is now fixed with magnets and screws. Therefore, there is no more clothespins for the extruder to snag on.
Each table in production is checked for surface evenness with such a printed test:

Remember to remove the test print before calibrating and first printing.
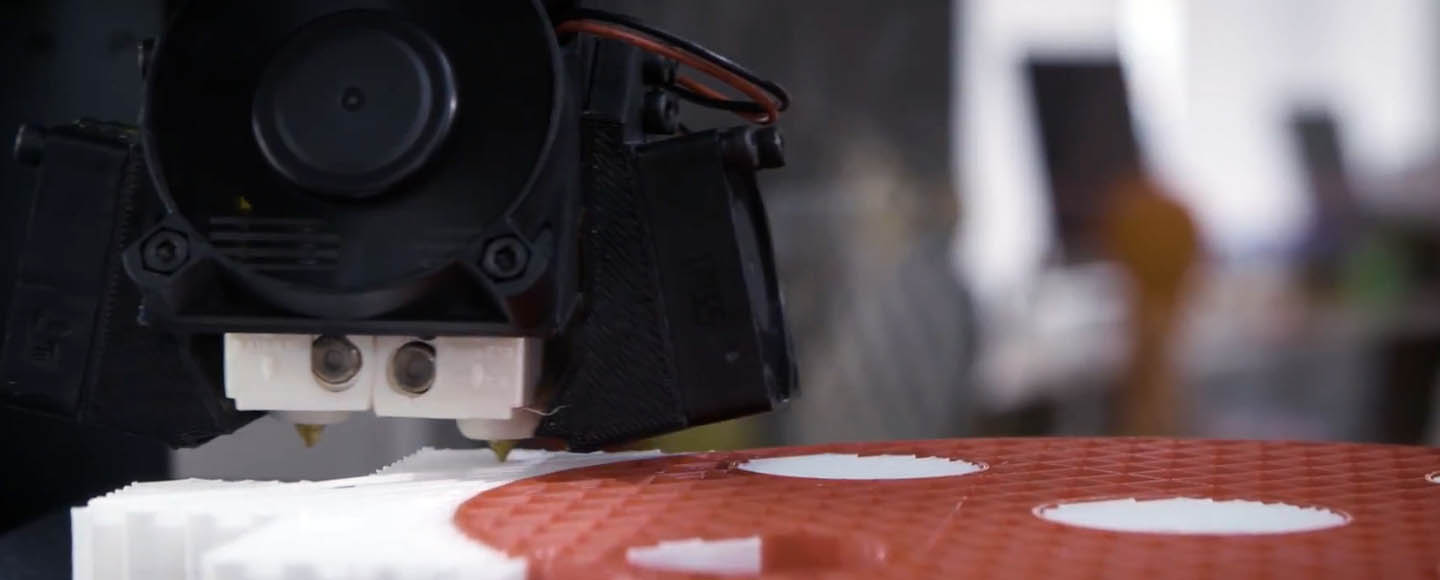
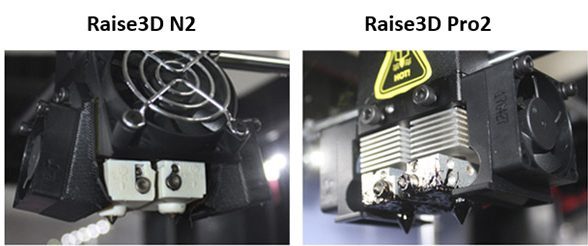
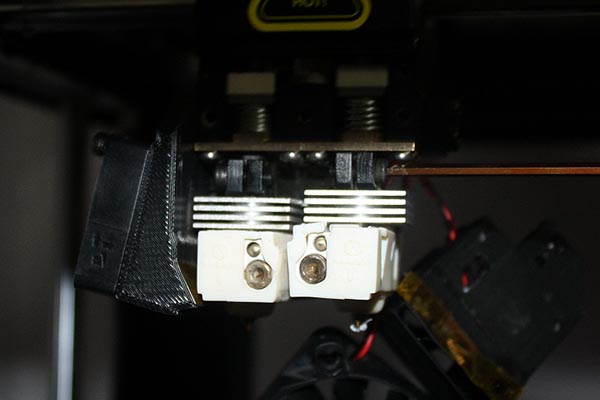
The most important upgrade in the Raise Pro2 3D printer is the extruder.
In N2, even if the nozzles were positioned correctly in height relative to each other, there was still a danger that the inactive nozzle could “knock down” the model.
With the Pro 2, this problem has been eliminated. The printer has a system of rising nozzles. When printing, the inactive nozzle rises up a few millimeters, just enough to prevent it from interfering with the active nozzle.

Calibrating the nozzles is now a little more difficult. However, this is compensated by a more convenient extruder system, which solves the main challenge of dual extruder printing.
The Raise3D N2 had 2 fans; one for the radiator and another for model. These two fans have been replaced in the Pro 2 with one large cooling fan for the extruder and 2 small fans for the model.
Now you can adjust the intensity of airflow on the model or turn off airflow completely.
The feed mechanism has also been completely redesigned.
The plastic feed motors are smaller and lighter, reducing overall head weight. Thanks to the reduced weight, you can print much faster without losing surface quality. There is an adjustment of the pressure mechanism, which will be a plus when printing with capricious plastics like rubber or flex.
A filament end sensor has been installed on top.

Now, if the plastic runs out, the printer will automatically pause.
There is also a small camera inside the case to remotely monitor the print job and record timelaps.
The Raise3D Pro 2 Plus has no battery. However, the resume printing function after a power outage is still there. This is accomplished through a memory was installed in the printer.
For all the parts to work smoothly and efficiently, the internal control board was replaced with a more powerful one.
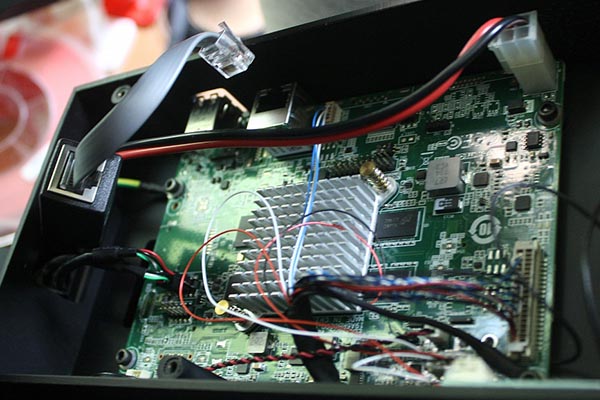
Here are the specs of the electronics:
- 400 MHz ARM Cortex-M7 32 bit RISC FPU
- Stand-alone motor driver
- Control system with 256 microsteps
Raise3D Pro2 Plus Design
The Raise3D Pro 2 3D printer looks professional on the outside. The body as well as the Z-axis rods of the machine are made of industrial-grade aluminum. A 7-inch touchscreen display has all the controls you need when running a print job.
The Raise3D Pro 2 is one of the best large 3D printers on the market. The machine has a build volume of 305 x 305 x 605 mm (12 x 12 x 23.8 inches). Thanks to the enclosure, you can print high-temperature materials such as ABS, HIPS, Nylon, PC, ASA, PETG, TPE, TPU, PC and others with this printer. The machine is also capable of handling flexing or abrasive materials such as metal filaments, carbon fiber, glass fiber, and more.
The Raise3D Pro 2 glass bead heats up to 110°C while the nozzle reaches up to 300°C. Therefore, it is basic default configuration, the machine cannot handle the likes of PEEK and Ultem.
The printer’s enclosure also improves the safety of the printer. Therefore, the machine would be suitable for use in not only manufacturing workshops but also educational institutions.
Dual Printhead

The Pro 2 has a dual extruder that is big and sturdy. The machine’s printhead resolution can reach 5 microns (0.005m) in the Z-axis.
This large format 3D printer is capable of dual printing. You can print not only models but also different soluble materials.
The printer’s dual-nozzle system is mounted in one printhead. The printer switches between the nozzles automatically in under one second. When the printer switches the nozzle, the slicer software gets rid of any excess filament using a skirt. This results in a separate shell that encloses your print.

During out tests, we did not see encounter any problems printing with the dual extruder.
Setup
The Raise3D Pro 2 is a big machine such that it’s delivered on a pallet. The printer’s dimensions are 305 x 305 x 605 mm and its weight is 52kgs. Therefore, you will need a sturdy benchtop to place the 3D printer.
The printer arrives secure, thanks to the many zip-ties, tilt-watch packaging, screws and clamps that make up the package.

The printer is fully enclosed and has a transparent acrylic casing. Thanks to the enclosure, you can be sure of getting better print quality for HIPS or ABS materials.
The Pro 2 Plus also has a cooling fan with a HEPA filter that keeps debris out of the air, reduces odor, and traps 90% of the contaminants emitted during a print job.
In the box, all the relevant tools are included (spare parts, nozzle cleaning kit, gloves, spatula, hex wrenches, and more). There are also two spools of PLA filament and 5 power cables for different countries.

Setting up the Raise3D Pro 2 is fast and easy. The printer has some sort of automatic bed leveling, like most professional FDM printers. It also uses an optical sensor as an end stop for the bed.
To calibrate the Z-offset, you have to tweak the distance between the photocell and the part cutting its connection, i.e., the screw. Adjust the screw as needed.
Raise3D Pro2 Plus Calibration

The plane of the table is calibrated from the factory. However, you will have to set the distance between the table and the nozzle. You have to send the extruder to the “home” first and only then the table. The “home” position of the extruder is slightly outside the table. Therefore, even if the table is too high, it will not crash into the extruder.
The printer is equipped with a dipstick for setting the gap between the table and the nozzle. The printer is calibrated “cold” – without heating the table and nozzles.

The table can be raised or lowered using the side pin that closes the optical sensor along the Z axis.

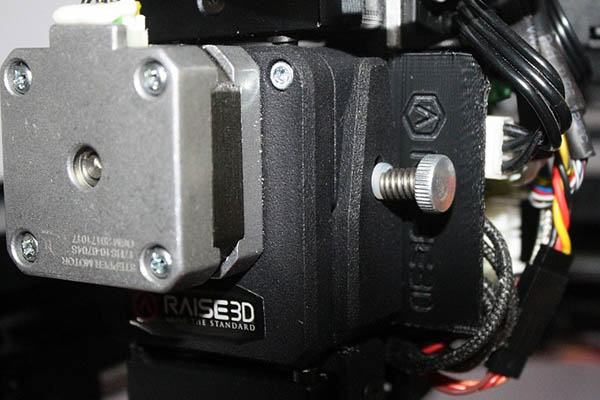
Calibrating the nozzles has become a little more difficult. If earlier it was enough to unscrew one bolt on the extruder, now you need to remove the fan that blows the radiator and side fan.
This photo shows the extruder switching mechanism. The principle is simple – 2 spring-loaded extruders with eccentrics are driven by a servo drive, which has only 2 positions (maximum left and maximum right).

The extruder must be lowered to the bottom position before calibration. To do this, you need to heat both extruders and press the extrusion button of the desired extruder on the display.
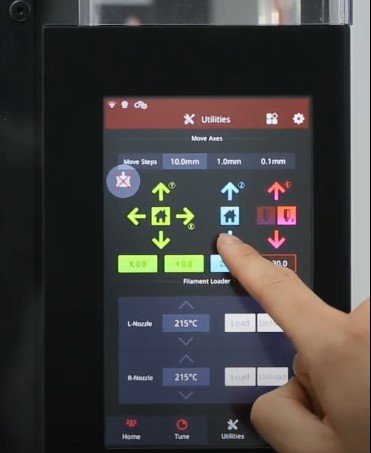
Next, unscrew one bolt that fixes the extruder and then you will be able to raise or lower the extruder.
Repeat the whole procedure with the second nozzle and assemble the extruder to complete the calibration.
After this, the Raise3D Pro 2 3D printer will be ready for use.
Here is a video that shows the calibration process:
Raise3D Pro2 Plus Software

Raise3D Pro 2 uses Ideamaker for operation controls as well as slicing prints. The software, which is available for Windows, Linux and Mac, is fast, responsive and has all the features you will expect from a printer control center.
The software really compares well to professional slicers such as Simplify3D and opensource alternatives such as Cura.

There are several new features added to ideaMaker. For instance, there is a new ready-made profile for printing “Ultra Quality” with a layer thickness of 0.05.

This may not seem as much but most people prefer using ready-made profiles.
The ability to automatically align models for two-color printing has been added. Previously, a two-tone boat had to be combined manually.
The software has also been fine-tuned. Multiple settings were added, from the accelerationto the ability to split the models on the table into different groups and print them simultaneously, but with different parameters (layer height, print speed).

Additional settings have also appeared in the menu of the printer itself, e.g., extruder offset, acceleration and others.
These settings automatically override the slicer settings and are automatically applied when printing.
If you have several printers, there is no need to prepare a separate file, it is enough to make the necessary settings once in the printer menu.
Here are our thoughts about Ideamaker:
- Convenient. The software is easy to use. All settings are laid out clearly and are easy to find.
- Right toolset. The software provides all the information you will want to know. We could see how much materials we would need, how much a print will cost, alert when the STL file was not watertight, option to repair broken meshes in the software without using an extra tool, ability to change temperature, and so on.
- Printing queue. After slicing an object, you can send it to the printer through Wi-Fi. You can also start the printing directly through Ideamaker.
- Pro Slicing. When you have several models on one build plate, most slicers struggle to distinguish between them. What they do, instead, is calculate the shortest path. As a result, the quality of your models may become inconsistent and there may be stringing between the parts.
Ideamaker does not have this problem. The software can recognize different models, layer by later. As a result, you will get better prints and have a short post-processing time.
However, there are two things about Ideamaker that we think can be improved.
- Notifications. The software does not provide notification after printing is done.
- Rafts. By default, every print is sliced by a raft. The BuildTak bed has strong adhesion, such that its was difficult to get the raft off the smaller prints without breaking them.
Print Results
This Raise3D Pro2 Plus review would not be complete without print results. All models are printed with original Raise plastic.
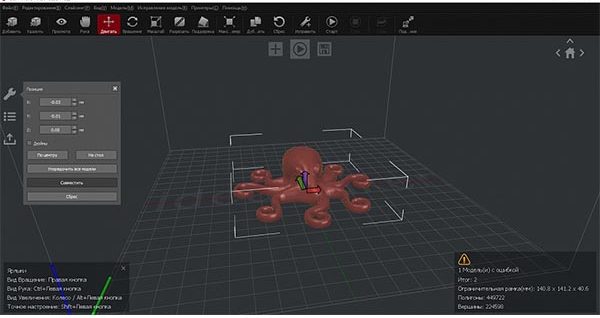
Lego Horn
A copy of the Lego-horn, enlarged several times. Layer 0.15. There was a lot of support from PVA, but unfortunately the photo was not preserved.

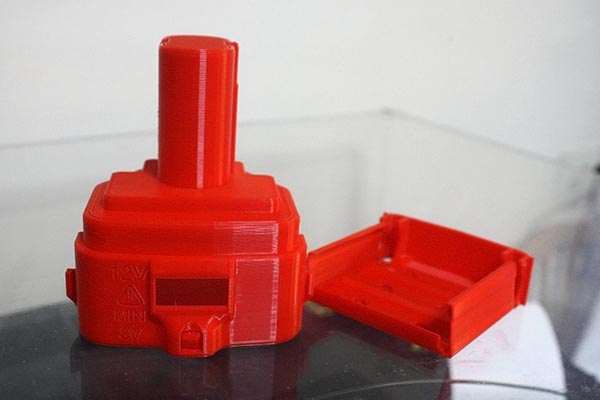
Battery case for screwdriver
Layer 0.2.
Small case for the board
Layer 0.1

And of course the most interesting thing is printing with water-soluble support.
PLA-PVA test cube


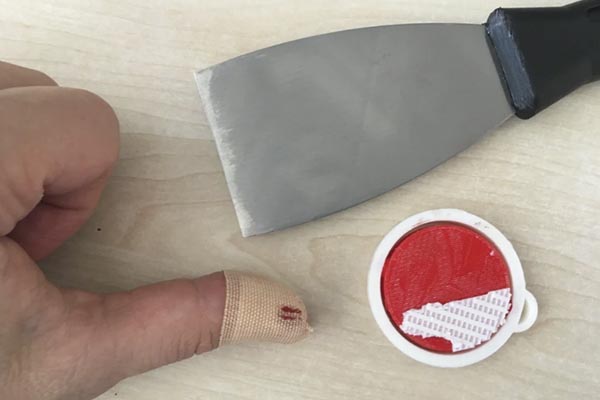
Coin holder
Layer 0.2

Vase (fish)
Layer 0.2.

Autodesk Test

The quality of this print was average. The Original Prusa i3 MK3 did better than the Raise3D Pro 2.
Benchy

We loved the quality of the Benchy.

However, for the dual material Benchy, there was some stringing, some color dropshot and a little too pixelated around the surfaces.
Eiffel Tower
We also printed this Eiffel Tower model without support structures. It turned out nice apart from the railing

From the results of the several models we printed, it’s clear that adhesion of the BuildTak coated aluminum print bed was excellent. Perhaps it was even too strong for some delicate parts.
Therefore, when printing with the Raise3D Pro 2 Plus 3D printer, you will need a razor-sharp spatula. After removing the print, snap the magnetic plate back into place, and the printer will be ready for the next job.
What We Like
- Strong, magnetic, heatbed
- HEPA filter
- 01 layer resolution
- Can print third party materials
- Great integrated software control thanks to Ideamaker software
- Fully enclosed for proper heat management
- Professional workflows
- Consistent and excellent print quality
- Great build quality
What You Should Know
- There is no notification once a print job is completed
- Calibrating the printer can be tricky
- Medium-size build volume compared to some large-format consumer printers
Raise3D Pro2 Plus Review: Verdict
The Raise3D Pro2 Plus simply delivers. Our test prints came from good to excellent most of the time. However, comparing the quality of prints to other 3D printers that cost about half of its $6000 price tag, we can’t say there is a huge difference.
The higher price tag is, however, justified if you do not like tinkering with the printer settings.
The Raise3D build quality is unmatched and the Ideamaker allows you to control the machine better than you would with a simple slicer. Thanks to Ideamaker, you can handle every aspect of the print from your PC or Mac, set up and queue print jobs, and change print settings instantly.
However, you cannot use big spools with the printer’s spool holders. If you have a print that require more than the typical 1kg spool, there are two holes on the sides of the cabinet that you can use to feed the larger filament. However, the filaments are likely to be stressed when fed at an angle. Still, this is a workaround that would be sufficient when you need to print large models.
Overall, the negatives of the Raise3D Pro 2 Plus are very small. In fact, there are only three
- No notification when a print job is completed
- The print quality is great but may sometimes dip
- It’s complicated to use 5 kg spools
To get the best print results from the Raise3D Pro 2 Plus, you will have to experiment with a few settings here and there.
Working with the Pro2 printer really feels good. The printer has been many useful features that increase the efficiency of the printing process and make it easier and more convenient to work with.
One of the most interesting features is the remote control of the printer and the ability to combine multiple printers into a print farm.
The Raise3D Pro2 Plus is suitable for any production, for creating prototypes, model models or ready-to-sell products. Its price is acceptable for a professional printer and even very small companies can afford it.
