
In 2011, the development of the M200 3D printer started, and in 2013 the Polish company Zortrax became known throughout the 3D world thanks to its Kickstarter campaign. The campaign was aimed at launching the M200, which promised ease of use and professional quality. The campaign raised $ 180,000. In 2014, the first Zortrax store was opened, and at the moment the brand is already represented in 50 countries of the world with 160 partners.
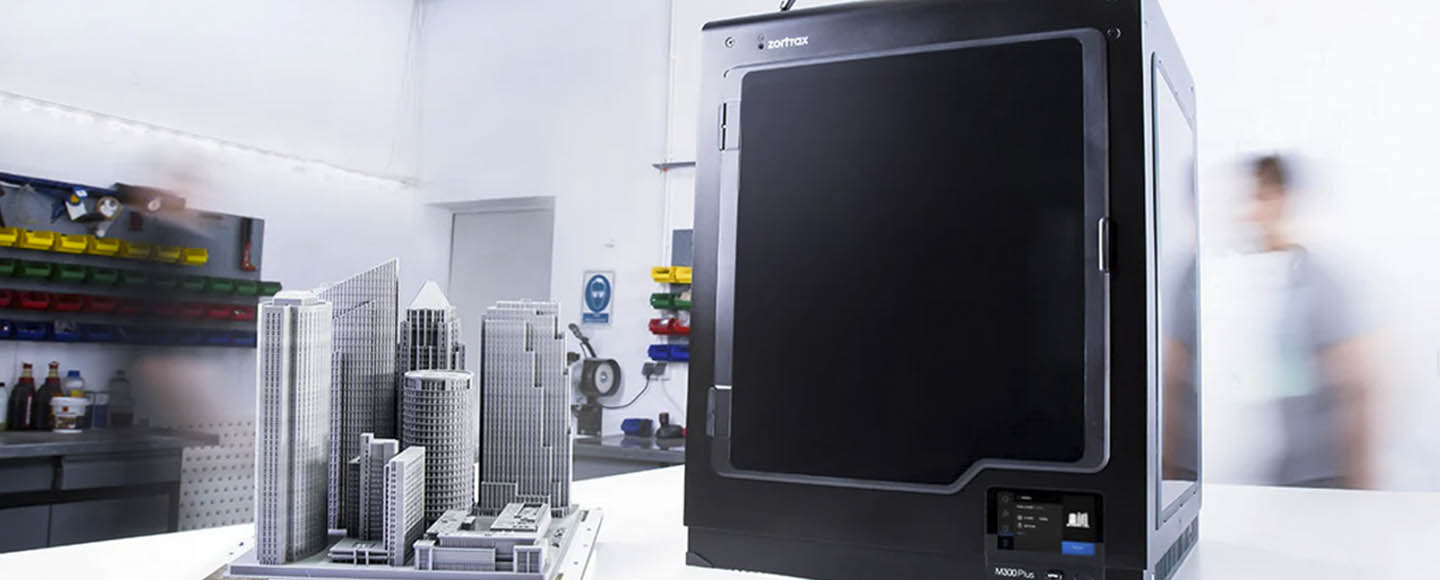
The Zortrax M300 is the big brother of the M200 . In M300, the printing area has become much larger (300x300x300 mm). The Zortrax M300 is a really big printer for printing large items =)
Initially, Zortrax was optimized to print only with in-house plastics. Despite a fairly large assortment (at the moment, Zortrax has about 9 types of plastic), many were repelled by the impossibility of printing with third-party plastics. In the new versions of the proprietary software Z-Suite, the developers have solved this problem – the ability to print with materials from other manufacturers has been added.
Appearance
The printer is made of durable aluminum and looks very solid and reliable. Despite the impressive size, no distortions, gaps or backlash were noticed anywhere. The build quality is excellent.


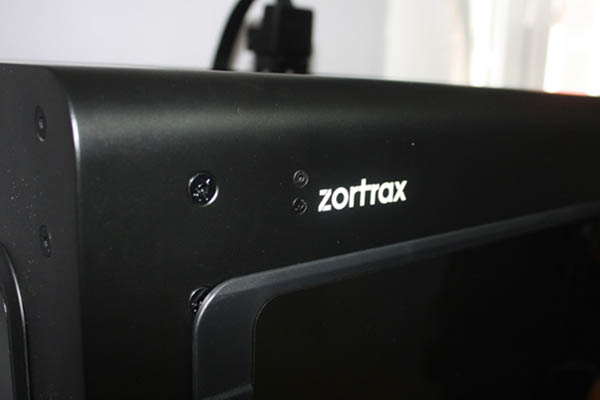
Zortrax M300 looks exactly the same as M200, it differs only in size) The same strict black color, smoothed corners. The design of the printer can be called minimalistic and concise.
The printer is controlled through a small display with the already familiar joystick – a twist)

Equipment
The package bundle is excellent:
- Spool holder.
- Guide tube for material and fasteners.
- 2 spools of 2kg of Zortax branded material.
- Power cable.
- SD card and card reader.
- Protective gloves.
- Knife.
- Scalpel.
- Hexagon set.
- Key to unscrew the nozzle.
- Strings for cleaning the nozzle 0.4 and 0.35.
- Nippers.
- 2 spatulas – large and small.
- Tweezers.
- Lubricant for moving parts of the printer.
- Protective glasses.
- Side panels and door.
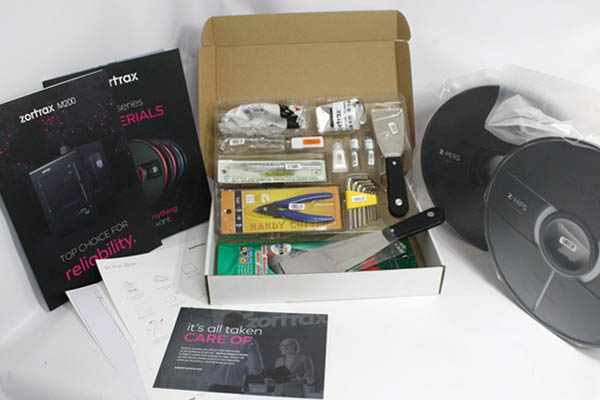
A very decent kit. Zortrax made sure that the user has everything they need at hand and does not have to buy something extra. There are as many as two spools of plastic, we had HIPS and PETG in the box. Most likely, the types of plastic for printers are chosen at random. Even the nozzle cleaning needle is available in 2 versions – for a nozzle with a diameter of 0.4 and 0.35 (the printer has a 0.4 mm nozzle by default).
Another important difference from the M200 – the M300 comes with plastic side and front panels.
Kinematics
The printer kinematics is an enlarged copy of the famous Ultimaker. It turned out to be a win-win solution.

On the Z axis, instead of the already familiar trapezoidal screw, a powerful ball screw and guide shafts are installed. I was very impressed with the thickness of the shafts – almost the size of the index finger.

The extruder is exactly the same as on the younger brother of the Zortax M200. All-metal with a maximum heating temperature of 280 degrees. The “cube” of the heater into which the nozzle is screwed is fixed. A trifle, but, thanks to this, the nozzle is very easily unscrewed, and you do not have to look for ways to fix the heater.

The feed motor is located on the print head. That is, a direct plastic feed mechanism is installed in the printer. Of course, this makes the printhead heavier, but it allows you to print with all types of plastics, including soft flex and rubber.

The print bed is a bit unusual – perforated like on UP printers.

The advantage of this solution is very good adhesion. There is no need to use glue or stickers to keep the models from peeling off during printing.
The only inconvenience is that you always have to print on a substrate (raft).
The board is made and designed specifically for the printer. All wires are shielded.

Preparation for work
After unpacking the printer, the first step is to prepare it for printing:
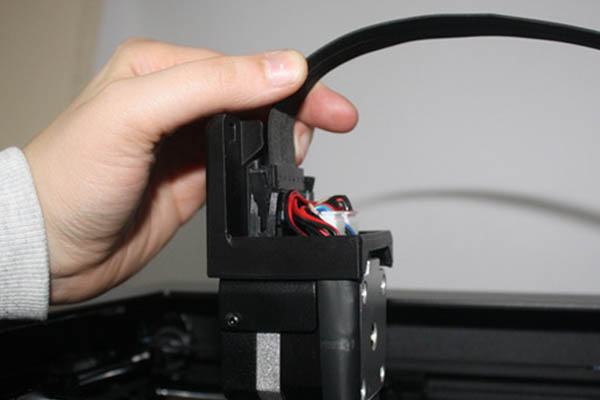
- connect the extruder loop;
- install and connect the printing platform;
- calibrate the printer.
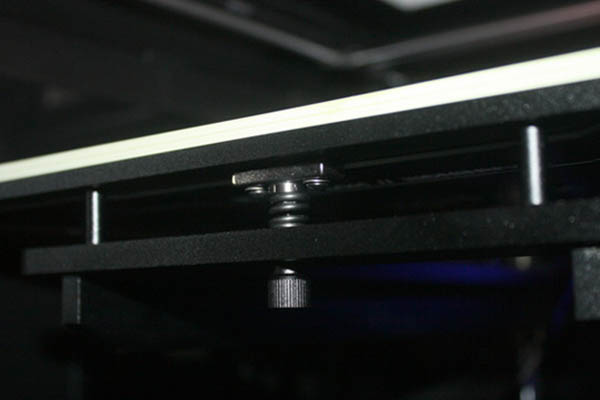
It will not be difficult to connect the ribbon cable – you need to open the top of the extruder and plug the ribbon cable into the connector. It’s nice that the cable is additionally securely fixed with latches.
We connect the connectors on the platform and install it on the magnetic fasteners.
When turned on, the printer asks to download a file from the manufacturer’s website and save it to a USB flash drive. Without this, the printer will not start. The M300 does not support Wi-Fi connection, files can only be transferred via a USB flash drive.

After downloading, restart the printer. Everything is working)
The printer menu is austere, but very convenient. There are points for loading, unloading plastic and calibration.
Then we carry out the calibration.
The printer is “hot” calibrated. We are waiting for the printer to heat up the nozzle and the table. After that, following the instructions on the screen, we calibrate. The printer will alternately poke a nozzle into the metal squares on the platform and ask you to unscrew or tighten a certain screw at the bottom of the platform.

Calibration finished, you can start printing =)
BY
The proprietary slicer Zortrax Z-Suite is used as software for the printer. The printer will not work with other slicers.
To download and run the program, you will have to enter the serial number of the printer.
Z-Suite has a very nice and intuitive interface. We launch the program and select our Zortrax model.

Load the model and place it on the table.
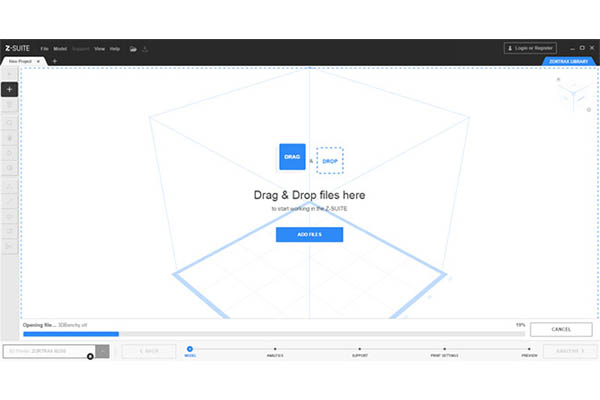
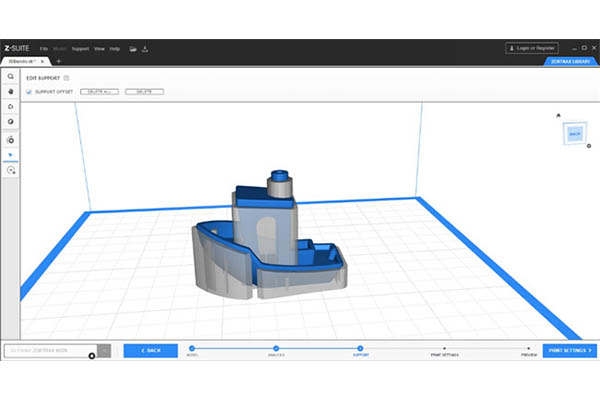
Preparation for printing takes place in several stages:
-
- Analysis of the model. The slicer will show the weaknesses and problem areas of the model.

- Posting support. Here you can select the angle of overhang of the model at which the support will be set, and slightly edit the support. Support is edited by “blocks”. You cannot add or remove support pointwise.
- Print settings. Here you can choose either a ready-made profile for the native Zortrax plastic or set your own settings for any material. The setting range is very decent.

- Preview. In the preview mode, you can add pauses at different heights. This is useful if you want to print a multi-colored model.

- Analysis of the model. The slicer will show the weaknesses and problem areas of the model.
The file is saved not in the usual GCode format, but in its own ZCode format.
Outcome
We did not have time to carry out printed tests yet, but now the Zortrax M300 pleases with its thoughtfulness. The M300 conquers with its reliability and competent design, and, of course, a really large working area – 300x300x300. The Z-Suite software is also pleased with the friendly interface and the presence of all the necessary functions. Unfortunately, the printer does not have a Wi-Fi connection and files will have to be transferred via a USB flash drive. The M300 package includes everything you need for comfortable work, including material for initial work. The M300 is almost omnivorous, making it a good companion in both large and small production.
