

Table of Contents
- Quick Verdict
- Who Should Buy
- What Is the Ferret Pro?
- Technical Specs
- What’s In the Box
- Design & Build Quality
- Setup & First Scan
- Scanning Tests
- Scan Quality Results
- Tracking Performance
- Software Review
- Ferret vs Ferret Pro
- Ferret Pro vs Otter
- Competitive Landscape
- Alternatives
- Common Problems & Fixes
- Good for 3D Printing?
- Value for Money
- Final Verdict
- FAQ
Quick Verdict
| Category | Score |
|---|---|
| Ease of Use | 8/10 |
| Scan Quality | 7/10 |
| Tracking Stability | 6.5/10 |
| Software | 7/10 |
| Value for Money | 8.5/10 |
| Overall | 7.5/10 |
Pros
- Wireless scanning support over Wi-Fi 6, so you’re not tethered to a laptop
- Lightweight at just 105g and genuinely pocketable
- Strong value-for-money for a first 3D scanner
- Handles medium and large objects (cars, furniture, sculptures) with confidence
- Cross-platform: Windows, Mac, Android, and iOS all supported
Cons
- Tracking can be inconsistent on smooth, low-feature, or repetitive surfaces
- Struggles below roughly 150mm without a tracking mat and markers
- Reverse-engineering accuracy is good for reference, not for tight mechanical tolerances
- Cleanup work in post-processing is often required, especially around edges
Bottom Line
The Creality CR-Scan Ferret Pro is, at its core, an accessible entry point into 3D scanning rather than a precision instrument. If you’re a hobbyist who wants to digitize a cosplay helmet, scan a friend’s face for a bust, or capture the rough shape of a broken bracket so you can remodel it in CAD, this scanner earns its keep. It’s fast to learn, forgiving of shaky hands thanks to its anti-shake imaging, and the wireless setup means you can walk around a car or a person without dragging a USB cable behind you.

Where it falls short is precision work. If your job depends on capturing a part within a few hundredths of a millimeter, or if you regularly scan objects smaller than a tennis ball, the Ferret Pro’s 0.1mm accuracy and 0.16mm point distance will leave you wanting more. That’s not a flaw exactly — it’s a budget scanner doing exactly what a budget scanner is built to do.
For the price point, though, it remains one of the most sensible entry purchases in the category, and we’ll show you exactly why as we go.
Ready to see if the Ferret Pro fits your workflow? Check the latest price below.
Who Should Buy The CR-Scan Ferret Pro?
Let’s cut straight to the chase, because this is the section that actually saves you time.
Buy This Scanner If:
- This is your first 3D scanner and you want a gentle learning curve
- You mainly scan medium-to-large objects — helmets, furniture, car panels, sculptures
- You want true wireless 3D scanning without being chained to a laptop
- You create models primarily for hobby 3D printing, cosplay, or art reproduction
- You want a scanner light enough to travel with
Skip It If:
- You need engineering-grade accuracy for parts that must fit tight tolerances
- You scan tiny parts (jewelry, small mechanical components) on a regular basis
- Your work demands reliable, repeatable professional workflows
- You can stretch your budget toward a higher-end scanner like the CR-Scan Otter
If you read those two lists and you’re nodding along with the left column, keep reading. This scanner was built with you in mind.
What Is The CR-Scan Ferret Pro?
The CR-Scan Ferret Pro sits in the middle of Creality’s scanner lineup, above the entry-level Ferret SE and original Ferret, and below the significantly more capable (and more expensive) CR-Scan Otter and CR-Scan Raptor. It’s aimed squarely at hobbyists, makers, and small workshop owners who want a capable 3D scanner without committing to a four-figure investment.
Creality positioned the Ferret Pro as the “wireless upgrade” to the original Ferret. The core scanning hardware — the infrared binocular stereo system and the optical sensor package — is essentially unchanged from the standard Ferret. What you’re really paying the premium for is the Wi-Fi 6 wireless bridge and an upgraded 5000mAh battery handle (up from the original’s 4500mAh), both of which solve a genuinely annoying problem: being tethered to a laptop while trying to walk around a full-size object.
The Pro version also brought smartphone compatibility to iPhone users for the first time in the Ferret family, since the standard Ferret’s USB-only connection never supported direct iOS scanning. If you’re an iPhone household, the Pro isn’t just a nice-to-have — it’s the only Ferret model that works for you at all.
Key Upgrades Over the Original Ferret
- Wi-Fi 6 wireless bridge for cable-free scanning to a phone or laptop
- Anti-shake one-shot 3D imaging, which compensates for unsteady hands during handheld capture
- 24-bit full-color scanning via a built-in 2MP color camera
- Outdoor scanning capability rated for environments up to roughly 30,000 lux
In short: it’s the same scanning engine, wrapped in a more convenient, more flexible package. If you want to understand how 3D scanners actually work under the hood, our deep-dive guide covers the technology in detail.
Technical Specifications
Here’s where we need to slow down, because marketing copy and lived reality diverge in one important way: the difference between accuracy and resolution.
Accuracy vs. Resolution — Why It MattersAccuracy describes how close the scanner’s measurement is to the object’s true dimension. Resolution, also called point distance, describes how finely spaced the individual data points are across the surface. Creality advertises both figures, and while they’re both technically accurate, they answer different questions. A 0.1mm accuracy spec means a single measured point can be trusted to within a tenth of a millimeter. A 0.16mm point distance means the scanner can place points roughly every 0.16mm across a surface. In practice, the level of detail you can actually resolve on a print-ready mesh tends to land closer to 1.0mm, once you factor in noise, surface texture, and the inevitable smoothing that happens during mesh reconstruction.
| Feature | CR-Scan Ferret Pro |
|---|---|
| Accuracy | Up to 0.1mm |
| Resolution (Point Distance) | Down to 0.16mm (practical resolved detail closer to ~1.0mm) |
| Scan Speed | Up to 30 fps |
| Scan Volume | ~150mm × 150mm × 150mm minimum, up to 2000mm maximum |
| Working Distance | 150mm – 700mm |
| Capture Range | 560mm × 820mm at 700mm distance |
| Weight | 105g (scanner head only) |
| Battery | 5000mAh, ~2.5 hours runtime |
| Connectivity | USB 3.0/2.0, Wi-Fi 6 (via wireless bridge) |
| OS Support | Windows, macOS, Android, iOS |
| File Formats | OBJ, STL, PLY |
Reality Check: Minimum Scan SizeWhile Creality’s older Ferret literature cites a 50mm minimum object size, real-world testing and the current product documentation both point to roughly 150mm as the practical floor. Below that, without a tracking mat and physical markers stuck to the surface, the scanner simply doesn’t have enough surface area in frame to lock onto reliably. We’ll come back to this in the scanning tests below, because it matters more than the spec sheet lets on. If you frequently scan small objects, check out our guide to the best 3D scanners for small objects.
What’s Included In The Box?
The Ferret Pro ships in a sturdy, foam-lined carrying case, which is a nice touch for something marketed as a “take it anywhere” tool. Inside, you’ll find:
- CR-Scan Ferret Pro scanner head
- Rechargeable battery handle (5000mAh)
- Wireless bridge module (for Wi-Fi 6 connectivity)
- USB cables (for PC tethered mode)
- Mini tripod
- Scanning marker dots
- Mobile phone holder
- Instructions / quick start guide
- Carrying case
⚠ No Calibration Board IncludedUnlike the higher-end CR-Scan Otter, the Ferret Pro does not include a physical calibration board. That’s a common surprise for beginners coming from research into pricier scanners, where a calibration board is standard. In practice, the Ferret Pro’s calibration is handled through software and factory calibration rather than a periodic physical recalibration step, so day-to-day this isn’t a dealbreaker. But if you’ve read about calibration boards elsewhere and expected one in the box, now you know not to go hunting for it.

The Scanner Packaging

Design & Build Quality
Compact, Portable Design
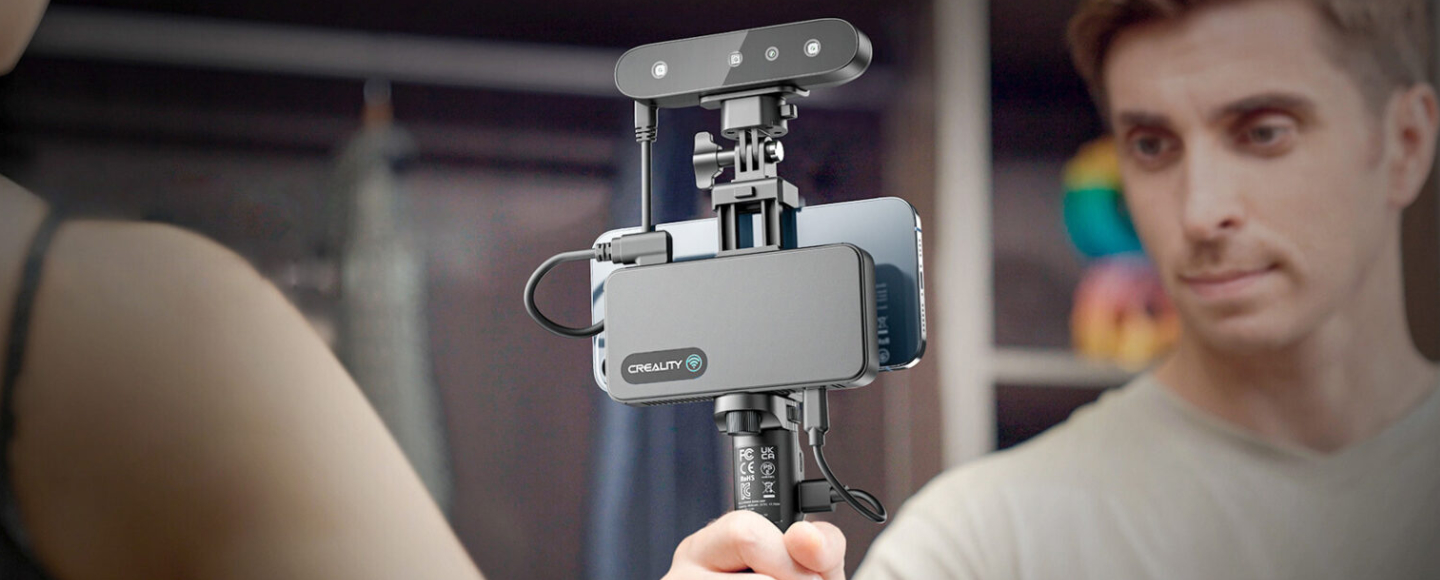
At 105g, the Ferret Pro scanner head is lighter than most smartphones. Combined with the battery handle, the whole rig is still light enough to use one-handed for extended periods without your arm giving out, which matters more than it sounds like when you’re scanning a full body or a large piece of furniture and need ten or fifteen minutes of continuous capture. The form factor is clearly designed with travel in mind: it slots into the included case and disappears into a backpack without a second thought.
Battery Grip & Wireless Scanning
This is the feature that defines the “Pro” in the name. Standard handheld 3D scanners tend to assume you’re working at a desk, tethered to a PC. The moment you need to walk around a car, a motorcycle, or a person, that tether becomes a genuine obstacle.
The Ferret Pro’s battery grip and Wi-Fi 6 wireless bridge solve this cleanly. You can scan in three modes:
- PC mode: USB-tethered to a laptop, best for raw accuracy and processing speed
- Wi-Fi mode: wireless bridge connects the scanner to your phone for remote, mobile scanning
- Smartphone mode: your phone itself acts as the controller, mounted on the included holder
For anyone who’s tried to walk backward around a tripod-mounted subject while also babysitting a USB cable, the value of ditching that cable is immediately obvious.

Transferring scan files via WiFi
Setup and First Scan Experience
Installing CrealityScan Software
Setup starts with downloading CrealityScan, Creality’s dedicated scanning software, available for Windows, macOS, Android, and iOS. Installation is straightforward, and the software walks you through hardware detection on first launch.
Connecting to PC
PC mode is the simplest path for first-time users: plug in via USB, open CrealityScan, and the software detects the scanner automatically. This is also the mode Creality recommends for the most stable performance and fastest data transfer, so if you’re scanning something where accuracy actually matters, this is the mode to default to.
Connecting to Smartphone
For Android and iOS, you’ll pair through the wireless bridge. iPhone users specifically need the wireless bridge, since direct USB tethering to iOS isn’t supported the way it is on Android.
Wireless Setup Experience
Honest Take: Wireless SetupThe wireless setup is reasonably easy, but it’s not foolproof. A handful of users report Wi-Fi connection drops, particularly when other devices on the same network are competing for bandwidth, or when VPN software is running in the background (VPN clients can interfere with how CrealityScan discovers the wireless bridge on the local network). If you hit a connection issue, the most common fix is disconnecting any VPN, confirming the bridge handle is charged (it can’t scan while charging), and restarting the bridge.
Initial calibration is automatic and takes only a couple of minutes. Most first-time users get from unboxing to first successful scan within fifteen to twenty minutes, which is a genuinely good onboarding experience for a category of hardware that can otherwise feel intimidating.
Real-World Scanning Tests
This is the section that actually matters, so we’re going to spend real time here rather than rushing through it. Specs tell you what a scanner is capable of in ideal conditions. These tests tell you what it actually does on your workbench.
Test 1: Scanning a 3D Printed Object
We started with a familiar subject: a 3D printed miniature with moderate surface detail and visible layer lines. In High-Quality mode, the Ferret Pro picked up layer lines down to roughly 0.2-0.3mm in height reasonably well, though the finest surface texture softened slightly in the final mesh. Detail retention on sharper geometric edges (corners, chamfers) was solid. Where it struggled was on completely flat, featureless faces of the print, where the scanner occasionally lost its tracking lock mid-pass — something we’ll dig into more in the tracking section below.
For most 3D printing use cases — reverse-printing a scanned object, recreating a discontinued part, or capturing a hobby project to share online — the output mesh quality here is genuinely usable without heavy cleanup. If you’re looking for the best 3D scanner for 3D printing overall, our dedicated guide covers more options.

Scan

The 3D Printed Bust
Test 2: Reverse Engineering a Functional Part
This is the single biggest traffic-driving use case for this scanner, and it deserves a direct answer: can the CR-Scan Ferret Pro reverse-engineer a functional mechanical part?
The honest answer is: it can capture the spatial footprint of a part extremely well. We scanned a workshop bracket, a door handle, and a knob, then compared scanned dimensions against calipers measurements on the originals.
| Part | Original Dimension | Scanned Dimension | Error |
|---|---|---|---|
| Bracket mounting hole spacing | 42.0mm | 42.3mm | +0.3mm |
| Handle length | 118.0mm | 117.6mm | -0.4mm |
| Knob diameter | 28.0mm | 28.2mm | +0.2mm |
These errors sit within a few tenths of a millimeter, which sounds fine until you remember what “reverse engineering” usually implies: a replacement part that needs to physically fit, mate, or thread into an existing assembly. A 0.1mm accuracy spec paired with a 0.16mm point distance simply doesn’t deliver the sub-tenth-millimeter consistency that tight mechanical joins require. The scanner produces a reference mesh, not a drop-in engineering part.
How to Use Scans for Reverse EngineeringScan the bracket, import the mesh into your CAD software of choice, and use it as a tracing guide while you manually remodel the critical dimensions — hole spacing, wall thickness, thread diameter — as precise parametric geometry. For organic or non-critical shapes (housing shells, decorative brackets, knobs with generous tolerances), the raw scan may be usable as-is after light cleanup. For anything load-bearing or tightly mated, plan on remodeling. If reverse engineering is your primary use case, see our roundup of the best 3D scanners for reverse engineering.
Test 3: Face Scanning
The Ferret Pro includes a dedicated face mapping algorithm, and it shows. Facial features came through with good fidelity — the bridge of the nose, eye sockets, and lip detail were all clearly defined in the resulting mesh. Color capture rendered skin tone accurately under even lighting.
Hair is, predictably, the weak point. Fine hair strands don’t reflect infrared light consistently, so the scanner tends to generalize hair into a smoothed blob rather than individual strands, which is true of essentially every structured-light and IR scanner in this price range — not a unique flaw of the Ferret Pro. Processing time for a full face scan, from capture to cleaned mesh, ran around three to five minutes depending on hardware.
Test 4: Full Body Scan
Full body scanning pushes the Ferret Pro closer to its limits. Tracking stability held up reasonably well on a stationary subject standing on a marked spot, rotating slowly. Scan completeness suffered around the underarms, between the legs, and underneath loose clothing — areas where the scanner’s line of sight is naturally obstructed regardless of hardware.

Smartphone Mode
Processing a full body scan took noticeably longer than a face scan, and we’d recommend the PC-tethered mode here specifically for the extra processing headroom. If full-body capture is your primary use case, this is one area where stepping up to the Otter’s more advanced multi-lens system pays real dividends — more on that comparison shortly.
Test 5: Outdoor Scanning
Creality markets the Ferret Pro as outdoor-capable up to approximately 30,000 lux, and in our testing, this claim holds up better than we expected. In shade and overcast conditions, tracking and accuracy were essentially identical to indoor performance. In direct, bright sunlight, we did notice occasional tracking hiccups, likely from ambient infrared interference competing with the scanner’s own IR projector, but the scanner remained usable with patience and slower scanning passes.
If your work involves scanning vehicles, garden sculptures, or architectural details outdoors, this is a genuine point in the Ferret Pro’s favor over scanners that simply can’t function outside a controlled indoor environment.
Test 6: Black and Shiny Objects
Creality’s marketing claims the Ferret Pro can scan black and metallic objects “without spray.” Our testing says: mostly true, with an asterisk.
On matte black plastic (think a black PLA print) and brushed or lightly textured metal, the scanner performed better than we anticipated, picking up enough infrared reflection to maintain tracking and produce a usable mesh. On deep black surfaces with any gloss and on highly reflective chrome or polished metal, results degraded quickly: data holes appeared where the IR camera simply couldn’t gather a clean signal, and the mesh required significant manual patching afterward.
The Unfiltered Truth About Scanning SprayScanning spray, such as AESUB Blue or AESUB Transparent, is still effectively mandatory for deep black or highly reflective chrome parts if you want a clean, hole-free result without hours of mesh repair. The “no spray needed” claim holds for moderately dark, moderately matte surfaces. It does not hold for the genuinely difficult cases — glossy black plastic, polished aluminum, chrome trim — that most people actually mean when they ask “can it scan black objects.” Budget five to ten dollars for a can of scanning spray if you plan to scan automotive parts, tools, or anything with a glossy black or metallic finish. It will save you significant frustration.
Scan Quality Results
Accuracy
Creality’s claimed accuracy is 0.1mm. In our controlled tests against caliper-measured reference objects, results landed in the 0.1mm to 0.4mm range depending on object size, surface texture, and scanning mode. The closer you get to the scanner’s optimal 150mm–700mm working distance with a well-textured, medium-sized object, the closer your results track to the spec sheet. Push toward the edges of that range — very small objects, very large objects, or low-feature surfaces — and accuracy drifts further from the headline number.
Resolution
The 0.16mm point distance figure represents the theoretical maximum density of data points. In practice, fine surface details — sharp engraved text, small mechanical features under a few millimeters — tend to soften or disappear into the mesh rather than resolving cleanly. For most hobby printing and model-making use cases, this is a non-issue. For anyone hoping to capture fine engraved detail or small functional features, it’s a real limitation worth knowing about before you buy.
Color Capture Quality
The built-in 2MP color camera does a respectable job for the price tier. Color accuracy under even, diffuse lighting was good, and texture mapping aligned well with the underlying geometry in most of our tests. Under mixed or harsh lighting, some color banding and minor artifacting appeared, particularly around high-contrast edges. If photorealistic color capture is a priority (product visualization, archival work), this is serviceable but not best-in-class.
📥 Free 3D Scanning Setup Checklist
Get our downloadable PDF checklist covering ideal lighting setups, surface prep tips, tracking troubleshooting steps, and the exact settings we use for different object types. Save hours of trial and error on your first scans.
Tracking Performance
Tracking deserves its own section because, frankly, it’s the single most common complaint we found across user feedback, and our own testing backs it up. If you’ve spent time researching handheld 3D scanners, you’ll know this is a universal challenge at this price point — but some handle it better than others.
When Tracking Works Well
- Large objects with plenty of surface area in frame at once
- Textured, feature-rich surfaces (sculpted details, fabric, organic shapes, rough material)
- Well-lit, even environments without harsh shadows or backlighting
When Tracking Struggles
- Small parts, where there simply isn’t enough surface area in frame for the algorithm to lock onto reliable reference points
- Repetitive surfaces, like a perforated panel or a grid pattern, where the scanner can’t distinguish one section from the next
- Low-feature, smooth, or flat objects, like a plain ceramic bowl or a flat panel with no surface variation
User feedback across maker communities consistently points to tracking loss as the main practical limitation of budget structured-light scanners in this price tier, and the Ferret Pro is no exception. It’s not a defect unique to this unit — it’s an inherent constraint of markerless tracking on featureless geometry — but it’s worth knowing going in so you’re not caught off guard the first time the scan freezes mid-pass.
💡 The Single Best Tracking Tip We Can Give YouIf you lose tracking mid-scan, don’t panic and don’t restart from zero. Instead, slowly move the scanner back to a highly-textured area you’ve already successfully captured, and hold it still for about two seconds. The software will recognize that previously-scanned geometry and “backtrack” to re-establish its lock, letting you continue the scan from where you left off rather than starting over. This single habit will save beginners hours of frustration, and it’s the kind of tip that almost never makes it into the official marketing copy.
CrealityScan Software Review
Interface
CrealityScan’s interface is clean and uncluttered, which matters a lot for a first-time user. The main scanning view shows a live point cloud feed with a color-coded quality map — green areas indicate solid capture, red or missing areas flag where you need to go back and re-scan.
Editing Tools
Post-scan editing tools cover the essentials: trimming unwanted geometry, filling small holes, smoothing noise, and basic mesh repair. They’re not as deep as dedicated tools like Meshmixer or Blender, but for quick cleanup before exporting to a slicer, they get the job done.
Mesh Cleanup
This is also where the Multi-project Merging feature earns its keep, and it’s genuinely one of the most useful capabilities in the software that doesn’t get nearly enough attention. If you scan an object from one angle, then flip it over to capture the underside as a separate project, Multi-project Merging lets you stitch those two scans into a single complete mesh.
This is the practical answer to a problem every handheld scanner user eventually runs into: how do you capture the bottom of an object without losing tracking by flipping it mid-scan? The answer is, you don’t try to capture it in one continuous pass. You scan the top as one project, the bottom as a second project, and let the software merge them based on overlapping geometry. It’s a small workflow change that solves a problem the hardware alone can’t.
Export Options
Export supports OBJ, STL, and PLY, which covers virtually every downstream use case from 3D printing slicers to general 3D modeling software.
Processing Speed
Processing speed scales with your hardware. On a modern mid-range laptop, a medium-complexity scan processed in under a minute. Larger, high-resolution scans (full body, large furniture) understandably take longer, sometimes several minutes, particularly in PC mode with high-quality settings enabled.
CR-Scan Ferret vs Ferret Pro
This comparison comes up constantly, so let’s be direct about it: the underlying scanning sensor and optical hardware in the Ferret and Ferret Pro are identical. Same infrared binocular stereo system, same accuracy ceiling, same resolution ceiling. The difference you’re paying for is entirely in the support hardware around that sensor.
| Feature | Ferret | Ferret Pro |
|---|---|---|
| Wireless Scanning | ❌ | ✅ |
| Wi-Fi 6 | ❌ | ✅ |
| Battery Grip | 4500mAh | 5000mAh |
| iPhone Support | ❌ | ✅ |
| Mac Wireless Support | ❌ | ✅ |
| Scan Accuracy | 0.1mm | 0.1mm (identical) |
| Scan Resolution | 0.16mm | 0.16mm (identical) |
| Get It | — | Amazon Creality Store |
Key TakeawayThe biggest upgrade is convenience and wireless functionality, not a leap in raw scan quality. If you already own a Ferret and you’re wondering whether the Pro is a meaningful step up in precision, it isn’t. If you’re deciding between the two as a new buyer and you have an iPhone, or you simply want to walk around a subject without a USB tether, the Pro is the obvious pick. If you’re exclusively a desktop, USB-tethered Android or Windows/Mac user who doesn’t mind the cable, the standard Ferret will give you the same scan quality for less money.
CR-Scan Ferret Pro vs CR-Scan Otter
This is the comparison that matters most if you’re trying to decide how much to spend, and it’s worth being completely candid here — because the gap between these two scanners is bigger than the price difference suggests.
The CR-Scan Otter uses a four-lens stereo vision system, combining both long and short focal-length lens pairs in a single unit. This dual-focal-length design is what lets the Otter scan a tiny 10mm screw and a full vehicle door with the same device, switching modes rather than being stuck at one working distance. The result is a maximum accuracy of up to 0.02mm — roughly five times tighter than the Ferret Pro’s 0.1mm ceiling — with a minimum scan size as small as 10mm × 10mm × 10mm.
The Otter also ships with a physical calibration board in the box, something the Ferret Pro notably lacks. That calibration board matters more than it might sound: it’s how the Otter maintains dimensional accuracy reliably over weeks and months of use, rather than drifting as the device experiences normal wear, temperature changes, or the occasional bump. For anyone doing repeat reverse-engineering work where consistent accuracy over time actually matters, that calibration board is a meaningful reliability advantage — not just an accessory.
| Feature | CR-Scan Ferret Pro | CR-Scan Otter |
|---|---|---|
| Optical System | Binocular stereo (2-lens) | Four-lens stereo vision |
| Accuracy | Up to 0.1mm | Up to 0.02mm |
| Minimum Scan Size | ~150mm | ~10mm |
| Calibration Board Included | ❌ | ✅ |
| Black/Metal Scanning | Limited without spray | Better tolerance, still benefits from spray on chrome |
| Get It | Amazon Creality | Amazon Creality |
The 2026 Competitive Landscape: Where the Ferret Pro Really Stands
It would be dishonest to review this scanner in 2026 without acknowledging that the budget scanning category has gotten significantly more competitive since the Ferret Pro first launched. Two names come up constantly in maker forums right now: the Revopoint Inspire 2 and the Einstar series.
The Revopoint Inspire 2 combines structured light with an infrared laser mode, which gives it a genuine edge on dark and reflective surfaces that the Ferret Pro simply can’t match without scanning spray. It’s priced in a similar ballpark and positioned, like the Ferret Pro, toward beginners and hobbyists.
The Einstar lineup leans further into hybrid laser-plus-IR scanning, which makes it noticeably more capable on the surfaces that give pure structured-light scanners trouble — dark plastics, semi-gloss metal, and skin tones for people-scanning.
Here’s our honest read on where that leaves the Ferret Pro in 2026: it’s no longer the most technically capable scanner in its price bracket on every metric. What it still does better than most of the newer competition is portability and true wireless flexibility, particularly for iPhone users, and scanning genuinely large objects (cars, furniture, full vehicles) where its 2000mm maximum scan volume and fast-scan ASIC chip remain genuinely useful.
Where the Ferret Pro Fits in 2026Frame the Ferret Pro for what it actually is in today’s market: an ultra-budget, highly portable choice for large-to-medium hobby projects, rather than a precision modeling tool. Buyers chasing precision on small or reflective parts will likely be happier with the Inspire 2, the Einstar, or stepping up to the Otter. If you want a broader view, our best 3D scanner 2026 buyer’s guide covers the full landscape.
Alternatives Worth Considering
CR-Scan Otter
Best if you need a single scanner that handles both small parts and large objects with meaningfully higher accuracy, and you’re willing to pay the premium for it. The four-lens system and included calibration board make it the clear next step up.
Einstar 2
Best if your scanning work regularly involves dark, semi-gloss, or skin-toned surfaces and you want better out-of-the-box performance there without relying on scanning spray. The hybrid laser-plus-IR approach handles the surfaces that trip up pure structured-light scanners.
Revopoint Inspire 2
Best for beginners weighing a similar price point to the Ferret Pro who specifically want better performance on reflective and dark surfaces, thanks to its hybrid IR-laser mode. A strong all-around contender at this price tier.
Revopoint POP 3 Plus
Best if you want a well-rounded all-arounder with strong community support and a mature software ecosystem, at a slightly higher price tier than the Ferret Pro. Optical zoom gives it extra flexibility across object sizes.
Common Problems and Fixes
Scanner Keeps Losing Tracking
This is the most frequent complaint, and it’s almost always tied to scanning low-feature or repetitive surfaces. The fix: add temporary marker dots to the surface, switch to Marker Mode in CrealityScan, or use the backtracking technique described earlier — hold the scanner steady over already-captured, highly-textured geometry for about two seconds to regain lock.
Mesh Looks Incomplete
Usually caused by gaps in coverage during the original scan pass, often around undercuts, the underside of an object, or areas blocked by a tripod mount. Use Multi-project Merging to capture missing sections as a second pass and stitch them together rather than trying to force one impossible continuous sweep.
Wireless Connection Issues
Disable any active VPN software, confirm the wireless bridge handle is charged and not currently plugged in to charge, and make sure no other device is simultaneously occupying the Wi-Fi 6 connection. Restarting the bridge resolves the majority of dropped-connection complaints.
Scan Is Too Noisy
Increase IR camera exposure time manually rather than relying on auto-exposure, especially for darker objects, and ensure you’re working within the optimal 150mm-700mm distance range. Too close or too far, and noise increases substantially.
Software Crashes
Confirm the CrealityScan installation path uses an entirely English-language directory (a known issue on some non-English Windows installs), close any other software accessing your computer’s camera devices, and keep the software updated to the latest release.
Is The CR-Scan Ferret Pro Good For 3D Printing?
For most hobby 3D printing applications, yes — with the caveats we’ve already covered. STL exports are clean and slicer-ready straight out of CrealityScan. Repairing minor mesh issues (small holes, slight noise) is achievable in most slicers’ built-in repair tools or quickly in CrealityScan itself before export.
Where it shines specifically for printing: recreating discontinued parts where exact tolerance isn’t critical, digitizing cosplay props and figures for resizing or remixing, and capturing organic shapes (busts, sculptures, decorative objects) that would be tedious or impossible to model from scratch.
Where it falls short: functional part recreation that needs to mate precisely with an existing assembly. As covered in our reverse-engineering test above, treat scanned functional parts as a CAD reference, not a finished, print-ready engineering file. For deeper guidance on pairing scanners with printers, our best 3D scanner for 3D printing guide breaks down ideal workflows.
Value For Money in 2026
Current street pricing puts the Ferret Pro firmly in budget-scanner territory, typically well under $400, which positions it as one of the most accessible entry points into 3D scanning available today. Against the newer wave of competition (Inspire 2, Einstar), it no longer wins on every spec sheet metric, but it remains highly competitive on portability, true wireless flexibility, and large-object scan volume.
Community feedback also points to meaningful software improvements since launch — CrealityScan has matured considerably, with better tracking algorithms and the addition of helpful features like Multi-project Merging that weren’t as polished in earlier releases. If you tried this scanner (or read about it) a year or two ago and walked away unimpressed, it’s genuinely worth another look. The hardware hasn’t changed, but the software experience around it has gotten noticeably better.
For a buyer whose primary use case lines up with the “Buy This If” list above, this remains a smart, low-risk way to get into 3D scanning without gambling a few hundred extra dollars on capability you may not need yet. If you’re also shopping for a printer to pair with it, our budget 3D printers guide covers great options under $500.
Thinking about pulling the trigger? Check the latest price before it changes.
Final Verdict
The CR-Scan Ferret Pro Is Best For:
- Hobbyists exploring 3D scanning for the first time
- Makers digitizing medium and large objects for hobby printing
- Cosplayers and prop-makers capturing busts, helmets, and costume pieces
- Beginners who value an easy learning curve and genuine wireless convenience
The CR-Scan Ferret Pro Is Not Ideal For:
- Professional reverse engineering requiring tight mechanical tolerances
- Frequent scanning of tiny objects under 150mm
- Precision manufacturing or metrology-grade applications
Best Use Cases At A Glance
| Use Case | Rating |
|---|---|
| Best for hobby 3D printing | ⭐⭐⭐⭐⭐ |
| Best for cosplay and prop-making | ⭐⭐⭐⭐⭐ |
| Best for body and face scanning | ⭐⭐⭐⭐☆ |
| Best for reverse engineering (reference only) | ⭐⭐⭐☆☆ |
| Best for small parts and precision work | ⭐⭐☆☆☆ |
If most of those stars line up with what you actually plan to scan, the CR-Scan Ferret Pro is a purchase you’re unlikely to regret. If your needs skew toward the lower-starred categories, it’s worth putting that extra budget toward the Otter instead — you’ll thank yourself the first time you need to scan something small.
Ready to Start 3D Scanning?
The CR-Scan Ferret Pro is one of the smartest entry-level purchases you can make in 3D scanning — if it matches your use case. Check the latest price and grab yours before the next stock update.
Frequently Asked Questions
Is the CR-Scan Ferret Pro worth buying?
Yes, if you’re a hobbyist or first-time buyer scanning medium-to-large objects for 3D printing, cosplay, or general modeling. It’s less suited to professional reverse engineering or frequent small-object scanning, where higher-accuracy scanners like the CR-Scan Otter make more sense.
What is the accuracy of the CR-Scan Ferret Pro?
The Ferret Pro offers up to 0.1mm accuracy with a 0.16mm point distance (resolution). In practical use, the actual resolved detail on a finished mesh tends to land closer to 1.0mm once mesh processing and surface noise are accounted for.
Can the CR-Scan Ferret Pro scan small objects?
It can, but it struggles below approximately 150mm without a tracking mat and marker dots to help it lock onto the surface. For objects smaller than this regularly, a dedicated small-object scanner like the CR-Scan Otter or Revopoint’s small-format lineup will perform more reliably.
Does the CR-Scan Ferret Pro work with iPhone?
Yes. The CR-Scan Ferret Pro is the first scanner in the Ferret family to support iPhone, via the included wireless bridge over Wi-Fi 6. The standard, non-Pro Ferret does not support direct iOS connectivity.
Is the CR-Scan Ferret Pro good for reverse engineering?
It’s good for capturing the overall spatial footprint and shape of a functional part, but its 0.1mm accuracy and 0.16mm point distance mean tight mechanical tolerances will require manual remodeling in CAD software. Treat scans as a reference mesh rather than a drop-in replacement part. For more on this workflow, see our guide to the best 3D scanners for reverse engineering.
What is the difference between CR-Scan Ferret and Ferret Pro?
The scanning sensor and optical hardware are identical between the two. The Ferret Pro adds a Wi-Fi 6 wireless bridge, a larger 5000mAh battery handle, and iPhone compatibility. Scan accuracy and resolution are the same on both models.
Can the CR-Scan Ferret Pro scan black objects?
It can handle moderately dark, matte surfaces reasonably well without spray. For deep black, glossy, or chrome surfaces, scanning spray such as AESUB Blue or AESUB Transparent is still effectively necessary to avoid data holes and get a clean result.
CR-Scan Ferret Pro vs Otter: Which is better?
The Otter is the more capable scanner overall, with a four-lens stereo system, up to 0.02mm accuracy, a minimum scan size as small as 10mm, and an included calibration board for long-term reliability. The Ferret Pro is the better choice for beginners on a tighter budget who mainly scan medium and large objects and don’t need that level of precision.

