After the successful release of the Sidewinder X1, the 3D printing community expected an upgrade based on user feedback. And now, the upgrade for budget-conscious 3D printing enthusiasts is here: the Sidewinder X2.
AVAILABLE ON ARTILLERY3D
The Sidewinder X2 is a new model that incorporates many of the beloved features from its predecessor. But it also comes with several exciting additions aimed at enhancing your 3D printing experience.
It’s time to put the Sidewinder X2 3D printer to the test and determine whether it deserves recognition as one of the best 3D printers available for under $400. Join us as we explore the features and advancements of the Sidewinder X2.
Artillery Sidewinder X2 Review
General Specifications
| Technology | Fused deposition modeling (FDM) |
| Year | 2021 |
| Assembly | Pre-assembled |
| Mechanical Arrangement | Cartesian-XY-Head |
| Manufacturer | Artillery |
3D Printing Specifications
| Build Volume | 300 x 300 x 400 mm |
| Feeder System | Direct drive |
| Print head | Single nozzle |
| Nozzle size | 0.4 mm |
| Max. hot end temperature | 240 °C |
| Max. heated bed temperature | 130 °C |
| Print bed material | Coated tempered glass |
| Frame | Aluminum |
| Bed leveling | Automatic |
| Connectivity | USB, microSD |
| Print recovery | Yes |
| Filament sensor | Yes |
| Camera | No |
Materials
| Filament diameter | 1.75 mm |
| Third-party filament | Yes |
| Filament materials | PLA, ABS, Flexible Materials, Wood, PVA, HIPS |
Software Requirements
| Recommended slicer | Cura, Simplify3D, Slic3r |
| Operating system | Windows, Mac OSX, Linux |
| File types | STL, OBJ, AMF |
Dimensions & Weight
| Frame dimensions | 550 x 405 x 640 mm |
| Weight | 12.9 kg |
Technology
The Artillery Sidewinder X2 is a remarkable large-format 3D printer with a generous print volume of 300 x 300 x 400 mm. This machine uses filament-based FDM (fused deposition modeling) technology. Therefore, it’s an ideal choice for anyone looking to create a wide variety of prints.
The Sidewinder X2 shines when it comes to producing sizable objects such as helmets, cosplay armor, or any other pieces that surpass the limitations of standard FDM printers. Generally, most budget FDM 3D printers have a build volume of around 220 x 220 x 250 mm. As a result, such machines cannot produce large-scale prints in a single piece. But with the Sidewinder X2, you can achieve precisely that.
This versatile machine also allows you to generate multiple smaller prints simultaneously. This feature is especially beneficial if you’re aiming to monetize your 3D printing hobby by engaging in small batch production.
In this Artillery Sidewinder X2 review, we’ll delve deeper into its features and capabilities. Let’s get started.
What’s in the Box?
The Artillery Sidewinder X2 is a sizable printer but is shipped in a compact box. In the package box, all the items are cushioned and secured by foam. This protects them during transportation.
The contents of the box include:
- Artillery Sidewinder X2 3D printer kit
- Spool holder components
- Pouch containing a collection of essential 3D printer tools
- Power cable
- USB stick
- Manual
- 1GB USB flash drive
- Spare parts
- Micro SD card
Compared to other 3D printers in its price range, the Sidewinder X2 offers a slightly smaller assortment of components. This is partly because the printer arrives almost fully assembled, which helps to streamline the setup process. For example, the touch screen module, which is typically provided separately in other printers, is conveniently embedded and pre-installed in the base of the Sidewinder X2.
However, the package does not include filament. Therefore, you’ll need to have some of your own for test prints. Also, some common 3D printing tools, such as a bed scraper for print removal or side cutters for filament trimming, are missing. However, you probably already have these or if you don’t, they are available for a couple of dollars at your local hardware store or even online.
We also recommend getting a bed adhesion product, such as Magigoo, before starting your 3D printing endeavors. Depending on the filament material you choose, the glass bed of the Sidewinder X2 will require assistance to ensure proper filament adhesion.
With the basics out of the way, let’s get started by assembling the machine.
Getting Started
The assembly process of the Artillery Sidewinder X2 is seamless and fast. While many 3D printer manufacturers partially pre-assemble their machines before shipping, Artillery has taken it a step further to minimize your workload. After unboxing, you can assemble the machine in 3 minutes and be ready to print!
See the video below:
Okay, and for some written guide, here we go.
Assembly
For assembly, begin by aligning the XZ gantry onto the base in its designated position. You’ll notice the built-in connector that automatically establishes the necessary connections between the X-axis components and the electronics compartment. This innovative system eliminates the need for manually connecting one or two cables.

Next, secure the gantry by screwing in the M5 bolts. Artillery has already pre-inserted these bolts into the base. In contrast, many other 3D printers typically include the bolts in a separate bag, requiring you to locate and insert them manually.

Next on line is assembling and attaching the spool holder. The assembly process is simple and well explained in the manual.

After assembling the spool holder, it’s time to plug in the cables. This process is also well-documented in the included manual.
One notable aspect of the Sidewinder X2’s wiring is the sufficient clearance provided under the print bed.
Setup
After fully assembling the Artillery Sidewinder X2, it’s crucial to ensure that it is properly configured and set up before starting any printing jobs. Artillery has provided comprehensive information on how to correctly configure the 3D printer before initiating your first print.
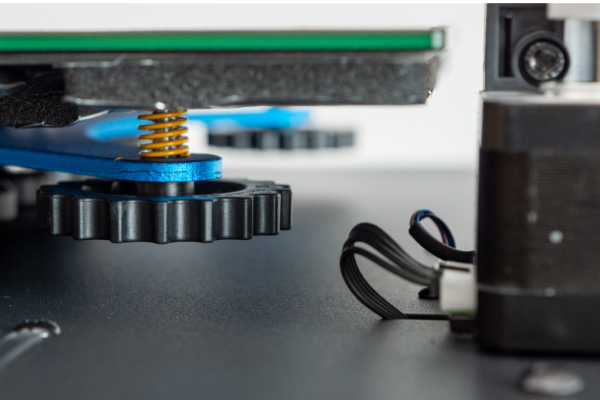
The setup process consists of just three simple steps. First, use the included Allen key to adjust the tension on the Z-carriages to ensure optimal performance.

Next, adjusting the eccentric nuts along the X and Y axes. This will guarantee smooth movement of your axes.

Lastly, follow the instructions outlined in the manual to level the bed and establish the Z-offset.
After completing these setup procedures, you can proceed to set the power supply voltage switch, connect the power cable, and print a file!
Sidewinder X2 Features
Build Volume
The Sidewinder X2 3D printer boasts a generous 300 x 300 x 400 mm build volume, just like its predecessor, the Sidewinder X1.
This build volume aligns with other large 3D printers currently available on the market, such as the Vivedino Troodon coreXY 3D printer (300 x 300 x 400 mm) and the Ender 5 Plus (350 x 350 x 400 mm).
If you need an even larger print area, the Kobra Max (400 x 400 x 450 mm) might be worth considering. However, you’ll need sufficient space on your 3D printer table for these larger printer models.
Extruder
The Artillery Sidewinder X2 maintains the same extruder and hot end as its predecessor. The extruder is a direct-drive design that looks somehow like the E3D Titan extruder. However, it is not an actual Titan extruder but rather similar to the one found on the Anycubic Kobra.
The extruder performs remarkably well, smoothly pushing the filament with minimal grinding. It grips the filament excellently, even during rapid movements and retraction.
These characteristics are particularly advantageous for a large 3D printer like the Sidewinder X2, as they enable efficient filament extrusion and handling, which are essential for successful large-scale 3D prints.
Hot End
Let’s delve into the hot end of the Artillery Sidewinder X2 3D printer.

This machine uses a PTFE-lined hot end. Therefore, it can only attain a maximum extrusion temperature of approximately 240°C. When exposed to temperatures beyond this threshold, the PTFE liner will degrade.
The maximum extrusion temperature of 240°C means you can print PLA, PETG, TPU, and low-temperature ABS filaments. If you need to print materials like nylon or polycarbonate, you’ll have to upgrade to an all-metal 3D printer hot end at some point.
For common 3D printing work, the PTFE-lined hot end is more than sufficient. If you’re uncertain whether you require higher temperatures, chances are that you don’t.
The hot end design of the Sidewinder X2 resembles an E3D Volcano hot end. This configuration enables high filament throughput, which synergizes effectively with the direct-drive extruder on the print head.
Print Bed
The Artillery Sidewinder X2’s print bed is similar to that of the X1 V4, albeit with minor enhancements in cable management.
One notable advantage of the print bed is its A/C (220V/110V) power supply. Compared to conventional direct current (D/C) powered beds, it heats up notably faster.
If you have some experience with 3D printing, you know how frustrating it can be waiting for the print bed to reach the desired temperature. The issue is more compounded with larger print beds. Fortunately, this is not a concern with this machine.
The print bed surface can reach a maximum temperature of 130°C. Therefore, you can use materials like ABS without any complications.
Interestingly, despite the counterintuitive notion, the A/C-powered print bed enhances safety. The reduced amperage carried by the wires mitigates the risk of overheating and potential fire hazards, even with the higher voltage.
The improved cable management and wiring of the Sidewinder X2 3D printer makes it safer during operation compared to many of its competitors.
The Sidewinder X2’s print bed is not removable. The glass bed is permanently attached to the heating element. Therefore, trod carefully when removing prints.
Should the glass bed be damaged, replacing the print bed and its heater can be quite costly.
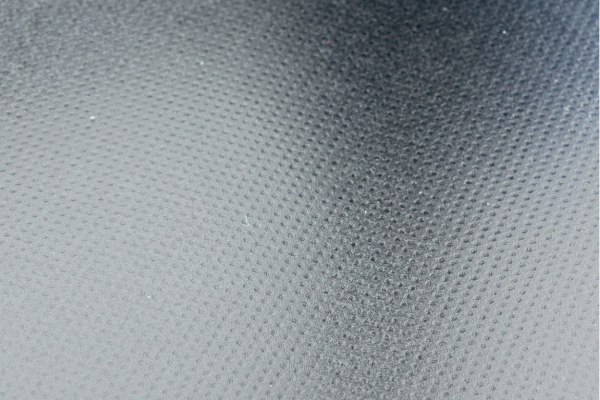
Finally, the glass bed is compatible with flexible filaments like TPU. With PEI or other coated print beds, removing flexible materials can sometimes be challenging, resulting in a compromised bed surface. As long as you diligently maintain the glass print plate of the Sidewinder X2, it will serve you indefinitely.
Heating Times
Thanks to the A/C-powered print bed, the Sidewinder X2 3D printer bed heats up fast (in approximately one minute).
The same efficiency applies to the hot end. Despite employing a Volcano-style hot end, which traditionally requires longer heating periods, the Sidewinder X2 reaches the target temperature in under a minute. Based on this fast response, it is safe to assume that a 50W or higher heater cartridge is employed in the system.
Automatic Bed Leveling
The Artillery Sidewinder X2 also features automatic bed leveling. The printer uses a touch probe to probe the print bed at multiple points and automatically adjust the Z-axis offset to ensure the nozzle maintains the correct distance from the bed. This eliminates the need for manual bed leveling.
You may need to manually level the print bed once, if it arrives with significant unevenness. After that, you can rely on the auto bed leveling feature indefinitely.
Artillery uses a probe touch sensor, similar to the BLTouch or Creality’s CRTouch, for automatic bed leveling.
The X2’s bed leveling sensor perform remarkably well. It is responsive, precise, and we encountered no issues with the probe’s extension or retraction.
Dual Z-Axis Design
For large format 3D printers like the Sidewinder X2, a dual-axis Z-motor and lead screw setup are essential. This configuration enhances stability along the Z-axis, resulting in improved print quality.
Artillery has incorporated this feature in the Sidewinder X2 3D printer as well. With its towering 400mm print height, this design choice was practically necessary. Moreover, it mirrors the inclusion of dual Z-axis in the X1 model.
At the top of the Z-axis, the lead screws and stepper motors are connected via pulleys and a timing belt. This arrangement helps prevent the stepper motors from skipping steps or falling out of synchronization.
Other Features
The Artillery Sidewinder X2 also incorporates several other useful features. These include a filament sensor and power loss detection.
The filament sensor, located on the spool holder, detects when the 3D printer runs out of filament. If the filament breaks or the spool becomes empty, the printer will automatically pause the print. Once you replace the filament or spool, you can resume the print from where it left off.
Similarly, the power loss detection feature is designed to address unexpected power interruptions. If the power supply to the Sidewinder X2 is disrupted, the printer can resume the print from where it stopped once the power is restored.
Both of these features are crucial for large 3D printers as they ensure your prints are not ruined by power loss or filament depletion.
Build Quality and Construction
As with any other 3D printer, there are aspects of the Artillery Sidewinder X2’s build quality and construction that we appreciate, as well as areas that we find less favorable.
Electronics
Controller Board
Unlike the Sidewinder X1, which uses an 8-bit ATMEGA2560-based controller board, the Artillery Sidewinder X2 boasts a more advanced board featuring a 32-bit processor. This upgrade to a 32-bit board brings significant improvements in performance.
The controller board used in the Sidewinder X2 3D printer is the Artillery Ruby v1.2. It is equipped with a powerful ARM STM32F401 CPU. This CPU provides ample processing power for a 3D printer with the Sidewinder X2’s array of features.
The stepper drivers used are removable StepStick-style modules. One advantage of these modules is their replaceability in case of failure.
Nevertheless, the most crucial aspect is that the stepper drivers on the Sidewinder X2 operate silently. They effectively eliminate bothersome vibrations and noises that could disrupt your printing experience.
Cable Management
The Artillery Sidewinder X2 excels in its wire management, which is particularly crucial for a 3D printer with an A/C-powered print bed. Proper cable management enhances safety and prevents potential hazards caused by short circuits.
One notable aspect of the printers cable management is the implementation of strain relief solutions throughout. Critical areas, such as around the print bed, feature secure wire fastening to prevent wear and tear resulting from constant movement.
Moreover, the frame of the Sidewinder X2 includes a cutout slot specifically designed for the flat rubber sleeved alternative to the less durable X1 print bed cable. This slot enhances the cable’s flexibility and extends its lifespan by increasing the bend radius.
Additionally, all wire connectors are firmly secured to their respective ports on the controller board using hot glue. This ensures that they remain in place despite the continuous vibrations during printer operation.
A crucial aspect of wire management is proper grounding, especially for a 3D printer with an A/C-powered print bed. Artillery has taken this matter seriously and ensured the entire frame is correctly grounded.
Moving on, the high-current D/C wires are appropriately crimped. This is an improvement over some manufacturers who only rely on solder tinning. By using correct crimping techniques, the wires maintain reliable contact, minimize the risk of overheating, and eliminate potential dangers.
In summary, Artillery has done an excellent job with the wire management on the Sidewinder X2. The inclusion of robust cable support for the print head and improved strain relief further enhance the overall wire management of the Sidewinder X2.
Noise Levels
The Sidewinder X2 operates at extremely low noise levels. Instead of providing specific decibel measurements, which can be unreliable without calibrated equipment, we can describe the noise levels as similar to a conversation in the next room.
The printer is remarkably quiet, with no bothersome stepper motor noise, loud fans, or coil whine.
Ease of Use
The Artillery Sidewinder X2 aims to be user-friendly, and we’ll explore if there are any challenges in operating the printer.
Touch Screen
The Sidewinder X2 features a built-in touch screen.
The touch screen is relatively small, measuring only 2.9″ / 7.4 cm across. This size limitation is mainly due to the flat base design of the printer, which offers limited space for a larger screen.
The touch screen is highly responsive and easy to use. Given the Sidewinder X2’s slippery feet, the responsive touch screen is beneficial.
Connectivity
The Artillery Sidewinder X2 3D printer offers two primary connection options: USB and microSD. While these options may seem limited, they are generally sufficient for most users.
Both ports are conveniently located on the front left of the device, near the touch screen. This placement makes them easily accessible. However, if you choose to connect via USB cable, it can sometimes obstruct your workspace.
During our testing, we encountered no issues with either port. There isn’t much else to add, except that for future iterations, it would be beneficial to include Wi-Fi connectivity as an additional option for user convenience.
Repairability and Maintenance
Repairability and maintenance are relatively straightforward with the Artillery Sidewinder X2. The electronics area is easily accessible, enabling easy upgrades or troubleshooting of components.
Similarly, accessing the extruder, hotend, and touch probe inside the print head is also simple. Removing the plastic cover of the print head provides access to these components.
Overall, this is one of the best Artillery 3D printers on the market.
BUYON ARTILLERY3D