
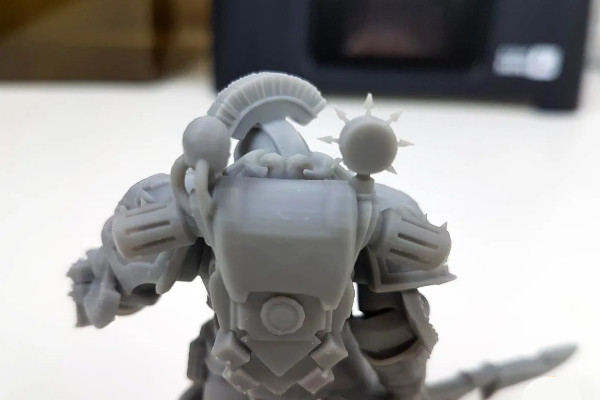
Looking for a new SLA 3D printer to add to your 3D printing farm? Read our Sonic Mini 4K review to find out whether this compact unit passes your bill.
[su_note][/su_note]
Phrozen is a Chinese 3D printer manufacturer that is relatively new on the market when compared to old-timers such as Anycubic or Wanhao. However, in just a couple of years, the company has come to be known for its reliable, quality and innovative printers.
Phrozen 3D printers are designed for both amateurs at home and professionals, mainly dentists and jewelers.
Phrozen 3D Printers
We’ve tested various Phrozen 3D printers in the past. The printers differ in size, screen resolution, electronic filling capabilities and price.

BUY ON TOP3DSHOP
Phrozen was one of the first manufacturers to start producing resin printers using LCD-SLA technology (also called MSLA), which use monochrome LCDs. The first printer in their lineup was the Phrozen Sonic.
We will talk about the advantages of MSLA displays a little later.
An improved version of the Phrozen Sonic, was released later on. This version is the Phrozen Sonic Mini.

BUY ON TOP3DSHOP
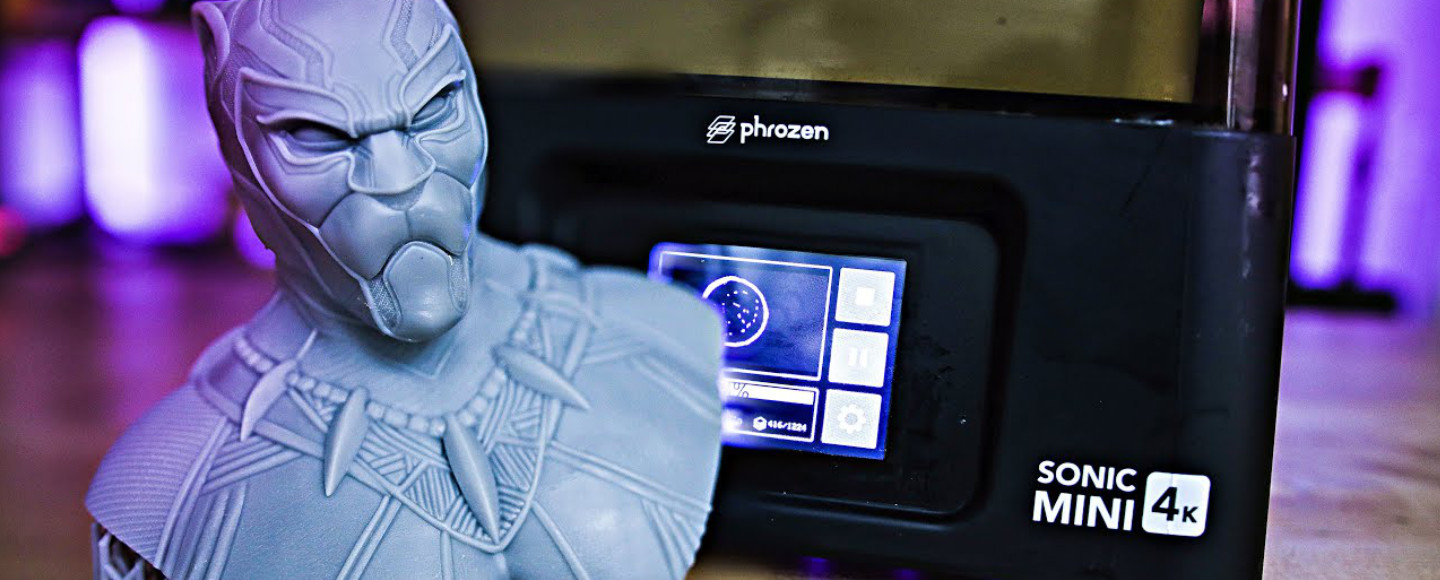
And most recently, the Phrozen Sonic Mini 4K was released. This is our review of the resin 3D printer.
Phrozen Sonic Mini 4K Review
In this guide, we’ll be going through the Phrozen Sonic Mini 4K 3D printer. Read on to find out the features, specs, and print quality of this unit.

BUY ON PHROZEN
What’s in the Box?
The Phrozen Sonic Mini 4K comes fully assembled and almost ready for printing. The printer comes with almost everything you need to use it.
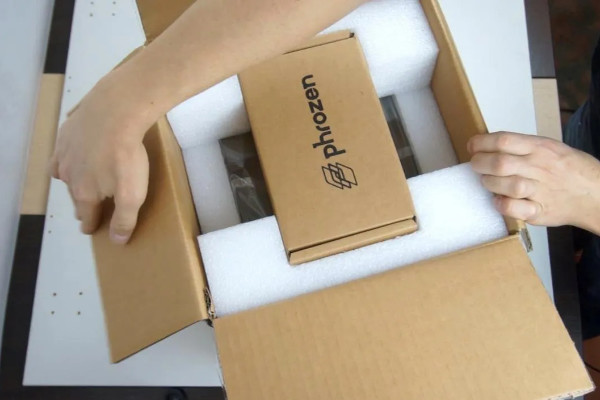
Here is an overview of the items available in the box:
- A small instruction manual
- 4 feet that have to be glued to the bottom of the printer
- USB stick
- Hexagon socket with two spare screws
- A small plastic spatula
- A large metal spatula
- A funnel for draining resin from the bathroom
- External power supply for 24 volts and 2 amps
- A pair of rubber gloves
- Sandpaper for sanding the surface of the print bed, if adhesion problems occur.
We would have wanted a filter included for filtering the used resin, and a spare FEP-film for the bathroom. However, these are trifles.

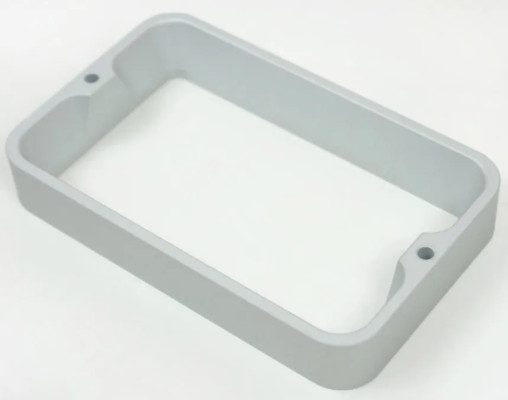
The printer looks like the Phrozen Sonic Mini, except for the color of the plastic from which the cover cap is made. The Sonic Mini 4K has a tan cover cap but it is almost the same shape as the Sonic Mini.
The printing platform has been improved. In the printer, it has beveled corners to allow the resin to drain freely.


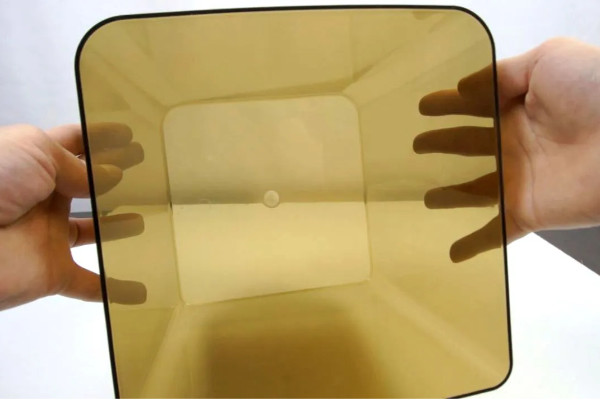
The resin bath has also changed.
For the Sonic Mini, the bath was plastic and transparent. While it wasn’t durable, it was comfortable to use. For the Sonic Mini 4K, the bath is made of aluminum. Moreover, its surface is a little rough, like fine sandpaper. This is inconvenient because if you wipe it with ordinary paper towels, there are many lint on the surface that can get into the resin. Of course, this is unacceptable.
In addition, the bathroom does not have a pit to drain the resin. However, this is not a big problem.

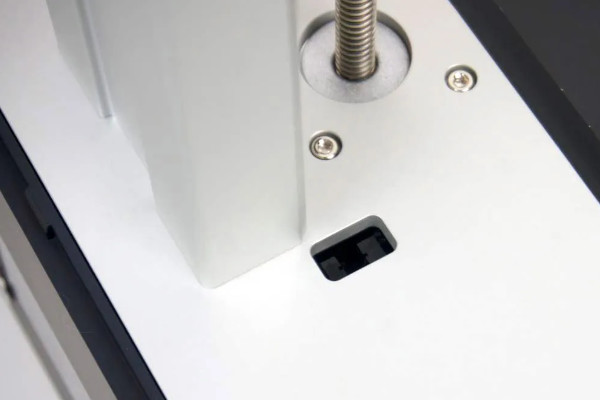
The printer has no specific features from a mechanical point of view. The Z-axis moves along one MGN15 rail and a single threaded 8mm screw. There is also an optical limit switch located at the bottom for precise positioning of the platform at the start of printing.
The end stop is recessed into the printer body.

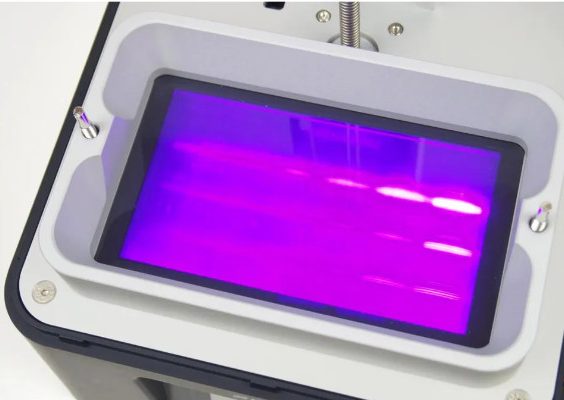
A matrix of LEDs with special lenses located above it is used as a light source. Phrozen calls it ParaLed 2.0.
The curl wave measures the standard 405 nm. Therefore, you can use any resin suitable for MSLA printers to print.

The touch screen and its interface are pretty simple. They just have the essentials.

On the touchscreen, we have the print start menu, calibration functions, backlight test and LCD screen, manual movement of the Z axis.


There is also a Vat-cleaning function. You can use this function if there is resin in the bathtub that cannot be removed.

The entire print area will be illuminated and resin residues will harden. The resin can then be removed.
However, you should use this function only in extreme cases, i.e., when you cannot remove the resin in a more accurate way.
There is a convenient opportunity to change settings right during printing. That is, when you already have a model cut, there is no need to cut it again for another resin. Instead, you can start it for printing and change the settings right from the screen.
Finally, the last and the most interesting thing about this printer is the LCD screen.
First, while the size of the bath is the same as that of the regular Sonic Mini, the printable area along the XY axes is larger here. The Sonic Mini 4K printable area is 134mm x 75mm while that of the Sonic Mini is 120mm x 68mm. The height remained the same 130 mm.

Second, like all Sonic printers, the screen is monochrome.
Unlike RGB screens, which are still used on most resin printers, light passes through monochrome screens more easily. Therefore, the screen heats up less and the radiation of the LED floodlight is used more efficiently. As a result, the service life of such screens is several times longer than that of RGB’ (by more than 2000 hours). Moreover, the exposure time of the resin is much shorter, from 1.5 to 3 seconds versus 8-12 seconds on an RGB screen with a layer of 50 microns.
In addition to the exposure, a lot of time is spent on lifting and lowering the platform between the layers.
Thirdly, the printer’s screen resolution is 4K (3840 by 2160 pixels). The size of each pixel is only 35nm, which is really impressive.

Calibrating the Printer
Let’s move on to the printing tests.
As with any resin printer, you need to calibrate the Phrozen Sonic Mini 4K before using it. Simply follow the instructions that come with the printer.
Loosen the 4 screws on the platform so that it can move freely.

Install an empty tray on the printer.

In the menu, go to Tools – Z-calib. Click Next. The platform will drop to the very bottom.
After that, evenly press the platform against the bathtub film and tighten 4 screws.

Click Done and you’re done.
You can also calibrate the platform by placing a piece of paper on the screen instead of an empty bathtub.
Also, before starting any printing, it is advisable to wipe the platform with alcohol to remove any possible greasy stains from it. Failure to do so can lead to adhesion problems.

Print Quality
For the first tests, we used a resin that is specifically designed for printers with 4K resolution. This is the Phrozen Aqua Gray 4K . With this resin, the printer must reveal all its capabilities.

After shaking the resin bottle, we poured it into the bathroom. We had to to shake up the resin harder as the gray pigment was quite viscous.

Because of this, the first models turned out to be a little lighter than they should have been.
We printed a test model found on a USB flash drive. This is a Phrozen ring.

The model is cut specifically for the Aqua Gray 4K resin with 8x anti-aliasing and a layer of 50 micrometers.
The ring was printed without any problem. And after a quick wash in alcohol, it was clear that the detail and quality of the resulting model was very high. No layers or pixelation are visible. All edges are clear and smooth. You cannot see any flaw with the naked eye.


Well, since the printer is working properly, you can try to slice something yourself.
Preparing a File for Printing
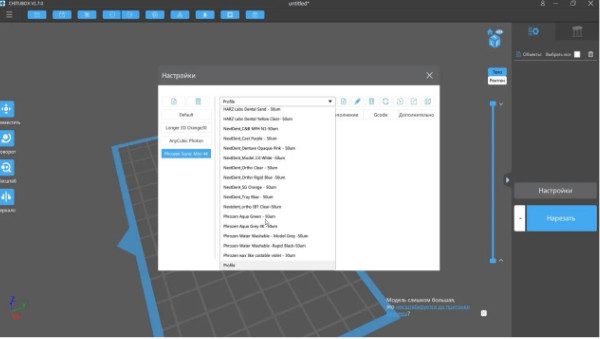
To prepare models for printing, Phrozen suggest using the Chitubox slicer. The USB stick contains the Chitubox 1.6.5.1 distribution and the Phrozen resin profiles file for this printer.
But after downloading the latest version 1.7.0 from the official Chitubox website, we found that both the Sonic Mini 4K printer and the profiles for Phrozen resins are already in it.

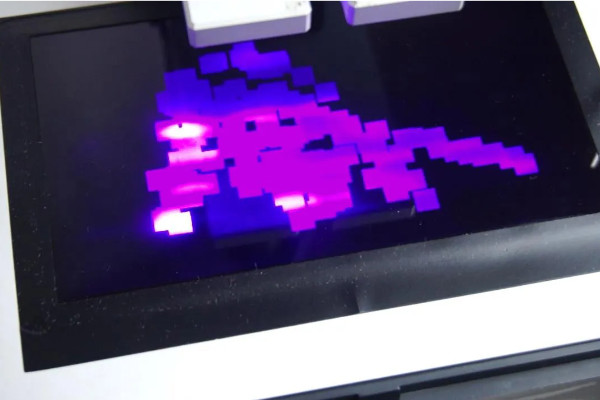
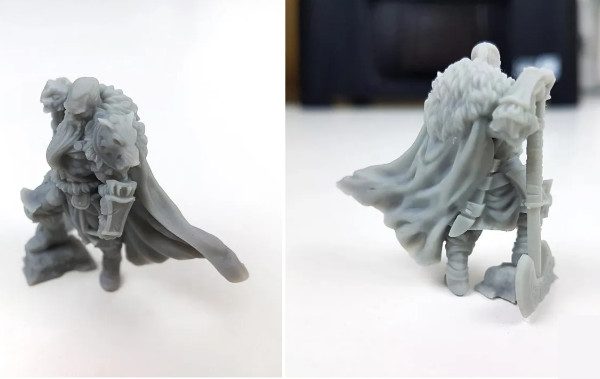
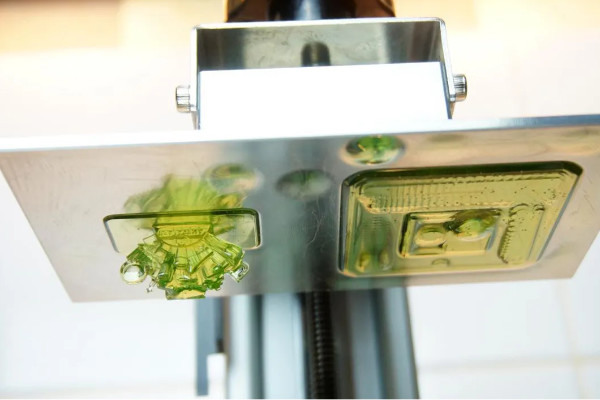
We prepared a miniature figurine of a barbarian with an axe for printing

Printing with Phrozen Aqua Gray 4K Resin
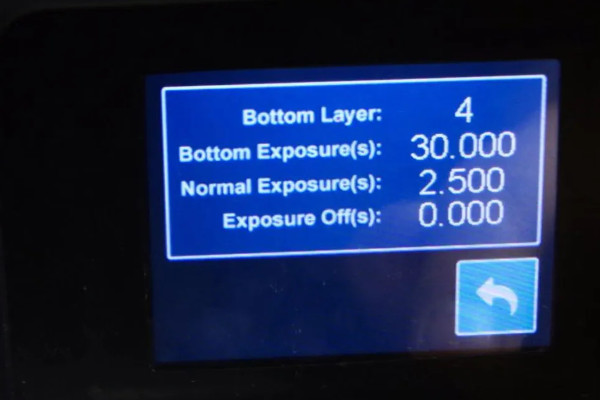
Together with the supports, the height of the model is 41.5 mm. The settings were standard. Layer 0.05mm, exposure time of the first 4 layers is 25 seconds, all others – 2 seconds. Printing took 2 and a half hours.
The barbarian printed exceptionally well. All the supports did their job.

At the same time, they separated very easily, leaving almost no traces on the model. The details were very high.

Even the patterns on the axe and the slightest cracks on the clothes were printed perfectly.

Unfortunately, capturing the quality of the model with the camera turned out to be quite difficult due to its size. But you can take my word for it, this is definitely solid.
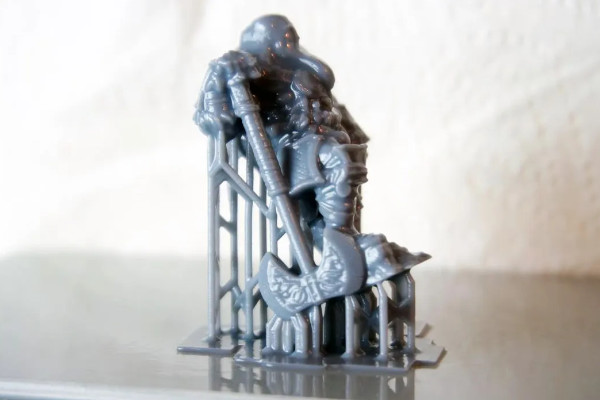
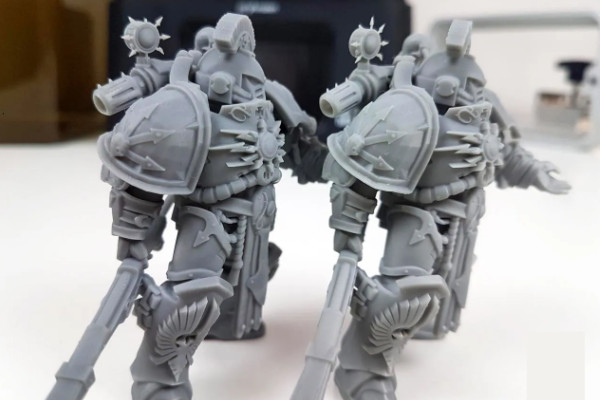
We used the same resin, with the same settings to print another miniature but of a larger size. This is the Chaos Space Marine from the Warhammer 40K universe.
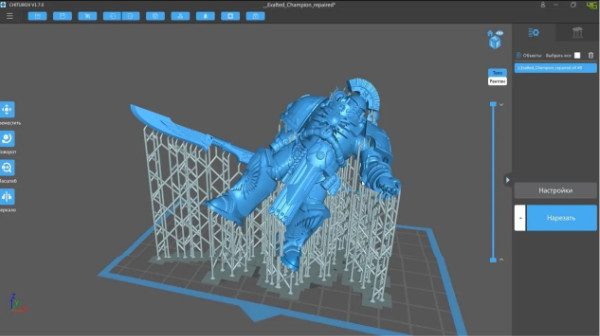
The model is complex and has a bunch of overhanging and small elements.
We angled the model on a large number of supports. The height of the model with the supports was 71.8mm. Printing took 4 hours and 46 minutes.
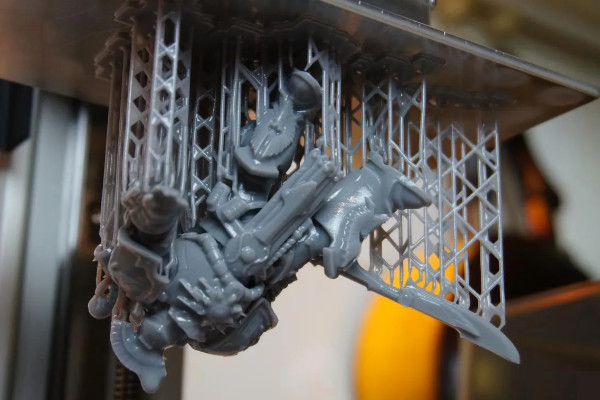
We removed the supports by hand, leaving almost no traces. There are a couple of places where the geometry is slightly distorted due to the lack of supports. Still, these are not significant. Everything was fine again.


The detail is great. Even the smallest elements are printed, such as the thin spikes on the back. All coats of arms, patterns, emblems are clear and even.

In general, what can be said about the Phrozen Aqua Gray 4K resin in conjunction with the Sonic Mini 4K printer. Model resin, therefore, it is best suited for printing artistic models with high detail. And then she shows herself in all her glory.
The printed figures are difficult to distinguish from cast figures. The supports are easy to remove and leave almost no traces. Basically, almost no post-processing is required.
On the flipside, the figment settles fast. Therefore, the resin must always be shaken very well. Also, there is an unpleasant smell. While, not very strong, but it is better to print under a hood.
Resin Printing Phrozen Water Washable
The next resin we tried with this printer is Phrozen Water Washable Rapid Black.

As the name suggests, you can rinse models made of this resin with plain water.
The settings for this resin for the Sonic Mini 4K printer are also available in the Chitubox slicer. Despite being called “Rapid-Fast”, the resin’s exposure time is slightly longer than that of Aqua Gray. The first layers are 40 seconds, while the rest are 3 seconds.
However, after the very first print, we realized this time is a little too high and it is quite possible to use 2.5 seconds. So we continued to print.
We decided to print a non-artistic model.
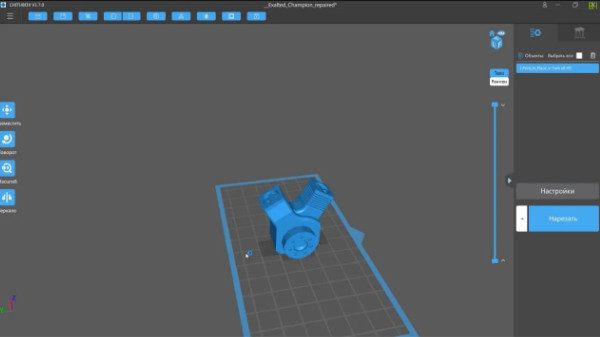
This is a rather difficult model to print for conventional FDM printers. The model is a small V-shaped motor, which is a movable mechanism, which is printed as an assembly without supports; the so-called Print-in-place. To prevent the first overexposed layers from gluing the elements of the mechanism, we hung the model on supports.
The model printed without problems.
We washed the model under running water and the tar washed off. Some black stains remained on the sink, which we easily removed with a regular sponge.
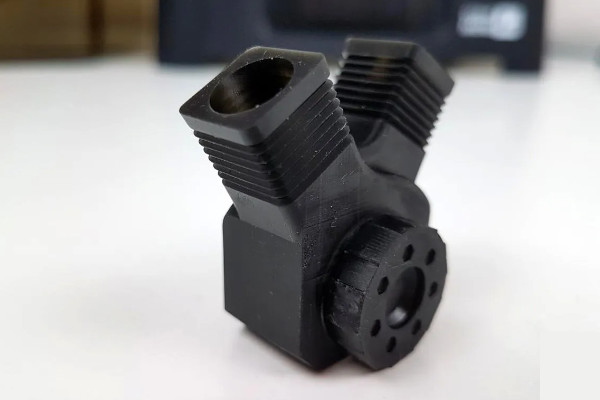
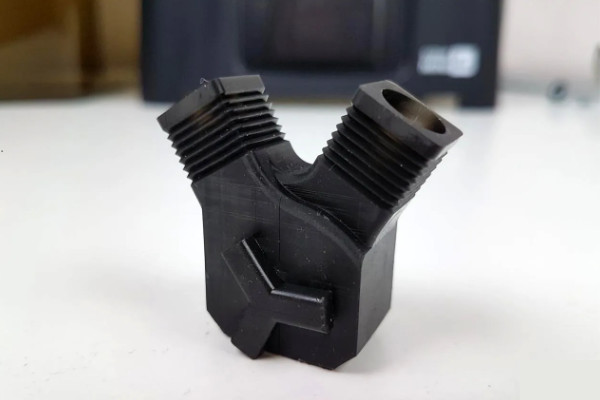
The model mechanism worked smoothly, given that, the gaps in it are designed for FDM printing.
Under certain lighting, we could see a couple of the smallest stripes on the surface. We are not sure where they came from. Otherwise, the model is great and works as it should.

Each bottle of Phrozen resin indicates the resolution that can be obtained from it. And on this resin, the XY-axis has a resolution of 0.03mm, exactly the same as the Aqua Gray 4K. Therefore, the detail with Rapid Black should be about the same.

BUY ON PHROZEN
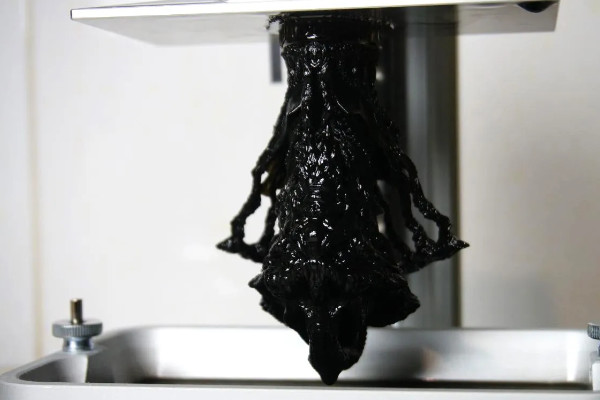
So we decided to print another detailed art model. This is the head of the Neillgaroth.

In addition to its high detail, this model is printed without support. To conserve resin, the model was hollowed out in Chitubox and added a couple of holes on the bottom. Also, to allow air to enter these holes, the entire model was hung on supports.
The size was made as large as possible. Together with the supports, it turned out to be 107mm in height.
The model printed well and the supports held. The printing time was 7 hours and 21 minutes. We loved the detail and quality of the print.
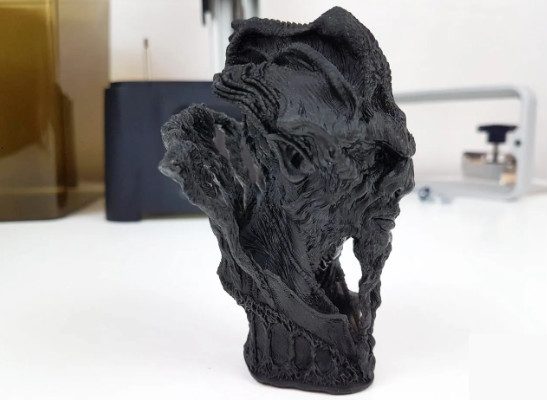

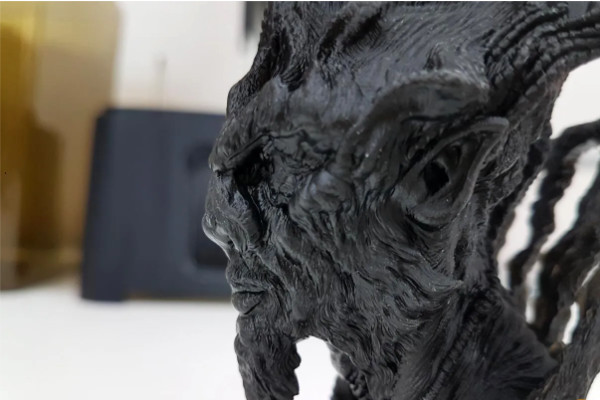

A small conclusion on this resin: Phrozen Rapid Black is slightly transparent, which is noticeable on thin elements. There were no difficulties in printing. We love the ability to wash the models in plain water. There is no need to mess around with smelly alcohol. Finally, the resin itself hardly smells.
In general, this resin is convenient for home use.
Printing with Phrozen Nylon Green Tough Resin
The last resin we used is also unusual. Modeling resins are usually tough but brittle. Therefore, they cannot print functional models. Nylon Green Tough resin is technical and in its properties are close to nylon.

Printing with nylon on a regular FDM printer is rather difficult due to strong shrinkage and poor adhesion to the table. Would the resin models be strong enough to be fully utilized without breaking? Will they have problems with shrinkage?
There were no settings for this resin for the Sonic Mini 4K printer in Chitubox. So, we had to first run several tests to select the parameters.
After printing the standard tests, we got 40 seconds for the first layers, with a margin, and 2.3 seconds for the other layers. During printing, we realized that the resin is quite thick and difficult to wash off with alcohol. Therefore, it is advisable to use an ultrasonic bath for rinsing or brushing off the resin, for example with a soft toothbrush.
To check for shrinkage and geometry distortion, we printed a laser duct. The model is not complicated. However, for its normal use, it should be as flat and accurate as possible.

We also printed on supports.
The first copy looked good. After flushing and re-illumination, the geometry did not float at all. All edges and walls were even. The support marks remain, but unlike regular nylon, this resin is highly machinable. You can smooth out the flaws with ordinary sandpaper without any problems.
A small turbine fan must be inserted into the duct on one side. On the other side, it is attached to the laser. The fan was hard, but it fit.

However, it was not possible to put the air duct on the laser. Apparently this resin does not shrink.
So, without any exact calculations, we reprinted the same model, this time increasing it to 101%. On this scale, the air duct fit on the laser snugly.


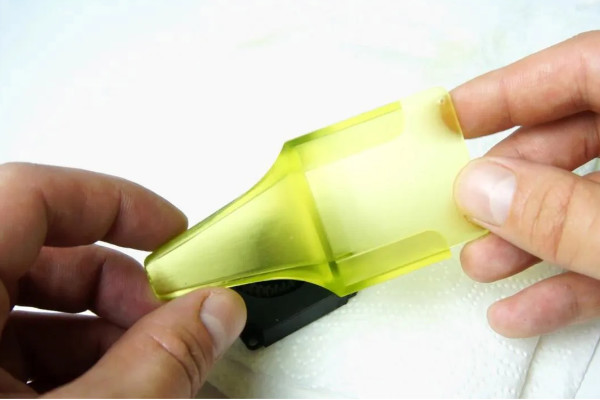
To test for strength and functionality, we tried to print a phone case.
Unfortunately, the case did not fit on the platform when lying down, despite the fact that it is for a relatively small phone, – the Samsung Galaxy S7. Therefore, we had to turn it around and partially hang it on supports.

The scale was also 101%.
The quality was not the best. However, this is not the fault of the printer or the resin. It was necessary to arrange it in some other way. Still, the phone case fits well.
We then checked whether it can withstand impacts on a hard surface. We did this by slamming the cover on the tile floor.

The pictures do not do justice to what we saw from different sides and angles. Basically, the cover did not break nor did it have any chips on it. It was as if nothing had happened.
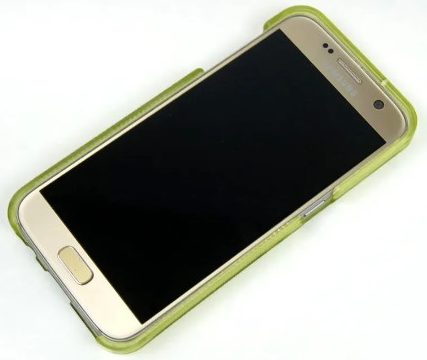


In general, the resin is really strong. The geometry of the resulting parts has no obvious distortions.
However, there is a slight shrinkage, and this should be taken into account when printing and modeling.
In conclusion, Nylon Green Tough resin can be used to print functional technical models that do not break under stress.
Comparison of Print Speed and Acceleration
Finally, we conducted some small experiments.
To begin, we compared the print times on a Sonic Mini 4K and a regular 2K printer with an RGB screen, the Longer Orange 30. We printed another barbarian with a poleaxe, exactly the same height. We used Aqua Gray 4K resin.
The exposure time, after a couple of tests, turned out 60 seconds for the first layers and 10 for the others.

The printing time was almost 5 hours; twice as long as the Sonic Mini 4K.
Moreover, despite the exposure time of only 2-3 seconds, when printing, it takes a lot of time to raise and lower the platform when switching between layers. It is clear that by saving 6-8 seconds on each layer, printing time is also reduced. For every 1000 layers, printing time is reduced from 100 – 130 minutes.
However, what if you try to speed up the printer even more?
First, you can increase the lifting speed of the platform so that the descent speed is not small. And the most important thing is the “Off Delay” parameter. In the standard profiles for the Sonic Mini 4K printer, this parameter is set to 9 seconds. In fact, it is the real time of printing one layer. Even if exposure, ascent and descent take less time, the spotlight will turn on only 9 seconds after the start of exposure of the previous layer.
Therefore, we will try to change these two parameters. We will not change the parameters for the first layers as this does not affect the total printing time much. However, it can cause problems with adhesion.
First, we printed a model of the well-known test rook with standard parameters. Its height is 24mm. The print time was 1 hour and 36 minutes.

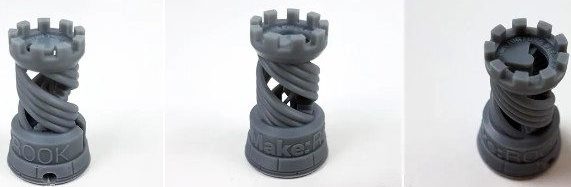
For the second rook, the platform lifting speed was increased from 80 to 160 mm/min and the delay time was reduced to 3 seconds. Thus, there is no delay between the descent of the platform and the start of the illumination of the next layer at all.
We noticed that the platform lifting speed increased, but still remained slower than the descent even though the descent speed was 150mm/min. Apparently, in the printer firmware, there is a limitation of the lifting speed. Therefore, we hit the ceiling.
The printing time for the second rook was 1 hour and 12 minutes, which is 75% of 1 hour 36 minutes. Therefore, the time has decreased by 25%, which is quite good. Also, the quality of the second rook does not differ at all from the first.

This model is small and not complicated. Therefore, we cannot say 100 percent that this printing mode is suitable for any task.
Therefore, we decided to print with these parameters the Chaos Space Marine.

Oddly enough, there were no problems with the model either. The model printed for only 3 hours 33 minutes, which is 1 hour 13 minutes less than printing the same model with standard settings. We get the same 25% savings.
The print quality did not change again. However, due to carelessness, one spike in the back broke off when separating the supports. And this is even good, otherwise it would be impossible to distinguish these models from each other.

Keep in mind that this experiment cannot be considered universal. With a different resin, with a different printer, this method may not work. But when combined with Phrozen Sonic Mini 4K and Aqua Gray 4K resin, we were able to reduce print time by 25% without losing quality.
Phrozen Sonic Mini 4K Review Conclusion
The Phrozen Sonic Mini 4K printer impressed us. However, there are some minor operational flaws. For example, the printer does not have the most comfortable bathtub. Also, in some situations, resin dripping from the platform can leave splashes on the inside of the protective cover. With us, this only happened with the gray tar in the seal of the Space Marine.
In all other respects, the printer has everything you need for fast and high-quality printing. After using monochrome LCD resin printers, conventional printers seem to be very slow. And the 4K resolution can satisfy the needs of both amateurs and professionals.

BUY ON PHROZEN
From what we’ve experienced, this is definitely one of the best resin 3D printers on the market.
