
The Best 3D Printing Accessories in 2026: Upgrades That Actually Matter
If you’ve been in the 3D printing hobby for more than five minutes, you already know the printer is just the beginning. The real magic — and the real frustration — comes from everything around it. The right 3D Printing Accessories can be the difference between a flawless first layer and a spaghetti disaster at 2 AM.
This guide covers everything from the must-have basics to the upgrades that serious makers are running in 2026. Whether you just unboxed your first 3D printer or you’re trying to squeeze every last millimeter of quality out of a high-speed setup, there’s something here for you.
Let’s cut straight to it.
⚡ Quick Navigation
- Quick Answer
- Comparison Table
- What Are 3D Printing Accessories?
- The Flow Rate Wall
- Tier 1: Essential Accessories
- Tier 2: Performance Accessories
- Tier 3: Pro Accessories
- Resin Printing Accessories
- Hybrid Home Office Setup
- The Bambu Effect
- Budget-Based Buying Guide
- Common Mistakes to Avoid
- FAQ
- Final Verdict
Quick Answer (What You Actually Need to Know)
The most essential 3D Printer Accessories in 2026 are a filament dryer, a textured PEI build plate, a high-flow nozzle, an enclosure (for engineering materials), and a reliable monitoring system. These five upgrades directly improve print quality, slash failure rates, and unlock the full potential of modern high-speed printers. If your budget is tight, start with the dryer and the nozzle — you’ll be shocked at the difference.
Comparison Table: Best 3D Printer Accessories at a Glance
| Product | Category | Best For | Key Benefit | Compatibility | Buy Now |
|---|---|---|---|---|---|
| Sunlu S4 Dryer Top Pick | Essential | All filament types | Multi-spool active drying | Universal | Check Price on Amazon |
| Eibos Cyclopes | Essential | Print-while-drying setups | Inline drying during printing | Universal | Check Price on Amazon |
| Wham Bam PEX Plate | Essential | Reliable bed adhesion | Flex-to-release, no scraping | Most FDM printers | Check Price on Amazon |
| Bambu Textured PEI | Essential | Bambu ecosystem | Perfect first-layer texture | Bambu Lab printers | Check Price on Amazon |
| Bondtech CHT Nozzle Best Value | Performance | High-speed printing | 3x flow rate vs. standard | E3D, Bambu, Revo | Check Price on Amazon |
| DiamondBack Nozzle | Performance | Abrasive filaments | Hardened, lasts for years | Various hotends | Check Price on Amazon |
| Mintion Beagle Camera | Performance | Remote monitoring | Easy setup, wide-angle | Universal | Check Price on Amazon |
| Obico AI Monitoring | Performance | Failure detection | AI spaghetti detection | Universal (cloud) | View on Official Store |
| Revo Six Hotend | Pro | Fast hotend swaps | Tool-free nozzle changes | E3D ecosystem | View on Official Store |
| Phaetus Dragon Hotend | Pro | High-speed sustained | Superior heat break design | Klipper / Voron | Check Price on Amazon |
| Nevermore Micro | Pro | ABS, ASA printing | Active VOC filtration | Enclosed printers | View on Official Store |
| Fysetc Input Shaper | Pro | Klipper users | Eliminates ghosting artifacts | Klipper printers | View on Official Store |
What Are 3D Printing Accessories, Exactly?
Good question, because people lump a lot of different things under this umbrella. Here’s how to think about it:
Tools are the things you use around the printer — spatulas, pliers, calipers, deburring tools. They don’t go on the machine, but you’ll reach for them every single print session.
Upgrades are hardware changes that improve performance — better nozzles, upgraded hotends, PEI plates, enclosures. These go on or around your printer and genuinely change what it’s capable of.
Consumables are the materials that get used up — filament, isopropyl alcohol, bed adhesive, glue sticks. You’ll reorder these regularly.
In 2026, the line between “nice to have” and “essential” has shifted dramatically. Three trends are driving this:
High-speed printing is now mainstream. What used to require a $3,000 Voron build is now available on $300 consumer printers. But speed reveals every weakness in your setup — a slightly wet spool of filament that printed “fine” at 60mm/s will absolutely fall apart at 300mm/s.
Multi-material workflows are growing. More makers are running AMS systems, filament changers, and dual-extrusion setups. Each material has its own drying requirements, its own bed adhesion needs, its own enclosure temperature demands.
The reliability-first mindset. People aren’t just printing for fun anymore — small businesses, product designers, and engineers are using FDM for functional parts. When a print failure costs you time and filament, accessories that prevent failures pay for themselves fast.
The 2026 Reality: Understanding the “Flow Rate Wall”
Here’s something that genuinely changed the way experienced makers think about their setups — and it’ll change how you approach 3D Printer Upgrades, too.
Your printer’s motion system might be capable of moving at 500mm/s. The firmware might be tuned perfectly. Input shaping might be dialed in. But none of that matters if your hotend can’t melt plastic fast enough to keep up.
This is the flow rate wall.
Think of it like a garden hose. You can open the tap as wide as you want, but if you’ve got a kinked hose, the water just can’t get through. In 3D printing, your hotend is the hose. Standard brass nozzles with standard hotends max out around 10–15 mm³/s of volumetric flow. Push beyond that and you get under-extrusion — weak layer bonding, gaps, surface defects, and failed prints.
Modern high-speed printers (Bambu X1C, Creality K2, Voron 2.4 at high speeds) are designed to push 25–40+ mm³/s. Without the right accessories — specifically a high-flow nozzle or upgraded hotend — you’re leaving 70% of your printer’s potential on the table.
This is why high-flow accessories are no longer optional for anyone running modern hardware. They’re required.
Tier 1: Essential 3D Printing Accessories (Highest ROI)
These are the accessories that will make the biggest visible difference to your prints right now, regardless of what printer you’re running.
Filament Dryer — The Single Most Important Upgrade
Let’s talk about the thing most new makers ignore until they’ve ruined three spools of Nylon.
Moisture is the number-one cause of print failures that people misdiagnose. Stringing, bubbling, surface texture issues, weak layer adhesion, unexpected warping — all of these can be caused by wet filament, and all of them disappear when you dry your spools properly.
Here’s why this is worse than you think: filament starts absorbing moisture from the air immediately after you open the bag. Depending on your climate (and if you’re in a humid area, you know exactly what I mean), PETG can become noticeably degraded within 24–48 hours of sitting out. Nylon and TPU are even more sensitive. PLA is the most forgiving, but even PLA prints better dry.
The 2026 trend that’s become standard practice among serious makers is active drying while printing — your filament sits in a dryer the entire time it’s feeding into your printer, not just before the print starts. This is a game-changer for multi-hour prints with hygroscopic materials. Proper filament storage and drying is non-negotiable.
Recommended Options:
Sunlu S4 Filament Dryer — This is the one most people in the community settle on. It holds up to four spools simultaneously, runs quietly, and has a wide temperature range that covers everything from PLA to Nylon. The built-in fan circulates hot air evenly around the spools, and the digital display makes it easy to set precise temperatures for different materials. At around $45–$65, it’s one of the best value purchases in all of 3D printing.
Eibos Cyclopes — If you’re running a setup where you want a single spool drying while it’s actively feeding into your printer, the Cyclopes is purpose-built for this. It has a pass-through tube that lets filament feed directly from inside the heated chamber to your extruder, keeping the material warm and dry from spool to nozzle. It’s a bit more expensive per spool capacity, but for print-while-drying setups, nothing beats it.
If you’re printing Nylon or PA-CF and you’re not using a dryer, you’re not actually printing Nylon — you’re printing degraded moisture-contaminated Nylon. Those aren’t the same material.
Build Plate — Reliability You Can Feel
The build plate is your printer’s foundation — literally. A good one means your first layer goes down perfectly, every time, and your finished print releases with a satisfying flex and pop. A bad one means you’re gluing, scraping, and cursing.
Textured PEI has become the industry standard in 2026 for a very good reason: it works with almost everything, it’s durable, and it doesn’t require any adhesive for most materials. The texture creates micro-mechanical adhesion that holds prints firmly when warm and releases easily when the plate cools.
Recommended Options:
Wham Bam PEX Plate — These are magnetic flexible build surfaces with a PEX (polyether-ether-ketone) coating that’s slightly more heat-resistant than standard PEI. They’re compatible with a wide range of printers through their magnetic base system, and the flex-to-release mechanism means you’ll never reach for a spatula again. Great for makers running multiple materials at varying temperatures.
Bambu Textured PEI Plate — If you’re in the Bambu Lab ecosystem (X1C, P1S, A1, etc.), this is the plate to grab. The texture is optimized for Bambu’s first-layer calibration system, and it works beautifully with PLA, PETG, ABS, ASA, and TPU right out of the box. The matte texture it imparts on the bottom of your prints also looks fantastic — a clean, professional finish that you’d otherwise need post-processing to achieve.
The difference between a first layer on a worn glass bed with glue stick versus a fresh textured PEI plate is immediately obvious. PEI gives you that confident “click” of adhesion that removes any doubt.
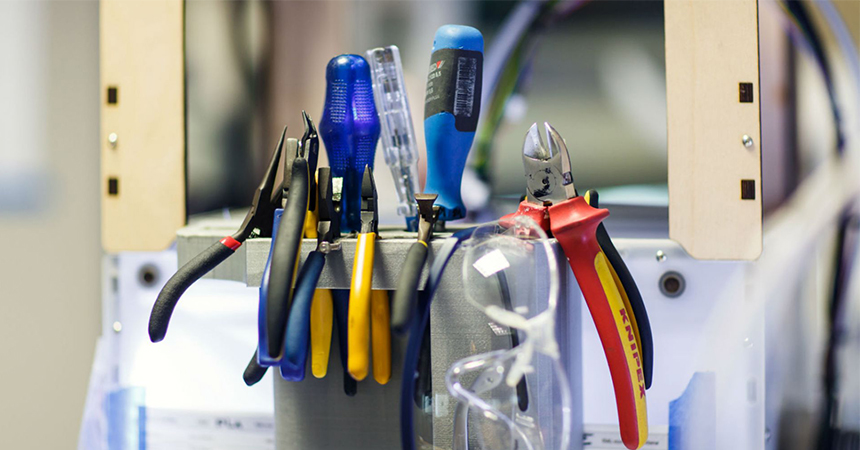
Tool Kit — The Underrated Essential
Every 3D printing guide focuses on the flashy hardware upgrades. Nobody talks enough about having the right Tools for 3D Printing in your workspace, and then they end up prying supports off with a flathead screwdriver like an animal.
Recommended Options:
iFixit Moray Driver Kit — This is a precision screwdriver set with a massive range of bits, and it’s become genuinely essential for printer maintenance. Adjusting belt tension, swapping hotend components, opening electronics enclosures — you’ll use this constantly. The quality is significantly better than the driver sets that come bundled with most printers.
Noga Deburring Tool — This is the one tool that dramatically changes the post-processing experience. A deburring tool with a swiveling carbide blade can clean up support interfaces, remove layer artifacts, and chamfer sharp edges with a level of control that a knife or sandpaper simply can’t match. Once you use one, you’ll never go back to picking at supports with pliers.
Grab Your Essential Tool Kit
Also worth having:
- Flush cutters (for trimming supports and purge lines)
- Nozzle cleaning needles (acupuncture needles work great)
- Calipers (essential for dialing in flow rate)
- Isopropyl alcohol (90%+) for bed cleaning
Tier 2: Performance Accessories (Speed & Flow)
Once your fundamentals are solid, these are the upgrades that take print quality and speed to a completely different level.
High-Flow Nozzles — The Most Impactful Performance Upgrade
Remember the flow rate wall we talked about? This is where you knock it down.
A high-flow nozzle upgrade is genuinely one of the most impactful improvements you can make to an FDM printer. The geometry inside a standard nozzle creates turbulence and limits how fast plastic can be pushed through. High-flow designs use a split-channel or optimized bore geometry that dramatically increases volumetric flow rate — often 2–3x — without requiring any other hardware changes.
Here’s the thing that surprises people: a $20 nozzle upgrade frequently outperforms a $200 hotend upgrade for raw print speed on setups that were already hitting the nozzle as their bottleneck.
Recommended Options:
Bondtech CHT Nozzle (Best Value) — CHT stands for Conical Heating Technology. The nozzle has an internal conical insert that splits the filament flow into three streams, dramatically increasing the surface area in contact with the heated walls. The result is a nozzle that can push 25–30 mm³/s versus the 10–15 mm³/s of a standard nozzle. Available in brass for standard filaments and hardened steel for abrasive materials (carbon fiber, glow-in-the-dark, etc.). At $20–$35, this is arguably the best 3D printer nozzle upgrade in all of FDM printing.
DiamondBack Nozzle (Premium Pick) — If you’re printing abrasive materials regularly and you’re tired of replacing nozzles every few spools, the DiamondBack is the solution. These are hardened nozzle with a CVD diamond-like coating on the bore that provides extreme wear resistance without sacrificing thermal conductivity the way some hardened steel nozzles can. They’re marketed as a “forever nozzle” — not quite, but they genuinely last many times longer than standard hardened steel. Higher upfront cost, but the math works out over time.
Standard brass nozzle = ~12 mm³/s max. Bondtech CHT brass = ~28 mm³/s. For context, printing at 300mm/s with a 0.4mm nozzle and 0.2mm layer height requires about 24 mm³/s — meaning a standard nozzle simply cannot keep up without under-extrusion.
Hotend Upgrades — For Sustained High-Speed Performance
If you’re pushing speeds of 300mm/s and above consistently, a hotend upgrade becomes necessary. The hotend is the entire assembly — heater block, heat break, heat sink, and nozzle together — and at sustained high speeds, the stock hotend on many printers becomes the limiting factor.
Recommended Options:
Revo Six (E3D) — The Revo system completely changed the nozzle-swapping experience. The nozzle threads directly into the heater block (no separate heat block), and you change nozzles by hand at operating temperature in about 30 seconds — no tools, no burned fingers, no torque wrenches. If you’re regularly switching between 0.4mm, 0.6mm, and 0.8mm nozzles for different projects, the time savings alone justify the cost. The Revo Six is the workhorse version, covering most standard FDM applications up to around 260°C.
Phaetus Dragon Hotend — A favorite in the Klipper and Voron community for good reason. The Dragon features a bimetallic heat break design that gives you an exceptionally short melt zone transition, dramatically reducing heat creep at high speeds. It handles sustained printing at 300–500mm/s without the filament softening prematurely in the cold zone — which is one of the failure modes you start encountering when you push stock hotends beyond their design limits. Available in standard and high-flow versions.
Monitoring & AI Failure Detection — Stop Wasting Filament
We’ve all done it. You start a 14-hour print before bed, wake up, and find the printer has been cheerfully extruding spaghetti into a pile for the last six hours while the actual part detached from the bed four hours ago.
Modern monitoring accessories can catch failures within minutes and pause or stop the print before you’ve wasted an entire spool.
Recommended Options:
Mintion Beagle Camera — This is the camera most makers reach for when they want simple, reliable monitoring without fuss. Wide-angle lens, decent low-light performance, easy setup, and direct integration with OrcaSlicer and Obico. Mount it inside your enclosure or on a flexible arm above the bed, connect it to your network, and you have a live view of your print from anywhere. At $35–$50, it’s an easy addition to any setup.
Obico (AI Failure Detection) — Obico (formerly The Spaghetti Detective) is a software service that uses AI to watch your print via camera and detect failure patterns — spaghetti, layer shifting, bed adhesion failures, nozzle clogs. When it detects a problem, it can pause the print, send you a push notification, or both. The free tier covers basic monitoring. The paid tier ($10/month) adds more AI-powered detection and higher sensitivity. If you’re running prints overnight or while you’re away from home, this is genuinely invaluable.
The first time Obico catches a spaghetti failure at 2 AM and sends you a notification before you’ve wasted 200g of filament, the subscription pays for itself.
Tier 3: Pro Accessories (Environment & Precision)
These are the upgrades that separate a good setup from a great one — particularly for makers working with engineering-grade materials or pushing the limits of print quality.
Air Filtration — Increasingly Non-Negotiable
This used to be a niche concern. In 2026, with more people running ABS, ASA, and resin in home offices and shared spaces, air filtration is rapidly becoming one of the most discussed Best Accessories for 3D Printing topics in the community.
ABS and ASA off-gas styrene and other VOCs (volatile organic compounds) at printing temperatures. These aren’t just unpleasant — at sustained exposure levels, they’re a real health concern. Resin printing involves even more aggressive compounds. If you’re printing in a basement, spare bedroom, or home office, filtration isn’t optional anymore.
Recommended Options:
Nevermore Micro — The Nevermore is a recirculating activated carbon filter designed to fit inside most enclosed printers (Voron, Bambu X1C, P1S, etc.). Rather than venting filtered air out of the enclosure (which would change the chamber temperature), it recirculates air through activated carbon pellets that absorb VOCs. It’s a DIY build, but the BOM (Bill of Materials) is cheap ($25–$40) and the community support is excellent. If you’re printing ABS regularly, this is one of the highest-impact modifications you can make.
BentoBox — A similar concept to the Nevermore, but designed as an external desktop unit that can be used with any printer. The BentoBox uses a combination of activated carbon and HEPA filtration. Good option if you want filtration without modifying your printer directly.
Input Shaping Tools — For Klipper Enthusiasts
If you’re running Klipper firmware (or planning to), input shaping is one of the most powerful quality improvements available. It’s a calibration process that measures the resonance frequencies of your printer’s motion system and compensates for them in the firmware — eliminating the ringing and ghosting artifacts that appear at high speeds as ripple patterns in your print surface.
Recommended:
Fysetc ADXL345 Input Shaper — This little accelerometer module mounts to your toolhead, connects to your Raspberry Pi or Klipper-capable MCU, and records the resonance data that Klipper uses to calculate the optimal input shaping settings. The process takes about 15 minutes once you have the hardware, and the improvement in surface quality at high speeds is remarkable. At $15–$25, it’s one of the cheapest and most impactful upgrades for any Klipper setup.
Resin Printing Accessories — A Complete Section
FDM gets most of the attention, but resin (MSLA) printing has its own ecosystem of essential accessories — and ignoring them can lead to failed prints, wasted resin, and genuine safety hazards.
Essential Resin Accessories
Wash & Cure Station — Non-negotiable for resin printing. You need to wash uncured resin off your prints in isopropyl alcohol or a purpose-made washing solution, then cure them under UV light to reach full strength. Stations like the Elegoo Mercury Plus or Anycubic Wash & Cure Machine 3.0 combine both functions in one unit. Attempting to do this manually with a jar of IPA and a UV lamp is messy, inconsistent, and slower.
IPA Containers with Lids — You’ll go through a lot of IPA. Get purpose-made resin washing containers with tight lids to minimize evaporation and reduce fume exposure. The resin-contaminated IPA can be cured under UV and then disposed of safely — don’t pour it down the drain.
UV Curing Tools — For post-curing larger parts or getting into crevices that a wash station’s UV can’t reach, a handheld UV flashlight or a dedicated UV curing box gives you more control.
Advanced Resin Accessories
Resin Exposure Calibration Tools — The Ameralabs Town test print or RERF (Resin Exposure Range Finder) files help you dial in exposure settings precisely for each resin you run. Different resins from different manufacturers need different exposure times, and guessing leads to brittle or uncured prints.
FEP/nFEP Replacement Sheets — The film at the bottom of your resin vat wears out and needs regular replacement. Keep spares on hand. nFEP (nano-coated) films have lower adhesion than standard FEP and reduce suction forces, which improves print success rates — especially for parts with large cross-sectional areas.
Screen Protectors — A monochrome LCD screen is one of the most expensive components of an MSLA printer. A screen protector (a thin FEP or release film sheet) placed between the screen and the vat catches stray resin and dramatically extends screen life. Cheap insurance.
The 2026 Hybrid Home Office Setup: Noise & Air Quality
Here’s a trend that doesn’t get enough coverage: most people running 3D printers in 2026 are doing so in shared living spaces — apartments, home offices, living rooms. The days of printers being banished to the garage are giving way to desktop-friendly machines that people want to run comfortably alongside their work-from-home setup.
This creates two real concerns that accessories can directly address.
Noise — Standard 3D printer fans are loud. At peak cooling demand (printing at high speed with aggressive layer cooling), they can hit 50–60 dB — roughly as loud as a normal conversation, constantly. Not great for calls or concentration.
Noctua NF-A4x10 and NF-A4x20 Fans — Noctua’s industrial fans are the gold standard for quiet operation. Swapping out the stock hotend cooling fan and part-cooling fan for Noctua equivalents can drop noise levels significantly while maintaining or improving airflow. They’re 12V and require a voltage regulator if your board outputs 24V, but the community documentation for most popular printers makes this a straightforward modification.
Vibration Dampening Pads — Printer vibration transmits through whatever surface it’s on, turning your desk into a resonator. Anti-vibration pads (silicone feet or purpose-made printer pads) absorb this vibration at the source. The difference when printing on a solid desk with vibration dampening versus without is immediately audible — and it slightly improves print quality by reducing low-frequency vibration that input shaping can’t compensate for.
Silence Your Printer Setup
The “Bambu Effect” — A Compatibility Reality Check
Let’s address something that confuses a lot of buyers: not all accessories are relevant for all printers.
Bambu Lab’s printers (X1C, P1S, A1, etc.) ship with a remarkable amount of functionality baked in:
- Automatic bed leveling with vibration compensation
- Input shaping (built into firmware)
- AMS (Automatic Material System) for multi-material
- AI failure detection via the built-in camera
This is fantastic for users — but it means the accessory calculus is different compared to, say, an Ender 3 or a Voron build.
Budget-Based Buying Guide
Not everyone is starting from the same place financially, and that’s fine. Here’s how to prioritize based on what you can spend:
Under $50 — The Biggest Bang for Your Buck
Start here, and you’ll eliminate the most common failure points immediately.
- Filament Dryer (~$45): The Sunlu S4 is your first purchase. No discussion.
- CHT Nozzle (~$20): Drop this into whatever printer you have and enjoy the flow improvement.
- Noga Deburring Tool (~$15): Post-processing quality of life goes up immediately.
- Flush Cutters (~$8): Stop prying supports off with your fingernails.
Total: ~$88 — yes, slightly over $50, but these four things will transform your experience more than any single upgrade at any price point.
$50–$150 — Reliability and Confidence
Once the basics are covered, these upgrades build your setup into something you trust.
- Textured PEI Build Plate (~$35): Say goodbye to bed adhesion problems.
- Mintion Beagle Camera (~$40): Monitor your prints remotely.
- Obico subscription (~$10/month): AI failure detection for overnight prints.
- iFixit Driver Kit (~$35): Proper tools for proper maintenance.
$150 and Up — The Serious Setup
These are the upgrades that take your printing to a professional level.
- Quality Enclosure (~$150–$400): Opens up engineering-grade materials. The Creality Enclosure, Bambu P1S (if upgrading from X1C), or a DIY Voron Trident cover different needs.
- Revo Six or Phaetus Dragon Hotend (~$75–$95): Unlock sustained high-speed performance.
- Nevermore Micro (~$25–$40 DIY): Essential air quality for ABS and ASA.
- Fysetc Input Shaper (~$20, Klipper only): Eliminate ghosting artifacts for good.
Common Mistakes to Avoid
These are the things that experienced makers have all done at least once, and that you can skip entirely.
Ignoring filament moisture. Already covered, but worth repeating. Wet filament causes more problems than any hardware failure. Buy a dryer before anything else.
Upgrading speed without upgrading flow. Getting excited about 300mm/s prints is natural. Buying a $150 linear rail upgrade before a $20 CHT nozzle is backwards. Fix the flow rate wall first.
Buying cheap no-name nozzles in bulk. The $10-for-20-nozzles packs from random sellers are inconsistently sized, wear out fast, and can actually damage your hotend if the threading is soft. Buy quality nozzles — Bondtech, E3D, Phaetus, Slice Engineering — and buy fewer of them.
Skipping an enclosure for engineering filaments. ABS, ASA, Nylon, and PC are not materials you successfully print in open-air environments with a draft blowing across your printer. Warping and layer delamination are the inevitable result. An enclosure isn’t a luxury for these materials — it’s a prerequisite.
Neglecting bed cleaning. A textured PEI plate works by creating micro-adhesion. Skin oils from your fingers contaminate this surface and cause adhesion failures. Clean with IPA before every print, and never touch the print surface with bare hands.
FAQ
What Accessories Do I Need for a 3D Printer?
At minimum: a filament dryer, a quality build surface (textured PEI is ideal), basic hand tools (flush cutters, deburring tool, precision screwdrivers), and isopropyl alcohol for bed cleaning. These four things cover the most common failure points. Everything else is an upgrade from there.
What Is the Most Important 3D Printing Accessory?
A filament dryer, without question. Moisture-degraded filament is the number one cause of print quality issues that people misattribute to printer settings, slicer problems, or hardware failures. Dry filament, alone, will improve the quality of most prints noticeably.
Are 3D Printer Accessories Worth It?
Yes — but strategically. A $20 CHT nozzle can double your effective print speed. A $50 filament dryer eliminates an entire category of print failures. The ROI on the right accessories far exceeds the ROI on a whole new printer. On the other hand, buying accessories randomly without understanding your specific bottleneck is a good way to waste money.
Do Beginners Need Upgrades?
Not immediately, but sooner than you might think. The first purchase every beginner should make is a filament dryer and a quality build plate — before they’ve even had their first print failure. The accessories that address moisture and bed adhesion will save beginners hours of troubleshooting that would otherwise have them convinced their printer is defective.
How Do I Improve 3D Print Quality?
In order of impact: (1) Dry your filament, (2) Clean and level your bed surface, (3) Upgrade to a high-flow nozzle, (4) Calibrate your flow rate and pressure advance in your slicer, (5) Add input shaping if your firmware supports it. Most print quality problems are solved by steps 1–3 before you ever need to touch slicer settings.
What Are the Best Accessories for 3D Printing With Abrasive Filaments?
For carbon fiber, glow-in-the-dark, metal-filled, or other abrasive materials: a hardened nozzle is essential (brass wears out within hours). A DiamondBack or hardened Bondtech CHT nozzle is the right tool. You’ll also want an enclosure for CF-Nylon, and a filament dryer is especially important since most high-performance composites are extremely hygroscopic.
Final Verdict: Our Top Picks
After running through all the options, here’s where we land:
Top Picks for 3D Printing Accessories
Best Overall Upgrade: Filament Dryer (Sunlu S4)
This is the upgrade that has the highest probability of immediately improving your prints, regardless of what printer you own, what filament you use, or how experienced you are. If you’re going to buy one thing from this list, make it this.
Best Value Upgrade: Bondtech CHT Nozzle
Twenty dollars. That’s what it costs to potentially double your effective print speed and eliminate under-extrusion at high flow rates. This nozzle is in more serious maker setups than any other single component for a reason.
Best Reliability Upgrade: Textured PEI Build Plate
First-layer adhesion anxiety is real, and a quality PEI plate eliminates it almost entirely. This is the foundation that everything else is built on — literally.
Best “Set It and Forget It” Upgrade: Obico + Mintion Beagle
The combination of a reliable camera and AI failure detection means you can confidently start long prints and not babysit them. For anyone printing overnight or while away from home, this pairing is transformative.
Best Pro Upgrade: Revo Six or Phaetus Dragon Hotend
If you’re running sustained high-speed printing and you’ve already covered the basics, an upgraded hotend is the next meaningful jump in performance. Both options are proven, community-backed, and genuinely make a difference above 250mm/s.
The reality of 3D Printing Accessories in 2026 is this: the printers have gotten dramatically better, faster, and cheaper. The ceiling has moved up. But the accessories that support them — that keep filament dry, build plates clean, nozzles flowing, and air breathable — those are what separate the makers who are consistently thrilled with their results from the ones who are constantly troubleshooting.
Start with the dryer. Grab a CHT nozzle. Clean your PEI plate with IPA. The prints will follow.
Related Articles: Best Filament Dryers for 3D Printing | 3D Printer Under-Extrusion: Complete Fix Guide | Best 3D Printer Nozzles Compared | Filament Storage Guide | Best 3D Printers in 2026 | PETG vs PLA vs ABS — Which Should You Use?
