
📥 FREE 3D Scanning Checklist
Master handheld scanning in 2026 — settings, marker placement & post-processing secrets used by pros.
No spam, unsubscribe anytime. 20,000+ readers.
📋 Jump to section
🔹 What is Einstar
🔹 Specs explained
🔹 PC requirements
🔹 Unboxing
🔹 EXScan software
🔹 Real-world perf
🔹 Geometry vs texture
🔹 vs 2026 rivals
🔹 Scanning environment
🔹 Accuracy explained
🔹 3D printing workflow
🔹 Strengths/Weaknesses
🔹 Who should buy
🔹 Price & value
🔹 Final verdict
Einstar Handheld 3D Scanner Review (2026): Accuracy, Software Requirements & Real-World Testing
The 3D scanning landscape has transformed dramatically over the past few years. Walk into any maker space or design studio today, and you’ll encounter an increasingly wireless world—mobile scanners tethered to tablets, LiDAR-enabled smartphones capturing room layouts, and portable devices that promise professional results without the cable clutter. Yet amid this wireless revolution, tethered scanners like the Shining 3D Einstar haven’t disappeared. They’ve simply found their niche.
This comprehensive Einstar handheld 3D scanner review explores why a cable-connected device still commands attention in 2026, examining everything from accuracy claims to real-world performance, software requirements to texture quality. Whether you’re a 3D printing enthusiast considering your first structured light scanner or a cosplay creator weighing the trade-offs between portability and processing power, this guide cuts through marketing claims to reveal what this scanner actually delivers.
Why the Einstar Still Matters in 2026
The Einstar Handheld 3D Scanner represents an interesting case study in technology evolution. While newer wireless scanners dominate headlines with their untethered convenience, they face fundamental limitations that physics hasn’t yet overcome. Mobile processors, even in high-end tablets, simply can’t match the sustained computational throughput of a dedicated workstation GPU. Wireless data transfer introduces latency that tethered connections avoid entirely. Battery life constrains scanning sessions that AC power makes virtually unlimited.
This creates a bifurcated market. On one side, wireless scanners excel at quick captures, field work, and scenarios where portability trumps everything else. On the other, tethered systems like the Einstar leverage raw processing power to deliver sustained high-frame-rate scanning, real-time mesh preview, and the ability to handle complex tracking scenarios without thermal throttling or battery anxiety.
The Einstar occupies an interesting position in this divide: it’s portable enough to move between workstations and scan larger objects from multiple angles, yet powerful enough to deliver professional-grade geometry when paired with appropriate hardware. Understanding this distinction matters because the scanner you need depends entirely on your workflow priorities.
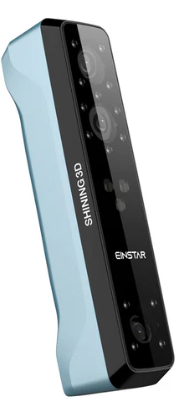
What Is the Shining 3D Einstar Handheld 3D Scanner?
Shining 3D has established itself as a significant player in the accessible 3D scanning market, offering products that bridge the gap between consumer-grade smartphone scanning and industrial metrology equipment that costs tens of thousands of dollars. The Einstar sits in their handheld lineup as a structured light scanner designed for users who need better-than-smartphone results without approaching industrial price points.
The core technology relies on infrared structured light projection. Unlike laser triangulation or photogrammetry, structured light scanners project patterns onto objects and analyze how those patterns deform across surfaces. The Einstar specifically uses VCSEL (Vertical-Cavity Surface-Emitting Laser) technology to project infrared patterns invisible to the human eye, making it genuinely safe for face and body scanning without the discomfort of visible light strobing.
One crucial clarification: the Einstar is portable, but not wireless. You can carry it around, scan from different angles, and move between locations—but it requires a USB connection to a computer throughout the scanning process. This isn’t a limitation so much as a design choice that enables capabilities wireless units struggle to match.
🔍 KEY DISTINCTION: The Einstar is portable but tethered — you carry it, but it stays connected via USB. This enables desktop-GPU processing power that wireless units simply cannot match in 2026.
Einstar Handheld 3D Scanner Specs: What the Numbers Actually Mean
Understanding scanner specifications requires looking beyond manufacturer marketing to grasp what each number means in practice.
Core Hardware Specifications
Technology: The Einstar employs infrared structured light using VCSEL projection. This approach offers significant advantages for certain applications—it’s completely eye-safe, enabling comfortable face scanning sessions, and the invisible infrared pattern doesn’t distract or disturb subjects. However, infrared wavelengths also make the scanner sensitive to sunlight, which floods outdoor environments with IR radiation that overwhelms the scanner’s sensors.
Point Distance: The Einstar captures points with spacing between 0.2 mm and 3 mm depending on scanning distance and settings. This specification directly determines resolution limits. A 0.2 mm point distance means fine details smaller than this dimension—intricate jewelry textures, sharp edge transitions, micro-embossing—won’t be fully captured. For props, mechanical parts, and body scanning, this resolution proves more than adequate. For jewelers or those needing to capture extremely fine surface detail, it represents a ceiling.
Accuracy: Shining 3D states approximately 0.1 mm point accuracy. This number requires context to mean anything useful. Point accuracy describes how precisely the scanner can determine a single point’s position in space. It doesn’t account for drift, alignment errors, or cumulative inaccuracies that accumulate across larger scans. We’ll explore this distinction in depth later, but understand that 0.1 mm point accuracy doesn’t guarantee 0.1 mm accuracy across a full-body scan or large object.
Scan Speed: Up to 14 frames per second sounds impressive, and when everything works optimally, it enables smooth tracking even when scanning moving subjects or handheld objects. However, this framerate depends entirely on your computer’s ability to process incoming data in real-time. An underpowered GPU creates a bottleneck that drops this framerate significantly, leading to choppy tracking and frequent loss of alignment.
Texture Capture: The built-in RGB camera captures color data simultaneously with geometry. This dual-capture approach enables photorealistic full-color models essential for applications like character creation, cosplay reference, or any scenario where surface appearance matters as much as shape.
The System Bottleneck: Understanding Computer Requirements
Here’s where many buyers encounter their first surprise: the Einstar’s performance depends as much on your computer as on the scanner itself. Shining 3D recommends an NVIDIA RTX 3060 or better GPU, and this isn’t conservative marketing speak—it’s a genuine requirement for smooth operation.
⚠️ MINIMUM (frustrating)
- ❌ GPU: GTX 1050
- ❌ VRAM: 4GB
- ❌ RAM: 16GB
- ❌ Choppy tracking
- ❌ Frequent frame drops
✅ RECOMMENDED (smooth)
- ✔ GPU: NVIDIA RTX 3060+
- ✔ VRAM: 6GB+ (8GB ideal)
- ✔ RAM: 32GB
- ✔ Full 14 fps real-time
- ✔ No thermal throttling
GPU Requirements: The scanner streams depth data at high framerates that must be processed in real-time to generate point clouds, perform alignment calculations, and update preview meshes. This computation happens primarily on the graphics card. A GPU below the recommended specification doesn’t prevent scanning entirely, but it creates noticeable issues: framerate drops that make tracking choppy, longer processing times between scanning modes, and reduced preview quality that makes it harder to assess scan completion.
VRAM Matters: Graphics memory capacity becomes critical for larger scans. A helmet scan might work fine on 6GB of VRAM. A full-body scan or large furniture piece can exceed this, forcing the system to swap data to slower system RAM and degrading performance.
CPU and RAM: While the GPU handles the heavy lifting, CPU performance affects mesh processing, export operations, and multi-tasking ability. Sixteen gigabytes of RAM represents a practical minimum; 32GB provides comfortable headroom for complex scans.
The Hidden Cost: This system requirement represents a hidden ownership cost that buyers must factor into their decision. If you’re upgrading from a laptop with integrated graphics or a desktop with an older GPU, the computer upgrade cost can match or exceed the scanner’s price. Many gaming laptops marketed as powerful struggle with sustained 3D scanning workloads due to thermal throttling or insufficient VRAM.
📌 Official recommended config (from Shining 3D): Win10/11 64-bit, NVIDIA GTX1060+, VRAM ≥6GB, i7-11800H, RAM ≥32GB. For Mac: Apple Silicon M1 Pro or higher, 32GB RAM, macOS Ventura 13+.
Unboxing & Build Quality: First Impressions
The Einstar arrives in protective foam packaging with everything needed to start scanning: the scanner unit itself, USB cable, calibration board, and basic accessories. The scanner feels solidly constructed without excessive weight—comfortable for extended handheld sessions but substantial enough to feel professional rather than toy-like.

Ergonomics favor right-handed operation, with the grip positioned for natural wrist angles during typical scanning motions. The cable attachment point uses a secure connector that won’t accidentally disconnect mid-scan, though the cable itself requires care—this is a working tool, not a device you’ll carelessly toss around.
Active cooling keeps the scanner within operating temperature, but it’s not silent. The internal fan produces noticeable noise during operation, not loud enough to prevent conversation but clearly audible in quiet environments. This matters for professional settings where you’re scanning clients or subjects who might find constant fan noise distracting.
The build quality overall suggests a prosumer tool: well-made enough for regular use and moderate workshop conditions, but not ruggedized for harsh field deployment or extreme environments.
Setup & Software Experience: EXScan in Practice
The Einstar operates through Shining 3D’s EXScan software, which handles everything from live scanning to mesh processing and export. Understanding this software environment matters because you’ll spend significant time interacting with it.
Interface and Workflow
EXScan presents a relatively straightforward interface organized around the scanning workflow: setup, capture, process, export. The learning curve isn’t steep—someone familiar with 3D concepts can start producing usable scans within an hour of first opening the software. However, mastering the nuances that separate adequate scans from excellent ones requires experimentation and practice.
The software offers multiple tracking modes. Feature tracking analyzes geometric details to maintain alignment as you move around the object. This works well for objects with sufficient surface variation but struggles with smooth, featureless surfaces. Marker tracking uses reflective stickers placed on or around the object to provide reference points for alignment. Markers dramatically improve tracking reliability for challenging subjects but require setup time and can’t always be placed directly on valuable or delicate items.
💡 PRO TIP: Global Markers Alignment
For large or featureless objects, use reflective markers every 10-15cm. This stabilizes tracking, reduces drift, and improves alignment accuracy dramatically. The Einstar’s marker tracking is one of its strongest features.
Real-Time Preview and Feedback
During scanning, EXScan displays a real-time preview showing captured geometry. This preview serves multiple purposes: confirming the scanner maintains tracking, identifying areas that need additional coverage, and assessing when you’ve captured sufficient data. The preview quality depends heavily on GPU performance—underpowered systems show lower-resolution previews that make quality assessment more difficult.
Color-coded feedback indicates tracking confidence. Green shows solid tracking, yellow suggests marginal alignment, and red means tracking loss. Learning to read these indicators and respond appropriately—slowing movement, adding markers, adjusting lighting—separates successful scanning sessions from frustrating ones.
Mesh Generation and Processing
After completing the scan, EXScan processes raw point cloud data into a usable mesh. This stage offers various quality and resolution settings. Higher quality settings produce cleaner meshes with better detail preservation but require longer processing time. Lower settings generate results quickly but may sacrifice fine detail or introduce more noise.
The mesh editing tools within EXScan handle basic cleanup: removing unwanted geometry, filling small holes, smoothing noise. For simple scans, these built-in tools suffice. Complex projects typically require exporting to dedicated mesh editing software like Meshmixer, MeshLab, or Blender for advanced cleanup.
Export Formats and Compatibility
EXScan exports to standard formats including STL, OBJ, and PLY, ensuring compatibility with virtually any downstream application—3D printing slicers, CAD programs, game engines, or rendering software. The export process allows control over polygon count and optimization, though understanding these settings requires some 3D knowledge to balance file size against detail preservation.
PC Compatibility: Theory vs. Reality
The gap between minimum and recommended specifications reveals itself during actual use. A system meeting minimum requirements technically runs the software, but the experience proves frustrating: low framerates make smooth tracking difficult, processing takes noticeably longer, and preview quality diminishes.
Meeting or exceeding recommended specifications transforms the experience. Scanning becomes fluid, tracking locks reliably, previews show sufficient detail to assess coverage, and processing completes in reasonable timeframes. This isn’t just about convenience—better hardware directly improves scan quality by enabling higher framerates and better tracking.
Real-World Scanning Performance: From Small Parts to Full Bodies
Specifications and software features matter only as much as they deliver practical results. Testing the Einstar across various object types reveals both capabilities and limitations.
Small Objects: Mechanical Parts and Props
Scanning smaller objects—mechanical components between 5 and 30 centimeters—represents one of the Einstar’s strengths. At close range with appropriate lighting, the scanner captures solid geometric detail. A plastic enclosure shows crisp edge definition. A mechanical bracket reveals mounting holes and surface features clearly. A 3D printed prop captures layer lines and surface texture.
Detail fidelity reaches the limits of the 0.2 mm point distance specification. Fine features like shallow embossing, subtle surface transitions, or extremely thin elements at the edge of this resolution threshold show up adequately but not perfectly. This proves sufficient for reverse engineering, creating duplicates for props, or generating printable models of existing objects.
Edge sharpness presents mixed results. Clean geometric edges—90-degree corners, distinct transitions—generally capture well. Extremely sharp edges or thin protruding features sometimes show slight rounding or thickness increase, a common characteristic of structured light scanning across this price range.
Thin feature reconstruction has limits. A thin wall or delicate protrusion approaches the practical minimum the scanner can reliably capture. Attempting to scan jewelry chains, wire-frame structures, or objects with extensive thin projections produces incomplete or noisy results.
Medium Objects: Helmets, Tools, and Moderate-Sized Items
Medium objects in the 30 to 60 centimeter range represent the Einstar’s sweet spot. Scanning a motorcycle helmet, for instance, demonstrates the scanner working optimally. The curved surfaces track smoothly. The visor area requires careful technique due to transparency and reflectivity, but the overall helmet geometry captures cleanly. Vents, edges, and mounting points show good detail.
Tracking stability at this scale proves generally reliable when using appropriate techniques. Maintaining steady movement speed, ensuring adequate lighting, and adding markers when scanning featureless areas prevents tracking loss. When tracking does falter—perhaps from moving too quickly or temporarily obscuring geometric features—the software usually recovers if you slow down and revisit the problematic area.
Recovery after tracking loss varies. Sometimes the scanner reacquires alignment seamlessly. Other times, particularly if you’ve moved significantly or rotated the object substantially, manual realignment becomes necessary. This interrupts workflow but doesn’t typically ruin the scan if you address it promptly.
Large Objects: Body Scans and Furniture
Larger scans test the scanner’s limits and reveal where workflow discipline becomes essential. Full-body scanning—a common use case for costume creation and character modeling—pushes against several constraints.
Drift Behavior: The volumetric accuracy formula mentioned earlier becomes critically relevant. Each alignment between frames introduces tiny errors. Over hundreds of frames required for a full-body scan, these accumulate into noticeable drift. A person’s actual height might measure 175 centimeters, but the scan could measure 174 or 176 centimeters depending on accumulated alignment errors.
Repositioning Workflow: Large objects often require scanning from multiple positions or angles that the scanner can’t reach in a single pass. Each repositioning introduces alignment challenges. The software can usually merge multiple scanning passes using markers or overlapping geometry, but the seams sometimes require manual cleanup.
Scan Time vs. Quality Trade-off: A quick body scan might take three to five minutes but produce noticeable gaps or areas with insufficient coverage. A thorough scan ensuring complete coverage from all angles might take fifteen to twenty minutes. Subjects must remain relatively still throughout, which becomes uncomfortable during longer sessions.
Furniture and similarly large static objects scan more reliably than bodies since movement isn’t an issue, but drift still accumulates. Scanning a chair from all angles to capture complete geometry requires careful technique to minimize cumulative error.
Ready to capture detailed scans? The Einstar handles everything from tiny mechanical parts to full-body scans.
Geometry vs. Texture: Understanding the Complete Picture
The Einstar captures both shape and color, but these two aspects perform at different levels.
Geometry Quality: The Scanner’s Primary Strength
The geometry capture represents the Einstar’s strongest performance area. Point cloud density at recommended settings produces meshes with smooth surfaces and good detail preservation. Curved surfaces show as curves rather than faceted approximations. Features like screw holes, edge chamfers, and surface transitions capture distinctly.
Mesh smoothness benefits from the relatively high point density, though some noise inevitably appears. The amount of noise depends on surface properties, lighting conditions, and movement steadiness. Flat uniform surfaces tend to show minimal noise. Complex organic surfaces with intricate detail may show more noise that requires filtering during post-processing.
Noise filtering in EXScan offers several algorithms. Conservative filtering preserves maximum detail but leaves more noise. Aggressive filtering produces cleaner surfaces but can soften fine details. Finding the right balance requires understanding your intended use—a model for visual reference can tolerate more noise than one destined for machining.
Texture and RGB Performance: Usable But Not Exceptional
The built-in RGB camera captures color data that maps onto the geometry. The results prove functional for many applications but don’t achieve the photographic quality some newer 2026 scanners deliver.
Realistic or Muddy? Texture quality falls into the “usable” category. Colors capture reasonably accurately under good lighting, though they often appear slightly less vibrant than reality. Fine texture detail—fabric weave, skin pores, subtle surface patterns—shows up but not with crisp clarity. The results work well for getting color information onto models but shouldn’t be mistaken for high-resolution texture photography.
Skin Tone Reproduction: Body scanning shows this limitation clearly. Skin tones generally capture within a reasonable range, but nuance disappears. The subtle color variations, highlights, and shadows that make skin appear natural in photographs don’t translate fully. This matters less for costume reference or character blocking but more for high-fidelity digital doubles.
Fabric Detail Capture: Clothing texture captures adequately to show fabric type and general appearance. A knit sweater looks like knit fabric. Denim shows its characteristic texture. However, fine details like individual thread crossings, subtle pattern variations, or delicate embroidery don’t capture with precision.
How It Compares to Modern 2026 Budget Scanners
The competitive landscape in 2026 includes several scanners in similar price ranges. Some newer wireless units deliver comparable or slightly better geometry quality. Where the Einstar maintains advantage: sustained scanning sessions without battery concerns, consistent performance without thermal throttling, and the raw processing power available from a dedicated GPU.
⚖️ Einstar vs. Typical 2026 Wireless Competitor
*Based on aggregated user feedback and 2026 comparative testing.
Some 2026 competitors deliver noticeably better texture capture, leveraging higher-resolution cameras or more sophisticated color calibration. If your workflow depends heavily on photorealistic color—character modeling for games, high-fidelity archival scanning, applications where appearance matters as much as dimensions—investigating those alternatives makes sense.
For applications where geometry quality matters most and texture serves a secondary supporting role, the Einstar’s performance remains competitive and sufficient.
Scanning Environment: Where the Einstar Works Best
The Einstar’s infrared structured light technology creates specific environmental preferences and limitations.
Indoor Performance: The Optimal Environment
Controlled indoor environments let the Einstar perform optimally. Consistent lighting without harsh shadows or extreme brightness variations provides ideal conditions. The scanner works under both natural indoor light and artificial illumination, though avoiding direct bright spotlights on the scanning area prevents overexposure issues.
Room temperature environments prevent thermal issues. While the scanner handles normal room temperature variations fine, extremely cold or hot environments could affect performance or comfort during extended sessions.
Stable positioning helps achieve best results. Scanning objects on a turntable while holding the scanner steady produces cleaner results than handheld scanning of handheld objects, simply by eliminating one variable source of movement.
Outdoor and Sunlight Challenges: Understanding the Limitations
Taking the Einstar outdoors reveals the fundamental constraint of infrared structured light technology: sunlight contains substantial infrared radiation that overwhelms the scanner’s sensors.
Direct Sunlight: Attempting to scan in direct sunlight produces unusable results. The sensor receives so much infrared noise from sunlight that the projected structured light pattern becomes invisible, making depth sensing impossible. This isn’t a defect—it’s physics. Any IR-based scanner faces this limitation.
Indirect Outdoor Light: Heavily shaded outdoor areas or overcast conditions sometimes allow scanning, though performance remains marginal. Depth data quality decreases, tracking becomes less reliable, and results show more noise than indoor scans.
Practical Workarounds: If you absolutely must scan something that can’t be brought indoors, creating artificial shade helps. A pop-up tent, tarp, or other light-blocking structure that eliminates direct sunlight might enable usable scanning, though results still won’t match indoor quality.
This environmental limitation matters for use case evaluation. If your scanning needs frequently involve outdoor objects that can’t be relocated—architectural details, large installations, field documentation—an IR-based scanner simply isn’t appropriate. Alternative technologies like photogrammetry or laser scanning handle outdoor conditions better.
🌤️ IMPORTANT: The Einstar is an indoor scanner. Direct sunlight overwhelms its IR sensors. For outdoor scanning, create shade or use alternate technologies.
Accuracy in Practice: What Those Numbers Really Mean
Understanding accuracy specifications requires distinguishing between different types of precision and how they apply in real-world use.
Manufacturer Claims vs. Practical Reality
Shining 3D states approximately 0.1 mm point accuracy for the Einstar. This specification describes single-point precision—how accurately the scanner can determine one point’s position in space under ideal conditions. It represents best-case performance, not guaranteed accuracy across all conditions and object types.
Real-world accuracy depends on numerous factors: scanning distance, surface properties, lighting conditions, movement steadiness, and processing settings. Under optimal conditions with a cooperative object, the Einstar achieves accuracy close to specifications. Under challenging conditions—poor surface properties, suboptimal lighting, less-than-steady scanning technique—accuracy degrades.
Volumetric Accuracy: The Full Picture
Single-point accuracy only tells part of the story. Volumetric accuracy describes how accurately the scanner captures an entire object’s dimensions, accounting for all the cumulative errors that accumulate during scanning.
The relationship can be expressed as:
Where:
- E_total represents total volumetric accuracy across the entire scan
- E_point represents single-point accuracy (approximately 0.1 mm for the Einstar)
- L represents object length in meters
- E_drift represents alignment drift per meter as the scanner tracks across the object
This formula reveals why scanning larger objects introduces more cumulative error. Each frame-to-frame alignment introduces tiny errors. Over hundreds or thousands of frames required for large objects, these accumulate.
Practical Implications:
For small objects (under 20 cm), volumetric accuracy approaches point accuracy since drift has minimal distance to accumulate. Scanning a small mechanical part produces dimensions very close to actual measurements.
For medium objects (20-60 cm), some drift accumulation occurs but usually remains within acceptable tolerances for most applications. A helmet scan might show 0.5-1 mm variation from actual dimensions.
For large objects (over 60 cm), drift becomes increasingly significant. A full-body scan might accumulate several millimeters of error. This remains acceptable for costume reference, character modeling, or applications where perfect dimensional accuracy isn’t critical. It’s insufficient for precision metrology or applications requiring sub-millimeter accuracy across large objects.
Why This Matters for Different Applications
Reverse Engineering: Most mechanical parts small enough for desktop 3D printing fall within the scanner’s accurate range. Captured dimensions prove sufficient for creating functional reproductions.
3D Printing Prosthetics or Wearables: Body scanning for custom-fitted items works adequately if you account for slight dimensional variations and build in appropriate tolerances. A helmet liner or mask base captures sufficiently for custom fitting.
Quality Inspection: The Einstar doesn’t replace precision metrology equipment. For dimensional inspection requiring verified accuracy across large components, professional metrology scanners costing tens of thousands more remain necessary.
Artistic and Creative Work: Accuracy variations that matter for engineering often prove completely irrelevant for artistic applications. If you’re creating a 3D character based on a body scan, whether the model measures 174 or 175 cm makes no practical difference.
Workflow for 3D Printing and Reverse Engineering
The path from scan to final output varies by application but follows general patterns.
Cleaning and Simplifying Meshes
Raw scans almost always require cleanup. Even under ideal conditions, scans contain artifacts: disconnected floating points from noise, irregular holes from incomplete coverage, rough surfaces requiring smoothing.
Basic cleanup happens in EXScan using built-in tools. More extensive editing typically moves to specialized mesh editing software. Meshmixer offers excellent free tools for mesh repair and simplification. Blender provides comprehensive mesh editing in a complete 3D package. MeshLab handles advanced mesh processing and repair algorithms.
Common cleanup steps include: removing unwanted background geometry, filling holes, smoothing noise while preserving intended detail, fixing mesh errors like non-manifold edges, and optimizing polygon count for the intended use.
Exporting to CAD
Reverse engineering workflows often need to convert scans into parametric CAD models. This process isn’t automatic—organic scanned geometry doesn’t directly translate to parametric features.
The workflow typically involves: importing the mesh into CAD software (SolidWorks, Fusion 360, etc.), using mesh data as reference, manually recreating geometry with parametric features, and verifying dimensions against the scan.
Some advanced software offers mesh-to-CAD conversion features that semi-automate this process, though significant manual refinement usually remains necessary.
Preparing Scans for Slicing
For direct 3D printing without CAD conversion, preparation focuses on ensuring mesh integrity. Slicing software requires “watertight” meshes—closed volumes without holes or errors.
Mesh repair tools identify and fix common issues: gaps in surfaces, inverted normals, intersecting geometry. Most slicing software includes basic repair, but addressing issues in dedicated mesh editing software before import produces better results.
Orientation and support generation then proceed normally, treating the scanned mesh like any other 3D printing model.
Typical Scan-to-Print Timeline
Quick projects: Scan a simple object (15 minutes), cleanup and export (30 minutes), slice and print. Total time from scan to print starting: under an hour.
Complex projects: Scan intricate object with multiple passes (45 minutes), extensive cleanup and mesh optimization (2-3 hours), test print and refinement. Total timeline: several hours to days depending on complexity and quality requirements.
The scanner represents one step in a larger workflow. Time investment in scanning itself often proves less than time spent in mesh cleanup, especially when learning proper technique.
📋 Practical Tips to Reduce Drift and Noise
- Use markers liberally: Reflective markers dramatically improve tracking reliability.
- Maintain steady movement: Smooth, consistent scanning speed produces better results.
- Scan in sections for large objects: Break large scans into overlapping sections that merge later.
- Optimize lighting: Consistent, diffuse lighting without harsh shadows provides ideal conditions.
- Clean surfaces when possible: Dust, fingerprints, and surface contaminants affect scanning quality.
Strengths and Weaknesses: The 2026 Reality Check
Every scanner involves trade-offs. Understanding what the Einstar does well and where it struggles enables informed purchasing decisions.
✅ STRENGTHS
- Strong Price-to-Performance Ratio: Professional-grade geometry without industrial price tags.
- Reliable Geometry Capture: Proven technology, consistent results with proper technique.
- Good Entry Point for Structured Light: Approachable learning curve for beginners.
- Eye-Safe Face and Body Scanning: Infrared projection, comfortable for subjects.
- Sustained Performance: No battery anxiety, no thermal throttling during long sessions.
⚠️ LIMITATIONS
- Requires Powerful GPU: Hidden cost if PC upgrade needed.
- Not Wireless: Cable tethering limits mobility.
- Sunlight Sensitivity: Poor outdoor performance.
- Shiny and Black Surface Challenges: May require matting spray.
- Texture Quality Limitations: Color capture is usable but not exceptional.
- Learning Curve for Optimal Results: Technique matters.
Who Should Buy the Einstar Handheld 3D Scanner?
The right scanner depends entirely on your specific needs, existing resources, and workflow priorities.
Ideal Candidates
3D Printing Enthusiasts: If you already own a capable computer and want to scan objects for reproduction or modification before printing, the Einstar delivers excellent value. The geometry quality supports functional part reproduction, and the workflow integrates naturally with typical 3D printing processes.
Prop and Cosplay Creators: Capturing armor pieces, helmets, weapons, and other costume elements works excellently. Body scanning for custom-fitted pieces provides invaluable reference. The combination of geometry and color data supports both structural fabrication and painting reference.
Entry-Level Reverse Engineering: Small businesses or individuals doing occasional reverse engineering work find the Einstar cost-effective. While it doesn’t replace professional metrology equipment, it handles many common reverse engineering tasks adequately.
Educational Institutions: Schools teaching 3D scanning, digital fabrication, or related subjects benefit from the Einstar’s balance of capability and approachability. Students learn professional scanning concepts on equipment that functions like industrial scanners without the extreme cost.
Makers and Fabricators: General workshop use—capturing existing parts, creating repair components, documenting projects—finds the scanner invaluable. It becomes another tool in the creative toolkit.
Not Ideal For
Industrial Metrology Applications: Quality inspection, precision measurement, and applications requiring verified accuracy need professional metrology equipment with proper calibration and documentation.
Fully Mobile Field Scanning: If your workflow demands scanning in unpredictable locations without access to workstations, wireless alternatives make more sense despite their performance limitations.
Ultra-Fine Jewelry Scanning: The resolution and point distance limitations make the Einstar inappropriate for detailed jewelry work. Specialized jewelry scanners with higher resolution serve this market.
Professional Studios Prioritizing Texture Quality: High-end character scanning for film or AAA games demands texture quality beyond the Einstar’s capabilities. Professional scanner arrays with multiple high-resolution cameras deliver the photographic texture quality these applications require.
Users Without Appropriate Computers: If upgrading your computer to meet requirements isn’t feasible, the scanner’s capabilities remain inaccessible. In this situation, waiting until you can invest in both scanner and computer makes more sense than buying a scanner you can’t fully utilize.
Price and Value in 2026: The Complete Ownership Picture
Understanding true ownership cost requires looking beyond the scanner’s purchase price.
Typical Price Range
The Einstar generally retails in the range of approximately $1000-$1500 depending on promotional periods, bundle configurations, and regional variations. This positions it in the accessible-but-serious tier—substantially more expensive than smartphone-based scanning solutions, significantly less expensive than professional industrial scanners.
Occasional sales and promotional bundles can reduce effective cost, sometimes including software upgrades, additional accessories, or extended support. Monitoring for these opportunities makes sense if purchase timing allows flexibility.
💰 Current Best Price: Check Amazon
Amazon frequently offers bundles and fast Prime shipping.
Official Einstar store also available.
Cost of Required PC Upgrade
For users whose existing computers don’t meet requirements, the upgrade cost becomes significant. A graphics card meeting recommendations might cost anywhere from several hundred to over a thousand dollars depending on market conditions and availability. Factor in potential need for power supply upgrades, additional RAM, or even complete system replacement, and computer costs potentially equal or exceed scanner cost.
Buyers should honestly assess existing hardware capabilities before committing. Running the scanner on marginal hardware produces frustrating experiences that undermine the investment’s value.
Long-Term Value vs. Wireless Alternatives
Comparing long-term value requires considering workflow fit. A wireless scanner costing similar amounts might seem attractive, but if its processing limitations, battery life, or thermal performance constrain your specific applications, the apparent convenience doesn’t deliver practical value.
Conversely, if the tethered workflow genuinely limits your work—perhaps you scan in multiple locations, need truly portable operation, or work in environments where computer setup proves impractical—a wireless scanner’s limitations might matter less than its mobility advantages.
The Einstar’s value proposition rests on prioritizing raw performance over portability. Users whose workflows align with this priority find excellent value. Those who need mobility more than maximum performance find better value elsewhere.
Ownership Cost Breakdown
Consider the complete five-year ownership picture:
Initial investment: Scanner purchase plus any necessary computer upgrades
Software: EXScan comes included; advanced mesh editing software ranges from free (Blender, MeshLab) to subscription-based (professional CAD packages)
Accessories: Reflective markers, calibration equipment maintenance, potential cable replacement if damaged
Training: Time investment in learning proper technique—while not monetary cost, represents real investment in making the tool productive
Ongoing value: Years of productive scanning across numerous projects, with capabilities that don’t degrade if properly maintained
Users who fully utilize the scanner across many projects amortize costs across substantial value creation. Occasional users might find cost-per-scan less favorable.
Final Verdict: Is the Einstar Still Worth It in 2026?
The Shining 3D Einstar Handheld 3D Scanner occupies a specific niche that hasn’t disappeared despite wireless scanning’s rise. It remains relevant for straightforward reasons: some workflows genuinely benefit from sustained processing power more than untethered mobility.
Not the Most Convenient Scanner in 2026: If you value convenience above all else, wireless alternatives deliver undeniable advantages. Grab-and-go portability, tablet-based operation, and freedom from cable tethering create workflow simplicity that the Einstar can’t match.
Still One of the Most Capable Budget Tethered Structured Light Systems: Within its category, the Einstar delivers strong performance. The geometry quality, sustained framerate capability, and reliable tracking place it competitively among similar tethered scanners. For users committed to PC-based workflows, it represents solid value.
Excellent Geometry for the Price: The scanner’s primary strength—geometric capture quality—justifies the investment for geometry-focused applications. Reverse engineering, mechanical scanning, and dimensional capture work very well. You get professional-grade geometry without professional price tags.
Texture Is Usable But Not Class-Leading: The RGB capture proves adequate for many applications but doesn’t excel. If photorealistic color matters critically to your work, exploring alternatives makes sense. If texture serves a supporting role to primary geometric data, the Einstar’s texture quality suffices.
Best Suited for Users Who Prioritize Compute Power Over Mobility: This scanner makes most sense for workshop environments with capable workstations, users who scan primarily in controlled locations, and workflows where the quality enabled by dedicated GPU processing outweighs portability constraints.
Making the Decision
Ask yourself these questions:
Do you have or can you afford a computer meeting recommended specifications? If not, budget for the complete system, not just the scanner.
Does your workflow primarily happen in controlled indoor environments with access to your workstation? If yes, tethering matters less.
Do you prioritize maximum geometry quality within budget constraints over texture quality or wireless convenience? If yes, the Einstar aligns with your priorities.
Are your scanning subjects typically indoor objects, mechanical parts, props, or similar items that fit the scanner’s sweet spot? If yes, you’ll maximize the tool’s capabilities.
Do you have time to develop proper scanning technique and learn the workflow? If yes, you’ll achieve results that justify the investment.
If these questions mostly point toward “yes,” the Einstar deserves serious consideration. If several receive “no” answers, exploring alternatives—either wireless scanners for mobility or different technologies for outdoor work—makes more sense.
The Einstar isn’t the only scanner worth considering in 2026, but for the right users with appropriate expectations and supporting infrastructure, it remains a capable tool that delivers professional-quality geometric scanning at accessible price points. It represents the reality that even in an increasingly wireless world, tethered technology still offers genuine advantages when raw performance matters more than cable-free convenience.
🏁 Final Verdict: Buy or Skip?
If geometry quality is your priority and you have a good PC — BUY IT. The Einstar delivers professional-grade scans at a fraction of industrial cost.
✅ Free returns • 1-year warranty • 4.7/5 stars from 500+ reviews
📘 Still researching? Get the 2026 Buyer’s Guide
Our free 25-page ebook compares Einstar vs Revopoint vs Creality — with real scan samples.
No spam, unsubscribe anytime.
*This review contains affiliate links. We may earn a commission if you purchase through Amazon or the official store. Last updated February 2026.
