

Would you like to buy a Uniz Slash Plus 3D printer? Before you do so, read our review to find out what to expect.
AVAILABLE ON TOP3DSHOP
Not so long ago, we received a new Uniz Slash Plus 3D printer in our test lab.
Slash Plus has proven itself in different industries, especially dentistry. Currently, the printer is one of the fastest non-industrial resin printers on the market. The printer successfully combines high speed with excellent accuracy. Moreover, it has a large build area.
About Uniz

UNIZ TECHNOLOGY LLC was founded in San Diego, California in 2014. The company is engaged in the development of 3D equipment and resin, both for general-purpose and industrial focused (engineering, dental and jewelry).
In 2016, Uniz posted its first project on Kickstarter to develop the first printer in the Slash line. The project was supported by 552 sponsors and $571,926 was collected. After that, the series was replaced with other improved printers, one of which we will talk about today.
Uniz Slash Plus Review
In this Uniz Slash Plus review, we’ll look at the features, specs, performance, and quality of print of the 3D printer.
Printing Technology
When developing the Slash series of resin printers, Uniz pursued the goal of achieving high speed of printing models without sacrificing accuracy. The printers also needed to have a large build area without being expensive. This result was achieved by LCD stereolithography technology with a water cooling system.
There are many reviews on the Internet that describe this technology, so we will briefly write the main principle.
FDM and SLA are significantly inferior in terms of printing speeds to DLP and LCD technologies. With FDM and SLA, the construction occurs pointwise but with DLP and LCD, the entire layer is illuminated simultaneously. However, with DLP and LCD printing, speed limits still remain.
If the speed is increased, a large amount of heat is generated during the resinization process. And when printing a large object, the temperature rises significantly and the light may damage the model.
The potential of DLP printers is limited by the structure of the optical path, which must remain unobstructed. Therefore, it is not possible to remove a certain amount of heat from the surface.
Slash Plus 3D printer uses contact exposure method, which involves placing the water cooling system as close to the LCD panel as possible. Illumination is carried out by an LED matrix. Cooling neutralizes large amounts of heat generated and enables large objects to be printed at high speed without problems.
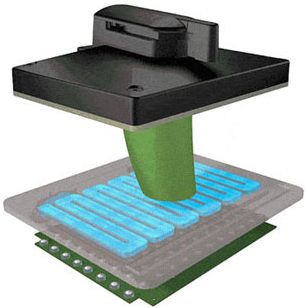
As a result, the Slash Plus can print at 1,000 cc/ hour, which is comparable to industrial machines.
For comparison, check the speed of printing the same models on Slash + and Formlabs 2:
| Specifications | UNIZ Slash Plus | Formlabs Form2 |
|---|---|---|
| Plot area | 192 mm * 120 mm * 200 mm Volume 4608 cm³ | 145 mm * 145 mm * 175 mm Volume 3679 cm³ |
| Dental Cast stamp (special dental resin). Layer height 0.05 mm | 6pcs / 1h 28 min | 4pcs / 6h 21 min |
| Ring printing (burned out resin) | 60pcs / 3h 51 min | 55pcs / 11h 22min |
| Layer height 0.025 mm | 180pcs / 12h | 55pcs / 12h |
| Cube printing: 10 * 10 * 10cm | 3h 54min | 39h 18min |
| Layer height: 0.1mm | 256 ml / h | 25.9ml / h |
| Resolution | X-axis: 75 μm Y-axis: 75 μm | 140 μm |
| Z-axis profile | 10 – 300 μm (customizable) | 25 – 300 microns |
We can see that the SLA printing technology of the Formlabs 2 printer lags well behind the LCD-SLA represented by the Slash Plus.
Specifications
| Characteristic | Value |
|---|---|
| Printing technology | LCD stereolithography |
| Body material | reinforced steel, carbon fiber |
| Plot area size | 192 × 120 × 200 mm |
| UV wavelength | 405 nm |
| Material type | resins |
| XY Positioning Accuracy | 75 μm |
| Print accuracy | ± 20μm |
| Z-axis positioning accuracy | 10, 25, 50, 100, 150, 200, 300 microns |
| Working temperature | Recommended 18-28 ° C |
| Print speed | 1000 cc cm / hour, thin-walled 200 mm / hour |
| Connection interface | USB, Wifi, Ethernet |
| Software | UNIZ |
| Minimum computer requirements | Windows 7 or later (64-bit only), Mac OS X 10.7 or later (64-bit only), 16 GB RAM, OpenGL 2.1, discrete graphics |
| Compatibility | iPhone, iPad, Android mobile devices |
| Supported file formats | STL, OBJ, AMF, 3MF, UNIZ |
| power usage | 3A 50 / 60Hz, 240W |
| Weight (without packaging) | 14 kg |
| Dimensions (without packaging) | 350 × 400 × 530 mm |
| Country of Origin | China |
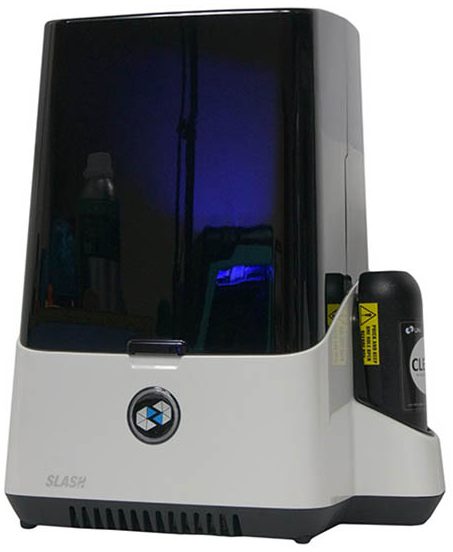
The Slash + has a really huge build area compared to other resins in this price range. It’s build area is 192 x 120 x 200mm.
Moreover, the printer itself is quite compact and weighs only 14 kg.
There is a compartment to the right of the printer to accommodate a container of branded resin.
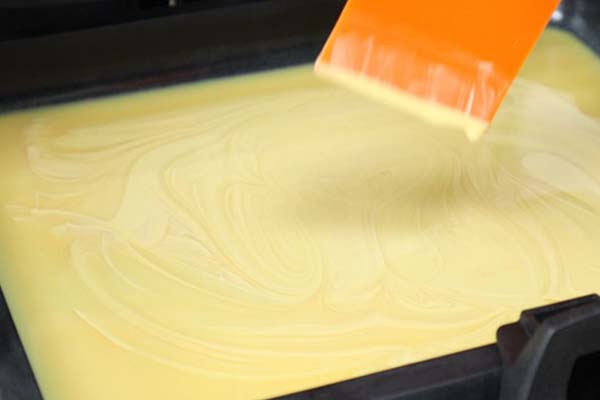
A multilayer film is stretched in the bath, which is designed for 1000 hours of printing (300 thousand layers).

The printer has an IPS WQXGA LCD display with a resolution of 2560 x 1600 (339 pixels per inch), XY accuracy is 75 microns, and Z accuracy is 10 microns.
The printer prints with any resins with an illumination wavelength of 405 nm.
Equipment
The printer is delivered completely assembled. It comes with:
- Wide spatula
- 5 cardboard cards for mixing the resin in the bath
- A piece of sandpaper so that you can sand the surface of the print bed in case of adhesion problems
- Spare air pump with mount and hose (for pumping out resin)
- USB cable for computer connection
- Half a liter of Uniz zABS branded resin
- Empty bottle for cleaning the resin pumping system (must be filled with isopropyl alcohol)
- Wrench, screwdriver, hexagon and awl

The power supply is provided by two identical 24V 10A power supplies that are connected to the printer via a splitter cable.

At the back, next to the power connector, there is an ON/OFF button, a USB port for connecting to a computer, an Ethernet port for connecting to a local network, and a forced fan switch.

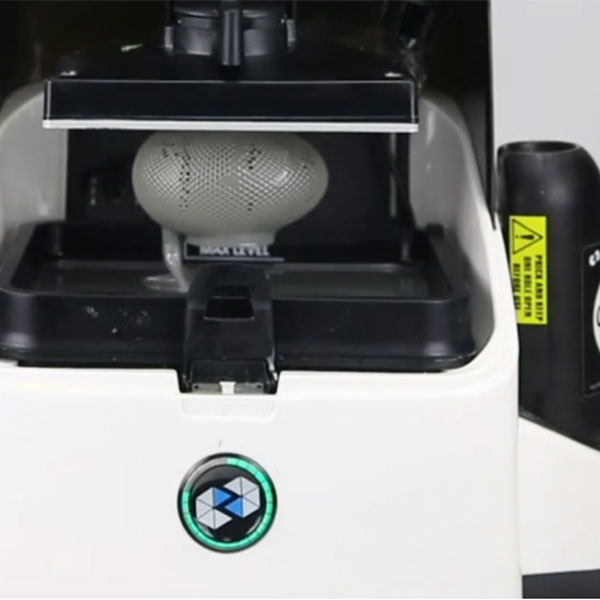
On the front of the printer, there is one large touch-sensitive button with a light indication that displays 5 different states:

To start printing, simply press the button.

The cover is made of dark plastic, which you cannot see anything, and swings up. In previous versions, it was yellow and transparent.
The printing platform has a quick release mount. To remove or fasten it, you just need to turn the handle.

You can start printing in a few steps.
First you need to register on the Uniz website and download the slicer app.
For the initial setup, you need to activate the printer and link it to your account. This can be done via USB, LAN or Wifi connection.

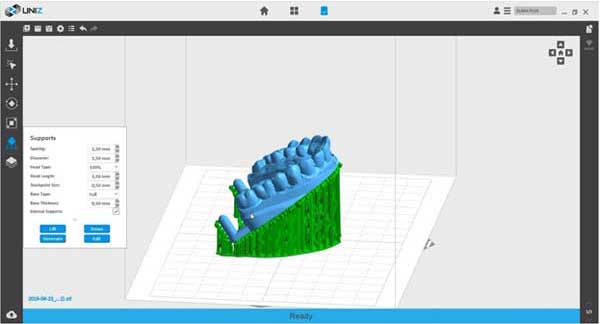
We will not dwell on all the functions of the slicer in detail. It has all the standard features like moving, rotating, resizing and setting supports. For supports, there is a minimum required set of parameters, such as thickness, distance between posts, size of points of contact, angle of allowable overhang, type of backing, and so on.
This is not much, but sufficient for most situations.
If for some reason the Uniz slicer support is not satisfactory, you can always arrange support, for example, in ChituBox and export the prepared model as STL.
To cut the model into layers and load into the printer, you need to use the Uniz slicer. You can also change the layer height and exposure time at different heights, something like the processes in Simplify3D.

More detailed information on all functions and settings is in the official instructions.
Calibration
The Z-axis calibration is not difficult. You have to remove the bath, lower the printing platform by hand to the LCD screen, and slightly twist the screw shaft so that they touch.

After that, in the slicer, click on the Reset Z-axis Zero position button.
Calibrating the Slash Plus 3D printer printer was a little confusing for us.
For example, it is not clear how much the platform should be lowered during a manual calibration. Moreover, it is difficult to determine the degree of adherence of the platform to the screen. Finally, when calibrating directly to the screen, the first layer always turned out too close, Therefore, the print height was about 0.3-0.4 mm less and therefore, the models were very difficult to remove from the platform.
We had to calibrate the platform with 4-5 sheets of paper to get it right. At this calibration, the models’ height was correct and the prints were normally glued to the table. In turn, we could remove them without much difficulty.

If the platform is not parallel to the screen, the calibration procedure becomes more complicated. However, this situation usually does not arise.
A detailed video tutorial on calibration is below.
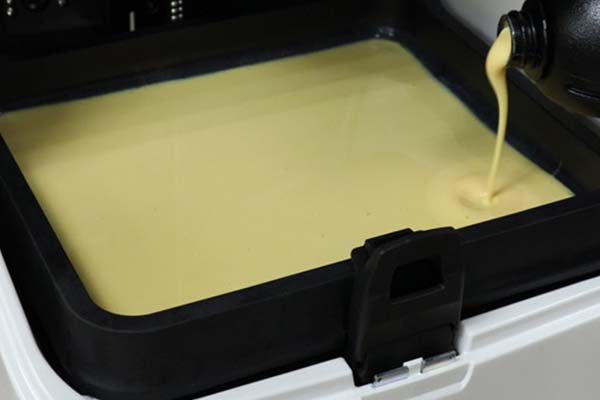
Refueling with Resin
After the Z-axis is calibrated, you can move on to filling the bath with resin. The resin pumping system uses the proprietary Uniz resin.
The resin bottle is specially shaped with side guides. One side of the bottle is flat. However, there is a plate with which the amount of resin remaining must be determined.

There is a screw cap with a hole under the plastic cap, and a rubber stopper under the cap.
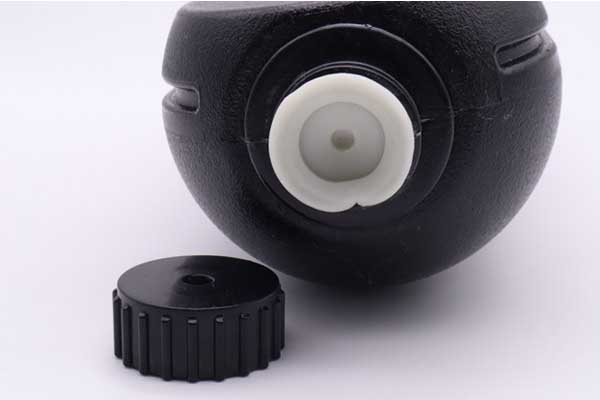
The needle is located in the printer compartment.

The bottle is placed upside down in the compartment, and when inserted, the needle passes through the hole and pierces the rubber stopper. After the bottle is installed, you need to pierce one of the holes in the bottom of the bottle with the awl that comes with the kit.
Air enters through this hole so that the printer can pump the resin out of the bottle unhindered.

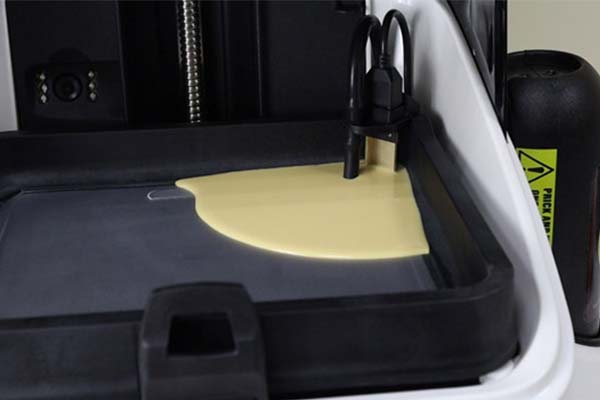
The inside of the printer has a feed tube and resin level sensor on the right. It needs to be attached to the bathroom.

To pump the resin into the bathroom, you need to press the Fill button in the slicer. The pump will turn on and the bath will begin to fill.
To stop the printing, press the button again. The printer is not able to automatically pump up resin to a certain level or add it during printing. To pump the resin back into the bottle, click on the Redraw button.
However, in theory, everything works. However, As you know, the resin must be shaken before use, since some resins are stratified into fractions. When the bottle is installed on the printer, this is not possible.
Moreover, the rubber stopper cannot be used twice. If you remove the bottle to shake it, you will need to change the cap. Therefore, you need a huge supply of these plugs in order to put a new one every time. And only 5 pieces are included with the printer.
The pumping system must be flushed with alcohol whenever you change the material. This adds to the complexity.

It turns out that this whole super-fashionable system only complicates the work with the printer, adds additional risks and increases the preparation time for printing. It’s easier not to use it at all and just pour the resin directly into the bath the old fashioned way.
Another not entirely clear solution is the mechanical limit switch of the Z axis, which is located on top. In our opinion, it would be more logical to put an optical sensor and place it at the bottom. This solution creates some difficulties in using the infrared camera.
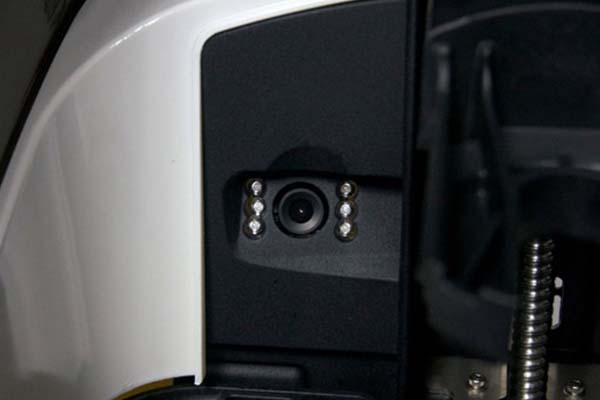
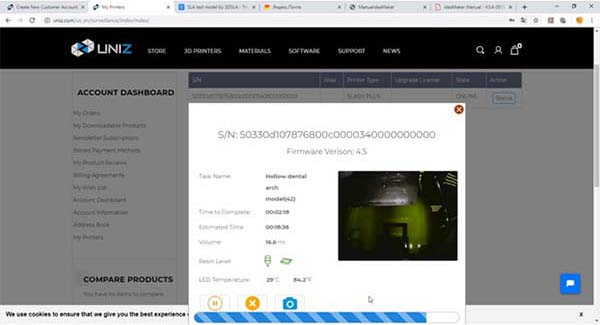
In theory, you can pause the printing, the platform will go up and the camera will take a photo. Therefore, even with the lid closed in the dark, you can see how the printing is going.
However, in our experience, after such a pause, when the platform rises to the top, there is always a strip on the model. The Z-axis cannot return exactly to the same location where printing was stopped.
As a result, two technological solutions in this printer turned out to be very controversial. Fortunately, this is far from the most interesting thing about a printer.
Printing Capabilities
The Slash Plus 3D printer is really very fast. Thanks to a powerful projector and a water-cooled LCD screen, Uniz can expose a 100 micron layer in just 3-5 seconds. Thinner layers are printed even faster. In 9-10 seconds, Uniz can illuminate a layer of 300 microns, which is simply impossible on most LCD printers.
The film on the bathroom is multi-layer and durable.
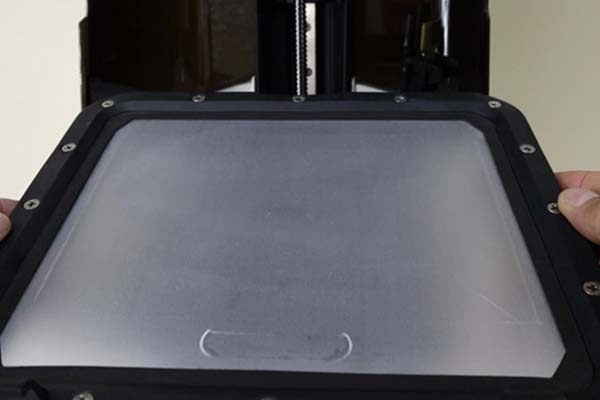
There are only a couple of marks in places that are outside the printable area. One of these tracks appears due to a small protrusion at the back. This element is here for a reason, air is pumped out through the holes in it, and the bathroom film seems to be sucked to the screen. This also contributes to less wear on the film.

Print Quality
Let’s move on to examples of printing.
Since Uniz Slash is primarily aimed at dentists and dental technicians, we printed most of the models with zDental Model Sand resin. The resin is designed for dental models. The main difficulty with using the resin is that it stratifies very quickly into fractions.
If it remains in the bath for literally several hours, it must already be thoroughly mixed. The light yellow pigment falls into a sediment, and a transparent resin remains on top. Because of this property, it is not possible to use the swap system with it.
Otherwise, the resin is very pleasant to use. It does not smell strong, small details are printed well, and it’s easy to process.
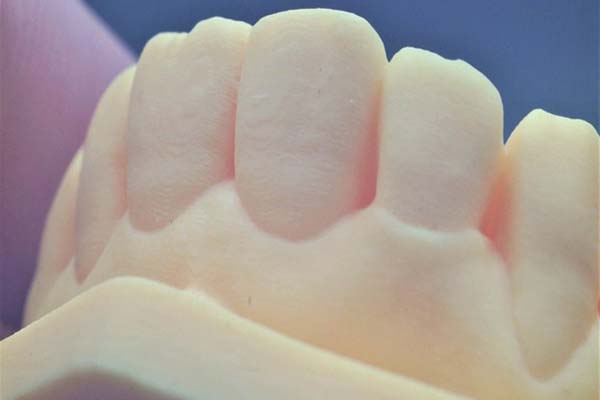
Dental Models
Different resins are used depending on the task. Sometimes, these are Dental Model types of resins. The resins are usually opaque, easy to process, have low shrinkage and are used to print accurate tooth master models. Sometimes, special transparent resins are used to print orthoses and aligners.
Also, in dentistry, burnout resins (Cast or Castable) are often used for printing, for example, clasp dentures and their subsequent casting from metal.
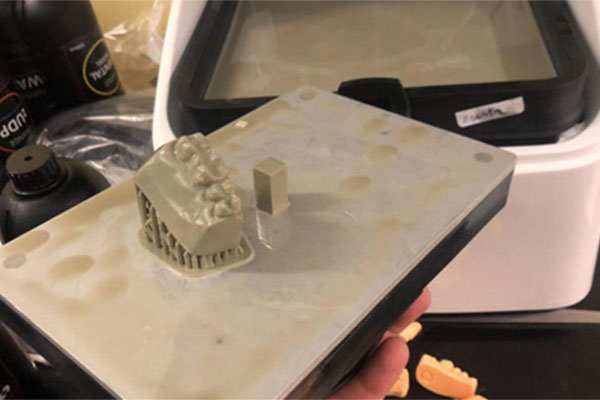
We printed different tooth master models. The first is a 3D scan of the upper jaw. It was printed at an angle and there were many supports on the bottom and inside. The total height of the model turned out to be about 4.5 cm, and it was printed for 2 hours and 20 minutes with a layer of 50 microns.

The quality of the resulting model is not perfect. On flat surfaces, there is slight unevenness in the layers. As it turned out later, the reason for this was a slight backlash in the printing platform. After tightening the bolts of its fastening, the problem was completely solved.
Circles are visible on smooth curves, which are the result of screen pixelation. But considering the print speed, the model came out well.
The following tooth model was taken straight from the Uniz slicer. It has a whole library of ready-made models already cut for certain resins, both paid and free.
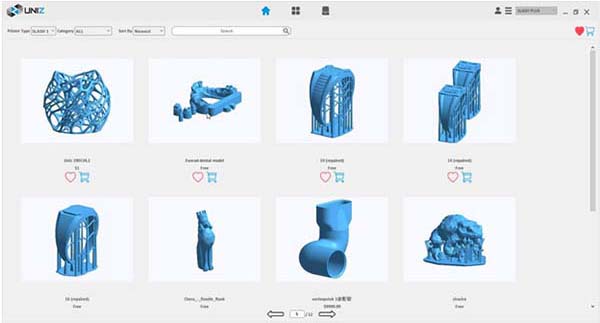
The big disadvantage of these models is that there is no way to change the print settings or orientation of the models. So, for example, these teeth lay flat on the platform and had cavities without air access. Because of this, the model adhered very strongly to the screen film.

In the process, the seal was paused twice to check how things were going. As a result, two stripes remained on the model. Because of them, teeth that were printed separately were difficult to insert into their holes. Although, after several times, they got used and already inserted easily.
On the upper surfaces, the transitions between the layers are quite visible. With the correct orientation of the model on the platform, a better result could be achieved.
The next couple of teeth models turned out much better. After the platform backlash was corrected, the pronounced layering disappeared. Elements that must be inserted into each other are assembled without problems and do not fall out.

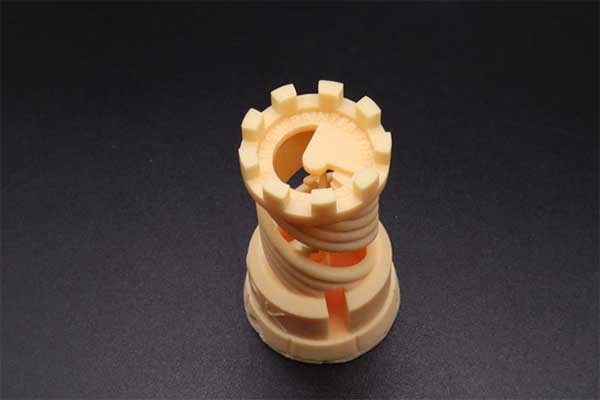
Completing the topic of dentistry, a clasp prosthesis was printed. The model is complex with a bunch of small thin-walled elements requiring support. Of course, clasp dentures need to be printed with burned-out resins. However, ordinary dental resin is also suitable for the test.
In front, the model broke off slightly from the supports, but overall it turned out very well. All complex elements were printed.

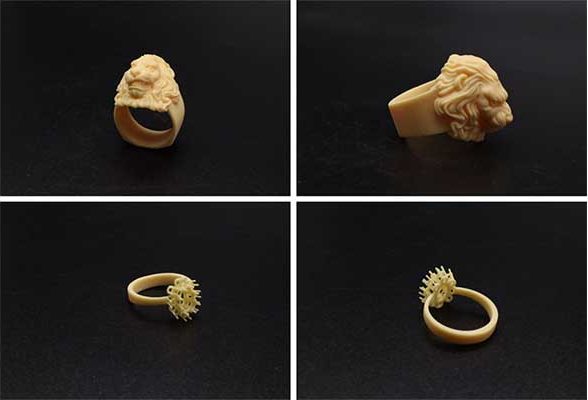
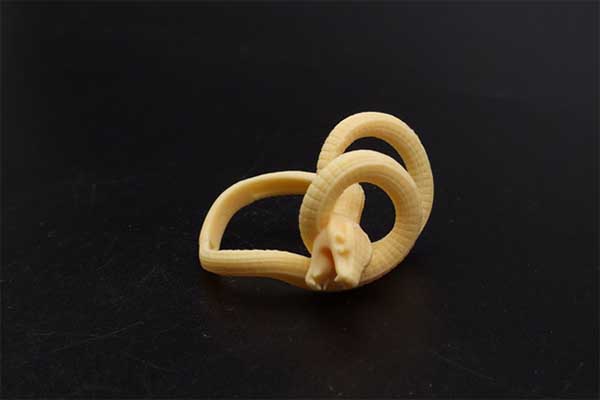
Another area for which SLA printing is often used is jewelry. Special resins are used for them, but again we used a dental one. We printed 5 different rings at once with a layer of 50 microns.

They all turned out great. The detail is great. We were most impressed by the lion ring and the small ring with a hole for the stone.
We also tried ESun Bio-resin. Of course, there are no settings for it in the Uniz slicer. Therefore, average values were used. This is 10-15 seconds for the first layers and 2.5-3 seconds for the rest.

AVAILABLE ON AMAZON
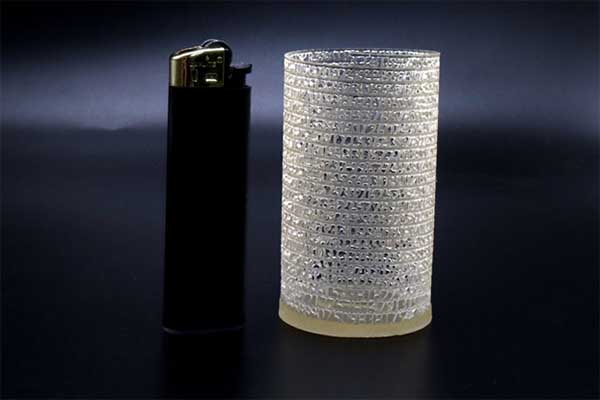
We printed a beautiful lamp without supports.

When printed, this resin is transparent. Unfortunately, after washing in alcohol, it becomes a little dull. In any case, Slash Plus coped with the lamp without problems. 9.5cm high, 0.1mm layer, printing time only 2.5 hours.

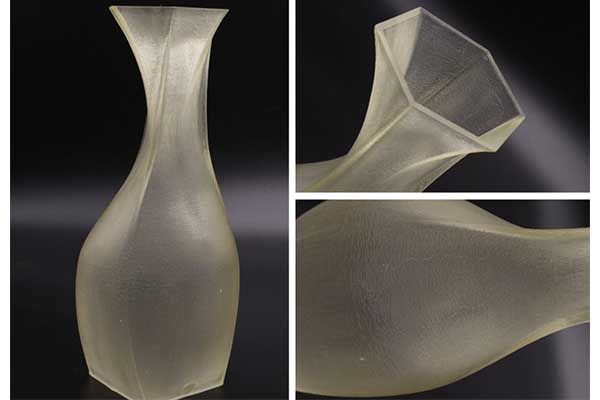
It was very interesting to see if Uniz really can overexpose 0.3mm layers. In haste, a 15-centimeter vase was modeled. At the bottom, we had to make a couple of holes so that the resin could drain normally when passing between layers, for these holes were printed caps.
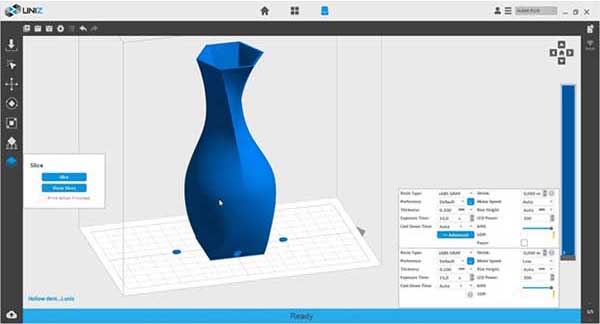
The 15 cm vase was printed in just 2 hours and 20 minutes. Of course, the layers are clearly visible. But for fast printing of technical models, for which appearance is not very important, this mode is just a godsend.
Post-Processing of Models
As you know, after printing, each model must be rinsed in isopropyl alcohol to rinse off the remnants of uncured resin. After that, you still need to illuminate it under ultraviolet light.
A simple plastic container filled with alcohol is usually used for flushing. The model is placed there and gently shaken for 10-15 minutes. Sometimes, you can use a toothbrush.
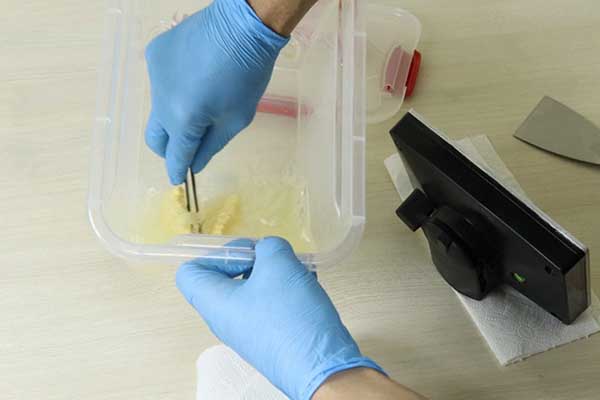
This post-processing is not very long. However, with mechanical action on a model that has not yet hardened to the end, you can accidentally damage small elements or leave traces on surfaces. A faster and more technologically advanced way to wash models is an ultrasonic bath.
Uniz offers bathtubs in two sizes.

For large models that the Slash Plus can print, the larger one is better. S
The small bathtub was enough for our tests. Using it is very simple: fill it with alcohol and place the model. Turn it on for a couple of minutes and you’re done.

All uncured resin flies off the model on its own without the threat of damaging fragile parts. Do not overdo the cleaning; 1-2 minutes is enough. With prolonged washing, the model may begin to collapse. .
The second stage of post-processing is additional exposure. The most budgetary way is to expose the model to bright sun and wait.
If you cannot expose the model to the sun, use a UV nail dryer. In it, the process is faster, but it still takes 5-8 hours. Moreover, most UV dryers are small. As a result, large models will not fit in them.

Finally, the best method is to use a special ultraviolet camera. Wanhao has one, called Boxman-1. This is a steel box resembling a small oven.
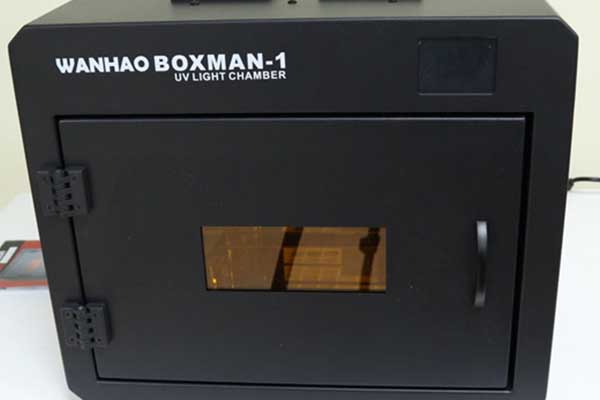
The “oven” consists of a panel inside the top that has ultraviolet diodes. All walls of the oven are mirrored. Glass lies below on special legs.

You just need to put the models in the camera, set the exposure time on the touch screen and wait some 20-30 minutes. Large models may take more time, but this is still much faster than using the above two methods.

Conclusion
What can be said in the end?
We were confused about a couple of solutions in Uniz Slash Plus, such as the automatic resin pumping system and camera use. Even so, we think the Slash Plus is a great printer. The print speed is fast among printers of this class.
The printer uses a convenient slicer that multiple customizable settings and offers various connection methods, including Wi-Fi, Ethernet, and USB. There are even Android and iOS apps for controlling printing and performing some functions.
Yes, the printer doesn’t have its own screen, but the Uniz ecosystem doesn’t need one.
The quality of the printed models is decent but the screen resolution is a little lacking. Unsurprisingly, this has become one of the best dental printers and jewelry printers.
And finally, here are a few more models printed on Uniz Slash Plus.


We hope you have enjoyed reading this Uniz Slash Plus 3D printer review.
