

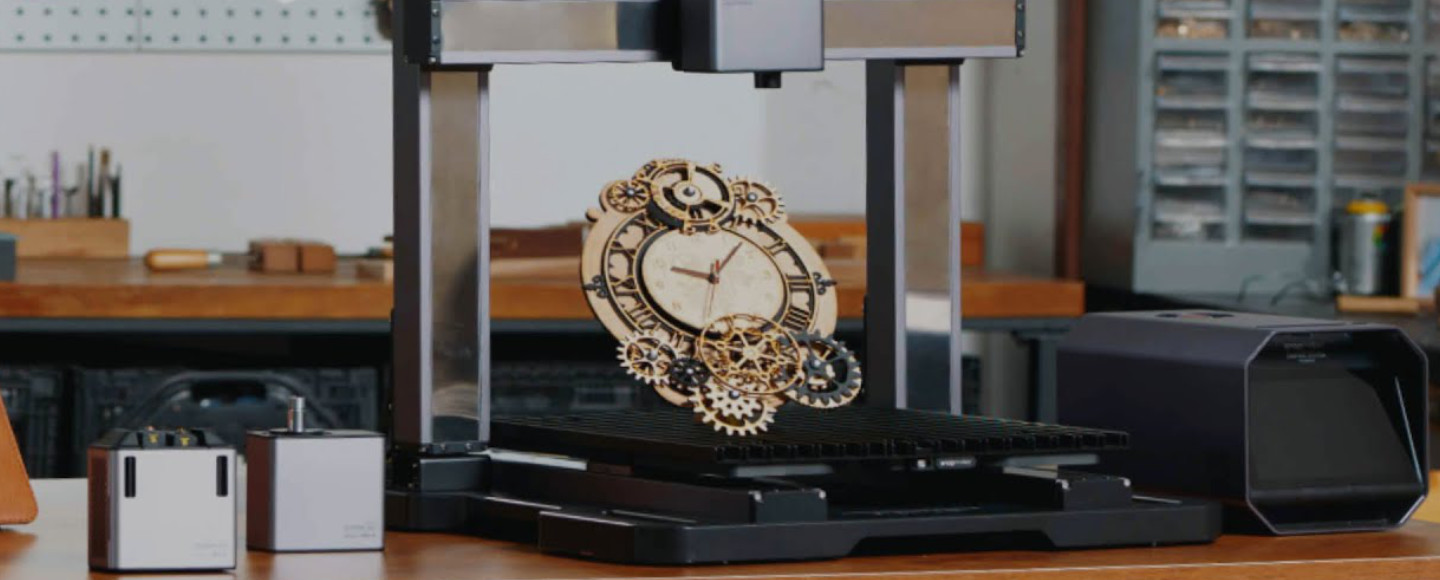
An in-depth hands-on review from our Test Lab. If you run a makerspace, prototyping lab, or serious hobbyist workshop, the Snapmaker Artisan may be the most versatile machine you can buy at this price point. But is it right for you? Let’s dive in.

Table of Contents
- 1. Quick Verdict
- 2. Snapmaker Artisan Key Specifications
- 3. Unboxing and Assembly
- 4. Design and Build Quality
- 5. 3D Printing Performance
- 6. 10W Laser Performance
- 7. CNC Machining
- 8. Software Ecosystem
- 9. Ease of Use and Module Swapping
- 10. Artisan vs. Snapmaker 2.0 A350
- 11. Artisan vs. Bambu H2D
- 12. Maintenance and Long-Term Ownership
- 13. Pros and Cons
- 14. Is a 3-in-1 Machine Still Worth It in 2026?
- 15. Who Should Buy?
- 16. Common Problems and Solutions
- 17. Best Materials for Artisan
- 18. Alternatives to Consider
- 19. Final Verdict
1. Quick Verdict
The Snapmaker Artisan is not simply a 3D printer. It is a modular digital fabrication platform that combines industrial-grade CNC machining, a powerful 10W diode laser engraver/cutter, and a capable dual-extrusion 3D printer in a single, rock-solid chassis.
That said, by 2026 standards, the Artisan faces new competition from both directions. Dedicated 3D printers like those from Bambu Lab have surpassed it in raw print speed, while the Snapmaker Artisan’s own newer sibling — the tool-changing Snapmaker U1 — now competes with it at the high end of the 3-in-1 concept. So before you spend $2,799, you need to know exactly what this machine is — and what it is not.
Performance Ratings
- 3D Printing: 4.0 / 5
- Laser Engraving: 4.5 / 5
- CNC Machining: 4.7 / 5
- Ease of Use: 3.8 / 5
- Value for Money: 3.7 / 5
Quick Facts
- Best For: Makerspaces, engineering workshops, prototyping labs, serious hobbyists who need additive AND subtractive manufacturing
- Not Ideal For: Beginners, small-desk setups, users focused purely on fast 3D printing
- Standout Feature: 200W CNC module with 18,000 RPM — by far the strongest upgrade over the Snapmaker 2.0
- Price: $2,799 USD (includes enclosure)
2. Snapmaker Artisan Key Specifications
Before we get into performance, here are the corrected, fully accurate specifications for the Snapmaker Artisan. Note that early web reviews contained significant errors in weight and dimensions — we have verified these against the machine we tested.
| Specification | Detail |
|---|---|
| Build Volume (3D Print) | 400 × 400 × 400 mm |
| Footprint | approx. 580 × 620 × 634 mm (assembled) |
| Machine Weight | approx. 52 kg (115 lbs) with enclosure — NOTE: this is NOT a portable machine |
| Print Head | Dual Extrusion (two independent nozzles) |
| Max Nozzle Temp | 300°C (high-temperature materials capable) |
| Max Bed Temp | 80°C |
| Max Print Speed | 180 mm/s (nominal) |
| Layer Resolution | 50–300 microns |
| Supported 3D Materials | PLA, ABS, PETG, TPU, and high-temp materials |
| Laser Module | 10W diode laser (40W upgrade available separately) |
| Laser Wavelength | 405 nm |
| Laser Safety Class | Class 4 laser (becomes Class 1 only inside the certified enclosure) |
| CNC Module | 200W spindle |
| Max CNC Spindle Speed | 18,000 RPM |
| Supported CNC Materials | Hardwood, softwood, MDF, HDF, plywood, acrylic, carbon fiber, jade, PCB, epoxy tooling board |
| Display | 3.5-inch color touchscreen |
| File Transfer | USB cable, USB flash drive, Wi-Fi |
| Software | Snapmaker Luban, Snapmaker Orca (OrcaSlicer-based), LightBurn compatible, Fusion 360 CAM compatible |
| Frame | Die-cast aluminum alloy with steel guide rails in linear modules |
| Power Supply | 100–240V AC with integrated e-stop |
3. Unboxing and Assembly
The Snapmaker Artisan ships in multiple large boxes. Packaging quality is excellent — every component is individually foam-molded and clearly labeled. All required tools are included; you should not need anything from your own workshop to complete the assembly.
Realistic setup time for most users, including enclosure assembly and first calibration, runs between 90 minutes and two hours. The instruction manual and the Snapmaker app both guide you through the process step by step. The levered Quick-Swap module system means you won’t need a screwdriver to swap between the three tool-heads once assembled — more on that later.
First calibration involves auto-leveling for the print bed, setting the Z-offset for the dual-extrusion head, and running a test print. Expect to spend some time dialing in the Z-offset to get clean first layers, especially if you intend to use both nozzles simultaneously.
Assembly Overview
- Unboxing: Check all foam-molded components against the manifest.
- Frame Assembly: Install linear rail modules onto the main body.
- Enclosure: Assemble the door and frame panels.
- Electronics: Connect power module and touchscreen.
- Calibration: Run auto-leveling and Z-offset routines.

4. Design and Build Quality
The Snapmaker Artisan’s most immediately impressive quality is how solid it feels. The die-cast aluminum frame, combined with industrial-grade steel guide rails embedded in the linear modules, gives the entire machine a rigidity you simply do not find on most desktop fabrication tools. This is not accidental — the design reflects the requirements of CNC machining, where vibration and flex translate directly into poor surface finish and dimensional error.
The linear rail system is a major upgrade over the lead-screw-and-pulley arrangement used in the Snapmaker 2.0 series. Linear rails constrain tool-head motion in both horizontal and vertical planes simultaneously, reducing flex under load and minimizing the ringing artifacts common to lighter-framed 3D printers. The practical benefit: smoother toolpaths for all three operating modes.
The enclosure is well-designed, with filtered ventilation, integrated lighting, and door interlock sensors that cut the laser if the enclosure is opened mid-job. For CNC work, the enclosure also acts as a dust shield, though you will still want a dedicated dust collection solution for heavy sessions.
The power module features a redesigned form factor compared to the Snapmaker 2.0 — wider, more octagonal, and notably more substantial. It includes built-in cooling vents that do an effective job of keeping operating temperatures in check. Our one ergonomic complaint: the emergency stop button is recessed slightly too far into the housing. In an emergency, you want that button to be an unmistakable, prominently mounted surface. We understand Snapmaker may have addressed this in later production runs.
The touchscreen display sits on the power module rather than on the main machine body. The viewing angle narrows noticeably if you are not standing directly in front of it. Snapmaker could improve this by reducing the bezel depth and angling the screen outward slightly.
5. 3D Printing Performance
Print Quality
We printed extensively in PLA, PETG, and ABS during our review period. Dimensional accuracy was consistently within 0.1–0.2mm across test prints — acceptable for prototyping and functional parts, though not class-leading by 2026 standards. Surface finish on PLA was smooth and clean, with minimal ghosting artifacts thanks to the linear rail system.
ABS required enclosure use to prevent warping, which is expected. With the enclosure closed, bed adhesion and layer consistency were both solid. PETG performed well without any special settings adjustments.

Dual Extrusion: The Real Advantage
The dual-extrusion head is where the Artisan’s 3D printing setup truly differentiates itself. Two independent nozzles — each capable of reaching 300°C — allow for genuine multi-material printing. In practice, this unlocks two workflows that matter enormously for prototyping:
Workflow Unlocked: Complex Geometries
With water-soluble PVA supports, you can print internal channels and hollow forms that are impossible to remove manually. Simply submerge the part in water post-print, and the supports dissolve away.
- Dual-color printing: Print functional parts or display objects in two colors simultaneously, without pausing to manually swap filaments.
- Water-soluble support printing: Print structural PVA supports alongside your main material. After printing, submerge the part in water and the supports dissolve cleanly, leaving complex geometries — overhangs, internal channels, hollow forms — with no manual support removal required. This is the capability that makes the Artisan genuinely useful in a prototyping lab context.
- Breakaway support printing: If you prefer not to work with moisture-sensitive PVA, breakaway support materials provide easy manual removal with no damage to the model surface.
Nozzle alignment is critical for good dual-extrusion results. The Artisan’s calibration routine handles this reasonably well, but expect to run a calibration print any time you change filaments or after a nozzle replacement.
Print Speed: The Honest Assessment
The Artisan supports print speeds up to 180 mm/s. This is a meaningful upgrade from the 100 mm/s ceiling of the Snapmaker 2.0. However, to frame this honestly in 2026: modern CoreXY printers from Bambu Lab routinely achieve 250–350 mm/s in everyday use, and their input shaping / vibration compensation systems maintain print quality at those speeds.
6. 10W Laser Performance: Engraving and Cutting Depth
The stock 10W diode laser on the Artisan is one of the headline upgrades over the Snapmaker 2.0, which shipped with a 1.6W module. The difference is not incremental — it is transformative. The 10W module cuts and engraves materials that the 1.6W could only mark lightly.
Materials We Tested
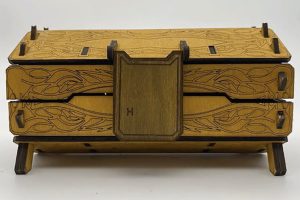
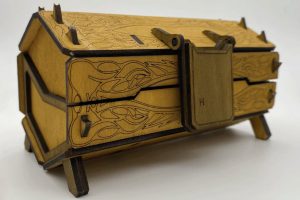
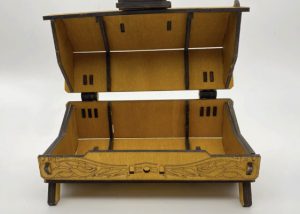
In our hands-on testing, we engraved and cut the following:
- 3mm plywood — clean cuts in a single pass at reduced speed
- Leather — crisp, detailed engravings with minimal charring
- Anodized aluminum — surface engraving (color removal from the anodized layer)
- Painted wood — high-contrast engravings at speed
The camera alignment feature in Snapmaker Luban — which uses the built-in camera to preview engraving placement on your workpiece — works well for flat materials and significantly reduces the chance of misaligned jobs.
40W Upgrade Option
Snapmaker also offers a 40W laser module as a separate purchase. With the 40W head, the Snapmaker Artisan is capable of cutting thicker acrylic, denser woods, and engraving with greater speed. If laser cutting is a significant part of your workflow, the 40W upgrade is worth serious consideration.
LightBurn Compatibility
A significant real-world workflow note for laser users: many experienced Artisan owners use LightBurn rather than Snapmaker Luban for their laser sessions. LightBurn offers more advanced toolpath control, better power/speed curve management, and a more refined camera calibration workflow. If you have any LightBurn experience from other laser systems, you will feel immediately at home using it with the Artisan. Snapmaker’s native Luban software handles laser tasks competently, but LightBurn is the professional’s choice for demanding engraving and cutting projects.
7. CNC Machining: Where the Artisan Truly Earns Its Price
If there is a single reason to choose the Artisan over its Snapmaker 2.0 predecessor, it is the CNC module. The jump from 50W to 200W, combined with the linear rail system’s rigidity, represents a genuine category upgrade — not a marginal spec bump.
Impressed by the CNC power? See the current price on Amazon.
CNC Hardware
The 200W spindle achieves 18,000 RPM — fast enough for clean cuts in hardwood, and sufficiently rigid to handle acrylic and carbon fiber without chatter. The combination of high spindle speed, industrial linear rails, and 52kg of machine mass means the Artisan performs light-to-medium CNC machining with a confidence that the Snapmaker 2.0 could not match.
To be clear about realistic expectations: this is not a Haas. It is not a Tormach. It is a desktop CNC router that can handle small wood and acrylic projects with professional-quality results. Do not approach it expecting heavy aluminum milling or production-rate throughput.
What We Machined
In our test sessions, we used the CNC module on:
- Hardwood (beech) — relief carving and pocket cuts. Performance was exceptional. Clean edges, smooth floor finish, no chatter.
- MDF — fast, clean through-cuts for panel components.
- Acrylic — letter-cut signage. Required careful feeds-and-speeds to avoid melting, but with the right settings, the results were clean.
We did not test aluminum in this review cycle. Snapmaker has suggested the machine can handle aluminum engraving with appropriate tooling and pass depths, but we would characterize that as a cautious exploration rather than a primary use case.




CAM Software: Going Beyond Luban
For straightforward CNC projects, Snapmaker Luban’s built-in CAM tools work well. However, experienced CNC users will quickly find Luban limiting for complex 3D toolpaths, multi-pass strategies, or optimized finishing passes. The professional workflow for serious CNC work on the Artisan uses Fusion 360 (or similar CAM software) to generate G-code, which is then transferred to the Artisan via USB. If CNC is central to your work, budget time to learn at least basic Fusion 360 CAM.
8. Software Ecosystem: Luban, Snapmaker Orca, and Beyond
Snapmaker Luban
Snapmaker Luban remains the official all-in-one software for the Artisan, handling 3D print slicing, laser toolpaths, and CNC CAM. For users new to digital fabrication, Luban lowers the barrier considerably — a single interface for all three disciplines, with guided workflows and preset profiles for common materials. Connectivity via USB or Wi-Fi is reliable.
Luban’s 3D printing slicer has improved significantly over the years but is not yet on par with the top standalone slicers in terms of support generation quality or fine-grained profile tuning.
Snapmaker Orca (Snorca) — The 2026 Update
A major development for Artisan users in 2026 is the maturation of Snapmaker’s OrcaSlicer-based workflow, commonly referred to as Snapmaker Orca or Snorca. Built on the widely respected OrcaSlicer engine, this workflow brings meaningfully better print profiles, improved support generation, finer speed and acceleration tuning, and faster slicing computation compared to Luban’s native slicer.
LightBurn and Fusion 360
As noted in the laser and CNC sections, many experienced users route their most demanding jobs through dedicated professional tools rather than Luban. LightBurn for laser work and Fusion 360 for CNC CAM are the two most widely used third-party integrations. Both are well-established, with active communities producing Artisan-specific settings and tutorials.
9. Ease of Use and the Module-Swapping Reality
How Fast Is the Quick-Swap System?
One of the Artisan’s marquee features is its lever-locking Quick-Swap module system, which replaces the screw-based attachment on the Snapmaker 2.0. Hardware swapping — physically removing one tool-head and locking in another — takes under two minutes in practice. This is a genuine improvement over the 20-minute module change process on earlier models.
However, it is important to be honest about total workflow transition time. Physically swapping the module is only part of the process:
- Remove the current module (under 1 minute)
- Install the new module (under 1 minute)
- Run calibration for the new tool (5–15 minutes depending on module)
- Load your workspace/file and verify settings
Total realistic transition time: 10–20 minutes. This is still substantially better than the Snapmaker 2.0, but prospective buyers should factor this in. The Artisan is not a machine you flip between 3D printing and CNC on a whim mid-afternoon.
Module Fatigue: How Users Actually Use It
We want to address something most reviews skip over: the real-world usage pattern of 3-in-1 machine owners. In our experience, and based on extensive community feedback, most Snapmaker Artisan owners go through an initial phase of exploring all three tools enthusiastically, then settle into a pattern where one or two tools dominate their usage.
The most common outcome: the machine becomes either a primary laser engraver/cutter with occasional 3D printing, or a primary CNC workshop machine. Pure 3D printing workflows often migrate to a faster dedicated machine over time.
2026 Hardware Refinements
It is worth noting that later production units of the Artisan include several quality-of-life improvements over early shipping examples. An improved module door, additional cooling vents, and revised extruder tension settings address the extruder clogging issues reported in early 2023 reviews. If you purchase a new Artisan today, you are likely getting a more refined machine than the one described in early reviews. The unit we tested showed none of the early-run clogging behavior.
10. Snapmaker Artisan vs. Snapmaker 2.0 A350
The most direct comparison for most buyers is the Artisan vs. the Snapmaker 2.0 A350. Here is how they compare across the key dimensions that actually matter:
| Feature | Snapmaker Artisan | Snapmaker 2.0 A350 |
|---|---|---|
| CNC Spindle Power | 200W | 50W |
| CNC Performance Increase | 4× more powerful | Baseline |
| Stock Laser | 10W diode | 1.6W diode |
| Laser Performance | Cuts thin wood and leather | Surface engraving only |
| Linear Transmission | Steel guide rails | Lead screws & pulleys |
| Max Print Speed | 180 mm/s | 100 mm/s |
| Dual Extrusion | Yes (with water-soluble support capability) | No |
| Build Volume | 400 × 400 × 400 mm | 320 × 350 × 330 mm |
| Enclosure Included | Yes | No (optional add-on) |
| Machine Mass | ~52 kg assembled | ~14 kg |
| Price | ~$2,799 | ~$1,799 |
The verdict on this comparison is relatively clear. If you do meaningful CNC work — cutting and carving real materials — the Artisan’s 200W module is not just a nice upgrade; it is a different category of machine. The A350’s 50W module is adequate for light engraving and soft materials. The Artisan’s 200W module handles hardwood reliably. That difference is real and significant.
The dual-extrusion system and the more capable laser are supporting arguments for the Artisan, but the CNC upgrade is the main event.
11. Snapmaker Artisan vs. Bambu H2D: Two Different Philosophies
With the arrival of the Bambu H2D in the premium maker machine space, prospective Artisan buyers are increasingly asking how the two compare. The answer requires understanding that these machines were designed for fundamentally different users.
| Category | Snapmaker Artisan | Bambu H2D |
|---|---|---|
| Primary Purpose | CNC + Laser + 3D Printing platform | High-speed AI-assisted 3D printing (with some laser capability) |
| CNC Machining | Full 200W CNC module — cuts real materials | Not a CNC machine |
| Laser Engraving | 10W / 40W professional diode laser | Integrated laser (limited capability) |
| 3D Print Speed | Up to 180 mm/s | 250+ mm/s with input shaping |
| Machine Weight | ~52 kg | Significantly lighter |
| Automation & AI | Standard workflows | AI-driven bed leveling, failure detection, AMS filament system |
| Software Ecosystem | Luban / Snapmaker Orca / LightBurn / Fusion 360 | Bambu Studio / cloud ecosystem |
| Who It’s For | Makers who need additive AND subtractive fabrication | Volume 3D printing with premium automation |
Choose the Artisan if:
you need real CNC machining capability alongside 3D printing and laser engraving, and you want a single machine that can do all three at a professional level.
Choose the Bambu H2D if:
3D printing is your primary discipline, you prioritize speed and automation, and laser/CNC are secondary or unnecessary in your workflow.
These are not competing products for the same user. They represent different philosophies about what a premium maker machine should do.
12. Maintenance and Long-Term Ownership
The Artisan’s modular architecture is one of its most user-friendly qualities from a maintenance perspective. Individual modules can be replaced without servicing the entire machine, and Snapmaker maintains a robust spare parts supply for the Artisan platform.
Maintenance Checklist
- Nozzle replacements: Standard for any FDM 3D printer. Dual-extrusion means two nozzles to maintain. Replace when print quality degrades, especially after extended high-temperature material use.
- CNC bit replacement: CNC bits are consumables. Bit life depends heavily on material and cutting parameters. Stock up on common sizes for your most-used materials.
- Linear rail lubrication: The steel guide rails require periodic lubrication to maintain smooth motion and prevent corrosion. Snapmaker provides guidance on lubrication schedules in the maintenance documentation.
- Enclosure cleaning: Laser sessions generate residue on the enclosure interior and lens. Regular lens cleaning is essential for consistent laser power delivery.
- Belt tension: The X and Y axes use Gates synchronous belts. Check tension periodically; loose belts are a common cause of print quality degradation and CNC dimensional error.
Overall, the Artisan is not a set-it-and-forget-it machine. It rewards owners who engage with its maintenance routine. For workshop environments where the machine runs regularly, building a maintenance schedule into your operation is advisable.
13. Pros and Cons
Pros
- True 3-in-1 fabrication: CNC, laser, and 3D printing in a single machine that is genuinely competent at all three
- Exceptional CNC power: 200W / 18,000 RPM spindle handles hardwood, MDF, acrylic, and carbon fiber with confidence
- Industrial build quality: Steel guide rails, die-cast aluminum frame, and 52kg machine mass translate to rigid, precise motion across all modes
- 10W laser capability: Cuts thin wood and leather; far beyond the marking-only 1.6W units on the Snapmaker 2.0
- Dual extrusion with water-soluble support: Opens up complex geometries that would be difficult or impossible on single-extruder machines
- Quick-Swap module system: Hardware swaps in under 2 minutes
- Large build volume: 400 × 400 × 400 mm for 3D printing; 400 × 400 mm for laser and CNC
- Enclosure included: Critical for ABS printing, laser safety, and CNC dust containment
- Mature software ecosystem: Luban, Snapmaker Orca, LightBurn, and Fusion 360 all supported
Cons
- Very heavy: 52kg fully assembled makes the Artisan immobile without dedicated infrastructure — plan your bench setup carefully
- Expensive: $2,799 is a significant investment, and the 40W laser and specialty tooling add further cost
- Slower 3D printing than modern CoreXY: 180 mm/s nominal vs. 250+ mm/s from Bambu Lab machines at similar or lower price points
- Large footprint: The footprint (~580 × 620 mm) plus clearance area for door opening requires substantial dedicated bench space
- Module transition time: Despite fast hardware swapping, calibration adds 10–20 minutes of total transition time between disciplines
- Recessed e-stop button: Emergency stop should be more prominently accessible
- Screen viewing angle: The touchscreen on the power module narrows significantly when viewed from angles
14. Is a 3-in-1 Machine Still Worth It in 2026?
This is a fair and important question. The 3-in-1 market has evolved. In 2022, when the Artisan launched, the concept of a machine that did CNC, laser, and 3D printing was genuinely novel at this price point. In 2026, there are more options on both sides: specialized machines have gotten better and cheaper, and the Snapmaker ecosystem itself now includes more specialized options like the tool-changer Snapmaker U1.
The case for a 3-in-1 machine remains strong for one specific type of user: the maker or small studio that genuinely uses all three capabilities and values the consolidated workspace, shared calibration investment, and unified tooling platform. For makerspaces, educational labs, and prototyping studios, the Snapmaker Artisan‘s combination of all three disciplines in a single robust chassis is still a compelling value proposition.
15. Who Should Buy the Snapmaker Artisan?
Best Suited For
- Makerspaces and fab labs that need multiple fabrication disciplines in a single, well-supported platform
- Engineering and product design studios that prototype across both additive and subtractive workflows
- Serious hobbyists who run a home workshop and want one premium machine rather than three separate tools
- Educators who want students to experience CNC, laser, and 3D printing on a single platform
- Small-batch producers who create products combining CNC-carved and 3D-printed components
Not the Right Choice For
- Beginners without workshop experience — the Artisan rewards makers who already understand at least one of its three disciplines
- Small desks or apartments — this machine needs a proper dedicated bench and substantial floor space
- Users whose workflow is 95% 3D printing — a faster dedicated printer will serve them better
- Tight budgets — at $2,799 before accessories and specialty tooling, this is a serious workshop investment
16. Common Snapmaker Artisan Problems and Solutions
Extruder clogging (early units)
Early 2023-production Artisans had extruder clogging issues, particularly with flexible and high-temperature filaments. This was addressed in later production runs. If you have an early unit, check the Snapmaker community forums for the revised tension settings and bowden tube updates that resolved most cases.
Z-offset drift
Some users report Z-offset changes after module swaps. Build a habit of running a quick first-layer calibration print after any module change rather than relying on stored values.
Laser camera alignment inconsistency
The Luban camera alignment feature works best on flat, matte materials. Shiny or uneven workpieces can confuse the camera preview. For precision work, use manual placement rather than camera alignment.
CNC chip management
The enclosure does contain most chips and dust for CNC work, but for extended sessions on dense materials, adding a small shop vacuum connection to the enclosure significantly improves chip clearing and visibility.
17. Best Materials for the Snapmaker Artisan
3D Printing
PLA
Best all-round material for the platform; easy, clean results.
PETG
Good mechanical properties for functional parts.
ABS
Requires enclosure; the Artisan handles it well with the enclosure closed.
PVA
Water-soluble support material for use with the second extruder.
Laser Engraving / Cutting
- Plywood (3–6mm) — excellent results; cuts cleanly at reduced speed
- Leather — precise, high-contrast engravings
- Anodized aluminum — surface engraving of the anodized layer
- Bamboo — fast, clean engraving
- Painted wood — high-contrast results at speed
CNC Machining
- Hardwood (beech, walnut, oak) — the Artisan’s CNC module handles these confidently
- Softwood (pine, cedar) — faster and easier than hardwood
- MDF and HDF — excellent for sign-making and panel work
- Acrylic — achievable with careful feeds and speeds
- Carbon fiber — possible with appropriate tooling; generate significant dust requiring filtration
- PCB milling — a niche but practical application for electronics prototypers
18. Snapmaker Artisan Alternatives to Consider
Snapmaker U1
Snapmaker’s own tool-changer platform. If you need a more automated module-switching experience and are primarily a 3D printing user with occasional laser needs, the U1 represents the next evolution of the Snapmaker concept.
Bambu H2D
If fast, AI-assisted 3D printing is your primary need with some laser capability, the Bambu H2D outperforms the Artisan on print speed and automation. Not a CNC machine.
xTool F1 Ultra (dedicated laser)
If laser engraving is your primary need, a dedicated diode laser system will outperform the Artisan on speed and workflow simplicity at a lower price point.
Dedicated desktop CNC (e.g., Carbide 3D Shapeoko)
If CNC is your dominant workflow and 3D printing is secondary, a dedicated CNC router will offer more rigidity and working area for comparable investment.
19. Final Verdict: Is the Snapmaker Artisan Worth It in 2026?
After extensive hands-on time in our test lab, the Snapmaker Artisan earns a strong recommendation — with important caveats about who it is actually for.
Think of the Artisan not as a 3D printer with bonus features, but as a compact digital workshop. Its CNC module is a genuinely serious machine tool. Its 10W laser is a capable production tool. Its dual-extrusion 3D printer opens up complex geometries that single-nozzle machines cannot achieve without labor-intensive support removal. Combined, they create a platform that serves creative professionals and advanced hobbyists in ways no single-discipline machine can match.
At $2,799, the Artisan is priced for serious makers who will use all three tools regularly. If that describes you, it delivers. If you’re primarily a 3D printing enthusiast who thinks you might dabble in CNC someday, the math may not work out.
Ready to Start Making?
If the Snapmaker Artisan sounds like the right fit for your workshop, check the latest availability and pricing.
“The Snapmaker Artisan earns its price if CNC machining and laser engraving are core parts of your workflow. A powerful, versatile fabrication platform.”
OVERALL VERDICT: 4.2 / 5.0


When was this review written? Have you tested the 40W laser Snapmaker has for the Artisan?
Hey Hawdy, here’s our review of the Snapmarker Artisan.