
Is the new device from Ortur worth the money? Read our Ortur Laser Master 3 review to find out.
Ortur has released a new laser engraving model. And this is not one of the new 10W modules attached to the old frame that most laser engraving manufacturers are producing. Rather, the Ortur Laser Master 3 or OLM3 for short, is a completely new device..

The Ortur Laser Master 3 is a 450nm blue diode laser with up to 10.5W true power. The unit is categorized as a Cat IV device. Therefore, it’s not a toy. The laser light can be dangerous to the skin and retina.
Also, during lasering, toxic gases may be produced depending on the material you are working on. Therefore, it is critical to wear safety goggle and use the device in a well-ventilated area.
Another thing to keep in mind is that there is a risk of fire when using the device. Depending on your area, operating such a laser may be subject to specific regulations. Please obtain information from the relevant authorities before you get a laser of this power class.
Let’s get started with the review.
Ortur Laser Master 3 Review

AVAILABLE ON ORTUR
To begin, let’s look at the structure of the device.
New Frame
The Ortur Laser Master 3 has a new, completely redesigned frame that is visually pleasing. Apart from a few injection-moulded plastic caps, the frame is made entirely of metal. The structure comprises of custom aluminum profiles or large C-profiles in which mechanics and electronics disappear.
Ortur spent a lot on the development of his new top model. For easy screwing, the unit has a new connection system based on the tongue and groove principle. The frame is square, sturdy, torsion-free and can be assembled in about 30 minutes.

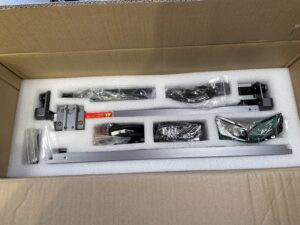
Inside the box, you will find 5 pre-assembled individual parts that are easy to screw. However, threading in the 2 closed belts for the Y-axis, which are driven on both sides via a shaft, can be a little tricky.
We also had a small problem with one of the two belts, which sounded like it was grinding. Dealing with this issue was quite awkward since the mechanism is in a closed C-profile. However, we were able to solve the issue.
The end product is a very chic frame with lean cable routing, 2 closed belts (driven on both sides by a shaft), and cleverly designed belt tensioners.


In a nutshell, Ortur put a lot of effort in the new frame. I really like that.
The laser module holder and the knurled screw for fixing the module have not changed. I still find it a bit tricky. However, with time, you get used to it.

The frame is rather flat, and this may not be quite practical. In addition, the X-motor sits visually nicely at the bottom of the crossbar. However, it further restricts the already somewhat tight height.
As you can see in the photo here, it’s not quite as ideal with my 400 × 400 honeycomb panel. However, it works.

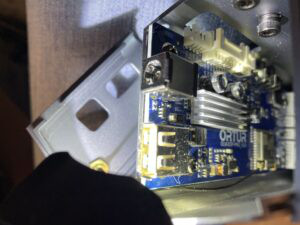
It was also quite difficult to get to the board. Therefore, I couldn’t provide any pictures of the board in this test.
The frame stands on 4 rubber feet. This is good. However, if you’ll want to screw it to a board somewhere, you’ll have to come up with something else.
Ortur intends to release a number of accessories for the OLM3. These include a honeycomb plate, an enlargement of up to 800×400, a foldable laser tent and a roll spinner.
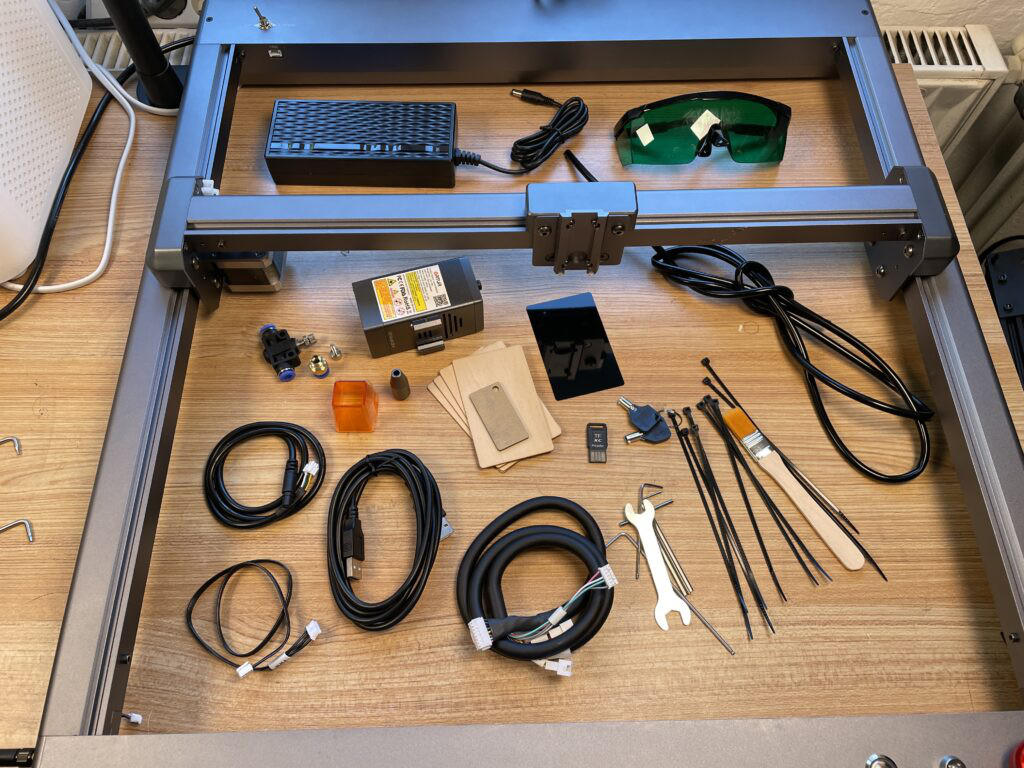
The Items in the Box
Ortur Laser Master 3 Board
The OLM3 is equipped with a board that seems to be proprietary to Ortur. The board is based on an ESP32 chip and TMC2209 stepper driver.
Some of the features of the board include internal memory, micro SD card, a USB connection port for operation with LightBurn or LaserGRBL, and a web interface. The board also supports Laser Explorer App, which is available for both iOS & Android devices. This means you can control it offline.
You can use the Laser Explorer App to either create or connect to an existing WLAN. The board is easily recognized in LightBurn. I haven’t tested LaserGRBL, but it should be just as easy.

One of the features that makes the Ortur Laser Master 3 different from the Ortur Laser Master 2 Pro or the Aufero 1 is that it doesn’t have end stops. However, it doesn’t need them at all because it uses the sensorless homing function of the TMC2209. This is new and cleverly done.

An additional IO port allows you to connect more accessories, e.g., a motorized Z-axis, which is an available upgrade. The cable harness for this is already available. Therefore, it saves additional effort when upgrading.
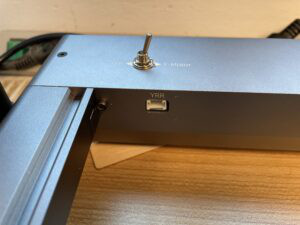
A dedicated YRR port allows trouble-free operation of a can roller. There is a toggle switch on the back of the frame that you can use to switch between the spinner and the Y- axis without any tinkering . This is very convenient.
The Ortur Laser Master 3 also has multiple security features that we’ve not seen with the competition. These include:

- Key to lock the laser
- Tilt & tilt sensor
- Shutdown at standstill, vibration
- Voltage & current monitoring.
- Shutdown if connection to host PC is lost
- Emergency stop button
However, the LaserMaster 2 Pro’s IR flame detection has been removed.
For power, Ortur LaserMaster 3 uses a 24V, 4A power supply for 110-240V.
Laser Explorer app
the Ortur Laser Master 3 is fully compatible with Laser Explorer app.

You can use the app to control the laser engraver without connecting to Wi=Fi. Check the AppStore and PlayStore for more information about the app for iOS and Android devices respectively.
Direct engraving of a photo will soon also be offered via the app (the function was not yet complete at the time of testing).
The Web Interface
To use the web interface, you must activate WiFi in the OLM3. This can be done either in Lightburn or in LaserGRBL. The WiFi SSID username is $74 and the password is $75. From there, activate with $WRS. You can follow the instructions to learn how to do this
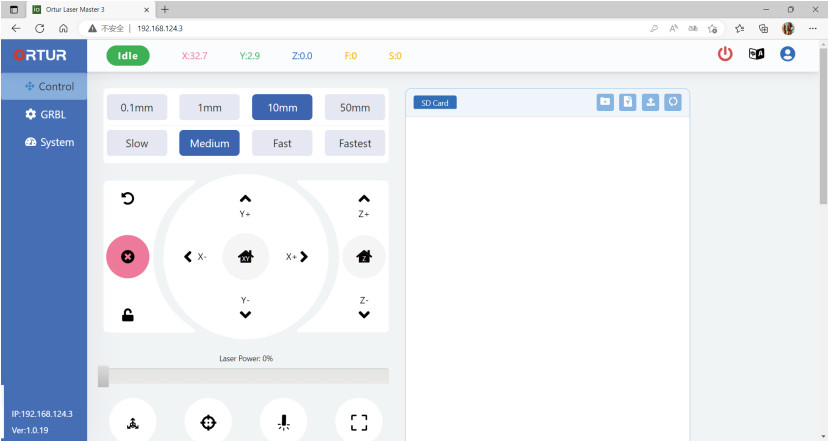
The Web Interface has the most important basic functions. These include jogging, home, the frame preview, performance and speed adjustment of the current job. The jobs previously created in Lightburn or LaserGRBL and saved as Gcode. You then have to upload the Gcode to the web interface and start the job. I find this quite useful.
Ortur 10W module LU2-10A

Like is the case with the other 10W modules, Ortur combines the output of two 5Watt diodes into a single beam of around 10W. However, the spot size of the Ortur is not quite as fine as it’s a rectangular 0.05mm x 0.10mm.
The stray light protection is available, but could go a little further down.
Another convenient feature of the OLM3 is the fold-in/fold-out lever, which is used as a focusing aid for the fixed-focus laser module. To use it, unfold the lever, lower the module until the lever touches the workpiece, tighten the knurled screw, and fold the lever in.
The focus is at least for engraving and not really for deep cuts. It’s practical and you won’t misplace the lever as quickly as the aluminum cylinders of the competition.


Another highlight of the module is the implementation of the AirAssist preparation. You simply need to plug in the hose of the pump at the top of the module and that’s it. The air then comes out of the “nozzle” parallel to the laser beam.
Ortur also supplies a usable hose, a pressure regulator and another hose coupling . However, you still have to get the pump yourself.

You can see the recommended settings for cutting and engraving with the Ortur Laser Master at this link: Ortur Materials Guide
Cut Tests
Now it’s time for some tests.
The Ortur Laser Master 3 is quite while on standby but quite noisy when in use. However, the noise is comparable to that of other hobby laser engravers in its class.
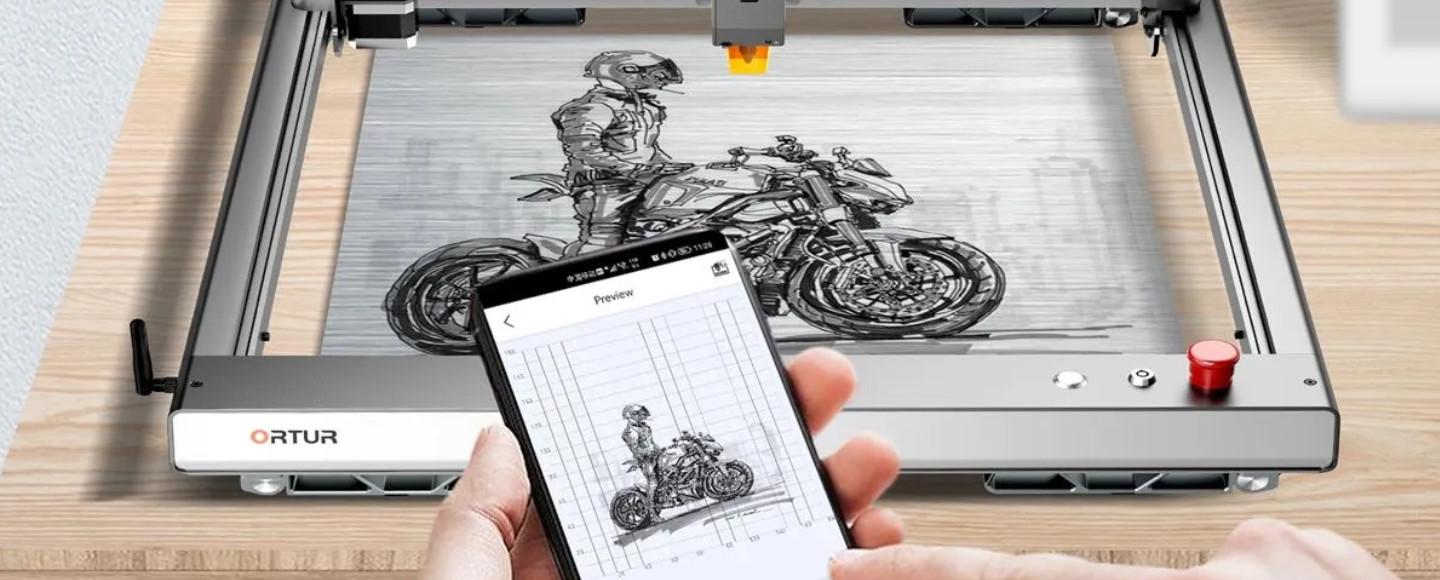
The Lasermaster 3 quickly executes empty runs when switched on. From there, you can adjust the speed depending on the kind of material you want to work on. The device can achieve speeds of up to 20,000mm/min , which is twice the competition. This is the fastest 10W laser module for engraving (not cutting) that we have had in our Test Lab.
In terms of performance, this module is respectable but not the fastest 10W we have tested for cutting. For example, it cuts 4mm plywood board with 275mm/min at 90% with 1 pass. For comparison, the Sculpfun S10 cut the board at 300mm/min, while the Longer Ray 10W cut at 425mm/min.
If the slower speed makes the laser more durable, then it’s a good thing.
See the images below we got when using the laser without Air Assist (L) and with Air Assist (R), Without Air Assist, everything is a little quicker and finer.
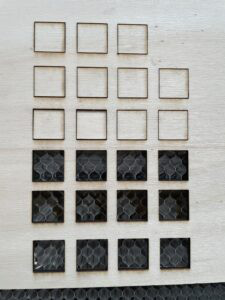
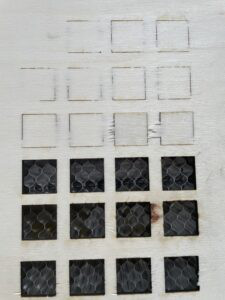
The last completely cut row was 200, 225, 250 & 275mm/min, as you can see, 300mm/min didn’t go through completely, chips remained. The brown spot used to be a branch.
The cuts are still respectable even without AirAssist. But the ones from Sculpfun & Longer were finer overall, which also agrees with the information on the Ortur homepage, which attests the 10W module a dot size of 0.05×0.1mm – while my previous favorite among the 10W modules was the Longer 10W advertises as 0.04×0.04.
Engraving Test
.DXF vector graphics, line mode, 5000mm/min at 50%

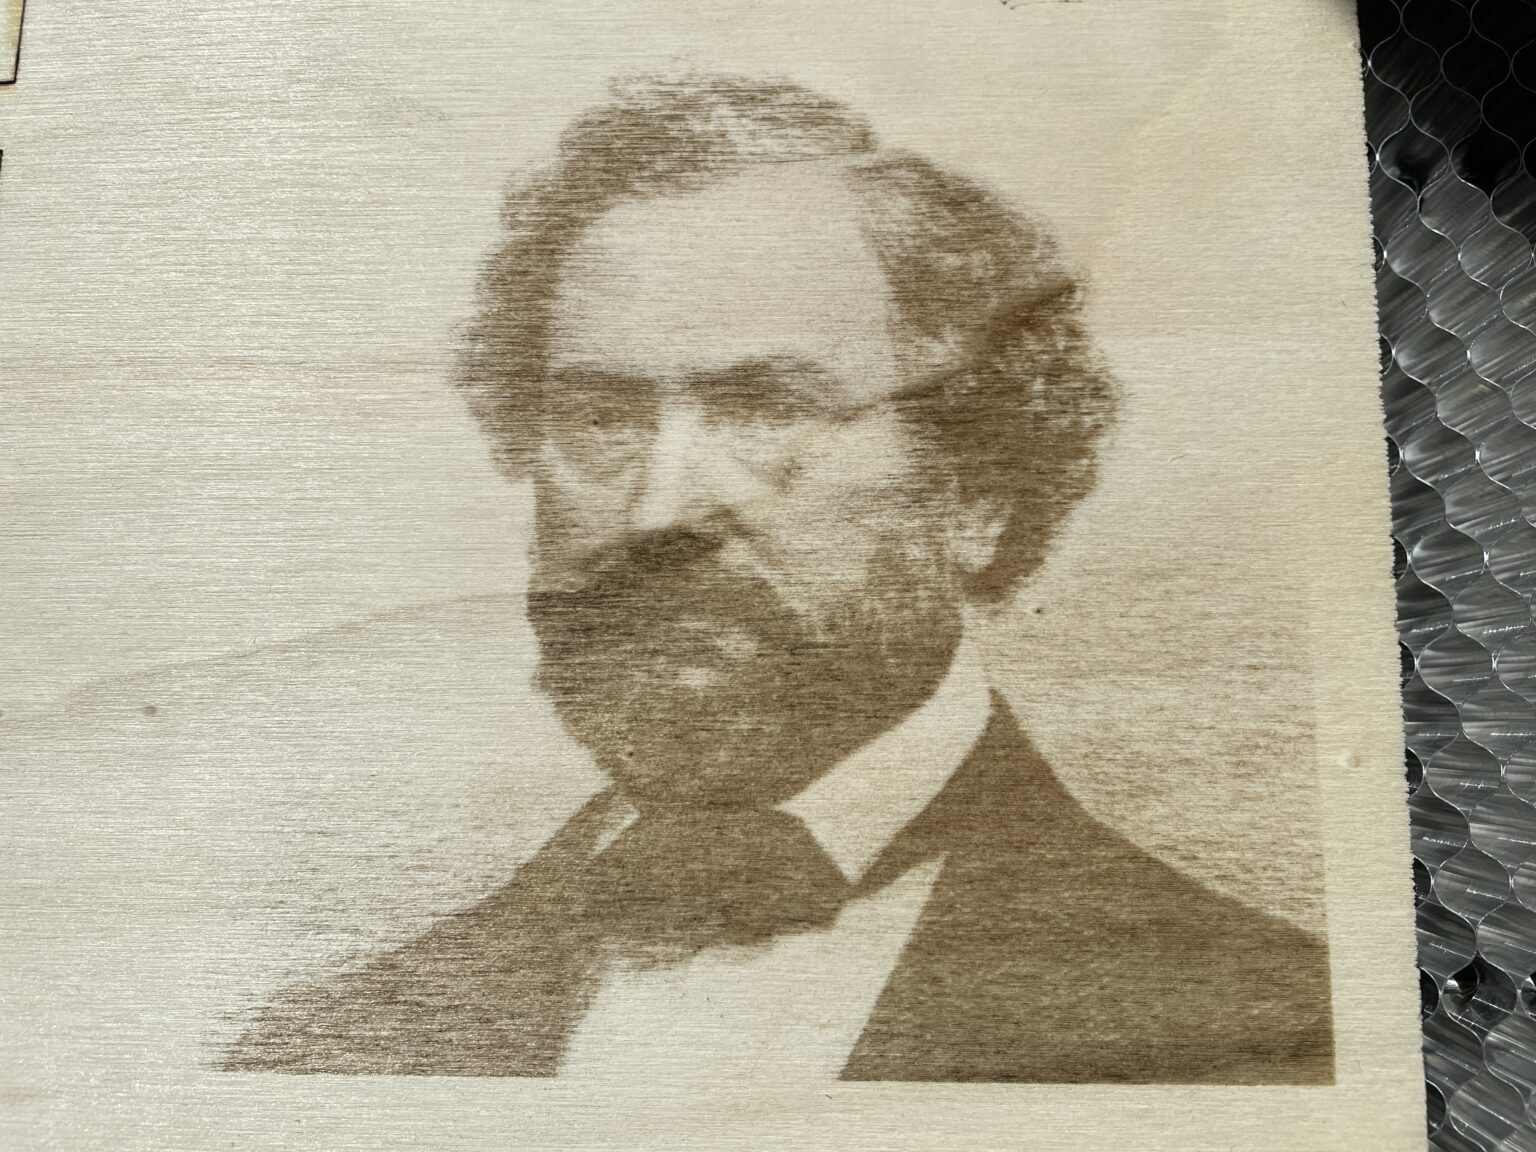
Photo Test
6000mm/min, 40% grayscale mode
Conclusion
The Ortur Laser Master 3 sports a great new frame and lots of safety features that other engravers in its class don’t have. Other features that I liked include the elimination of end stops, the offline controller using the app, network-capable, many expansion options, and good concept for AirAssist.
The Laser Master 3 does a lot of things really well. Therefore, it doesn’t bother me that much at the moment that the included LU2-10-A-22F18 module tested here doesn’t cut quite as fast as the other two 10W modules tested so far.
When choosing a laser engraver, pure cutting power is not everything. Moreover, this device power is still well above the 5.5W modules of the last generation. Engraving and photos turn out surprisingly well with the OLM3. And here you can also use the higher speed of the OLM3.
Ortur offers a well-equipped laser that works very quickly, especially when it comes to engraving. The device is also easy and quite comfortable to use.
SEE PRICE AT ORTUR
