
A CNC router, laser engraver and 3D printer: this is what we can rightfully refer to the Snapmaker 2.0 A350T. This printer come with automatic calibration and user-friendly software Even beginners in 3D printing can easily get started with this unit.
Snapmaker A350T Review

AVAILABLE ON SNAPMAKER
If you have been looking for a high-quality 3D printer, the Snapmaker 2.0. A350T is one you should consider. This is a 3D printer, a laser engraver and a CNC milling machine bundled in one machine.
Pricewise though, you’ll want to think twice.
We had already tested a similar, much cheaper system from the Chinese manufacturer Ecubmaker. However, the Toydiy 4-in-1 3D printer which cost less than $300 did not convince us in the test. Now coming at over $1000, we’re confident that the Snapmaker 2.0 A350T will do better in all areas.
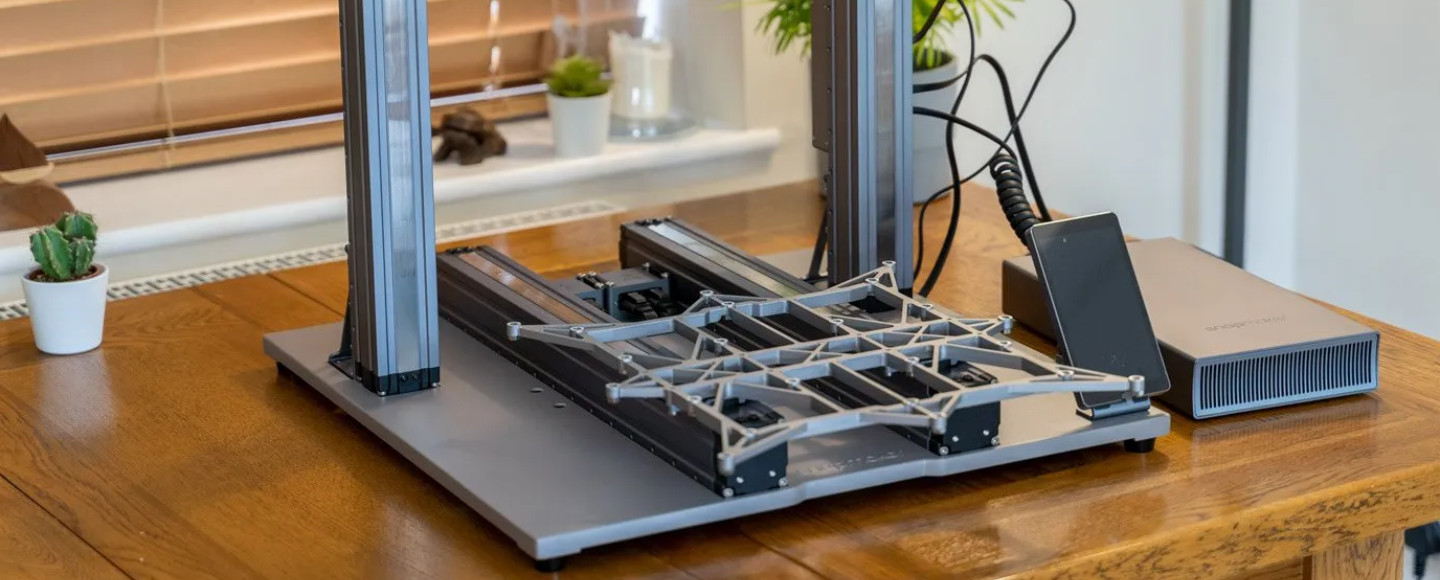
Overview of Snapmaker 2.0 A350T
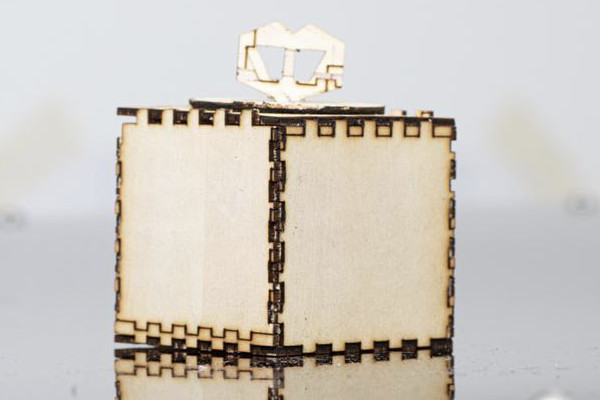
The Snapmaker 2.0 A350T exceeded our expectations in all areas. As soon as we set it up, it was clear that the device was in a different league. All parts are smartly packaged and secured in foams to ensure they reach their destination safety.
The unit has high quality parts that are built to great precision. The design is based on the function. Almost all metal parts are either anodized or powder-coated. It’s clear the manufacturer wanted to bring the best out of every part.

Snapmaker A350T
A highlight of the Snapmaker are its closed linear rails.
Why?
For the CNC function, with the high chip development, these must be completely closed. The complete control system is installed in each rail. A thin sheet of spring steel protects the internal motor system, electronic control and other mechanical components.
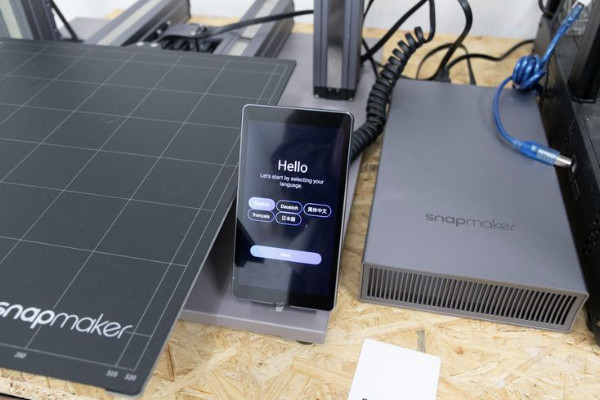
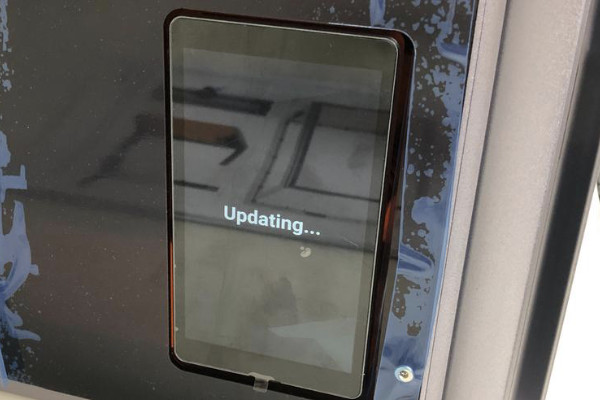
The large 5-inch touchscreen, with its rounded corners and minimal bevels, is very reminiscent of the earlier iPhones. The screen is heavy in the hand, which makes it look high quality. The high-resolution display and the reliably fast touchscreen leave a positive impression. The quality corresponds to the high price here.
Technical Specifications
[su_table]
| Frame | Aluminum alloy |
| Connectivity | Wi-Fi, USB |
| Touchscreen | 5-inch TFT LCD |
| Software | Snapmaker Luban, third-party slicers |
| Supported OS | MacOS, Windows, Linux |
| Rated Power | 320W |
[/su_table]
3D Printing Specifications
[su_table]
| Build Volume | 320 × 350 × 330 mm |
| Layer Resolution | 50-300 microns |
| Nozzle Temperature | Up to 275 °C |
| Nozzle Diameter | 0.4 mm |
| Supported Materials | PLA, ABS, flexible filament, etc. |
| Supported Files | STL, OBJ |
| Heated Bed | 80 °C |
[/su_table]
Laser Engraving Specs
[su_table]
| Work Area | 320 x 350 mm |
| Laser Power | 1.6W |
| Wavelength | 450 nm |
| Safety Class | Class 4 |
| Supported Materials | Wood, leather, plastic, fabric, paper, non-transparent acrylic, etc. |
| Supported File Types | SVG, JPEG, PNG, etc. |
[/su_table]
CNC Specs
[su_table]
| Work Area | 320 x 350 x 275 mm |
| Shank Diameter | 0.5mm-6.35 mm (0.02-0.25 inches) |
| Spindle Speed | 6000-12,000 RPM |
| Supported Materials | Wood, acrylic, PCB, carbon fiber sheet, jade, etc. |
| Supported File Types | .CNC/.NC |
[/su_table]
Software Requirements
[su_table]
| Recommended Slicer | Luban |
| Operating System | Windows, macOS, Linux |
| File Types | .stl, .obj, more formats to be added |
| Connectivity | Wi-Fi, USB cable, USB flash drive |
[/su_table]
Dimensions & Weight
[su_table]
| Frame dimensions |
628 × 554× 312mm |
| Weight | 28.0kg |
[/su_table]
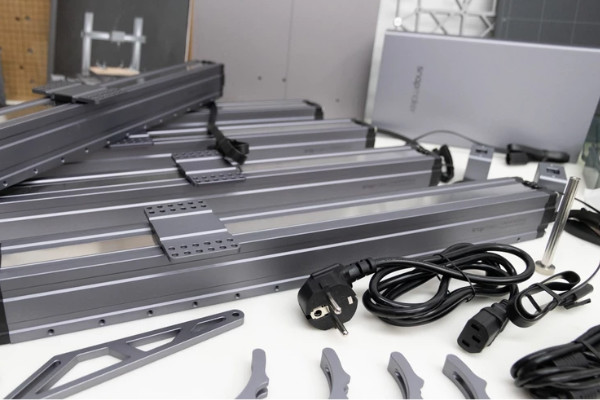
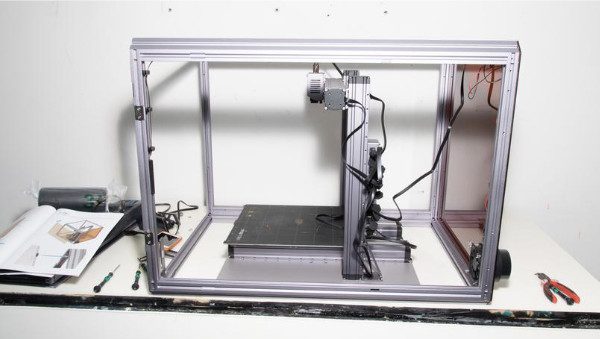
Construction
The construction of the Snapmaker 2.0 A350T, including the housing, takes almost half a day. This is despite having some experience with 3D printers. However, the assembly is also easy to do for beginners.
All parts fit together perfectly and every step, no matter how small, is precisely illustrated in the assembly instructions. We would like it to happen more often. Putting it together reminded us of the exciting Lego Technik kits from childhood, a good feeling!
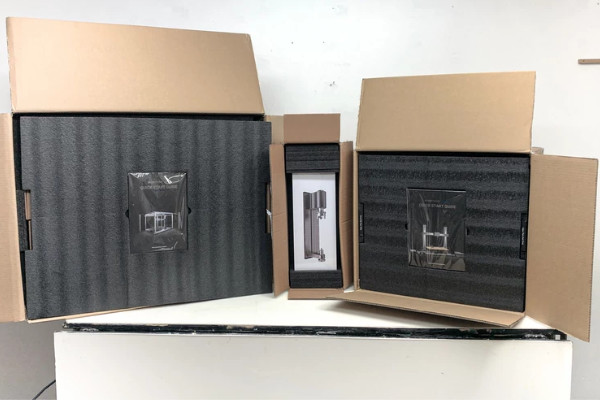
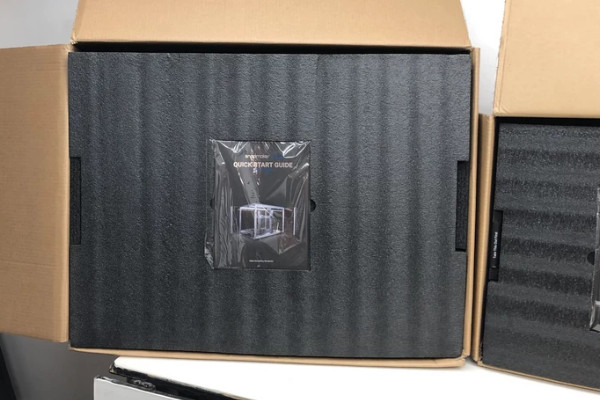
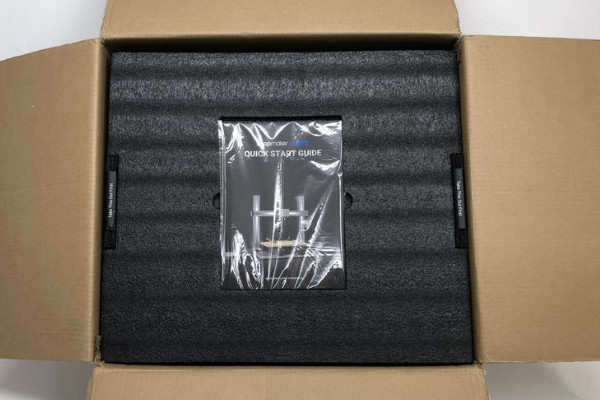
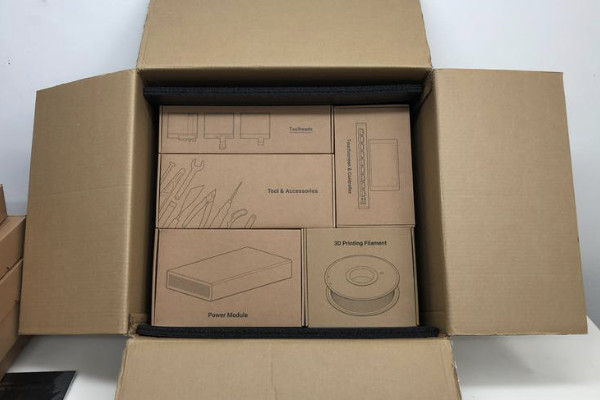
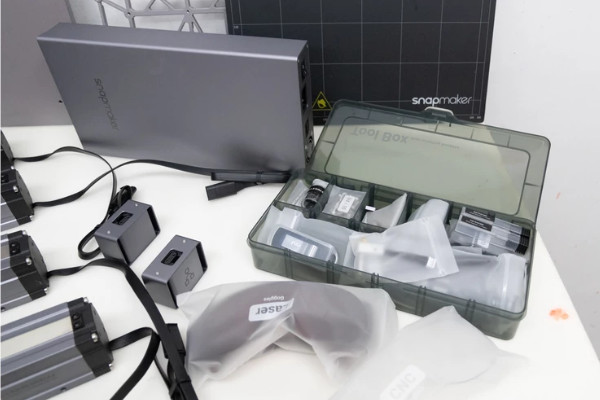
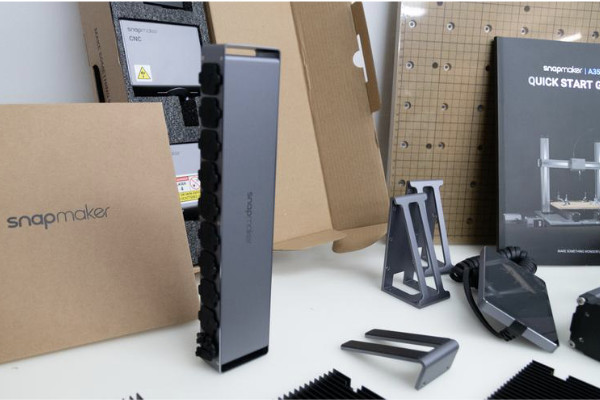
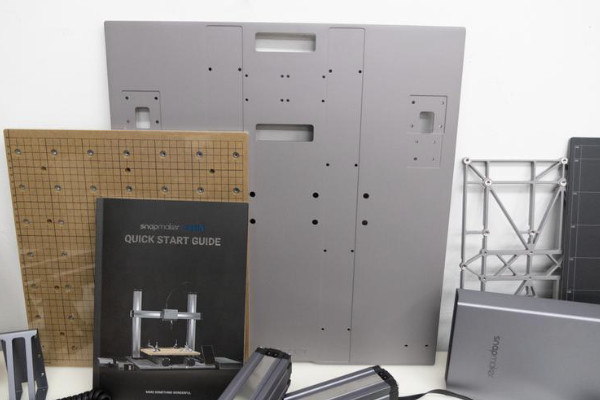
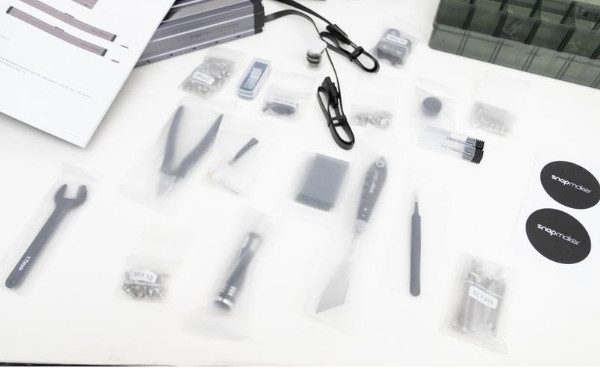
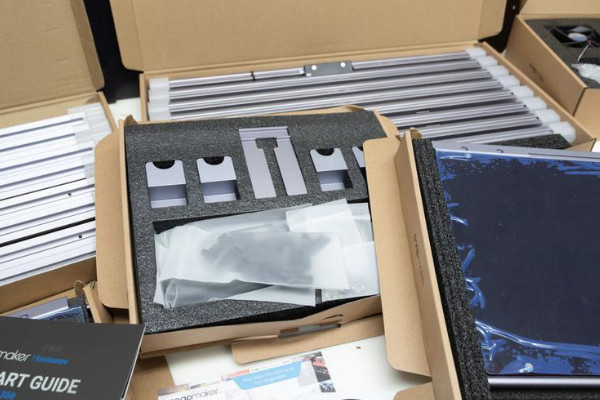
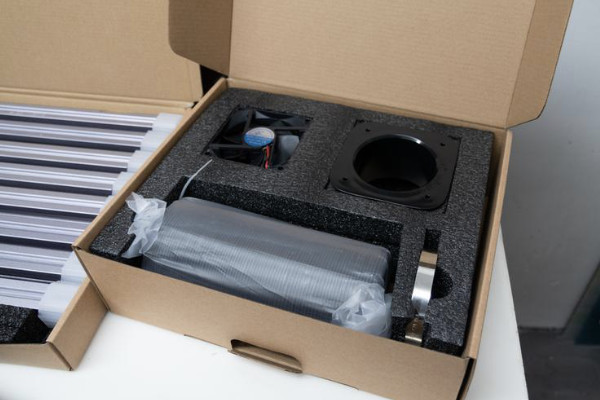
The Snapmaker 2.0 A350T and its accessories are packed in a large, box for transport. The housing comes in an additional box. When the printer’s box is open, numerous individual parts await us. These include some pre-assembled components, tools, instructions and more.
There are also detailed operating instructions and the modules for the various operating modes. These are individually packed in cardboard boxes. The rest of the machine is also packaged in an exemplary manner and secured against damage.
Snapmaker offers its customers a positive product experience as soon as they unpack.


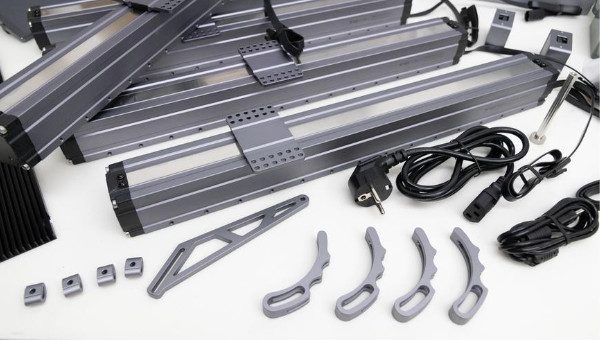
All in all, we can expect a mixture of precisely fitting modules, components and many screws. Nevertheless, the construction is relatively simple. Since the structure is quite big, we will summarize the steps here:
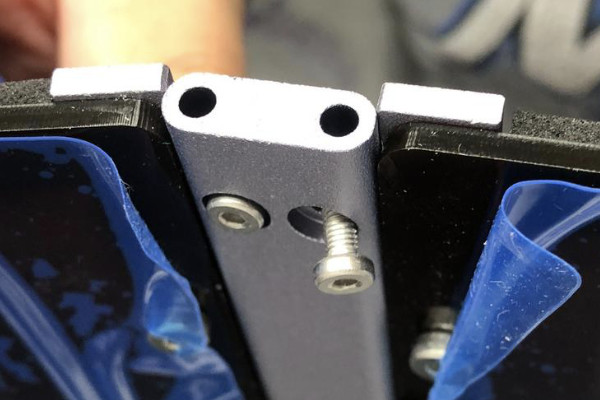
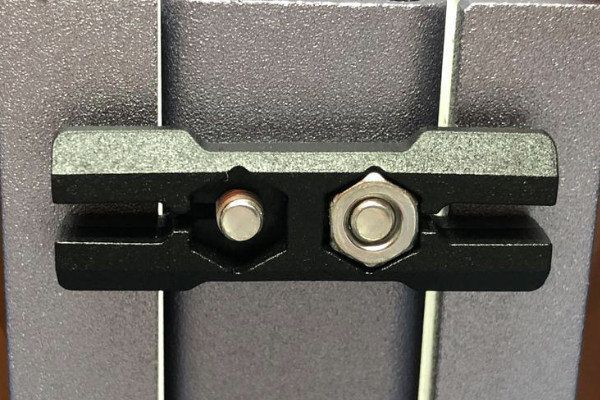
First, the two Y-rails are placed in the recesses of the powder-coated platform and fixed with screws from below. There are three rails each with a lead of 20 mm and two with 18 mm. The three rails for the Y and X axis are the linear rails with 20mm lead.
Next, attach the angle brackets of the Z-rails, and then screw on the z-rails loosely. Now, connect the X-rail to both Z-rails, and then tighten the Z-rails on the platform.
Then, you can attach the trolley, the cable distribution sockets of the pairs of rails and the hub for the electronics. At this point, all the cables are connected. The cables are properly labeled or have clear connectors.
Overall, the assembly is very simple thanks to the detailed operating instructions and precise part labels.
We still have two small points of criticism. The quality of the screws cannot be compared with tat of the rest of the materials. The cable routing is also not exactly inconspicuous. We have some cable ties that we’ll use to create a little more order.
If you don’t want to have problems using the 3-in-1 machine, you have to work precisely! Check all parts, but especially the rails and the frame of the enclosure, to ensure that they are correctly aligned and positioned.


Software
Once all parts are assembled and wired, the Snapmaker can be started. The printer uses Snapmaker’s in-house software (Luban) for control. This software features of all processing tools; from 3D print slicer to 4-axis CNC router. A program can be selected directly on the start page or a test model can be loaded in the lower area.
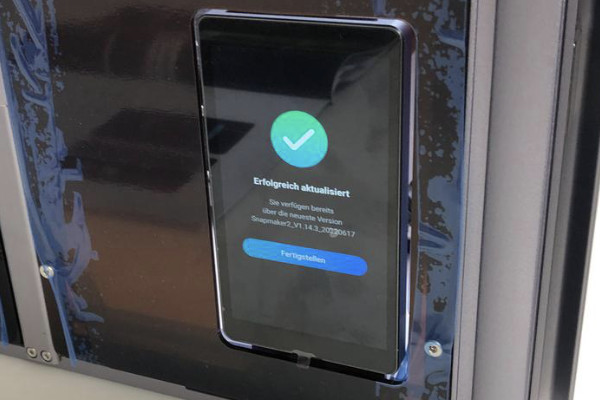
There are also some useful explanations for control and operation. After setting up the WLAN connection, we get a notification message that the system software is out of date. One push of a button and the Snapmaker updates itself. This is very convenient

Snapmaker A350T: Software


3D Printing
First, let’s test 3D printing.
After the 3D models have been prepared and coded, the G code can be loaded directly from the PC onto the printer. The advantage of this method is the direct tool control. The disadvantage: The computer must remain connected to the Snapmaker and must not switch to sleep mode.
Alternatively, the file can be transferred to Snapmaker via WLAN or a USB stick. In this case, the device will work independently without a connected computer. However, monitoring and control will then be limited.
The associated Luban software is intuitive and clearly structured. Unfortunately, the performance of the software cannot be compared to that of the Snapmaker. We had problems building up the individual layers with the 3D print slicer.
During the vector conversion of a photo in the laser software, the program froze again and again for a short time. There are also sporadic connection problems when switching from the preparation window to the workspace. There it can also happen that the software hangs completely, which requires a restart.
However, the issues with the software are not really a dealbreaker. After all, there are great alternative programs, some of which are free. For example, you can use Prusa Slicer or Ultimaker Cura to create the Snapmaker printer profile. We recommend using one of these programs.
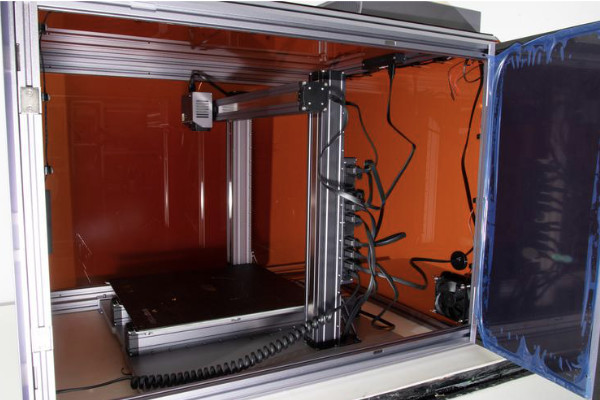
Snapmaker A350T: Housing


Laser Module
Snapmaker’s laser software is perfect for simple photo and vector engravings. However, there are not really many setting options, at least in comparison with commercial software. If you want to get more out of the laser, check out the Lightburn program. The software is available as a free trial.
CNC Module
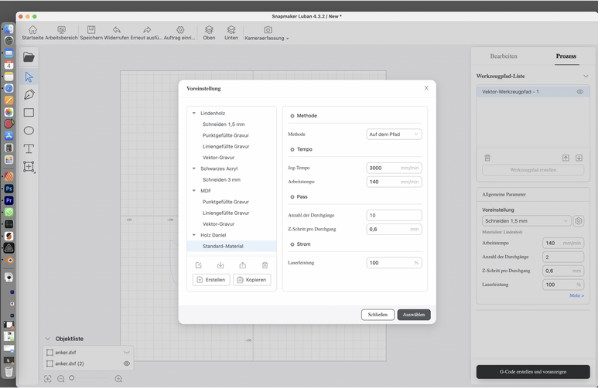
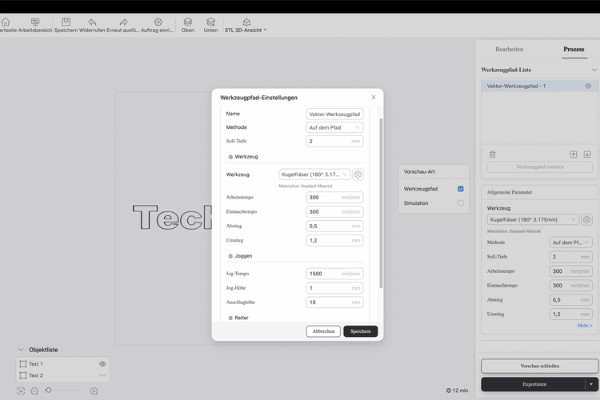
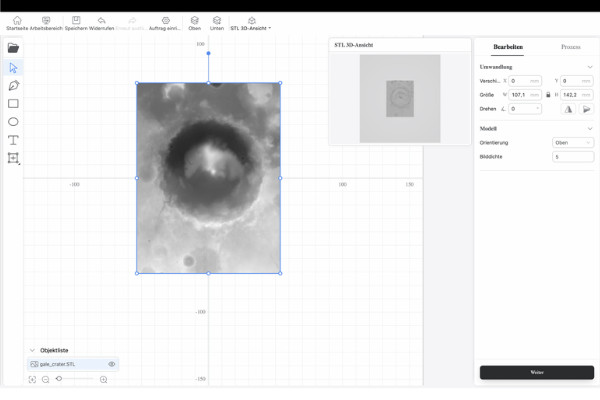
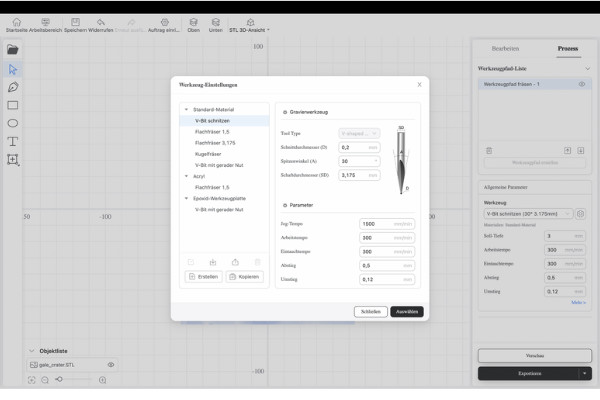
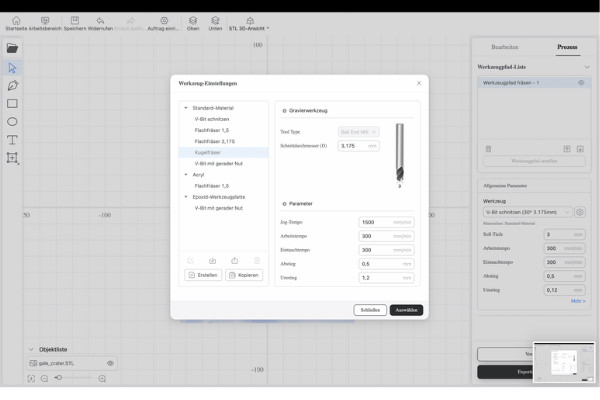
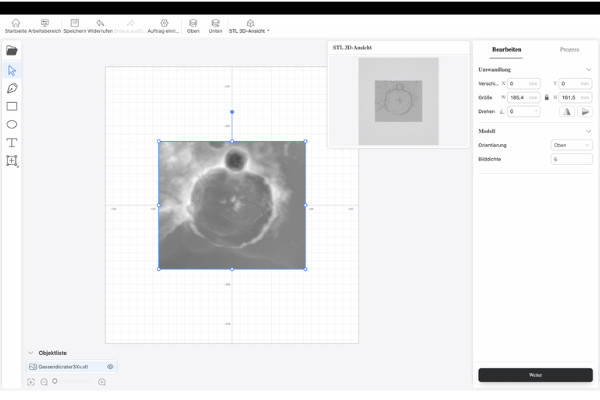
The Snapmaker’s CNC software works with SVG files or STL files. SVG files (vector graphics) work with lines that relate to each other. STL files, on the other hand, describe the surface of 3D models with triangular facets.
With SVGs, the milling head simply follows the lines of the vector file and the user decides how deep the lines are to be milled. For STL files, Luban converts the top view of the model into an elevation relief. This relief is then removed layer by layer.
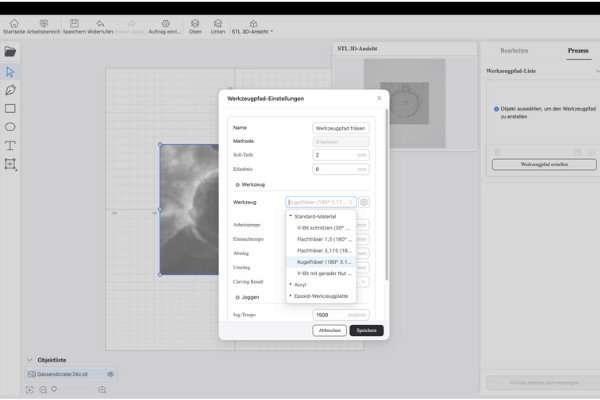
The in-house milling heads have already been created in Luban (see picture gallery, software). After the workpiece and milling head have been assembled, the center point and starting height must be defined just above the surface to be prepared.
do this, you have to center in the middle of the horizontal line, then lower the Z-distance down to the 0.1 mm distance card. After this, press the Center of Origin button. When this is don, the processing mode on the display will switch correctly to the CNC program.
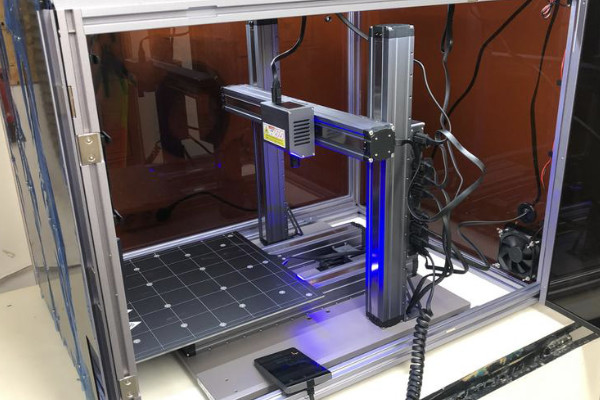
The Snapmaker has to be modified depending on the function used. Below are some photos with different equipment.
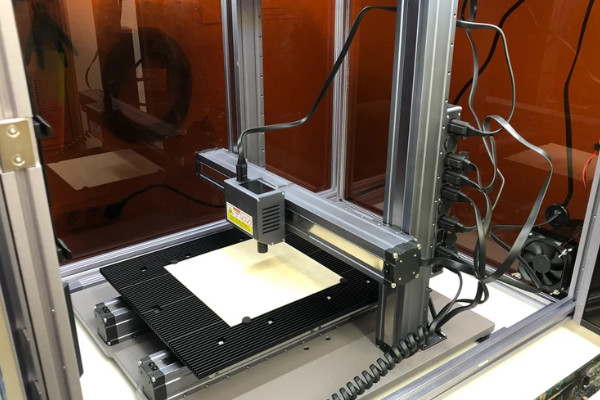


3D Printing Module
We started the test using the Luban software that comes with this 3D printer. If you have Snapmaker filaments, there are pre-made slicer settings for them. If you are using a different filament, the profiles must first be adjusted.
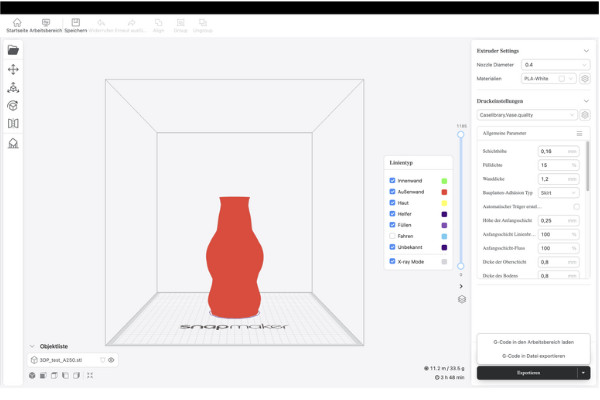
After all the settings have been defined, press the Gcode button and in a few seconds, the model will be ready for printing. In the test, we had no problems with the model of a vase supplied on the USB stick. But for our own 3D models, after the first unsuccessful attempts with Luban, we switched to Cura. The models from Cura were then all printed wonderfully.
The extruder only has one feed wheel for the filament feed. Unfortunately, this is no longer state of the art. There is also a small fold-out compartment for changing the material or unclogging extruder. In case the filament jams, simply open the compartment and take it out.

Print Quality
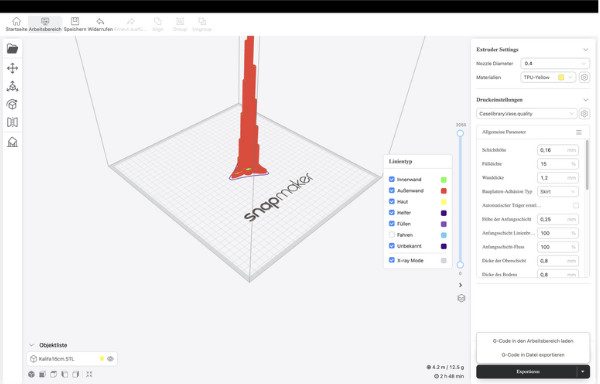
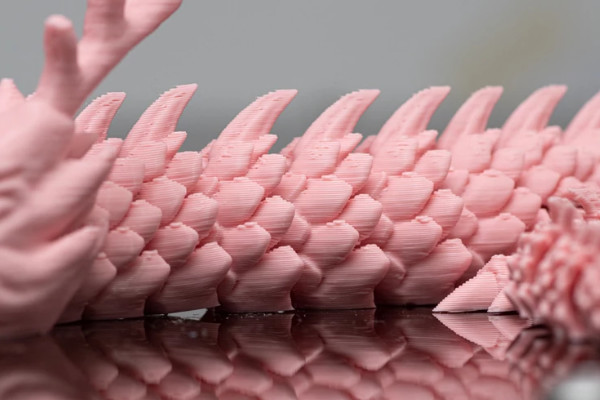
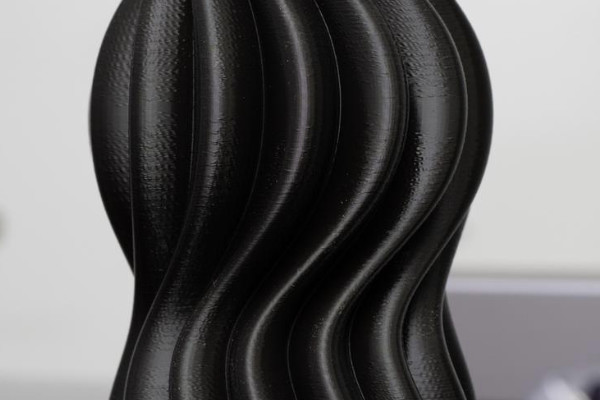
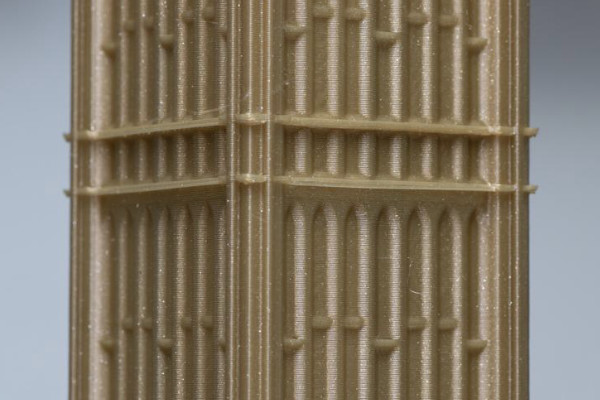
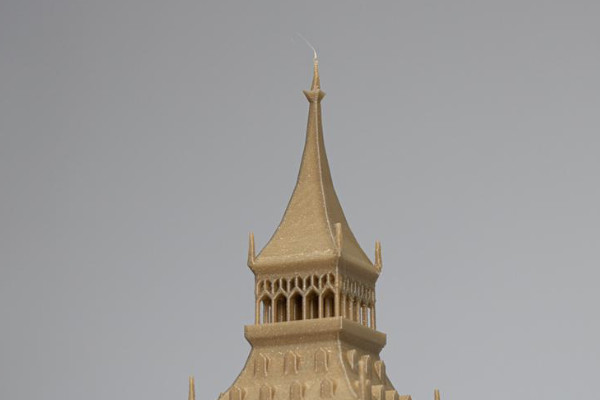
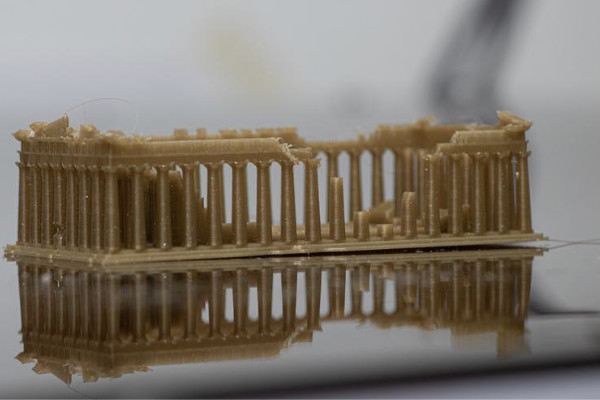
We printed Big Ben, the Pantheon, the vase saved on a USB stick and a dragon from PLA. The classic Benchy was then printed with TPU.
Overall, the printer delivers a decent to excellent print image. There is no offset in the layers, but minimal patterns in the vase print. The problem does not appear with the self-edited models. The cooling component of the 3D printing module is so powerful that it enables models with fine tips to be perfectly finished.
However, with TPU, the one-sided extruder weakens. You can print TPU with the Snapmaker. However, the speed has to be greatly reduced. At a slow 20 mm/s print speed, we got a good quality print result. If you want to print TPU with the Snapmaker, you should ideally even reduce the speed to between 10 and 17 mm/s.
With a print bed temperature of 80°C and a nozzle temperature of 275°C, the Snapmaker can print a wide variety of materials, incluing PLA, PLA+, and PETG. TPU also works, but only at low printing speeds.
ABS, ASA and CPE can also be prnited with a print bed temperature of only 80°C. However, you should also use Fall adhesives such as the classic glue stick, diluted wood glue or Magigoo adhesives. The Snapmaker can definitely process the materials. However, without a really airtight housing, there can be cracks in larger print models.
Overall, the Snapmaker is a good and reliably working 3D printer for the most common materials. However, with exotic materials such as nylon, PC and larger prints made of ABS, ASA and CPE, the printer reaches its limits.

Snapmaker A350T: test results


Laser Module
Switching to the laser is easy. However, there are four screws that need to be replaced first. The Snapmaker then independently recognizes the tool change.
To begin, an outdated firmware of the laser module was detected and immediately updated via WLAN. To get the printer’s heating bed out, we had to remove about 20 screws. After that, the work surface was ready for the four black, ribbed aluminum rails for working with the laser.
The ribbed surface means that less heat is radiated to the underside of the component to be engraved. The result is clean cuts and fewer burned undersides. The four rails are fixed to the frame with four screws each.
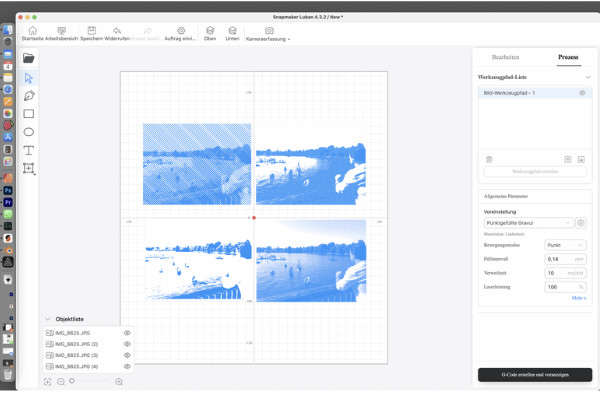
Even inexperienced users will quickly understand how the software works. The video instructions also give a quick insight into where the important keys are located. In principle it’s quite simple: Load a photo or other JPEG via the software, scale the file to the right size with a mouse click and position it on the work surface.
If the Snapmaker is controlled directly from the Luban workspace, the camera can even take a live image of the workspace, including the material. The engraving can then be precisely aligned. This is a convenient solution and an ideal prerequisite for successful and correctly positioned engravings.
If the data is sent via USB or WLAN, positioning the workpiece is a bit trickier. But with a little practice, it works too.
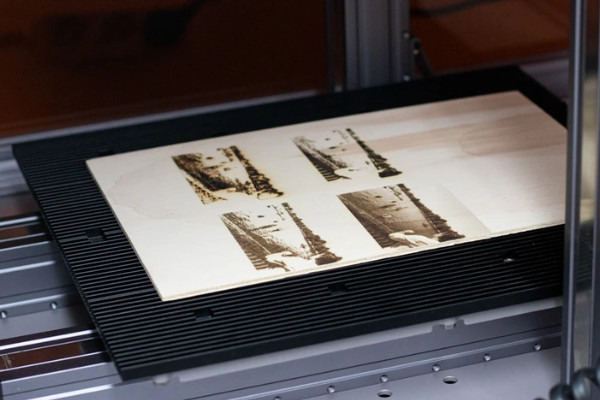
We started our test with an enclosed wooden board. The board is positioned and fixed with small silicone nubs on all four sides. These silicone nubs secure the material on the workbench and prevent it from shifting during the work process.
However, be careful. Due to the heat generated, some materials, such as wood, can heat up so much that they warp during engraving. Therefore, never leave the laser unattended!

The tension here was too high
First, we selected the box from the Luban desktop test files. At the beginning of the laser program, you can choose between automatic or manual calibration. In the case of automatic calibration, the material thickness must first be specified. Then, a 5 cm long test strip with different heights is lasered onto the material. Using the camera, the laser independently adjusts the ideal focal length. With manual calibration, the origin is defined itself.
LED lighting, extraction of the housing, working speed and laser power can be controlled during operation. The housing with the special glass that protects against the laser light registers open doors and then interrupts the program. Here the manufacturer has thought along and done everything right. Open housing and eye hazard are major criticisms of most lasers.
Laser Quality
The laser module, which has an output power of 1.6 watts, is well suited for laser engraving. But when it comes to cutting, it disappoints. With 1.6 watts, the only thing we could cut with it in one run was a thin cardboard. For the supplied 1.5 mm thick wooden panel, the laser needed at least three passes. Four would have been better.
With a 4.5 mm thick poplar plywood, even ten passes were not enough to completely cut through the material. In theory it is possible, but in practice the cuts are no longer clean. Even lowering the laser to change the focus doesn’t help here.
In short, the small module is not suitable for laser cutting. However, Snapmaker offers a powerful 10-watt laser module as an add-on. Read the Snapmaker 10W laser module review for an overview of its performance.
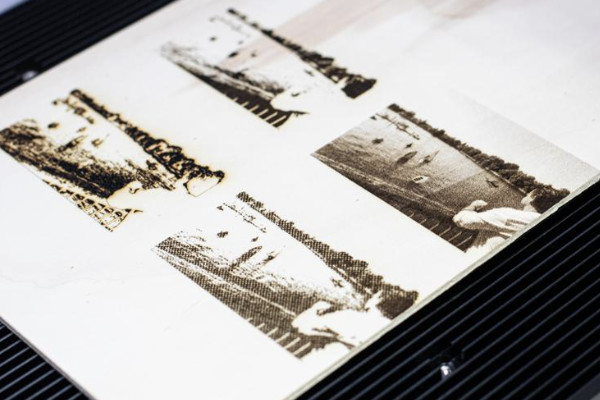
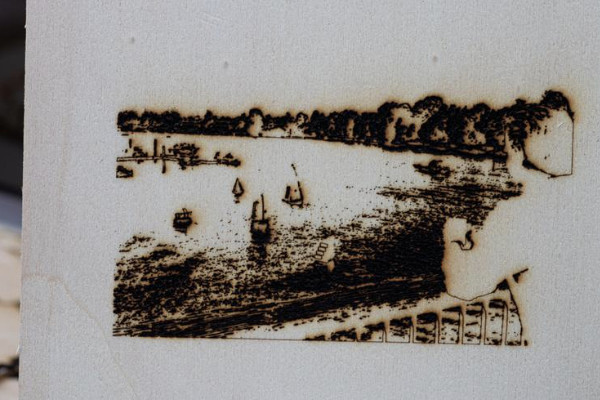
However, with the engravings, we had great success and are very satisfied. The software offers a choice of four classic processing modes: Black&White, grayscale, dot and line grid, and vector drawing. When fine-tuning the vector drawing, the program freezes for a short time, but gets working and we can continue with the exercise.
With us, the photo engravings on wood are all successful. The result is clear, even and sharp. There were no dropouts or discernible offsets during the tests either. The laser module does a great job here.
CNC Milling Module
Stainless steel fittings, solid arbor and a heavy CNC module are good signs of a decent tool. After successful assembly and alignment, we first drove the flat-head milling head full can into the workpiece.
However, we had made one mistake: we had not confirmed the Center of Origin button. Therefore, it’s best to make the first attempts with the more stable round head and have your hand on the power switch.

Overall, the drive of the CNC module runs smoothly and quietly. However, we could still hear sporadic disturbing vibrations with the round head milling head. We then slowed down the working speed and the vibrations became less.
After an hour and a half, our first test model, a phone holder, was ready. The edges were all milled cleanly. However, due to the round head, there is an uncleanly milled trailing edge.
With our height relief, the round head milling cutter ran much more smoothly. We are almost satisfied with the result and look forward to the next tests with confidence.
CNC milling is a largely new technology for us – that’s why new milling heads, aluminum and Sika blocks have now been ordered.
There is also a mini lathe for 4-axis milling for the milling module. There are also so-called Schnitzer milling heads. In contrast to the flat and round heads, these resemble a double, very pointed knife. We will present both together with the 10-watt laser module in an update.
Snapmaker A350T Price
The Snapmaker A350T is currently priced at about $1000 (check current price). This is a great modular device that beginner makers would love to have. However, we find it still expensive, unless you will be using all the 3 modules of 3D printing, laser engraving and CNC cutting.
If you will mostly be using the 3D printer module, there are pure 3D printers that are cheaper and offer excellent print quality.
Conclusion
The Snapmaker 2.0 A350T is a high-quality, stylish and reliable 3-in-1 system with clear but not yet fully developed software. Without much tinkering, the Snapmaker 2.0 A350T is a successful, very expensive, all-round carefree package with fascinating possibilities.
The print quality with standard filaments is high. However, the print module reaches its limits with exotic materials. After all, TPU and ABS are printable from the factory. Our tip: For print jobs, we recommend alternative software such as the free Cura.
The laser module included in the bundle was fully convincing when it came to engraving. Engraving leather, wood, or stone surfaces works great and is fun. However, there is a lot of odor produced.
The possibility of positioning motifs via camera view is ingenious and makes it particularly easy to get started. However, if you want to cut with the laser, you need more power. This will mean getting the Snapmaker 10W laser module.
With the engraving module, we noticed the good concentricity and the tolerable volume. Unfortunately, we didn’t have the time, materials or milling heads for more than a few tests. However, these have been ordered and so we will include this information in an update.
Engraving soft materials works well in any case. The next few weeks will show how well the milling cutter with the Schnitz milling cutter and optional lathe module performs.
The Snapmaker hardware and software work perfectly together, thanks to the closed ecosystem. These two offer a comfortable entry into the areas of 3D printing, laser and CNC milling.
However, despite the very good results, there is still one big downside of the Snapmaker 1350T: high price. There are comparably good printers that are much cheaper. There are also laser engravers and cutters available in much more powerful versions for a fraction of the cost. It remains to be seen whether the milling function will pay off in the medium term.
AVAILABLE ON SNAPMAKER
