

Of late, we have been testing laser engraving and cutting machines in our Test Lab. Today, we are going to test the NEJE 3 Max!
In this NEJE 3 Max A40640 review, we’ll take it from a beginner’s perspective. This way, if you do not have a lot of experience with laser engraving, you will have a thorough guide to rely on.
Let’s get started with the structure.
About NEJE®
NEJE is a brand focused on providing laser tools, services, products and solutions. The company has been in operation since 2013 and boasts of a y laser module that has been fully developed and manufactured independently. Its laser engravers are designed for small businesses, schools, and hobbyist users.
One of their most popular engravers is the NEJE 3 A40640 Max.
NEJE 3 Max A40640 Review
AVAILABLE ON NEJE | AMAZON | ALI EXPRESS
Technical Data
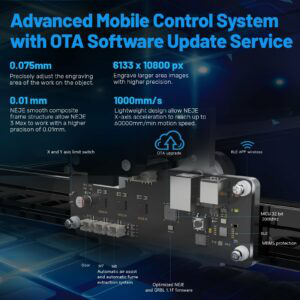
The NEJE 3 MAX laser engraving machine is equipped with NEJE’s most powerful A40640 PRO laser module. The machine uses advanced Compressed Spot Technology to synthesize 2 diode laser beams into a single fine laser beam, which doubles the engraving power to 10W and enables the unit to cut 18mm thick wood and 10mm thick dark acrylic. The laser engraving speed is 20,000mm/min.
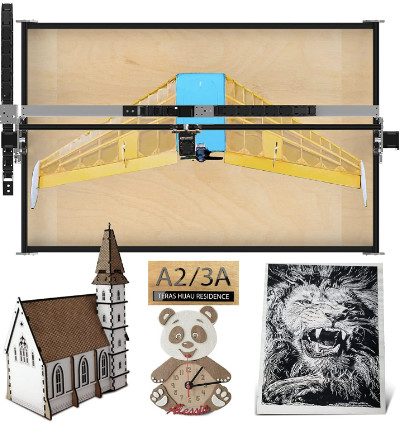
With an engraving space of 810 x 460mm, this unit can meet your various DIY needs. Talk about small items like customized business cards, cell phone cases, dog tags etc. You can also make big projects like big 3D puzzles, Christmas decorations, family photos, landscape paintings, airplane models, and so on. Moreover, the engraver can be expanded to 810 x 1030mm with the NEJE- expansion kit.
The powerful NEJE 3 MAX A40640 laser engraver engraves and cuts 18 mm thick wood. Some of the materials it can engrave include: : paper, cardboard, wood, leather, rubber, acrylic, glass, pebbles, aluminum oxide, painted metal, and stainless steel.
The materials it cannot engrave include gold, silver, copper, Brass or reflective materials.
When it comes to cutting, the NEJE 3 Max can cut paper, MDF, pine, hardwood, plywood (<18 mm), acrylic (<10 mm), Leather, ABS, and PVC sheets.
For professional engraving with higher precision, the NEJE Laser Engraver has MF8 Air Assist Kit, M8 Auto Air Supply Device, M7 Auto Smoke Exhaust Device, and a DOOR Emergency Switch Device. This accessory optimizes cutting of materials and evacuation of the smoke, thus improving the engraving effect.
In case of an accident, you can press the emergency button to stop the machine. The New 32-bit motherboards process instructions more efficiently.
The laser engraver is easy to install and use. You can use the NEJE APP on your cell phone or tablet (Android/ iOS/ iPadOS/ MacOS) to wirelessly connect and control it. The unit also supports NEJE Win Software, Lightburn, LaserGRBL.
NEJE 3 Max Structure
The Neje 3 Max comes is just 6.2kg but comes in quite a large box. The equipment and its accessories is packed well to ensure it survives long distance shipping.


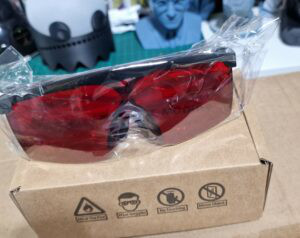
The laser engraver comes with all sorts of accessories for successful operation. Inside the box, there are some simple tools, safety goggles, an emergency stop switch (door opening), the MF8 Air Assist Kit, and a car smoke extraction module and air supply unit.
In addition, NEJE encloses a brief manual and a set with test materials. There are also multiple screws and nuts (one can get lost). However, we realized two important screws were missing…more on that later.
We unpacked and laid out things on a table to get an overview of the laser engraver.


We assembled the frame in a few minutes. The assembly is self-explanatory. The belts are also pre-assembled and even properly tensioned. 6 screws and 4 minutes later, the laser engraver was ready.
When testing the deck rollers/motors, I noticed that the right side has a small, recurring runout/imbalance with every full revolution of the rollers. However, since the imbalance was minimal, I initially ignored it. I will order and replace suitable rollers in due course.
 |
 |
 |
 |
 |
Cables & Accessories
When it came to the installation of the cable ducts, the laying of the cables and screwing the guide profile for the cable duct, we experienced some challenges.
To completely assemble the laser with the tool provided, you need a third hand and ideally, small hands. The tool is small, so you may fiddle a little bit when assembling the laser. However, you will definitely finish the assembly.
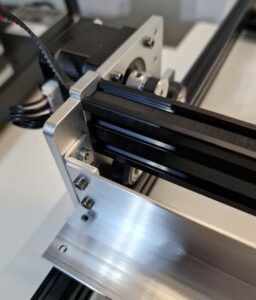
By the way, all rails, modules, carriers and attachments are cleanly deburred. There is no danger of cutting yourself or that cables can “ravel” somewhere.
 |
 |
 |
 |
The 4 feet/corner profiles should also be mentioned. These are different in color (free) but have a rubber lip that prevents slipping. They works great.
Up to this point, I am very satisfied. I had imagined that it would be more difficult.
The NEJE 3 Max laser engraver comes with interesting modules. To begin, there is the MF8 Air Assist Kit for mounting directly on the laser. In my opinion, this part does not really deserve the name Air Assist Kit. Instead, I ordered the AF8 Air Assist Kit, which works better and fits the laser perfectly.
I will talk about the AF8 kit later on.
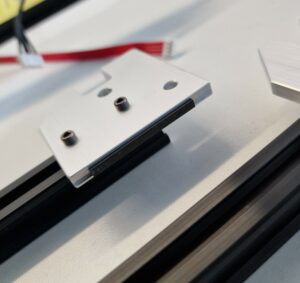
Next, we have the M7 smoke vent module for controlling the fans, an emergency stop switch/door opener and the M8 car air supply device, which is switched between the compressor and the air assist kit. For this module, the two screws mentioned at the beginning of the review were missing. Since the screws need to be of a certain length (from below as a cable duct holder, through the aluminum bracket into the air supply unit), I had to improvise and shortened 2 screws to suit.
The laser engraver is pre-assembled. In addition to a plug from above, it is fixed on the side by an Allen screw, which is also used for height adjustment.
This looked like a little problem but it turned out to be a sensible and useful accessory. After a little research, I stumbled across some professional users who consider this to be an advantage.
Installation
So, the laser is standing, wired and should be able to start. But where does the micro SD card go?
The NEJE 3 A40640 Max can be controlled via USB connection from a Windows or Mac computer, as well as from Android or iPhone, iPad.
The setup is easy, even for beginners. A comprehensive tutorial is available at https://neje.wiki/doku.php?id=neje_3_max.
With a Windows PC, the driver and .NET Framework are installed. Windows 10 PCs should be able to recognize the laser without installation. NEJE offers the software NEJE_v6.1.8.exe to control the laser (this is only for the lasers of the 3 series)
I also tested the connection to the laser with the Android app, which is available in the Google Playstore > https://play.google.com/store/apps/details?id=com.neje.n3 NEJE_3_v3.0.3.apk. I haven’t tested the optional N-Scanner app yet.
LaserGRBL software for Windows is also available on the site.
Well then, the huge laser engraver was assembled and ready for use. I screwed it to a 60cm x 100cm wooden board with the angle brackets provided. The advantage is that you can simply move the quite light laser to another location if necessary.
The advantage of having a large engraving area is that it takes a lot of space. So, make sure you have some space on your workshop.
NEJE also offers an extension that can increase the working area to a whooping 1.03 meters! x 0.81 meters.

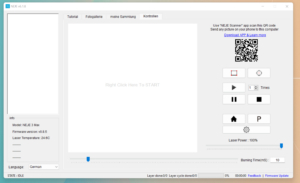
Software + Firmware
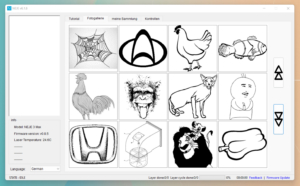
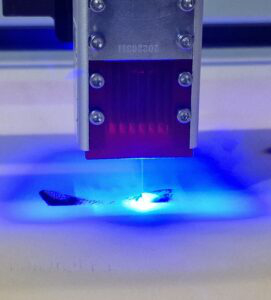
The software from NEJE first checks the devices and firmware updates. After this, the NEJE 3 Max runs problems in the NEJE software. Due to a lack of experience, I started by engraving an image from the NEJE library with 100% laser power.
In seconds, the machine has grilled a 4mm slab of wood and half the desktop underneath. The laser engraver is powerful. See the pictures below.
 |
 |
 |
 |
 |
 |
 |
I learned from my mistake.
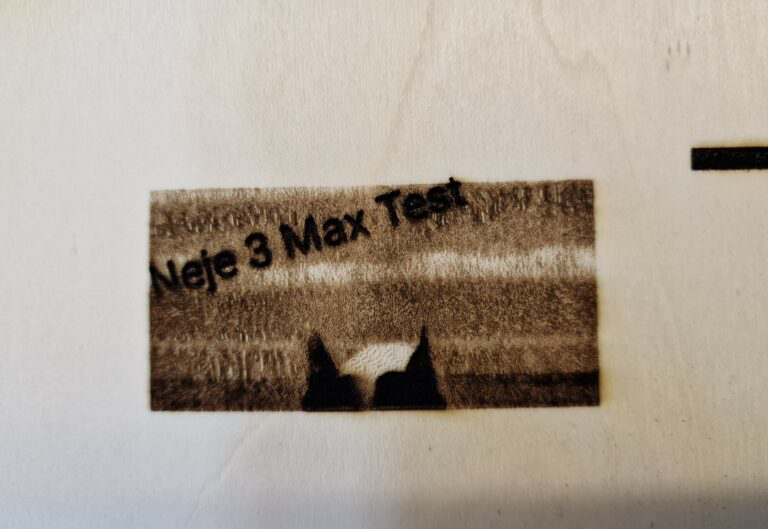
The next test was a cat, also from the library (this contains countless pictures, graphics and much more) from NEJE. I set the laser power to 30% and started the run. After 40 minutes, the work was done. The picture is sharp and looks exactly like the original. Great, I like it
The laser works quiet, even under load/pulse. My quietest 3D printer is audibly louder than the NEJE 3 Max.

Next, I used the NEJE app on my phone, selected a picture from my library and sent it to the laser. The app recognized the laser and connected to it.
In this case, I lowered the laser power to 22% and left everything else as it was. After about an hour, I canceled the process. I realized the laser either worked more slowly or with more detail, probably due to incorrect settings/parameters. I didn’t want to wait for 5 hours for the test image.


Lightburn
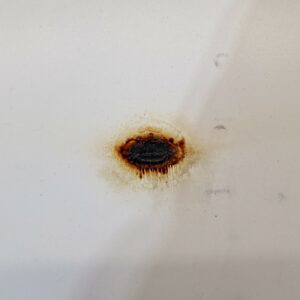
I also installed and tested Lightburn, but stumbled across one or two small problems which are not due to the laser, but to me. The laser is recognized and can be controlled under Lightburn, However, I did not enter the values correctly and the engraving image looked “bad”.
I have discovered the mistake I made and I’ll post some tests later. I could also not determine whether the possibility of cutting or engraving was possible in the NEJE app, probably not due to the simpler parameters.
But I will provide more information as soon as possible. Attached is a picture of the failure.

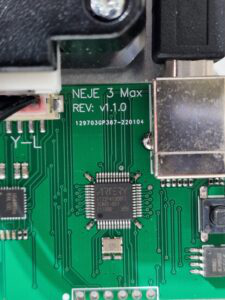
Board and Laser Module
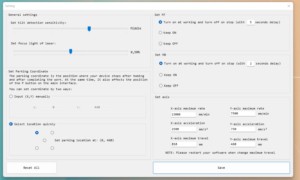
The board is a 24 volt, 32bit board with an Allegro hr4988 driver. The first attempts, including the failed ones in Lightburn, delivered results. However, the results were not as well as I know them from other lasers. This is not exactly easy for a beginner if you expect a “Plug’n Play” laser.
I had to adjust the laser to get it working well. The laser module has a focus ring that you can rotate according to the application. With the correct adjustment, you can engrave as well as cut with one setting. The focus ring is controlled via the speed. If you want to cut deeper, NEJE recommends adjusting the focus ring.
 |
 |
 |
Here is a link to the explanation/instructions: https://neje.wiki/doku.php?id=neje_3_max#step_5adjust_focus
While this seemed to be a challenge for a beginner like me, i.e., the interaction between focus and distance to the material, it is actually an advantage for the experienced laser user.
Attached is an engraving/svg vector graphic with the new settings > 600mm/s and 50% power > a good 3 minutes 🙂
Conclusion
Both the Windows software and the mobile app work smoothly. They do not offer the scope that Lightburn, for example, offers, but are ideal for getting to know and understand the machine better.
I actually wanted to create a PRO and CON list, but quickly stumbled over the cons.
I had a number of pros such as the simple setup, the belts already installed, the large working area, the simple factory software, high performance and comprehensive accessories etc. As such, the cons became increasingly difficult for me the more I thought about it.
Why? Because the negative points for me are actually none for an advanced user.
For example, while I was bothered by the “open” design of the main board, the Pro sees opportunities to realize what is important to him with the accessible connections, or the module to control fans, as well as the M8 air supply unit, and an AirAssist available.
I would have loved a compressor, but as far as I know, no current laser engraver comes with a compressor, at least not in the standard configuration. If available, it usually comes as an external set.
NEJE specifies the point size of the laser as 0.04mm by 0.04mm. This is one of the finest modules.
AVAILABLE ON NEJE | AMAZON | ALI EXPRESS
