

Milling machines are convenient for creating PCBs from PCB. If you are familiar with how CNC machines work, you can make your own PCBs at home. The quality of the project will depend on some things that must be taken into account, both when preparing the project on a computer and when implementing it on a machine.
Read this guide to learn how to mill a PCB with CNC.

What is a CNC PCB Machine?
https://www.youtube.com/watch?v=E8hjARrjyZ0
A PCB CNC machine is a typical router equipped with a custom work table on which a thin piece of PCB is firmly attached. CNC milling printed circuit boards is not very different from any other work performed on numerically controlled machines . However, CNC milling is highly accurate and requires minimal involvement of human work.
The main work work you will have to do is to prepare a virtual model of the printed circuit board and evaluate the completed project.
Pros and Cons of CNC Milling
Before buying a PCB router, you need to have an idea of the kinds of projects you will be doing.
Comparing the advantages and disadvantages of PCB milling, it is obvious that buying a machine is profitable in any case. Even if you have a small workshop, a cheap CNC milling cutter will significantly improve the quality of boards in comparison with hand-made ones. Moreover, the machine will reduce the time and effort you will need to put.
Pros of CNC Milling Machines
- Fully automatic milling
- No chemicals are used in the manufacturing process
- You can produce one or multiple parts at a consistent level of quality
- Faster working speed for any kind of project
Cons of CNC Milling Machines
- Relatively high initial investment
- Requires some little training

As you can see, the benefits are more than the downsides. Even the training required is not that difficult. Of course, your first product will not come out perfectly. However, after mastering how the machine works, you can be sure of 100% perfect products.
Software for Creating PCBs on CNC Machines
There are different software for creating printed circuit boards. Some of them are paid, some have free trial periods.
Below is an overview of some popular software you can use:
- Estlcam is a program for generating G-code. You can control the machine directly from the software’s interface.
- Free Mill is a free CAM module for generating G-code.
- DeskProto is a professional CAM program for creating simple and complex projects with minimal effort.
How to Mill a PCB with CNC
The milling process of printed circuit boards is divided into two stages.
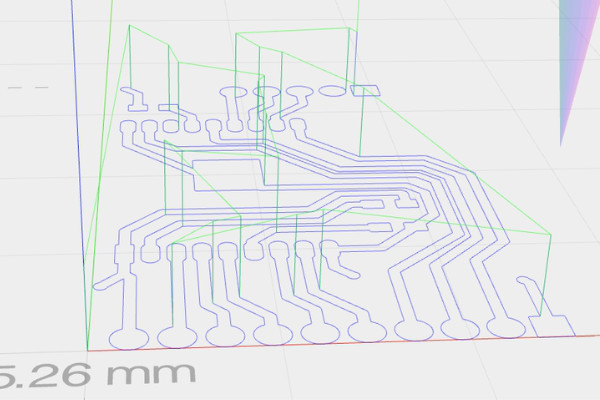
The first is an extensive preparation stage. Here, you have to develop a topology and a drilling pattern on a computer. You also need to create a diagram of a finished board.
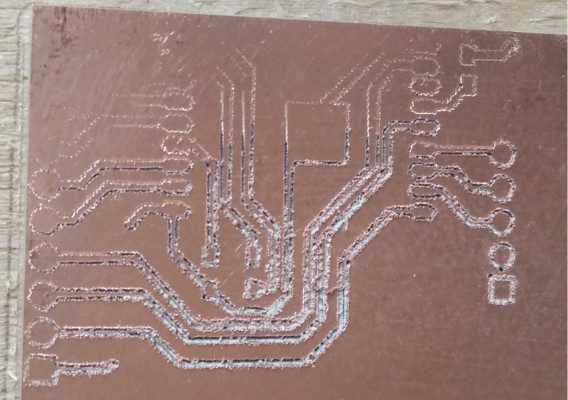
The second stage is working on the machine. You have to transfer different files to the machine to mill grooves between tracks and drill holes. After that, you have to cut the board from a piece of PCB, if necessary.
After determining the desired width of the tracks and grooves between them, take them into account when developing the project. When the milling cutter is set correctly, all products will come out accurately.
Developing the Circuits Paths
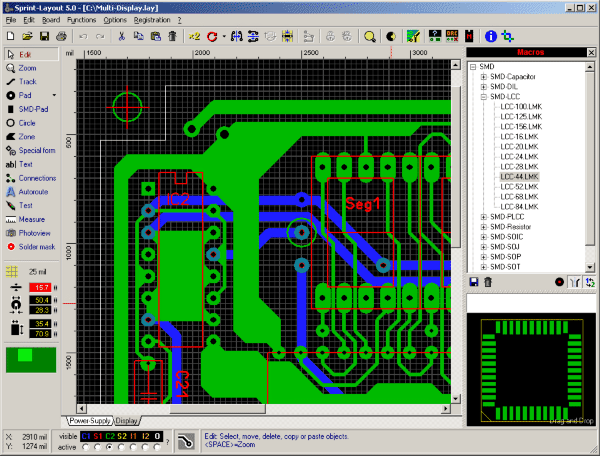
Any suitable computer program can be used to design electrical circuits. If you are a beginner, we recommend using Sprint Layout. This software lies is simple and has an intuitive interface.
There many templates for Sprint Layout on the Internet. You can use the templates to reduce development time by reworking the finished project.
Base Curvature
When milling printed circuit boards on CNC, ensure that the workpiece is fixed properly on the machine table. Since the depth of the grooves is a fraction of a millimeter, the cutter runs at the same depth over the entire area of the PCB.
The first thing to do is to securely fix textolite on the desktop so that it does not move in the process. There are several ways of doing this. You can use clamps or glue the textolite to the table with double-sided tape.
Next, consider the local curvature of the textolite plate. To do this, the machine scans the surface, lowering the tool at different points and memorizing the result. This allows you to automatically build a height map.
Getting G-code from Gerber Files

After creating a PCB project in the software, select it from the menu: File – Export – Format – Gerber. In the window that opens, select the required thickness of the copper layer and click on the “Frame for fracture” button. Then, specify the file name and location in the gerber format.
Right-click the the gerber file and on the context menu that appears, mark “Raw lines” and then select the edge of the board with the cursor. For large printed circuit boards, bridges should be avoided when milling.
Finally, can save the file by specifying the name. This will be the G-code for cutting a free-form board.
Selecting Milling Options
To correctly mill boards on a CNC machine, elect the correct values for the following machine parameters:
- Cutter rotation speed
- Spindle feed speed
- Milling depth in one pass
To determine these parameters, consider the following:
- Spindle characteristic
- Cutter type
- Features of the PCB (thickness of the conductive layer)
Since there cannot be universal settings, you will have to identify the optimal input for your machine and for a specific type of textolite based on these characteristics.
Making PCB Boards on a CNC Machine

Let’s look at an example.
Consider creating a printed circuit board project in Sprint Layout. First, trace the tracks. The tracks need sufficient gaps between them for the cutter to pass. The zero layer in the program means the contour along which the finished board is cut.
Then, indicate the thickness of the cutting tool through the “Strategy settings”. If necessary, indicate the need to mark holes by choosing the appropriate checkbox.
To control the milling cutter, you can use the Step Cam utility. Here, you need to set the milling depth, considering the thickness of the copper layer. Convert the finished file to G-code. Next, export the G-code file to the machine. Finally, specify the zero point and execute the program.
Conclusion
The work of milling printed circuit boards on CNC machines is like any engraving job. After a short training or self-study, you will be able to use a milling machine without any problems.
There are a number of things to keep into account when you want to mill PBC on a CNC machine. These include the difference in the stiffness of the upper conductive layer and the base sheet, the speed and depth of milling that depend on them, and the dependence of the quality of the result on the evenness of the textolite board. However, after a little practice, you will get excellent results.
