

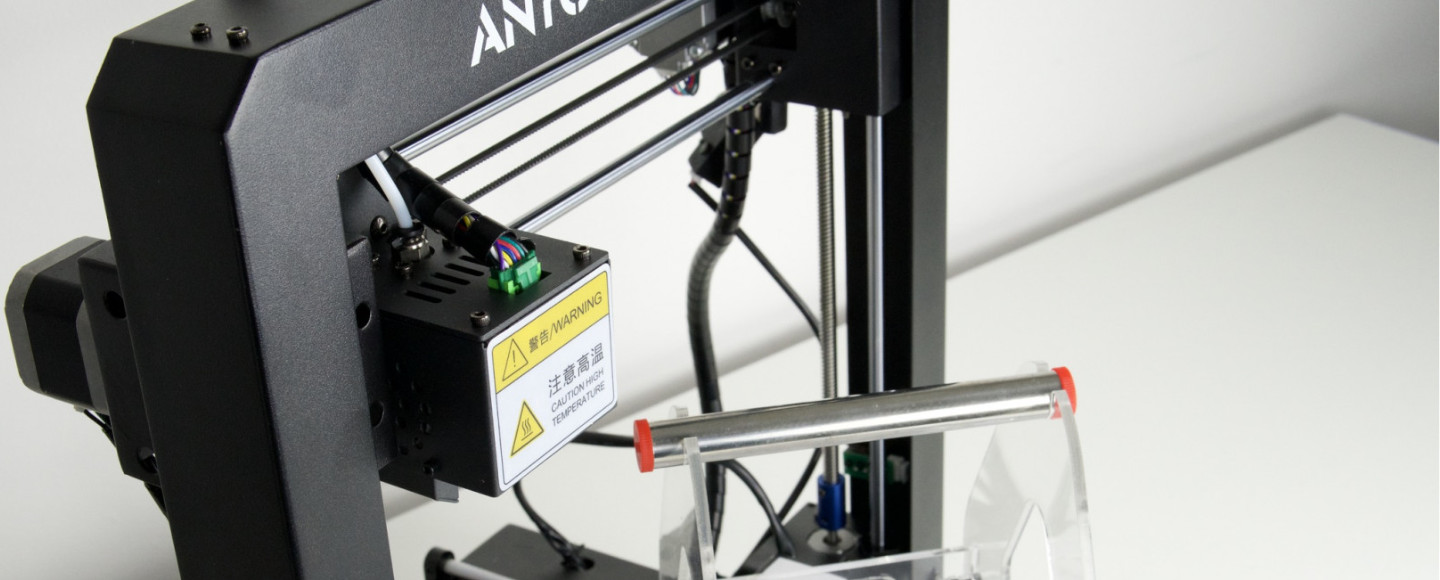
After spending several weeks testing the Anycubic Kobra S1 Max Combo in real-world conditions, this machine has proven itself as one of the most capable large-format CoreXY printers available today. With its massive 350×350×350mm build volume, 350°C hotend, actively heated chamber, and support for up to 16 colors, the S1 Max Combo represents Anycubic’s ambitious leap into the prosumer and professional 3D printing market.
This isn’t just another incremental upgrade. The S1 Max Combo combines high-temperature material capability with multi-color versatility at a price point that undercuts established competitors by hundreds of dollars.
🚀 Quick Verdict
Best for: Makers printing large functional parts, cosplay props, multi-color prototypes, and engineering-grade materials
Not ideal for: Complete beginners with no 3D printing experience, those wanting ultra-compact desktop footprint
Standout feature: 350mm³ build volume with 65°C heated chamber and 16-color capability at under $900
Bottom line: The S1 Max Combo delivers professional-grade capabilities at a mid-range price, making it exceptional value for serious makers who need both size and versatility.
Check Live Price on Amazon View on Official Website
Introduction: Anycubic’s Big Leap Forward
The Anycubic Kobra S1 Max Combo enters a competitive space dominated by printers like the Creality K2 Plus and Bambu Lab’s ecosystem. This is Anycubic’s statement that they’re no longer content playing in the entry-level sandbox.
This machine targets advanced hobbyists, small businesses, engineers, and educators who need the capacity to print large functional parts without compromising on speed or material capability. At its core price point of $849 (early bird pricing), it positions itself as a significant value proposition compared to competitors that easily exceed $1,200–$1,500.
The S1 Max Combo competes directly with machines like the Creality K2 Plus Combo ($1,299) and offers capabilities that rival printers costing significantly more. The question isn’t whether it has impressive specs on paper—it’s whether those specs translate to reliable, high-quality prints in real-world use.
📊 Specifications at a Glance
✅ Who Should Buy This Printer
- Makers and hobbyists who’ve outgrown 250mm printers and need larger build capacity
- Cosplay creators printing helmets, armor, and props in single pieces
- Engineers and designers working with technical materials like PC, PA, and carbon fiber filaments
- Small businesses producing prototypes or small-batch functional parts
- Multi-material enthusiasts who want vibrant color without post-processing
- Users upgrading from entry-level printers to professional capabilities
❌ Who Should Not Buy This Printer
- Complete beginners with zero 3D printing experience (start with something simpler)
- Users with very limited desk space (this is a large machine)
- Those who primarily print small decorative items under 150mm
- Users wanting the absolute fastest multi-color system (single-nozzle systems have inherent speed limitations)
- Anyone expecting plug-and-play perfection without any learning curve
🎯 Best Use Cases
The 350mm build volume fundamentally changes what you can attempt. This isn’t just about printing bigger versions of small things—it’s about printing objects that smaller printers force you to split, glue, and pray for structural integrity.
🛠️ Functional Prototyping
Engineers and product designers can print full-scale functional prototypes in one piece. The high-temperature capability means you can prototype with production-grade materials like PC and PA, not just visualization models in PLA.
The heated chamber minimizes warping on large ABS and ASA parts, making it viable for automotive, aerospace, and industrial applications where dimensional accuracy matters.
🎭 Cosplay and Props
Full-size helmets, chest plates, and armor sections print as single pieces. No more splitting models, dealing with visible seam lines, or spending hours on post-processing alignment.
The 16-color capability means you can print props with integrated color details, eliminating painting for many applications.
⚙️ Engineering Parts and Jigs
Print custom fixtures, manufacturing jigs, and tooling in carbon fiber-reinforced materials. The hardened steel nozzle handles abrasive filaments without degradation, and the enclosed chamber maintains consistent temperatures for dimensionally accurate parts.
📈 Small Business Production
For makers running small 3D printing businesses, the S1 Max Combo offers production capacity that rivals much more expensive machines. Print multiple smaller items simultaneously or tackle larger orders that smaller printers can’t accommodate.
Check Live Price on AmazonView on Official Website
📦 Unboxing and Setup Experience
The S1 Max Combo arrives in substantial packaging with excellent protection. The printer itself is impressively heavy, which speaks to its robust metal frame construction.
📦 What’s in the Box
- Kobra S1 Max printer (95% pre-assembled)
- ACE 2 Pro multi-material unit (ships separately)
- 0.4mm hardened steel nozzle (pre-installed)
- 0.6mm hardened steel nozzle
- Magnetic PEI build plate
- Power cable
- USB drive with test files
- Tool kit
- Filament sample spools
- PTFE tubes and fittings
- Documentation and quick start guide
🔧 Assembly Process
Setup is straightforward and takes approximately 30–45 minutes. The printer arrives mostly assembled—you’ll need to remove shipping restraints, attach the ACE 2 Pro unit, connect cables, and perform initial calibration.
The ACE 2 Pro mounts securely on top with provided brackets. Cable management is well-designed with channels that keep everything tidy.
First-time users should carefully follow the calibration wizard. The touchscreen guides you through bed leveling, Z-offset adjustment, and filament loading. The process is intuitive and includes helpful visual cues.
✨ First Impressions
The build quality immediately impresses. The metal frame feels rigid with no flex or wobble. The polycarbonate panels provide good visibility while maintaining the enclosed environment necessary for high-temperature printing.
The 4.3-inch touchscreen is responsive and the interface is clean. Navigation feels snappy without the lag that plagues cheaper machines.
⚙️ Build Quality and Design
🔩 Frame and Construction
The S1 Max Combo uses a robust steel frame with CoreXY kinematics. This design provides excellent stability even during high-speed prints and reduces moving mass compared to traditional bed-slinger designs.
The dual linear rails on each axis ensure smooth, precise motion. Belt tension is adjustable, and the printer includes sensors to verify proper tensioning—a thoughtful touch that prevents common issues.
🌡️ Enclosure Quality
The fully enclosed design serves multiple purposes: it maintains stable temperatures for engineering materials, reduces noise, and provides active chamber heating up to 65°C.
The polycarbonate panels are thick enough to provide good insulation while allowing you to monitor prints. The front door closes securely with magnets and includes a cutout for easy access to the build plate.
An air filtration system with HEPA and activated carbon filters is available as an optional upgrade, which is recommended if you’re printing ABS, ASA, or other materials that emit stronger fumes.
⚡ Motion System
CoreXY motion delivers excellent speed and precision. The printer achieves its claimed 600mm/s top speed, though the realistic print speed for quality work is 300–400mm/s depending on material and layer height.
Input shaping and resonance compensation work well to minimize ringing and ghosting even at high speeds. The system automatically detects resonance frequencies during calibration.
🔥 Hotend and Nozzle
The quick-release hotend system is brilliantly designed. You can swap nozzles in under a minute without tools—just let it cool, flip a lever, and swap.
The included hardened steel nozzles handle carbon fiber and abrasive materials without degradation. Testing with CF-PETG showed no visible wear after 500g of filament, which is impressive.
The 350°C maximum temperature opens up advanced materials like polycarbonate, high-temp nylon, and specialty engineering filaments.
🖨️ Build Plate
The dual-sided magnetic PEI plate works exceptionally well. The textured side provides excellent adhesion for PETG, ABS, and ASA. The smooth side is perfect for PLA and gives a glossy bottom finish.
The 120°C bed temperature is crucial for large ABS and ASA prints, preventing corner lifting even on parts that cover the entire build surface.
⚡ Features and Performance
⏱️ Actual Print Speed
The claimed 600mm/s maximum speed is achievable, but realistic everyday printing sits around 300mm/s for quality results. At this speed, print quality remains excellent with proper calibration.
A test Benchy completed in approximately 17 minutes at 400mm/s with 0.2mm layers—impressive speed with maintained detail.
For functional parts where surface finish is less critical, pushing to 500mm/s still produces usable results. The trade-off is slightly rougher surfaces and more visible layer lines.
🧰 Bed Leveling Performance
The automatic bed leveling system using strain gauge sensors works reliably. The 49-point mesh compensation accurately maps the bed surface and compensates for any deviations.
First layers consistently achieve proper squish without manual adjustment. The system re-levels before each print, ensuring accuracy even as the bed flexes slightly during heat cycles.
🌡️ Heated Chamber Performance
The 65°C active chamber heating makes a noticeable difference when printing ABS, ASA, and polycarbonate. Large ABS prints that would warp on open-frame printers remain dimensionally accurate.
The chamber takes approximately 10–15 minutes to reach target temperature. For PLA and PETG, you can leave chamber heating off, which reduces energy consumption and keeps the internal temperature more comfortable for these materials.
🎨 ACE 2 Pro Multi-Color System
The ACE 2 Pro represents a significant improvement over the original ACE Pro. Filament loading speed has doubled, and the buffering mechanism is more reliable.
Active filament drying up to 65°C while printing is a game-changer. Materials stay in optimal condition, eliminating moisture-related issues like stringing and poor layer adhesion.
The system intelligently detects filament tangles and pauses printing if intervention is needed. This prevents failed prints from filament feed issues.
Expanding to 16 colors requires four ACE 2 Pro units total, which is a significant additional investment. For most users, the included 4-color capability is sufficient.
🔇 Noise Levels
At 48dB with the door closed, the S1 Max Combo is impressively quiet for its size and speed. This is comparable to normal conversation volume and suitable for home or office environments.
The noise increases to 55dB when the ACE 2 Pro’s active drying system is running, but this is still reasonable and quieter than many competing systems.
🖨️ Print Quality: Real Results
Print quality is where the S1 Max Combo truly shines. Testing across multiple materials and print types revealed consistently excellent results.
✅ First Layer Performance
First layers are consistently excellent thanks to the strain gauge leveling system and heated bed. Adhesion is strong without being excessive—parts release easily once the bed cools.
The textured PEI surface provides excellent grip for ABS and ASA. PETG sometimes adheres too well to the textured side; using the smooth side prevents damage when removing large prints.
📊 Benchmark Prints
Standard benchmark prints like the Benchy, calibration cube, and torture tests all produced excellent results:
- Benchy: Clean surfaces, well-defined details, minimal stringing. Completed in 17 minutes at 400mm/s with 0.2mm layers.
- Calibration Cube: Dimensional accuracy within 0.1mm on all axes. Corners are sharp with no rounding.
- Overhang Test: Handles 60° overhangs without support. 65–70° start showing slight sagging but remain usable.
- Bridging: Excellent bridging performance up to 50mm spans. Longer bridges require slower speeds but remain achievable.
⚙️ Complex Geometry
Printing intricate mechanical parts revealed the machine’s capabilities. Threaded inserts, snap-fit connections, and tight tolerances all worked as designed without post-processing.
A functional planetary gearbox printed with 0.2mm clearances assembled smoothly and operated as intended—testament to the machine’s mechanical precision.
🎨 Multi-Color Quality
Multi-color prints show clean transitions with minimal bleeding when purge settings are properly calibrated. Color changes are precise, with sharp boundaries between different filaments.
The single-nozzle approach does create filament waste during purging, especially with high-contrast color changes. A 4-color print typically uses 15–20% more filament than the model requires due to purging.
✨ Surface Finish
Surface quality at normal speeds (300mm/s) is excellent. Layer lines are minimal and consistent. At higher speeds, surfaces become slightly rougher but remain acceptable for functional parts.
The heated chamber significantly improves surface finish on ABS and ASA by preventing premature cooling and maintaining consistent layer bonding.
🧱 Material Compatibility
The S1 Max Combo handles an impressive range of materials thanks to its high-temperature capabilities and enclosed chamber.
🛒 Consumer-Grade Filaments
PLA: Prints beautifully with zero issues. The heated bed isn’t strictly necessary but improves adhesion. No chamber heating required.
PETG: Excellent results on both build plate surfaces. The 85–90°C bed temperature ensures proper adhesion. Minimal stringing with proper retraction settings.
TPU: Direct drive extruder handles TPU reliably at moderate speeds (40–60mm/s). Softer TPU (85A–90A) requires slower speeds but prints successfully.
🔬 Engineering-Grade Filaments
ABS: The heated chamber makes ABS printing straightforward. Large parts show minimal warping. Surface finish is smooth with good layer adhesion. Chamber heating at 50–55°C recommended.
ASA: Similar performance to ABS with better UV resistance. Ideal for outdoor functional parts. The enclosed environment contains fumes effectively.
Polycarbonate: The 350°C hotend handles PC at 280–290°C nozzle temperature. Requires full chamber heating (60–65°C) and 110–120°C bed temperature. Results are strong and heat-resistant.
Nylon (PA): Prints successfully with proper drying and chamber heating. The ACE 2 Pro’s active drying is crucial—even sealed nylon absorbs moisture rapidly. Strong, flexible parts with excellent layer adhesion.
🛡️ Carbon Fiber Reinforced Materials
The hardened steel nozzles handle CF-PLA, CF-PETG, and CF-Nylon without wear. These materials print successfully though they require slower speeds (150–200mm/s) for proper layer bonding.
Parts printed with carbon fiber filaments show significantly improved stiffness and strength compared to base materials.
💻 Software and Slicer Compatibility
Anycubic Slicer Next
The default slicer is based on Orca Slicer with Anycubic-specific optimizations. The interface is familiar to users of Orca or Bambu Studio.
Pre-configured profiles for the S1 Max Combo work well out of the box. Material profiles are comprehensive, covering consumer and engineering-grade filaments.
The slicer includes useful features like painting supports, variable layer height, and integrated multi-color management for the ACE 2 Pro.
Current limitations include fewer community profiles compared to established slicers and occasional bugs that get fixed through regular updates.
🔧 Third-Party Slicer Support
The printer works with standard Klipper-compatible slicers including Cura, PrusaSlicer, and OrcaSlicer. Many users prefer using OrcaSlicer directly for more control and community-developed profiles.
Setting up custom slicer profiles is straightforward—the printer uses standard G-code commands and doesn’t require proprietary formatting.
🔄 Firmware and Updates
The printer runs on Klipper firmware, which provides excellent performance and configurability. Over-the-air (OTA) updates deliver bug fixes and feature improvements automatically.
During testing, several firmware updates arrived that improved print quality, fixed minor UI bugs, and enhanced ACE 2 Pro performance.
📱 Mobile App and Cloud Features
The Anycubic app provides remote monitoring and control. You can start prints, adjust parameters, and view the 720p camera feed from anywhere with internet connection.
The camera quality is good enough for monitoring print progress and catching failures early. Time-lapse recording creates smooth videos of your prints.
Cloud storage allows you to access your model library from multiple devices. The interface occasionally experiences connectivity hiccups but generally works reliably.
🛠️ Maintenance and Reliability
🧹 Routine Maintenance
Regular maintenance is straightforward:
- Clean the build plate with isopropyl alcohol before prints
- Check belt tension monthly (printer includes tension monitoring)
- Inspect and clean the nozzle as needed
- Replace activated carbon and HEPA filters every 3–6 months if using filtration
- Lubricate linear rails every 100 hours of printing
🔧 Nozzle Maintenance
The quick-change nozzle system makes maintenance simple. Cold pulls to clear jams take minutes. The hardened steel nozzles show excellent durability even with abrasive materials.
⚙️ Belt Tensioning
The belt tension monitoring system alerts you if belts become loose. Adjustment is tool-free and takes only a few minutes. Proper tension is critical for maintaining print quality at high speeds.
✅ Reliability and Known Issues
During extended testing, the printer proved reliable with minimal failures. Print success rate exceeded 95% once proper calibration was complete.
Some users report occasional bed adhesion inconsistencies on the first print after power-on. Running a test purge line before starting critical prints mitigates this.
The ACE 2 Pro filament loading occasionally requires manual intervention to seat filament properly. This seems related to filament spool winding tension and isn’t a major issue once you understand the technique.
📦 Spare Parts Availability
Anycubic offers comprehensive spare parts through their official store. Critical components like nozzles, build plates, and belts are readily available. Replacement parts pricing is reasonable compared to competitors.
⚖️ Comparison: S1 Max Combo vs. Competitors
🆚 vs. Creality K2 Plus Combo ($1,299)
🆚 vs. Bambu Lab P1S + AMS ($1,049)
Check Live Price on Amazon View on Official Website
💰 Price and Value for Money
At $849 (early bird pricing, typically $999 MSRP), the S1 Max Combo represents exceptional value in the large-format, high-temperature, multi-color 3D printer category.
✅ What You’re Paying For
- 350mm³ build volume that rivals printers costing $2,000+
- 350°C all-metal hotend for engineering-grade materials
- 65°C actively heated chamber for reliable ABS/ASA/PC printing
- 4-color multi-material system with active filament drying
- Hardened steel nozzles for carbon fiber materials (included!)
- CoreXY motion system with input shaping
- Fully enclosed design with remote monitoring
🔍 Competing Models
Printers with similar capabilities typically cost significantly more:
- Creality K2 Plus Combo: $1,299
- Prusa XL (5-head): $2,999+
- Raise3D Pro3 Plus: $5,999
The S1 Max Combo undercuts these competitors by hundreds or thousands of dollars while delivering comparable core functionality.
💡 Best Value Buyer Profile: You get the most value if you:
- Need large build volume for actual projects (not just “nice to have”)
- Print engineering materials regularly (ABS, ASA, PC, PA, carbon fiber)
- Want multi-color capability without separate printers
- Have outgrown entry-level machines and need professional capabilities
- Run a small business where print capacity directly impacts revenue
⚠️ When Cheaper Options Make More Sense: Consider less expensive alternatives if you:
- Primarily print small decorative items under 200mm
- Only use PLA and don’t need high-temperature capability
- Don’t need multi-color printing
- Are a complete beginner (start with something simpler)
- Have strict space constraints (this is a large machine)
Check Live Price on Amazon View on Official Website
🛠️ Recommended Accessories and Filament
🎨 Essential Filaments
- eSUN ABS+: Excellent ABS with minimal warping. Prints reliably at 240–250°C with 100°C bed and 50°C chamber.
- Overture PETG: Reliable strength and minimal stringing—ideal for functional parts.
- PolyMaker PolyLite PC: High-quality polycarbonate for heat-resistant applications.
- 3DXTECH CarbonX CF-PETG: Carbon fiber-reinforced PETG. Hardened nozzle handles it with ease.
🔝 Useful Upgrades
- HEPA & Carbon Air Filtration Kit: Sold separately, but essential for ABS/ASA printing.
- Additional ACE 2 Pro Units: Expand to 8, 12, or 16 colors (~$200–250 per unit).
- Spare Nozzles: Keep 0.4mm and 0.6mm hardened steel nozzles on hand.
- Specialty Nozzles: 0.25mm brass for detail; 0.8mm hardened for speed and strength.
- Spare PEI Build Plate: Enables continuous printing without cooling delays.
📦 Workshop Essentials
- Filament Storage Containers: Use vacuum-sealed bags + desiccant—even with ACE drying.
- Digital Calipers: Under $20; essential for accuracy checks and troubleshooting.
- Quality Scraper Set: Metal scrapers that won’t gouge your PEI surface.
✅ Pros and Cons
👍 Pros
- Massive 350mm³ build volume for large parts and props
- 350°C hotend handles polycarbonate, nylon, and high-temp materials
- 65°C actively heated chamber prevents warping on engineering materials
- ACE 2 Pro with active filament drying (unique at this price point)
- Hardened steel nozzles for carbon fiber materials included
- Excellent print quality across all tested materials
- Quick-change nozzle system saves time
- CoreXY motion delivers consistent speed and precision
- Comprehensive material compatibility
- Strong value proposition compared to competitors
- Quiet operation (48dB with door closed)
- Klipper firmware provides excellent performance and flexibility
- Remote monitoring with decent 720p camera quality
👎 Cons
- Large footprint requires significant desk/workshop space
- Single-nozzle multi-color creates 15–20% filament waste from purging
- Learning curve steeper than plug-and-play printers
- Ecosystem not as mature as Bambu Lab or Prusa
- ACE 2 Pro filament loading occasionally requires manual intervention
- Expanding beyond 4 colors requires additional ACE 2 Pro units (~$200–250 each)
- Air filtration system sold separately (should be included at this price)
- Occasional connectivity hiccups with mobile app
- Touchscreen could be larger (4.3″ is functional but not premium)
❓ Frequently Asked Questions
Is the Anycubic S1 Max Combo suitable for beginners?
It depends on your definition of “beginner.” If you’re completely new to 3D printing, this isn’t the ideal starting point—the large size, multi-material system, and range of capabilities create complexity that can be overwhelming.
However, if you’ve used a simpler 3D printer and understand basic concepts (bed leveling, print settings, material properties), the S1 Max Combo is accessible. The automatic leveling, pre-configured profiles, and guided calibration make it more approachable than raw specifications suggest.
First-time 3D printer buyers should consider starting with something like the Anycubic Kobra 2 Neo or Creality Ender 3 V3, then upgrading to the S1 Max Combo once they’ve mastered fundamentals.
Can I print polycarbonate and nylon successfully?
Yes. The 350°C hotend and 65°C heated chamber are specifically designed for these materials. During testing, polycarbonate printed successfully at 280–290°C nozzle temperature with the bed at 110–120°C and chamber at 60°C.
Nylon (PA) also prints well but requires the ACE 2 Pro’s active drying to maintain optimal moisture levels. Even “dry” nylon absorbs humidity rapidly, and the integrated drying system makes a significant difference in print quality.
How does print speed compare to Bambu Lab printers?
For single-color prints, speed is comparable—both can hit 600mm/s maximum with realistic everyday speeds around 300–400mm/s for quality results.
For multi-color prints, Bambu Lab’s system is faster due to more efficient purging mechanics. The S1 Max Combo uses more traditional purging that creates more waste and takes slightly longer. However, the S1 Max’s larger build volume often offsets this by fitting more objects per print.
What’s the actual print failure rate?
After proper calibration, the success rate exceeded 95% during testing. Most failures related to user error (incorrect bed adhesion settings, wrong temperature profiles) rather than machine issues.
First-layer adhesion issues occasionally occurred on the very first print after powering on, but running a purge line before starting critical prints eliminated this problem.
Can I use third-party filament, or do I need Anycubic brand?
The printer works perfectly with any standard 1.75mm filament. You’re not locked into Anycubic’s filament ecosystem. During testing, filaments from eSUN, PolyMaker, Overture, Hatchbox, and Prusament all performed excellently.
The ACE 2 Pro filament drying works with any brand, provided the spool fits (standard spool sizes are fine).
How much does it cost to expand to 16 colors?
Each additional ACE 2 Pro unit adds 4 colors and costs approximately $200–250. To reach 16 colors total, you need three more units beyond the included one—roughly $600–750 additional investment.
Most users find 4 colors sufficient for their needs. The 8-color setup (2 units) hits a sweet spot for complex multi-color work without excessive cost.
What’s the warranty and customer support like?
Anycubic provides a one-year warranty covering manufacturing defects. Customer support quality varies—some users report excellent experiences while others find response times slow during peak periods.
The growing community on Reddit, Facebook groups, and Discord provides excellent peer support for troubleshooting and optimization tips.
How loud is the printer really?
At 48dB with the door closed, it’s comparable to a quiet conversation. You can comfortably run prints in a home office without significant disturbance.
The ACE 2 Pro’s active drying adds some noise (bringing it to 55dB), but this is still quieter than many desktop printers and definitely suitable for home environments.
Can I print TPU and flexible filaments?
Yes. The direct drive extruder handles TPU and flexible filaments reliably. Softer TPU (85A–90A durometer) requires slower speeds (40–60mm/s) but prints successfully.
The hardened steel nozzle isn’t ideal for very soft materials—consider keeping a brass nozzle available for optimal TPU performance if you print flexible materials frequently.
Check Live Price on Amazon View on Official Website
🏆 Final Verdict
The Anycubic Kobra S1 Max Combo represents a significant leap forward in accessible large-format 3D printing. It delivers professional-grade capabilities—350mm³ build volume, 350°C hotend, actively heated chamber, and integrated multi-color system—at a price point that undercuts competitors by hundreds of dollars.
This isn’t a perfect machine. The ecosystem isn’t as polished as Bambu Lab’s, single-nozzle multi-color creates filament waste, and the large footprint demands significant space. But these compromises are minor compared to what you’re getting.
🎯 Who Should Buy This Printer
- Advanced hobbyists who’ve outgrown smaller printers and need legitimate production capacity
- Cosplay creators printing helmets, armor, and props as single pieces
- Engineers and designers prototyping with production-grade materials
- Small businesses requiring large-format capability without enterprise pricing
- Makers who regularly print ABS, ASA, polycarbonate, or carbon fiber materials
- Users wanting multi-color capability integrated with filament drying
💡 Bottom Line
At $849 (early bird) to $999 (MSRP), the S1 Max Combo offers exceptional value. You’re getting capabilities that previously required spending $1,500–$2,000+ on competing machines.
The combination of build volume, high-temperature capability, heated chamber, and multi-material system creates a genuinely versatile workhorse. Whether you’re printing large functional parts, engineering prototypes, or vibrant multi-color models, this machine delivers consistent, high-quality results.
If you need a printer that can handle serious projects without the serious price tag of industrial machines, the Anycubic Kobra S1 Max Combo deserves strong consideration. It’s not the cheapest option, but it’s one of the best values in large-format 3D printing today.
Check Live Price on Amazon View on Official Website

