What should you expect of the Wanhao Duplicator 9? Is this workhorse really worth buying? Read our Wanhao Duplicator 9 review for the features, specs and performance of this 3D printer.
Wanhao has three large format printers – the Wanhao Duplicator 9/300, D9/400 and D9/500.

CHECK PRICE
There has been a lot of debate as to how viable a printer with such kinematics and such a large size would be. We decided to test the Duplicator 9 and this is our review.
Wanhao Duplicator 9 Review
In this review, we’ll look at the specs, appearance, features and quality of print that can be achieved with the 3D printer.
Let’s get started.
Specifications
| Manufacturer | Wanhao |
| Printing Technology | FDM/FFF |
| Tread diameter | 1.75 mm. |
| Type of material | PLA, PETG, Nvlon(Nylon), Others |
| Size of the plot area | 300x300x400 mm |
| Housing material | Steel |
| Numbers of Extruders (print Heads) | 1 |
| XY axis positioning accuracy | 12 microns |
| Z-axis positioning accuracy | 4 microns |
| Layer thickness | 100-400 microns |
| Nozzle diameter (mm) | 0.4 |
| Working temperature of the extruder | 180-250 °C |
| Heated platform | yes |
| Print speed | 70 mm/s (max) |
| Display | LCD display |
| Connection interface | SD, USB |
| Software | cura, simply 3D, host byRepitator |
| Operating systems | Mac OSX, windows 7, windows 8, windows XP |
| Supported file formats | STL, OBJ |
| Power consumption | 100-250B, -4A, 50-60HZ |
Other functionality added in the Wanhao Duplicator 9 include a calibration sensor and a resume function. We’ll talk about them in more detail below.
Appearance
To begin, the printer stands out by its size. In fact, it’s even slightly higher than Raise3D N2 without a cap.

On the bottom of the case, there is a small touchscreen display for controlling the printer.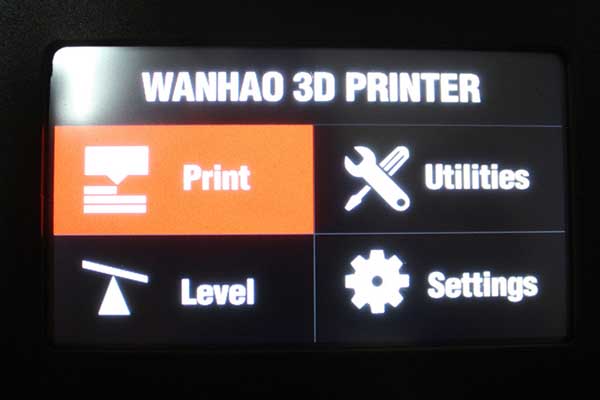
The printer can only print from an SD card or directly from a computer using a cable.
Assembly
The Wanhao Duplicator 9 is shipped unassembled. However, the assembly is not difficult and takes just 13 steps.

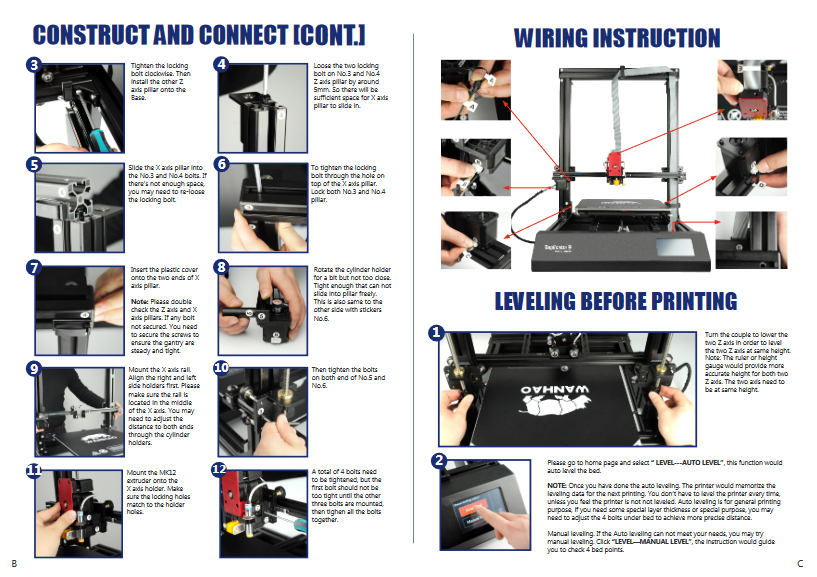
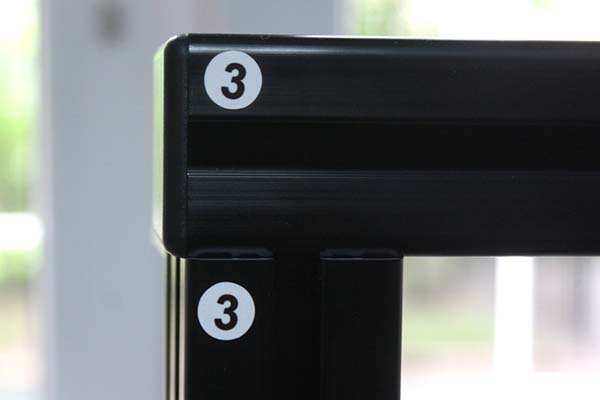
The assembly process is easier since all the wires and frames are named. Moreover, the instructions come in different languages, including English and Russian.

Construction
The printer has a “spongy” kinematics with all its pros and cons. The main disadvantage is, of course, the table rolling along the Y-axis.

With such a table, it will be problematic to print at really high speeds. Moreover, tall and thin models will wobble when printed.
The unit is decently rigid, more than what the Wanhao Duplicator i3 manages. However, nothing should prevent you from further strengthening it if you wish to.

During our test, we felt that the Duplicator 9 frame is decently rigid and does not wobble during the printing process.
The heated printbed is made of metal and is also magnetic.

The printbed made it easier and more convenient to remove model after they have finished printing. You can even remove your prints without a spatula. To do this, gently tear the flexible adhesive surface away from the model.
The Wanhao Duplicator 9 extruder features the proprietary Wanhao DIRECT feed. The extruder is versatile and can print a wide range of materials, including flexible and rubber filaments.

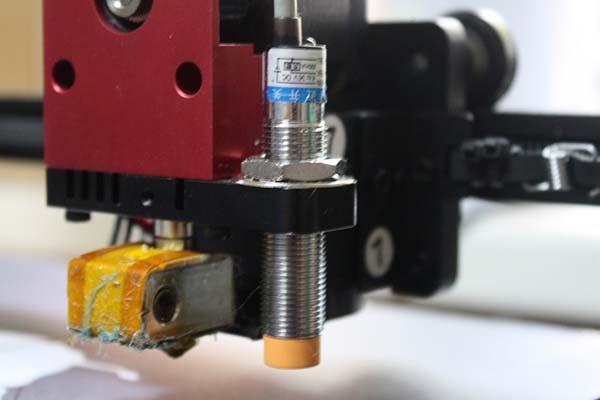
Another plus of the Wanhao Duplicator 9 3D printer is that it has an auto-calibration sensor.
Calibrating and starting up the printer for the first time is easy
The extruder moves in the X and Z axes using rollers rather than linear bearings.
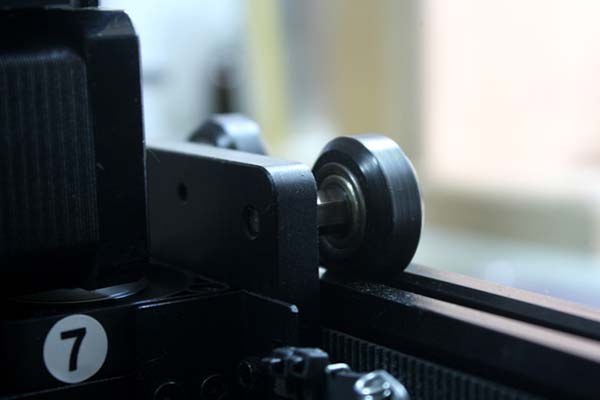
Time will tell how good this decision is. So far, the movement has been flawless.
One thing that we were, however, not happy with is the extruder mounting. The mounting is not rigid enough and as a result, easily bends down or up by hand by 4-5 mm.
Still, this did not affect printing in any way. The extruder does not move under its own weight or during printing. Still, it would have been nice if the extruder mounting was more rigid.
Two trapezoidal screws are installed along the Z-axis. The screws are fixed from above.

Moving on, we have the familiar Y and X-axis limit switches.

There is no limit switch on the Z-axis. Instead, an auto-calibration sensor does the work that the limit switch would have done.
The Wanhao Duplicator 9 has a long cable that runs from the extruder to the body. The cable is attached to the unit’s body with latches and glued by double-sided tape to prevent it from chafing.


Calibration
Calibrating the Wanhao Duplicator 9 is very simple. Simply choose the Auto level menu and follow the instructions.

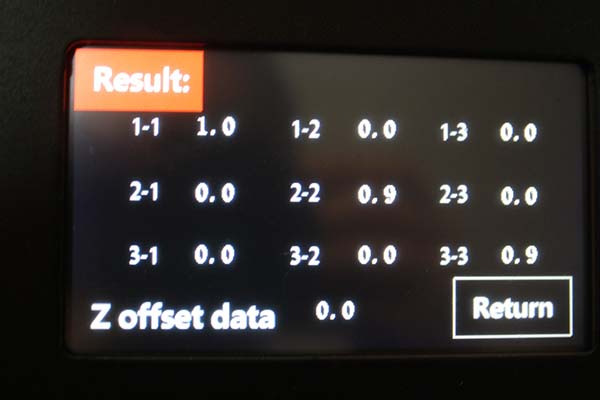
When you select the Auto Level function, the printer will go over several points on the table, remembering the difference in height and taking this difference into account when printing.
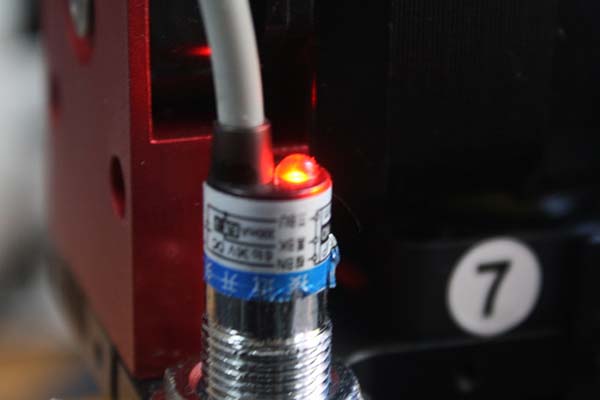
Sometimes it may be necessary to calibrate the height of the sensor itself. To do this, you’ll need to bury the nozzle into the table and unscrew the sensor mount to lower or raise it until the light on top lights up.
The Wanhao website has detailed photo and video instructions on calibration.
The calibration sensor acts as a limit switch in the Z-axis. This may not be very convenient since if the sensor cannot be configured or is defective, printing will become impossible.
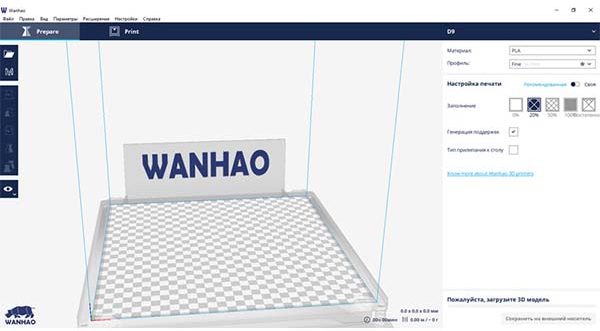
Slicer
The Wahao Duplicator 9 uses the latest version of CURA as its slicer.
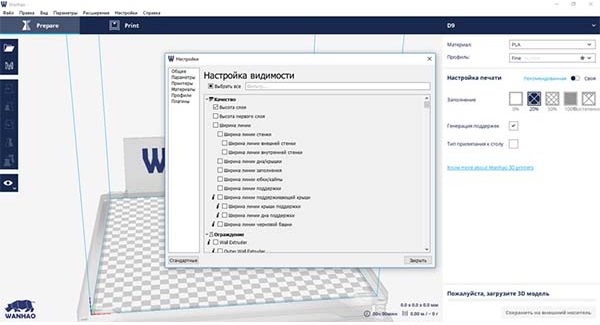
You can turn display the settings that you need (there are a lot of them).
Or use ready-made profiles.
Print Quality
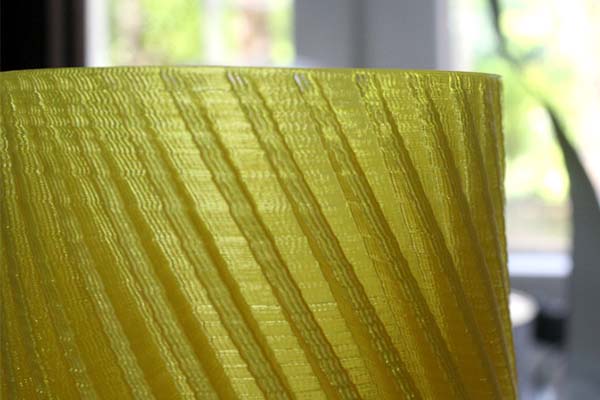
For our test, we decided to print a big model. We chose the vase.
Model Details
- Vase
- Layer 0.2
- PLA ESUN
- printing time 1 day
- Printing with Vase mode or spiral printing – in one pass.
As expected, the vase turned out to be thin. Moreover, the flaws of the kinematics were immediately clear.

The layers below look very good. There is no wobbling in the Z-axis.

But when you go higher, the layers became noticeably uneven. The uneveness was due to the fact that the vase swayed when the table moved.
The outermost layers from above turned out to be generally perforated.
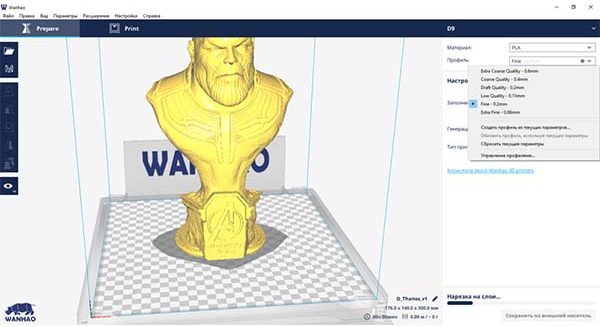
For the next test print, we choose a more massive model to avoid the problem of the table swaying.
Model Details
- Bust of Thanos
- Printing time is approximately 3.5 days
- Material – PLA ESUN.


Since the Thanos model is quite massive (weighs about half a Kilogram), there are no such obvious differences in the lower and upper layers as in the vase.


Moreover, there is no wobbling.

During the printing of Thanos, we experienced power outage several times. The resume print function was very helpful in these moments.
Conclusion
The Wanhao Duplicator 9 is not the fastest 3D printer nor one that produces the most precise prints. However, it is easy to operate and comes with standard settings. Moreover, it’s price is quite low compared to that of other large format 3D printers.
We recommend the Wanhao D9 for a beginner hobbyist who wants not only to start printing, but also to understand the printer.