
Want to upgrade your Ultimaker 2 to 2+? Then you probably need an extrusion upgrade kit. Read our E3D Ultimaker 2 Extrusion Upgrade Kit review to find out if it’s worth the money.
Ultimaker 2 Extrusion Upgrade Kit Review
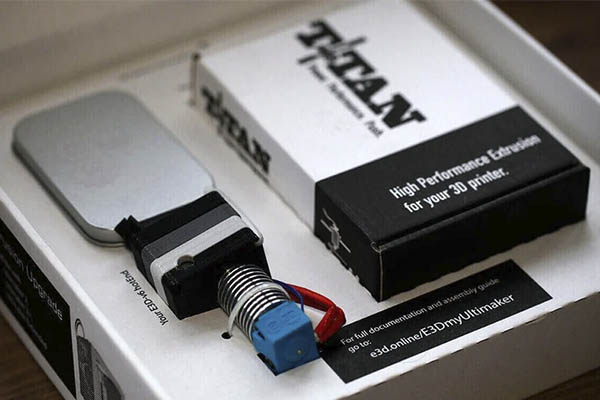
ED3 has been producing a wide range of nozzles and hotends for a few years now. The company also now produces its own SpoolWorks filament range. When you purchase the E3D Ultimaker 2 Extrusion Upgrade Kit, you will also receive a small sample amount of Edge filament for testing your printer’s calibration.
There are two versions of the E3D upgrade kit i.e. the 2.85mm and the 1.75mm. This is quite something given that traditional Ultimaker printers have only been compatible with the 2.85 filaments. Even better, E3D ships both the 1.75mm and the 2.85mm upgrade kit. Therefore, you can switch to the 1.75mm if you prefer.
The E3D filaments have an interchangeable nozzle. Therefore, you won’t be stressed when it comes to using some of the future-generation printing materials. Moreover, you won’t have to worry about getting your nozzle destroyed. You will only purchase and install a new nozzle when you truly need to.
For a long time, the Ultimaker 2 was considered the best-fused filament fabrication (FFF) 3D printer in the market. However, the introduction of the Ultimaker 3 changed things.
However, while the design of the Ultimaker 2, (the old single head) has been overtaken by time, its reputation is still solid. The printer is renowned for its filament support and print. Its only real limitation is the limited hardware customization options.
Today, new printing materials have been unveiled in the industry. Most 3D artists want to experiment with these materials. However, the Ultimaker 2 does not have interchangeable nozzles. This makes it hard to work with.
To work with some new filaments, you can buy the Ultimaker 2+. However, E3D has an Ultimaker 2 extrusion upgrade kit, just in case you don’t want to part with your old machine.
The kit has various features that will upgrade your Ultimaker 2 to Ultimaker 2+. This kit works for both the Standard and the extended versions. Moreover, it is less costly than purchasing a new Ultimaker 3, but enables your 3D printer to have the same functionalities.
About E3D
ED3 was started in 2012 and has since grown to be a leading3D printing company. The pivotal point for this company was the rollout of the V5 hotend. Its success was followed by development of the E3D-V6, and the V6.1 used in the ED3 Extrusion Upgrade Kit for the Ultimaker 2.
To demonstrate how rapidly the company has grown, Prusa Research is now supplying every new MK2 machine with an E3D-V6 hotend.
ED3 Ultimate 2 Extrusion Upgrade Kit Overview
This upgrade kit enables Ultimaker 2 Extended owners to upgrade their old machines with a new extrusion system. However, it is most beneficial for intermediate to advanced users since installing it on a new machine will significantly improve its capability.

When you install the upgrade kit, your printer will have better print speeds and accept different nozzle sizes. The kit also has a new extruder that can stop the filament from slipping.
The advantages of the upgrade kit are less pronounced for Ultimaker 2 and 2+ users. In the Ultimaker 2 + upgrade, the intruder is already improved and the nozzles are interchangeable.
Upgrading Ultimaker 2 with Ultimaker’s kits is more expensive than with the E3D kit. The price difference is a factor that most people will consider before an upgrade.
The setup for the new extruder and hotend and swapping the wiring is not difficult. You can use E3D’s online guide to confirm each setup stage; from hardware installation to software updates and configuration.
E3D Ultimaker 2 Extrusion upgrade kit is better than Ultimaker’s kit in terms of print quality. Moreover, it has a few extra options and comes in two versions; the 1.75mm, and the 2.85mm. If you have an Ultimaker 2 printer, you will most likely to want to purchase this upgrade kit.
However, some Ultimaker 2+ owners may be reserved about getting the kit, except maybe for those who need the volcanic hotend temperatures supplied by V6.1 or those that want to switch to a 1.75mm filament system. The V6.1 produces temperatures of 40°C higher than the original.
However, after the installation, the E3D upgrade requires more tinkering than the Ultimaker’s 2+ upgrade. Therefore, this upgrade might prove frustrating to people used to the quick select options for print quality settings and materials, or the plug-and-play feature of the Ultimaker 2.
However, if you are daring enough and decide to dismantle your Ultimaker 2, you will enjoy the benefits of your E3D Ultimate Extrusion Upgrade.
E3D Ultimaker 2 Kit: Design and Features
The E3D Ultimaker Extrusion Kit has an impressive selection of swappable nozzles, which is the main thing that lacks in the Ultimaker 2 extrusion system. The kit contains the Titan Extruder and E3D V6.1 hotend. You can also purchase additional specialist nozzles from E3D website.
The upgrade kit comes with everything you need for a start. This includes a standard nozzle that comes in a tin together with 6 other nozzle options; 0.25mm, 0.3mm. 0.35mm, 0.5mm, 0.6mm and 0.8mm. There is also a 0.4mm nozzle already installed. With this, you have a lot of control of both the print speed and print quality after the installation.
The V6.1 is compatible with a wide range of filaments. This is partly as a result of its ability to swap nozzles and because it can reach temperatures of up to 300°C.
The 1.75mm kit is another factor that has intrigued many users. Some users prefer it that way. However, there is also the option of swapping filament diameters if you want to.
The V6.1 also comes with the Titan extruder. This is definitely a new experience for people who are used to the Ultimaker 2 extruder. With the Titan extruder, every material that you feed is gripped without you being compelled to make adjustments like was required with the Ultimaker 2 extruder.
E3D Ultimaker 2 Extrusion Upgrade Kit Packaging and Setup
Installing and testing this kit will take you some time. To make your work easier, watch the video below:
E3D Setup Instructions
1. The hotend replacement
This step is straightforward. Simply swap and replace the hotend by transferring the bearings and fans from the old head into the new assembly. Once the bearings and fans are securely in place, you can adjust the four long screws around the fan mount to allow the perfect flow of air across the print.
You can also carry out the adjustments at any point after the installation.
2. The nozzle installation
During the nozzle installation, especially when placing the heatsink fan, pay close attention to the orientation. This part of the assembling usually may get somewhat challenging. Therefore, ensure you are working in a spacious and well-lit area.
3. Installing the Titan extruder on the back of the printer
When done with the installation of the hotend and the nozzle, the next step is to install the Titan extruder.
To begin, remove the stepper casing from inside the printer. After this, slot in the new motor and extruder and tighten the bolts. Once the filaments are in place, tensioner the extruder again.
4. Electronics and cables
This stage might be a bit of a headache. First, strip out the old wiring for the extruder and hotend and replace it with the new ones. Here are the steps to follow:
- Flip the printer onto its side and release the protective plate over the control board
- Next, unbolt the four screws to release the board .Once free, you will be able to access all the connectors
- Follow the online instructions manual to place the connectors on the assigned locations. For instance, the heatsink cable should link to the connectors that had not been used.
- Before connecting the new wires (assuming the old ones have been disconnected), carefully re-route all the wires
- Since the spaces become somewhat crowded once you begin re-installing covers, reconnect the cables well. Also, have the cable layout as neat as possible.
5. Priming the system
When everything has been installed and the machine is back together, you can now prime your new system.
To start, flash the Ultimaker 2 with the new firmware from E3D. Refer to the online guide for instructions on where to get the firmware and the installation process. Here’s a summary
- Connect the Ultimaker 2 to your computer and download the firmware via an option in the Cura software.
- Run the SpoolWorks Edge filament test sample from the printer to ensure that everything is installed and set up as required.
- Download the Edge filament profile and quickly run it through the printer.
[su_note]Before printing, re-check the settings and ensure that they are your own rather than Cura’s. This is what you should always do even with other software you use on Ultimaker.[/su_note]
You can then proceed with the Edge sample and when done, print whatever materials you want.
E3D Ultimaker 2 Extrusion Upgrade Kit Performance
The upgrade kit makes a big difference with your Ultimaker. One thing you will note is the quality of the Titan Extruder.

The Titan extruder is efficient and will grip every printing material you feed in it. It does not slip the filament, shred, or shear it. The extruder performs just as expected. If you have to make some adjustments, tensioning the bolt is easy.
The E3D V6.1 hotend works in perfect unison with the Titan extruder to produce excellent prints. You will be impressed with the print results in terms of speed, reliability and quality. There are no problems with under or over heating , build-up, or blockages of the filament.
However, while the print quality is excellent, it is not better than what you will get with the standard Ultimaker system. The only real advantage of the E3D kit to the Ultimaker’s kit is the reliability and flexibility to increase the hotend temperatures past 260°C and to change the nozzle diameters at free will.
E3D Ultimaker 2 Extrusion Upgrade Kit Software Review
The Ultimaker 2 Extrusion Upgrade Kit software supports Cura. However, while the Ultimaker ecosystem and the Cura software are wholly integrated, you have to customize the software print settings a little to prep up things.
Cura will also have to be adjusted to different print quality settings. Its quick quality selection is not that excellent. After customizing Cura, the usual easy workflow will be back.
You also need to customize or adjust the printer. When loading a new filament, you have to set up each as a new filament type. This is because quick quality selection just won’t deliver the great results.
For the Ultimaker, you need to set the filament setting to Custom 1, Custom 2 and so on as opposed to the ABS and PLA quick selection. After adjusting the Cura settings, the printer will produce excellent results.
If you are using Simplfy3D, the print process will be more complex. To get a decent quality print, you will need a lot of practice and trying out different things.
Conclusion
The E3D Ultimate 2 Extrusion Upgrade kit has all the right features for upgrading the Ultimaker 2. The printer is also one of the best performing on the market. Many Ultimaker 2 users will love the upgrade kit.

In terms of hardware, the upgrade kit has quality parts. Its head block is 3D printed for good measure. Like with any printer assembling, confirm the stability of the head by calmly moving it back and forth along each axis. This will alert you of any sticking points that should be removed.
Ultimaker Upgrade Kit vs E3D Ultimaker 2 Extrusion Kit
Which one should you buy between the Ultimaker Upgrade kit and E3D Ultimaker 2 Extrusion Upgrade Kit?
The choice is really yours to make. Ultimaker’s upgrade kit is wholly integrated with the Ultimaker ecosystem but is more expensive than E3D’s.
The E3D upgrade kit is cheap and provides extra options. However, you have to manually set it up and adjust the software. Despite this, the upgrade kit does not lead to a better print quality than what you will get with Ultimaker’s kit.
The E3D’s extruder and the hotend are of excellent quality. The kit is easy to fit and the installation and configuration don’t take a lot of time. However, running the firmware update and setting up the filament profiles and quality settings takes some time.
After installation, confirm that the 3D printed parts of the hardware fit perfectly together. Remember, any flash of plastic that disrupts the fits will affect the smooth motion of the head across the X/Y axis.
For the cable layout, you can complete the installation process if you have some tinkering knowledge. The only slight hurdle might be caused by the odd shim and washer.
Finally, let’s talk about print quality. While you have to setup custom profiles and settings with the E3D, expect a similar print quality with that of the Ultimaker 2+ upgrade. Therefore, maybe the whole experience is just good for revamping your Ultimaker 3D printer.
Why Buy the ED3 Ultimate 2 Extrusion Upgrade Kit
- Has an excellent extruder
- A wide range of interchangeable sizes and nozzles
- Kits for 2.85mm or 1.75mm filament
- Excellent hotend temperature
- Easily replaceable parts
Downsides of ED3 Ultimate 2 Extrusion Upgrade Kit
- Cura software requires setup for each change in quality
- Takes a few hours to update firmware
- Designed for only intermediate and advanced users
- Customized profiles required for all filaments
Our Verdict
For half the cost of upgrading your machine to Ultimaker 2+, you can get the same advantages and results with the E3D Extrusion Upgrade Kit if you have an Ultimaker 2 or Ultimaker 2-Extended.
On the other hand, upgrading your Ultimaker 2 or Ultimaker 2-Extended will not result into more benefits, except if all you are after is a cheaper replacement, the 1.7mm filament or the extra hotend temperature.

@Charles where did you find the latest firmware and software for this? I cannot find anything as it is not found on the E3D git
Hey A2K, check the info here: https://e3d-online.dozuki.com/Wiki/Ultimaker_Upgrade_Supplemental_Info
Thank you but that Github firmware link is no longer available! If you click it you will see. That’s why I thought you may have a ‘magic’ link.