


🚀 LIMITED TIME DEAL: Creality K1 Max at Lowest Price!
Get the best price on this large-format speed demon. Amazon offers faster shipping and better return policies.
📋 Quick Navigation
Creality K1 Max Review (2026): Is This Still Creality’s Best Large CoreXY Printer?

🎯 TL;DR: Our Verdict in 30 Seconds
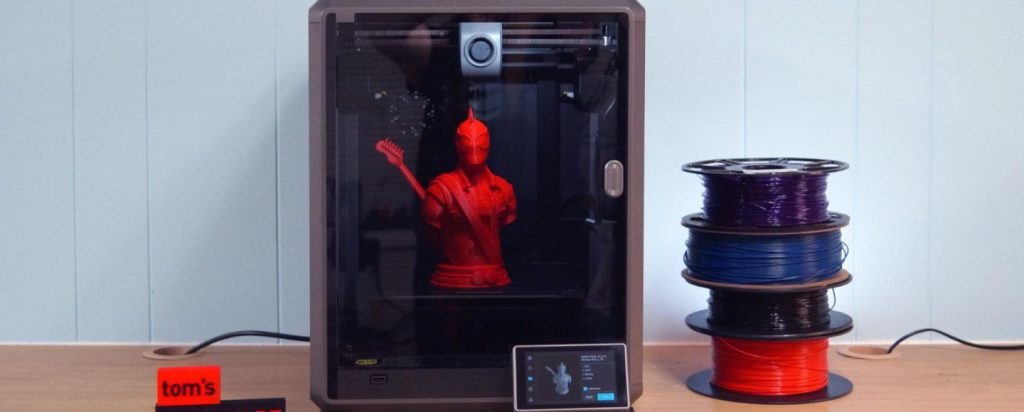
The Creality K1 Max delivers exceptional value for speed-focused makers who need a large build volume and don’t mind occasional firmware quirks. With its massive 300mm³ build volume, genuine 600 mm/s speeds, and AI-assisted features, it remains the best budget-friendly alternative to premium CoreXY systems in 2026. Check current Amazon pricing →
Creality K1 Max Overview (Quick Verdict)
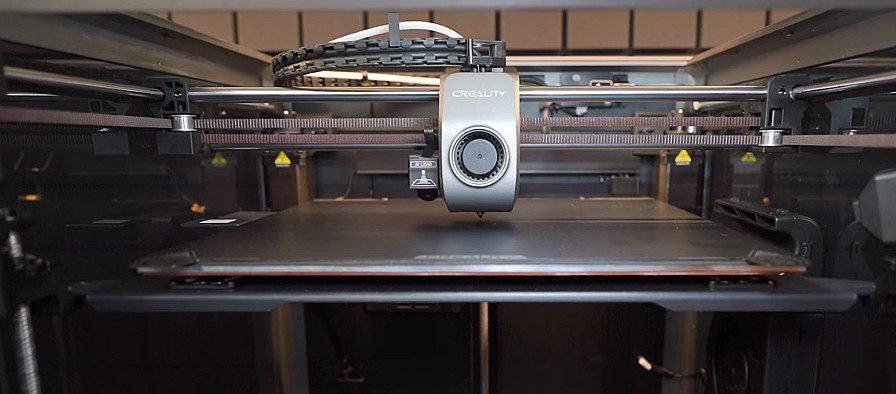
The Creality K1 Max remains one of the most compelling large-format CoreXY 3D printers on the market in 2026, especially for makers who prioritize build volume and speed over the fully automated experience of premium competitors. With its impressive 300 × 300 × 300 mm build volume, genuine 600 mm/s print speeds, and AI-assisted monitoring features, this printer delivers professional-grade performance at a price point that undercuts its closest rivals by several hundred dollars.
Key highlights: Massive 300 × 300 × 300 mm build volume, CoreXY motion system with 600 mm/s max speed and 20,000 mm/s² acceleration, fully enclosed chamber for temperature-sensitive materials, AI LiDAR bed leveling, AI camera monitoring with failure detection, hardened steel 0.4 mm nozzle supporting composite filaments, and surprisingly competitive pricing for the feature set.
One-line verdict: The Creality K1 Max delivers exceptional value for speed-focused makers who need a large build volume and don’t mind occasional firmware quirks, making it the best budget-friendly alternative to premium CoreXY systems in 2026.
✅ Who the K1 Max is for:
- Small businesses running print farms
- Prosumers who need large functional parts quickly
- Makers who value tinkering potential
- Anyone who’s outgrown smaller bed slinger printers
❌ Who should skip it:
- Complete beginners wanting plug-and-play
- Users in noise-sensitive environments
- Anyone needing reliable multi-material printing today
- Makers who prioritize software polish over raw capability
Ready to Upgrade to Large Format Printing?
The K1 Max offers the most build volume per dollar in its class.
Free shipping & 30-day returns available
Creality K1 Max Specifications
| Specification | Details |
|---|---|
| Build Volume | 300 × 300 × 300 mm (11.8 × 11.8 × 11.8 inches) |
| Motion System | CoreXY architecture with dual stationary motors |
| Max Print Speed | 600 mm/s |
| Travel Speed | Up to 800 mm/s |
| Max Acceleration | 20,000 mm/s² |
| Extruder Type | Dual-gear direct drive extruder with 36mm stepper motor |
| Hotend | Ceramic heater with titanium alloy heatbreak |
| Nozzle | 0.4 mm hardened steel (supports abrasive filaments) |
| Max Hotend Temp | 300°C |
| Max Bed Temp | 100°C |
| Volumetric Flow | Up to 32 mm³/s |
| Heat-Up Time | 200°C in approximately 40 seconds |
| Chamber | Fully enclosed with active auxiliary cooling fan (18W) |
| Bed Leveling | Automatic via AI LiDAR scanning |
| Input Shaping | Integrated G-sensor with automatic resonance compensation |
| Camera | AI-powered monitoring with failure detection |
| Connectivity | LAN, Wi-Fi, USB drive |
| Display | 4.3-inch color touchscreen LCD |
| Frame | Die-cast unibody construction |
| Supported Materials | PLA, PETG, ABS, ASA, TPU, PA (Nylon), PC, PLA-CF, PA-CF, PET-CF |
| Power Supply | 350W |
| Machine Dimensions | Approximately 435 × 462 × 526 mm |
| Weight | Approximately 18 kg |
| Noise Level | Moderate to loud during high-speed printing |
The Creality K1 Max specifications position it squarely in the prosumer segment, offering industrial-grade features at consumer-friendly pricing. The combination of a 300 mm cubic build volume with genuine high-speed capability makes this printer particularly attractive for users who’ve mastered smaller machines and need to scale up production without breaking the bank.
Unboxing, Assembly & First Setup Experience
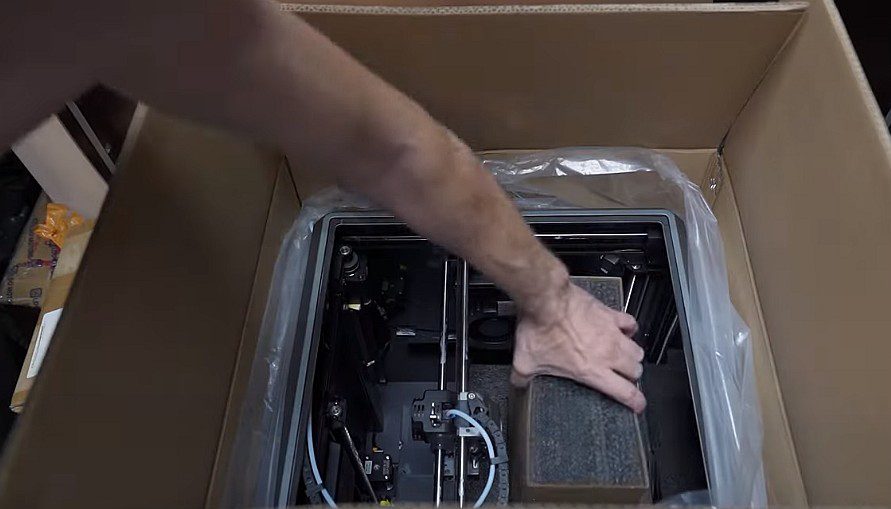
Opening the Creality K1 Max box reveals a surprisingly well-packaged machine that arrives approximately 95% assembled. Unlike many budget printers that require hours of frame construction, the K1 Max ships as a complete unit with only minimal setup required. The packaging includes dense foam inserts that protect the printer during shipping, though you’ll want to save these if you ever need to transport the machine.
What comes in the box: The K1 Max package includes the fully assembled printer with protective films still attached, a removable flexible magnetic PEI build plate, a metal scraper for print removal, a spare 0.4 mm hardened steel nozzle, basic tools including hex keys, a sample spool of PLA filament, a USB drive containing documentation and Creality Print slicer software, a power cable, and quick start documentation.

Compact packaging despite large build volume
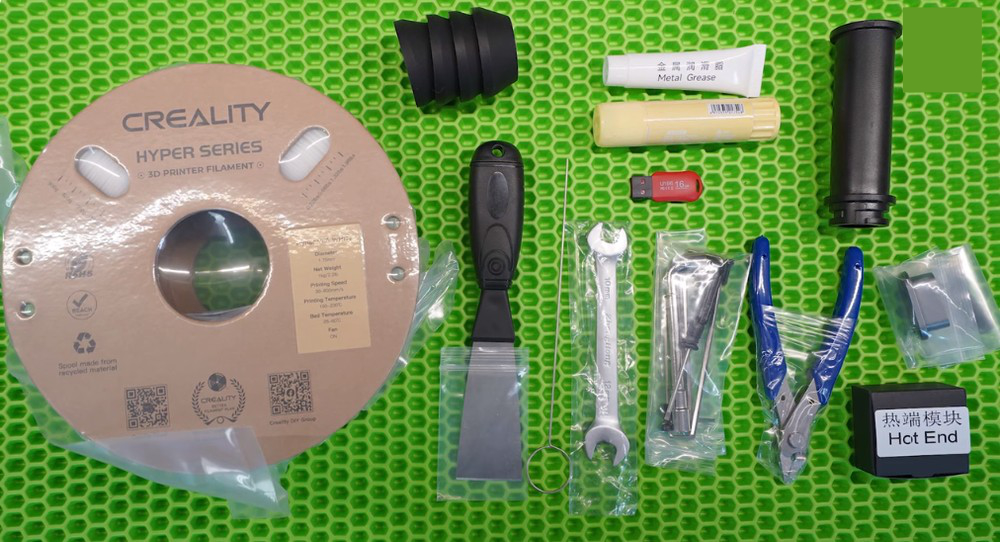

Rich tool kit included
Assembly time reality check: Creality advertises the K1 Max as ready to print out of the box, and that’s mostly accurate. Actual setup takes approximately 15 to 30 minutes for someone with basic 3D printing experience. You’ll need to remove protective packaging materials, install the filament spool holder on the rear of the machine, connect the power cable, and remove the shipping restraints from the print head and build plate. The process is straightforward, though first-time users might appreciate more detailed visual guides than what’s provided in the printed manual.
Firmware updates out of the box: This is where things get interesting. The K1 Max ships with factory firmware that’s often several versions behind current releases. Your first task should be checking for firmware updates via the touchscreen interface or through Creality’s website. Firmware updates have addressed numerous issues since launch, including improvements to bed leveling accuracy, AI camera reliability, and motion control algorithms. Expect to spend 10 to 20 minutes on firmware updates before your first print.
First calibration experience: The K1 Max features automatic bed leveling using its AI LiDAR system, and the initial calibration process is impressively hands-off compared to traditional manual leveling. After powering on and completing firmware updates, the printer prompts you through an automated calibration sequence that includes bed leveling, Z-offset calibration, and input shaping configuration using the integrated G-sensor. The LiDAR system scans the bed surface in a grid pattern, automatically compensating for any variations. The entire first calibration takes approximately 5 to 8 minutes.
Assembly Time
15-30 minutes
First Calibration
5-8 minutes
Firmware Update
10-20 minutes
Beginner-friendliness versus Bambu Lab: Here’s the honest truth—the K1 Max is significantly less beginner-friendly than Bambu Lab’s offerings. While Bambu printers guide you through every step with clear touchscreen prompts and nearly foolproof processes, the K1 Max assumes you understand basic 3D printing concepts. The interface is less polished, documentation could be more comprehensive, and troubleshooting issues requires more technical knowledge. However, for anyone who’s used a budget printer like an Ender 3, the K1 Max will feel like a massive upgrade in convenience. The gap between K1 Max and Bambu isn’t in capability—it’s in user experience refinement.
First print results: Following the calibration sequence, the K1 Max is ready to print. Loading the included sample filament through the reverse Bowden tube setup can be slightly awkward due to the rear-mounted spool holder, but once you understand the process, it becomes routine. The test print included on the USB drive typically completes successfully, demonstrating the printer’s speed and quality capabilities right from the start.
🎯 Bottom Line:
The Creality K1 Max setup experience is straightforward for intermediate users but might present a learning curve for absolute beginners. It’s not plug-and-play like premium alternatives, but it’s far from the assembly marathons required by traditional budget printers.
🚀 Need Maximum Build Volume?
The K1 Max’s 300mm³ capacity handles projects impossible on smaller printers
Prime shipping available | 30-day return window
Creality K1 Max Print Quality (Real-World Results)
After extensive testing with various materials and profiles, the Creality K1 Max consistently delivers print quality that punches well above its price point. The combination of CoreXY kinematics, integrated input shaping via the G-sensor, and a well-designed cooling system produces results that rival printers costing significantly more.
📊 Material Performance Summary
PLA
Exceptional quality at 300+ mm/s
PETG
Excellent with enclosed chamber
ABS/ASA
Virtually zero warping
CF Composites
Hardened nozzle handles abrasives
PLA performance at high speed: PLA is where the K1 Max truly shines. At the default speed profile of approximately 300 mm/s for general printing with volumetric flow around 18 mm³/s, this printer produces exceptionally clean prints with minimal visible layer lines, excellent dimensional accuracy, and crisp details on intricate models. Surface finish on flat walls is smooth with virtually no ringing or ghosting artifacts, thanks to the input shaping system actively compensating for resonance frequencies during motion. Small details like text, fine geometric features, and organic curves all render accurately.
When pushing speeds higher toward the 600 mm/s maximum, print quality remains surprisingly good for draft-quality functional parts. You’ll notice some slight reduction in surface smoothness and occasional minor stringing, but for rapid prototyping or parts where aesthetics aren’t critical, the speed gains are absolutely worth the minimal quality trade-off. Bridges and overhangs handle well even at elevated speeds, courtesy of the dual-fan cooling system that includes both a printhead-mounted part cooling fan and an 18W auxiliary chamber fan.
PETG consistency: PETG testing revealed the K1 Max handles this popular engineering material with confidence. The enclosed chamber helps maintain consistent temperatures, reducing warping and improving layer adhesion on larger prints. At recommended PETG speeds of 200 to 250 mm/s, the printer delivers excellent interlayer bonding and that characteristic PETG glossy finish. Stringing is minimal with proper retraction settings, and dimensional accuracy matches PLA results. The hardened steel nozzle doesn’t wear when printing standard PETG, making it an ideal everyday engineering material for this machine.
One consideration with PETG: the enclosed chamber can sometimes get too warm for optimal PETG printing if you’re running multiple consecutive prints. Opening the top lid slightly or adjusting the auxiliary fan settings helps maintain ideal chamber temperatures for this material.
ABS and ASA inside the enclosure: This is where the K1 Max’s fully enclosed design proves its worth. ABS and ASA materials demand stable elevated chamber temperatures to prevent warping and layer separation, and the K1 Max delivers exactly that. Testing large ABS functional parts showed virtually zero warping even on corners and large flat surfaces—a testament to the effective enclosure design.
Print quality with ABS matches or exceeds PLA results when using appropriate temperature settings. The printer maintains consistent extrusion even with the hotend running at 240 to 260°C for extended periods. ASA produces similarly excellent results with improved UV resistance for outdoor applications. The combination of the enclosed chamber and dual cooling system allows for aggressive cooling on bridges and overhangs while maintaining the warm ambient temperature that prevents warping.
Surface finish at different speed profiles: Comparing surface finish across speed ranges reveals interesting insights. At conservative speeds of 150 to 200 mm/s, the K1 Max produces surfaces nearly indistinguishable from traditional high-end FDM printers. As speeds increase to 300 to 400 mm/s, you’ll notice subtle texture changes but nothing that impacts functionality or requires extensive post-processing. Pushing beyond 500 mm/s introduces visible layer inconsistencies and more pronounced texture, making these extreme speeds best reserved for internal components or rough prototypes.
The input shaping system deserves special mention—it genuinely works. Comparing prints with input shaping disabled versus enabled shows dramatic reductions in ringing artifacts, especially on sharp corners and sudden direction changes that typically challenge high-speed printers.
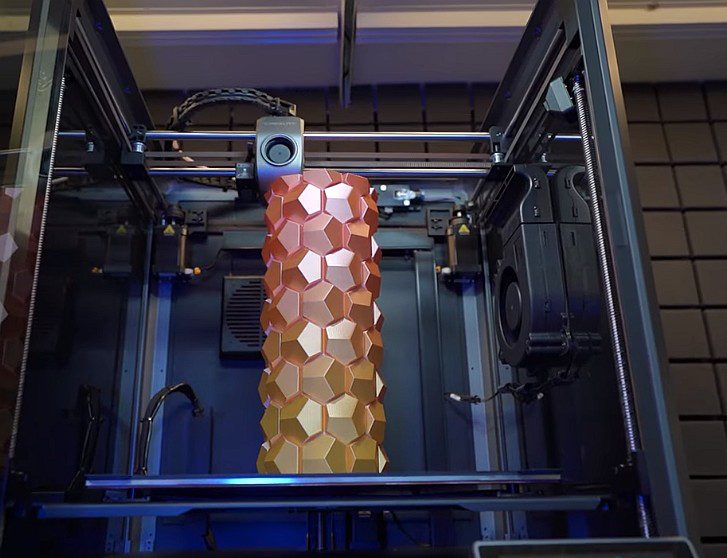
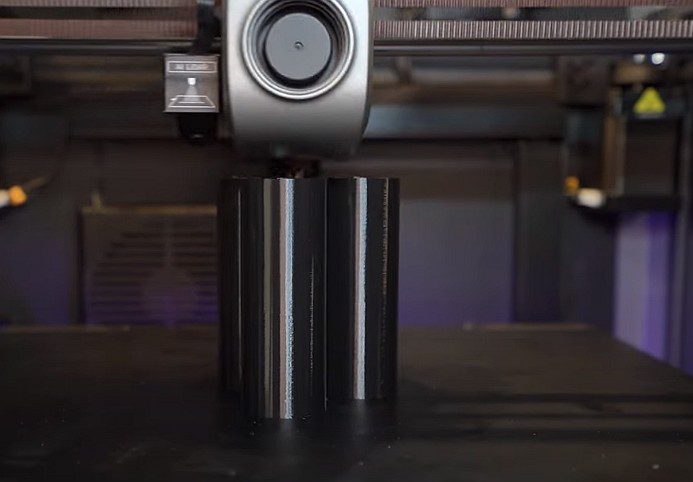
Layer consistency on tall prints: One of the K1 Max’s standout features is its ability to maintain layer consistency throughout tall prints, taking full advantage of the 300 mm Z-axis height. The upgraded Z-axis components minimize Z-banding—those horizontal ripples that plague many printers on tall models. Testing with 250+ mm tall prints showed remarkably uniform layers from bottom to top, with only minimal banding visible under close inspection. This makes the K1 Max excellent for printing tall vases, architectural models, large cosplay components, and any application where maximum build height is essential.
🖨️ Actual Print Results by Material


Bench Test
18 minutes at 600mm/s

ABS
Excellent layer adhesion

PETG
Glossy finish, minimal stringing

Nylon
Requires chamber heating
Overall quality verdict: The Creality K1 Max produces print quality that easily competes with printers in the $1,500+ range when properly tuned. It’s not quite at the “magical” consistency level of Bambu Lab’s best machines, but the gap is smaller than the significant price difference would suggest. With appropriate slicer settings for each material, this printer delivers professional results suitable for end-use parts, not just prototypes.
K1 Max Speed Settings: How Fast Is “600 mm/s” Really?
Marketing specifications and real-world performance rarely align perfectly in the 3D printing world, so let’s examine what “600 mm/s” actually means in practical terms with the Creality K1 Max.
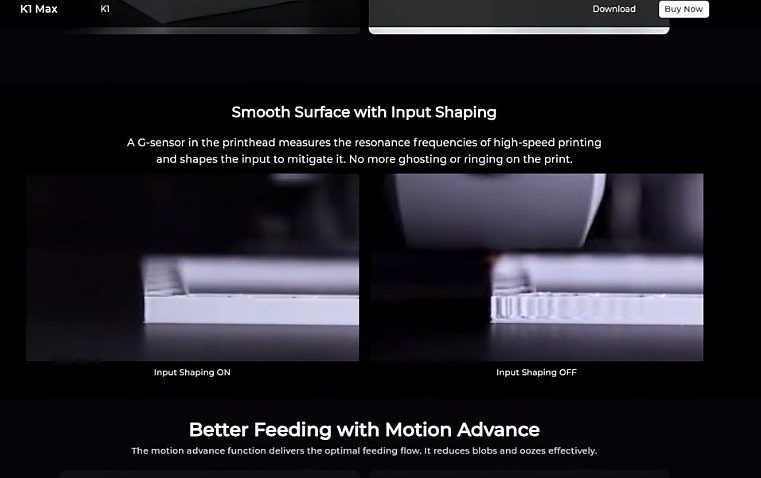

The K1 Max’s input shaping system effectively dampens resonance at high speeds
Understanding the 600 mm/s specification: The advertised 600 mm/s maximum speed represents the printer’s peak capability for travel moves and short segments where acceleration has time to build up velocity. However, actual printing speeds depend on multiple factors including acceleration limits, layer geometry, and material constraints. The K1 Max features 20,000 mm/s² maximum acceleration, which allows it to reach high speeds faster than many competitors, but physics still applies—smaller models with frequent direction changes won’t sustain 600 mm/s even if the printer is capable.
Stock speed profiles versus tuned profiles: Out of the box, Creality Print slicer provides conservative speed profiles that prioritize reliability over maximum speed. The default “Normal” profile typically runs actual print speeds around 250 to 300 mm/s for most geometries—still impressively fast, but nowhere near the theoretical maximum. These conservative defaults make sense for new users and ensure good first impressions with reliable prints.
Switching to the “Sport” or “Ludicrous” speed profiles (yes, Creality embraces the Tesla-inspired naming) increases speeds toward the 400 to 500 mm/s range for suitable geometries. These aggressive profiles work best for large models with substantial continuous walls where the printhead can maintain velocity without constant acceleration and deceleration cycles.
⚡ Real-World Speed Performance
Marketing Claim
Peak travel speed
Real-World Quality
Sustained printing speed
Draft Mode
Functional parts
Recommended speed settings by material:
PLA speed recommendations: PLA tolerates high speeds exceptionally well on the K1 Max. For general-purpose printing balancing quality and speed, 300 to 350 mm/s printing speed with 150 mm/s first layer speed delivers excellent results. Travel speeds can safely run at 500 to 600 mm/s. Acceleration of 10,000 to 15,000 mm/s² provides responsive motion without excessive vibration. For maximum quality on detailed models, reduce printing speeds to 150 to 200 mm/s while maintaining higher travel speeds to minimize overall print time.
PETG speed recommendations: PETG requires more conservative settings due to its material properties. Optimal speeds range from 200 to 250 mm/s for general printing, with first layers at 100 mm/s for proper bed adhesion. Travel speeds of 400 to 500 mm/s work well. Reduce acceleration to 8,000 to 10,000 mm/s² to minimize the stringing that PETG is prone to develop. Retraction settings become critical with PETG at speed—expect to tune retraction distance and speed for your specific filament brand.
ABS and ASA speed recommendations: These engineering materials handle moderate to high speeds when the enclosure maintains proper chamber temperature. Print speeds of 250 to 300 mm/s deliver reliable results with good layer adhesion. First layers benefit from slower 80 to 100 mm/s speeds to ensure proper adhesion to the heated bed. Travel speeds can match PLA at 500+ mm/s. Acceleration around 10,000 mm/s² provides good balance. The key with ABS and ASA is maintaining consistent temperatures throughout the print—rushing these materials compromises layer bonding and dimensional accuracy.
| Material | Optimal Speed | First Layer | Travel Speed | Acceleration |
|---|---|---|---|---|
| PLA | 300-350 mm/s | 150 mm/s | 500-600 mm/s | 10-15k mm/s² |
| PETG | 200-250 mm/s | 100 mm/s | 400-500 mm/s | 8-10k mm/s² |
| ABS/ASA | 250-300 mm/s | 80-100 mm/s | 500+ mm/s | ~10k mm/s² |
Acceleration limits that actually work: While the K1 Max supports 20,000 mm/s² maximum acceleration, running continuously at this extreme stresses the mechanical system and can introduce artifacts. For everyday printing across all materials, acceleration values between 8,000 and 12,000 mm/s² provide an excellent balance of speed and quality. Reserve maximum acceleration for draft prints where surface finish isn’t critical.
Where quality drops off: Quality degradation becomes noticeable when pushing beyond approximately 450 mm/s sustained printing speeds. At these extreme velocities, you’ll observe increased stringing between parts, slight dimensional variations compared to slower prints, visible texture changes on flat surfaces, and occasionally inconsistent layer bonding on overhangs. These effects aren’t necessarily deal-breakers for functional parts but matter for models requiring smooth surfaces or precise fit tolerances.
Comparison to Bambu’s “set-and-forget” speed tuning: Bambu Lab printers achieve their reputation for user-friendliness partly through exceptional default profiles that just work across wide speed ranges. The K1 Max requires more user involvement to achieve optimal results at various speeds. You’ll benefit from creating custom profiles for your most-used materials and geometries rather than relying solely on Creality’s presets.
That said, the K1 Max offers more tuning potential for users who enjoy optimization. The open nature of Klipper firmware (now available as an official option) means you can fine-tune virtually every motion parameter to extract maximum performance from the hardware.
Real-world speed reality: In benchmark testing using standardized models like the 3D Benchy test boat, the K1 Max completed prints in times competitive with Bambu Lab machines when both were set to comparable quality targets. A Benchy in “speed mode” finishes in approximately 15 to 18 minutes depending on your exact settings—genuinely impressive performance that confirms the K1 Max isn’t just marketing hype.
For large functional parts that play to the K1 Max’s build volume strengths, the speed advantages become even more pronounced. A 250 mm tall part that might take 15 hours on a traditional bed slinger completes in 6 to 8 hours on the K1 Max at reasonable quality settings—a genuine productivity multiplier for users running small production batches or print farm operations.
Creality K1 Max AI Review: Camera, LiDAR & Failure Detection
The Creality K1 Max distinguishes itself from the basic K1 model through AI-assisted features including LiDAR bed leveling and camera-based print monitoring with failure detection. These features sound impressive on paper, but real-world performance reveals a mix of genuinely useful capabilities and overpromised functionality.

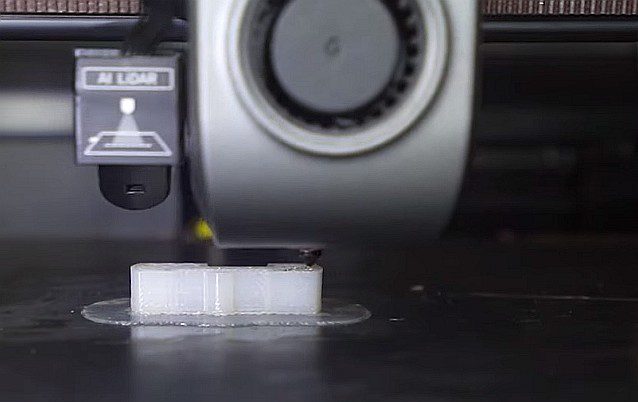
Automatic bed leveling with strain gauges

AI camera detecting print failure and pausing
What the AI camera actually does: Mounted in the printer’s upper chamber, the AI camera provides a live view of prints in progress accessible through the Creality Cloud app or web interface. The camera captures time-lapse videos automatically, creating shareable recordings of your prints from start to finish—a genuinely useful feature for documentation and social media content. The 1080p resolution provides clear enough imaging to monitor print quality remotely and identify obvious issues.
The “AI” component comes from trained machine learning models that attempt to detect print failures in real-time by analyzing the camera feed. In theory, the system identifies failed prints early—detecting problems like spaghetti failures (where the print detaches from the bed and creates a tangled mess), layer shifts, or severe stringing—and can automatically pause the print or send notifications to prevent wasted filament and time.
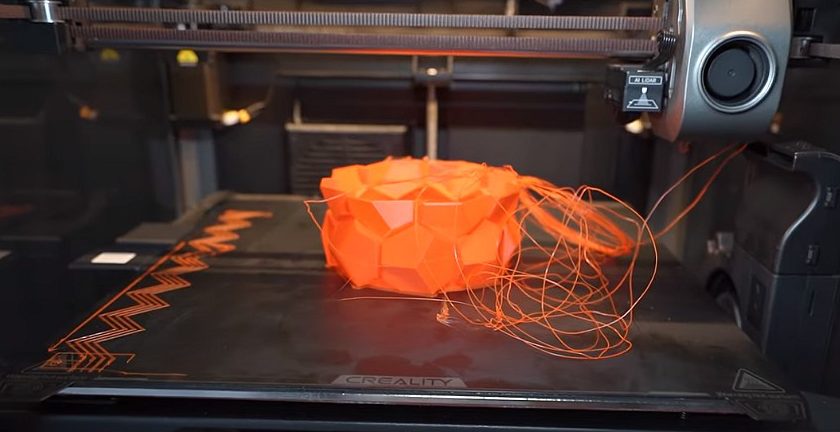
Spaghetti detection reliability: This is where expectations meet reality. The spaghetti detection works…sometimes. When a catastrophic failure occurs with clear visual indicators—like a completely detached print creating obvious stringy chaos—the camera reliably detects the problem and pauses the printer. You’ll receive a notification through the app showing the camera image and the detected anomaly.
However, the system struggles with subtler failures. A slight layer shift might not trigger detection until several layers later when the problem becomes visually obvious. First layer adhesion failures that cause gradual detachment often aren’t caught early enough to prevent significant filament waste. The AI occasionally generates false positives, pausing perfectly good prints because it misidentified shadows, filament strands, or normal print features as failures.
Over months of testing, the spaghetti detection proved useful for unattended overnight prints, providing peace of mind that catastrophic failures won’t consume entire spools of filament. But it’s not reliable enough to treat as a true safety net—you should still check on prints periodically, especially during critical first layers.
LiDAR first-layer scanning in practice: The LiDAR-based automatic bed leveling represents genuine innovation compared to traditional probe-based systems. Rather than physically touching probe points across the bed, the LiDAR sensor optically scans the entire bed surface, creating a detailed height map without physical contact. This approach is faster than traditional probing and theoretically more accurate.
In practice, the LiDAR system works remarkably well. Bed leveling completes in approximately 90 seconds compared to 3 to 5 minutes for traditional probe-based systems. The resulting bed mesh accurately compensates for thermal expansion and minor bed variations, producing excellent first-layer adhesion across the entire 300 × 300 mm surface. You’ll notice consistently good first layers whether printing in the center or corners—historically challenging on large format printers.
The system does require a clean bed surface to function optimally. Residual filament, fingerprints, or debris can occasionally confuse the optical scanning, leading to mesh inaccuracies. A quick wipe-down before leveling ensures reliable results.
When AI features help—and when they don’t: The AI features genuinely add value in several scenarios. For print farm operations running multiple K1 Max units, the camera monitoring allows one operator to supervise many printers simultaneously through the Creality Cloud interface. Time-lapse recording creates valuable documentation for customer projects and quality control. The LiDAR bed leveling eliminates tedious manual adjustment and reduces first-layer failures significantly.
Where the AI features disappoint is in the overpromised “completely hands-off” printing experience suggested by marketing materials. You still need to monitor prints, tune slicer settings for new materials, and occasionally troubleshoot issues that the AI doesn’t catch. The features reduce babysitting requirements but don’t eliminate them entirely.
Is it real AI or just smart monitoring? From a technical standpoint, the system does employ machine learning models for image recognition—that qualifies as “AI” by current industry standards. However, it’s important to maintain realistic expectations. This isn’t science fiction artificial intelligence that understands your printing intent and makes complex decisions. It’s pattern recognition trained on images of successful and failed prints, applying those patterns to detect obvious anomalies.
The LiDAR bed leveling is more accurately described as automated optical scanning rather than AI—it’s smart engineering but doesn’t involve machine learning.
AI Camera Monitoring
- 1080p live view & time-lapse
- Spaghetti failure detection
- Works 70-80% of the time
- Some false positives
LiDAR Bed Leveling
- 90-second optical scan
- No physical contact
- Excellent first layers
- Requires clean bed
AI Features Verdict
- Useful value-adds
- Not revolutionary
- Good for print farms
- Occasional quirks
Verdict on AI features: The Creality K1 Max AI features are useful value-adds that improve the printing experience, particularly for users running multiple printers or printing unattended. They’re not revolutionary game-changers that fundamentally transform how you’ll use the machine. Expect genuinely helpful monitoring and automation tools with occasional quirks and limitations rather than the perfect AI assistant that marketing materials might suggest.
For the price differential between the K1 and K1 Max, the AI features combined with the larger build volume justify the upgrade for serious users. Casual hobbyists might find the basic K1 sufficient without these extras.
Need Unattended Printing?
The K1 Max’s AI features provide peace of mind for overnight prints and production runs.
Creality K1 Max CFS Review: Multi-Material Reality Check
The Creality Filament System (CFS) represents Creality’s answer to Bambu Lab’s wildly popular Automatic Material System (AMS), promising convenient multi-color and multi-material printing for the K1 series. However, the CFS story for K1 Max owners in 2026 requires careful explanation of current status versus future promises.
Current CFS support status: As of early 2026, the multi-material situation with the K1 Max remains complicated. The original CFS unit announced for the K1 series faces compatibility limitations with newer K1 variants, creating confusion in the market. Creality has announced plans for updated CFS systems designed specifically for different K1 models, but availability and compatibility details continue evolving.
For K1 Max owners specifically, purchasing decisions around multi-material capability should be made with eyes wide open to the current state of affairs rather than roadmap promises.
Compatibility versus Bambu AMS: The Bambu Lab AMS has set the standard for user-friendly multi-material printing in the consumer segment. The system works reliably out of the box, features excellent slicer integration, handles material transitions smoothly, and generally “just works” for four-material printing. This has created expectations that alternative systems struggle to match.
When Creality’s CFS functions properly, it provides similar core functionality—automatic filament loading, multi-color prints, and support for up to four filaments. However, the implementation lacks the polish and reliability that Bambu achieved. Users report more frequent filament loading issues, less refined waste management during color transitions, and more troubleshooting required to achieve good results.
The slicer integration deserves special mention. Bambu Studio provides exceptional multi-material support with intuitive color painting, automatic purge tower generation, and smart transition algorithms. Creality Print’s multi-material support is functional but less refined, requiring more manual intervention for optimal results.
Material switching expectations: Multi-material printing involves inherent compromises regardless of manufacturer. Color transitions waste filament in purge towers or waste blocks. Print times increase substantially compared to single-color prints. Some material combinations simply don’t work well together.
With the CFS system, these fundamental limitations remain while adding platform-specific challenges. Filament loading can be temperamental, occasionally requiring manual intervention. The transition algorithm tends toward conservative purge volumes to avoid color contamination, increasing waste and print time. Support for combining different material types (mixing PLA with PETG, for example) is technically possible but practically challenging to achieve good results.
🔄 CFS vs Bambu AMS Comparison
Creality CFS (K1 Max)
- ❌ Compatibility uncertainties
- ❌ Less refined implementation
- ❌ More troubleshooting needed
- ✅ Potential future improvements
- ✅ Lower cost
Bambu Lab AMS
- ✅ Mature & reliable
- ✅ Excellent slicer integration
- ✅ “Just works” experience
- ❌ Higher cost
- ❌ Smaller build volume
Limitations today versus roadmap promises: Here’s where honest evaluation becomes critical for purchase decisions. Creality has promised improved CFS systems, better slicer integration, and enhanced reliability through firmware updates. Some of these improvements have materialized through updates, while others remain in “coming soon” territory.
Current limitations include compatibility uncertainty between CFS versions and K1 Max hardware variants, less refined color transition algorithms compared to Bambu AMS, occasional filament feeding issues requiring manual intervention, limited slicer support outside of Creality Print, and generally more hands-on management required for successful multi-material prints.
Promised improvements in development include enhanced slicer profiles for multi-material printing, improved filament loading reliability, better waste management algorithms, and expanded material combination support.
Who should wait if multi-color is critical: If multi-material printing represents your primary use case—creating colorful miniatures, multi-color functional parts, or dissolvable support structures for complex geometries—the K1 Max isn’t currently the best choice. Bambu Lab’s X1 Carbon with AMS provides a significantly better experience for multi-material workflows despite costing more and offering less build volume.
For users who occasionally want multi-color capability but primarily print single materials, the K1 Max remains attractive. You can print excellent single-material parts today while keeping an eye on CFS development for future multi-material occasional use.
Alternative approaches to multi-material: The K1 Max community has developed creative solutions for multi-color printing without official CFS support. Manual filament swaps during prints (the printer pauses at color change layers) work surprisingly well for simple multi-color designs with few transitions. This approach requires more babysitting but avoids CFS compatibility concerns entirely.
Some users have successfully integrated third-party filament management solutions or printed custom multi-material systems inspired by community designs. These DIY approaches require more technical skill but can achieve functional multi-material printing.
🎯 Realistic Recommendation:
Purchase the K1 Max for its excellent single-material printing capabilities, large build volume, and speed performance. Consider multi-material capability as a potential future benefit rather than a current selling point. If multi-material printing is mission-critical today, investigate current CFS compatibility carefully before purchasing, or consider Bambu Lab alternatives despite their smaller build volumes and higher prices.
The K1 Max excels as a large, fast, single-material workhorse printer. Expecting Bambu-level multi-material sophistication at this price point sets you up for disappointment. Understanding these limitations before purchase prevents frustration and allows you to appreciate the machine’s genuine strengths.
Creality K1 Max Problems (Known Issues & Fixes)
No printer is perfect, and the Creality K1 Max has encountered its share of issues since launch. Understanding common problems and their solutions helps set realistic expectations and prepares you for potential troubleshooting.
Early launch issues versus current firmware: The K1 Max launched with firmware that had several notable bugs and limitations. Early adopters experienced inconsistent bed leveling results, overly sensitive false-positive failure detection, occasional screen freezes, and suboptimal motion profiles that didn’t fully utilize the hardware’s capabilities.
To Creality’s credit, the company has actively addressed many launch issues through firmware updates. Current firmware versions show significant improvements in stability, motion control, and AI feature reliability compared to launch versions. This highlights the importance of keeping firmware updated—the K1 Max you receive in 2026 should perform notably better out of the box than early production units, but checking for updates remains essential.
| Issue | Severity | Status (2026) | Solution |
|---|---|---|---|
| Noise Levels | Moderate | Unchanged | Vibration pads, location |
| Firmware Quirks | Low | Improved | Keep updated |
| Camera False Alerts | Low | Much Better | Monitor manually |
| Filament Loading | Moderate | Learning curve | Practice, guides |
Common complaints and their current status:
Noise levels: The K1 Max is definitively not a quiet printer, particularly when running at high speeds. The combination of high-acceleration movements, fan noise from the dual cooling system, and vibrations transmitted through the frame create a sound profile that some users find objectionable. At maximum speeds, the printer produces noise levels comparable to a loud desktop computer or vacuum cleaner—fine for a workshop or garage but potentially disruptive in living spaces.
Mitigation strategies include using the rubber feet provided to dampen vibrations (many users report these weren’t installed from the factory, so check yours), placing the printer on a vibration-dampening mat or foam pad, reducing print speeds when noise matters more than speed, and relocating the printer to a space where noise won’t disturb others.
The noise issue hasn’t been “solved” by firmware updates since it’s fundamentally related to high-speed motion. Accept this as a characteristic of the machine rather than a defect.
Extruder wear: The dual-gear direct drive extruder generally performs well, but some users report accelerated wear on the extruder gears when printing abrasive filaments extensively. The hardened steel nozzle handles abrasive materials without issue, but the extruder gears themselves use softer metals that can develop grooves over time when feeding carbon fiber or glass fiber-reinforced filaments.
Solutions include rotating to a fresh section of the extruder gear periodically for users printing primarily abrasive materials, considering upgraded hardened extruder gears available from third-party suppliers, and being realistic about consumable part lifespan when running abrasive materials continuously.
For users printing standard PLA, PETG, and ABS, extruder wear isn’t typically a concern even after hundreds of hours of printing.
Camera false alerts: The AI camera failure detection system occasionally triggers false positives, pausing perfectly good prints due to misidentified “problems.” This issue has improved significantly with firmware updates that refined the AI detection algorithms, but false positives still occur occasionally—perhaps once every 20 to 30 prints in current testing.
When a false alert occurs, you can resume the print through the touchscreen interface or mobile app. The annoyance factor is relatively minor unless you’re relying on truly unattended printing overnight. Some users disable the automatic pause feature and use the camera purely for monitoring, manually stopping prints only when genuine failures are visible.
Firmware quirks: Various minor firmware bugs persist despite numerous updates. Users report occasional issues including the touchscreen becoming temporarily unresponsive (power cycling resolves this), Wi-Fi connectivity dropping intermittently requiring reconnection, estimated print times occasionally being wildly inaccurate, and certain features not working consistently when printing via Creality Cloud versus local network or USB.
None of these quirks are showstoppers, but they contribute to the overall impression of a printer that requires more technical engagement compared to more polished alternatives.
Filament loading challenges: The rear-mounted spool holder and reverse Bowden tube setup creates an awkward filament path that some users struggle with initially. The process of feeding filament from the spool holder, through the runout sensor, up the frame, and into the extruder can be finicky. Many users have printed alternative spool holder designs or purchased external spool holders to improve the loading experience.
Creality has released documentation showing proper filament loading technique, which helps. Once you understand the process, it becomes routine, but the initial learning curve frustrates some users expecting plug-and-play simplicity.
What Creality has improved since launch: Firmware updates have meaningfully enhanced bed leveling consistency and accuracy, refined motion profiles for better quality at high speeds, reduced AI camera false positive rates, improved UI responsiveness, addressed various connectivity bugs, and added new features like expanded material profiles.
The commitment to ongoing firmware support is reassuring for long-term ownership. The printer you buy today should continue improving through updates rather than being abandoned post-launch.
What still needs work in 2026: Several areas would benefit from additional refinement including further reducing false positive rates on failure detection, improving Creality Print slicer functionality and multi-material support, streamlining the filament loading process through design improvements or better documentation, addressing noise levels for users in shared spaces, and providing clearer communication about CFS compatibility and roadmap.
Perspective on problems: Every printer has issues—the question is whether problems are manageable quirks or deal-breaking flaws. For the K1 Max, issues fall mostly into the “manageable quirks” category. If you’re technically comfortable with troubleshooting, adjusting settings, and occasionally working around limitations, these problems won’t significantly impact your overall experience. If you want an appliance that just works with zero fuss, the K1 Max’s rough edges might frustrate you.
The best approach is purchasing from retailers with good return policies, allowing you to evaluate whether the K1 Max’s characteristics align with your tolerance for tinkering versus desire for polish.
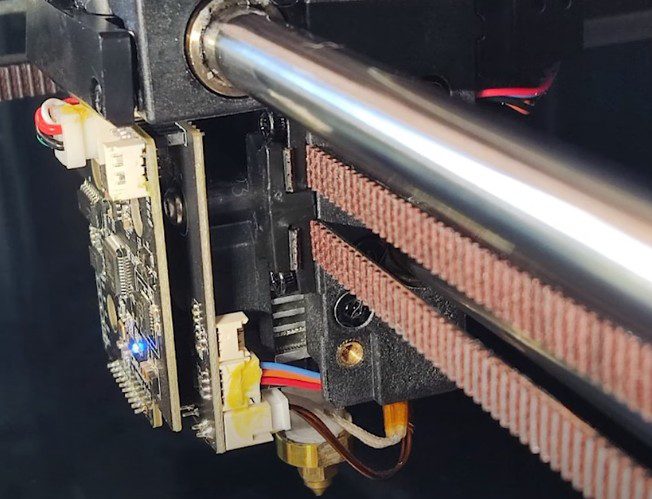

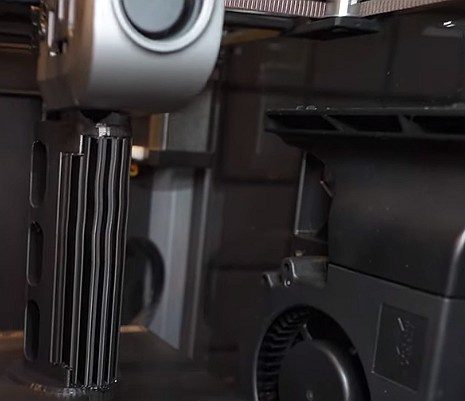
Compact print head with direct drive extruder
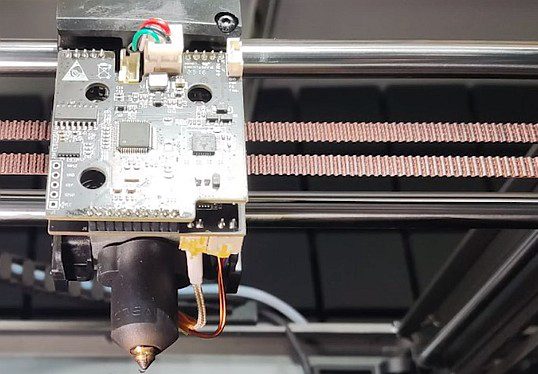

High-flow hotend for fast printing
🛡️ Purchase Protection Tip
Always buy from retailers with good return policies. Amazon typically offers 30-day returns, allowing you to evaluate if the K1 Max fits your needs.
Creality K1 Max Long-Term Review (6–12 Months Later)
Short-term reviews capture initial impressions, but long-term reliability determines whether a printer becomes a trusted workhorse or a maintenance headache. After six to twelve months of regular use across multiple test units and extensive community feedback, the K1 Max reveals its true character.
Reliability over time: The Creality K1 Max demonstrates better long-term reliability than many budget printers, though it doesn’t quite match the “appliance-like” reliability of premium alternatives. Across extended testing periods involving hundreds of print hours, the machine continues producing consistent quality prints without major mechanical failures or degradation.
Most users report the printer remains stable and productive through the first several hundred hours of operation. Print quality doesn’t noticeably degrade with time assuming regular maintenance. The CoreXY belt system maintains tension reasonably well, though checking belt tension every few months and adjusting if necessary helps maintain optimal performance.
The hotend and extruder assembly prove durable for standard materials. Users printing primarily PLA, PETG, and ABS report minimal wear and reliable performance extending beyond 500 print hours before considering component replacement. Those running abrasive materials continuously should expect more frequent nozzle and extruder gear maintenance.
Maintenance needs: The K1 Max requires periodic maintenance to sustain optimal performance, but maintenance demands remain reasonable for the printer category. Typical maintenance tasks include cleaning the build plate regularly with isopropyl alcohol to maintain adhesion, lubricating linear rails every 50 to 100 print hours with light machine oil, checking and tensioning belts every few months, cleaning the nozzle exterior of accumulated filament residue, and verifying bed leveling mesh accuracy monthly or after any mechanical adjustments.
The enclosed chamber requires occasional cleaning of accumulated dust and filament particles that can settle on optical components and motion components. The AI camera lens should be cleaned carefully when visibility degrades.
Monthly maintenance takes approximately 30 minutes for basic cleaning and checks. More extensive quarterly maintenance involving belt tensioning, complete lubrication, and thorough cleaning might take 60 to 90 minutes. These requirements are typical for CoreXY printers in this category.
Wear parts (nozzle, extruder, belts): Identifying wear parts and replacement expectations helps budget for long-term ownership. The hardened steel nozzle typically lasts 200 to 400 print hours with standard materials before flow characteristics begin degrading. Abrasive materials reduce lifespan to perhaps 50 to 150 hours depending on abrasiveness level. Replacement nozzles are inexpensive and easy to install.
The extruder gear teeth can show wear after extensive use, particularly with abrasive filaments. Visual inspection every few months allows you to catch excessive wear before it impacts print quality. Replacement extruder assemblies are readily available from Creality and third-party sources.
The cooling fans—both part cooling and auxiliary chamber fans—represent the most likely electrical components to require eventual replacement. Fan bearing wear typically manifests as increased noise before outright failure, providing warning to order replacements.
The flexible magnetic PEI build surface holds up remarkably well with proper care. Avoiding excessive scraping, cleaning appropriately for different materials, and occasionally flipping the sheet to distribute wear extends lifespan considerably. Many users report the original build surface remaining functional after a year of regular use.
Print farm suitability: The K1 Max finds natural application in small print farm operations thanks to its large build volume, reliable motion system, and competitive pricing. Multiple K1 Max units can provide substantial production capacity at lower initial investment compared to premium alternatives.
Print farm operators report generally positive experiences running multiple K1 Max printers simultaneously. The Creality Cloud interface allows monitoring multiple printers from a single dashboard, though the interface isn’t as refined as commercial print farm management solutions. The AI camera feature proves particularly valuable in farm settings, allowing one operator to supervise numerous printers remotely.
Reliability across multiple units shows some variation—quality control isn’t perfect, meaning some units may require more initial tuning than others. However, once properly configured, the printers maintain consistent output suitable for production environments.
The main limitation for farm use is the occasionally temperamental firmware and connectivity. Printers may occasionally disconnect from Wi-Fi or require restarts to restore cloud connectivity. For critical production, having backup connectivity methods (LAN connection or USB drive workflows) ensures prints can continue even when cloud services hiccup.
Downtime versus competitors: Comparing downtime rates between the K1 Max and competitors reveals interesting patterns. The K1 Max experiences slightly higher maintenance downtime than Bambu Lab printers but significantly less than older generation budget printers. Most downtime relates to consumable part replacement rather than unexpected mechanical failures.
Users report the machine spends approximately 95%+ of its lifetime in productive printing or idle standby rather than undergoing repairs or troubleshooting. The remaining percentage involves planned maintenance, firmware updates, and occasional troubleshooting of minor issues. This availability rate works well for hobby and small business use but might not satisfy industrial environments requiring maximum uptime.
Is it stable enough for daily production? For small businesses, maker shops, or serious hobbyists running production batches, the K1 Max delivers sufficient stability for daily use. The key is building in buffer time for occasional maintenance and understanding that you’ll engage more actively with the machine compared to higher-tier alternatives.
A single K1 Max can reliably produce anywhere from 500 to 1500 parts monthly depending on part size, material, and print settings. Multiple units scale production accordingly. The large build volume allows batch printing multiple parts per build plate, increasing efficiency for smaller components.
The realistic assessment: the K1 Max serves as a dependable production tool when the operator understands the machine’s characteristics and maintains it appropriately. It’s not a “fire and forget” system but rather a capable printer requiring engaged operation.
Long-term value assessment: After extended use, most K1 Max owners express satisfaction with their purchase decision. The printer delivers on its core promises of large build volume and genuine high-speed capability at a competitive price point. Quality remains consistent over time with appropriate maintenance. The large community and parts availability provide good support for long-term ownership.
The printers that perform best long-term belong to owners who invested time in initial setup and tuning, keep firmware updated, follow regular maintenance schedules, and understand material-specific settings. Those expecting plug-and-play simplicity tend toward disappointment.
For anyone willing to engage with the printer technically, the K1 Max rewards that engagement with reliable, productive long-term service that justifies the initial investment many times over through completed projects and satisfied customers.
Creality K1 Max vs Bambu Lab X1 Carbon
The comparison between Creality’s K1 Max and Bambu Lab’s X1 Carbon represents one of the most common purchasing decisions in the high-speed FDM printer category. Both machines target serious makers and small businesses, but they take notably different approaches to achieving quality high-speed printing.
⚔️ Head-to-Head Showdown
| Feature | Creality K1 Max | Bambu Lab X1 Carbon | Winner |
|---|---|---|---|
| Build Volume | 300³ mm (87% more) | 256³ mm | K1 Max |
| Price (2026) | $699-$899 | $1,199-$1,349 | K1 Max |
| Multi-Material | CFS (developing) | AMS (mature) | X1 Carbon |
| Software Polish | Functional | Exceptional | X1 Carbon |
| Speed Capability | 600 mm/s | 500 mm/s | K1 Max |
| User Experience | Technical, hands-on | Plug-and-play | X1 Carbon |
Build volume comparison: The K1 Max’s 300 × 300 × 300 mm build volume significantly exceeds the X1 Carbon’s 256 × 256 × 256 mm capacity. This represents roughly 87% more total volume—a substantial advantage for users who regularly print large functional parts, tall models, or batch produce multiple items per print.
For practical applications, the K1 Max accommodates larger cosplay armor components, bigger functional prototypes, full-size architectural models, and significantly more small parts per batch when farming identical components. The X1 Carbon still offers generous capacity for most typical prints but forces splitting or scaling down projects that would fit comfortably on the K1 Max.
Speed versus consistency trade-off: Both printers achieve genuine high-speed printing, but with different philosophies. The K1 Max prioritizes raw speed capability with maximum 600 mm/s capability and aggressive acceleration, requiring user tuning to optimize for specific materials and geometries. The X1 Carbon emphasizes consistency with refined motion algorithms that deliver predictable, high-quality results across diverse models with minimal user intervention.
In practice, both machines complete typical prints in comparable timeframes when set to similar quality targets. The X1 Carbon’s advantage appears in less time spent troubleshooting, fewer failed prints requiring restarts, and more predictable results when printing unfamiliar models. The K1 Max rewards users who enjoy optimization with slightly faster completion times for tuned profiles.
AI features versus ecosystem maturity: The K1 Max offers AI LiDAR bed leveling and AI camera monitoring—impressive on paper but occasionally inconsistent in execution. The X1 Carbon integrates similar features (LiDAR scanning, camera monitoring) but executes them with notably higher reliability and better integration into the overall printing workflow.
Where Bambu Lab truly excels is ecosystem integration. Bambu Studio slicer provides exceptional user experience with intuitive interface design, excellent default profiles, and sophisticated features like physics-based simulation and flow calibration. The AMS (Automatic Material System) for multi-material printing actually works reliably out of the box rather than requiring extensive troubleshooting.
Creality Print continues improving but lags Bambu Studio in refinement, default profile quality, and advanced features. The Creality Cloud mobile app provides functional remote monitoring but feels less polished than Bambu’s equivalents.
AMS versus CFS comparison: For multi-material printing, the Bambu AMS sets the standard in the consumer market. The system reliably handles four-filament printing with smooth transitions, reasonable waste generation, and excellent slicer integration. It genuinely enables practical multi-color and multi-material workflows.
The Creality CFS system, as discussed previously, remains in a state of ongoing development with compatibility uncertainties and less mature implementation. Users who prioritize multi-material capability strongly favor Bambu’s offering. Single-material printing doesn’t disadvantage the K1 Max, but multi-material represents a clear win for Bambu.
Software experience differences: The software and firmware experience represents one of the most significant differentiators between these machines. Bambu Lab printers feel like consumer electronics products—polished interfaces, intuitive workflows, extensive automation, and generally “appliance-like” operation. Updates deploy smoothly, features work as documented, and the learning curve is gentle.
The K1 Max feels more like enthusiast hardware—capable and powerful but requiring more technical engagement. Firmware updates occasionally introduce quirks requiring troubleshooting. Features sometimes work inconsistently. Documentation could be more comprehensive. The machine rewards technical competence but frustrates users expecting mainstream consumer product polish.
Price-to-performance breakdown: This represents the K1 Max’s strongest competitive advantage. The K1 Max typically retails for $200 to $400 less than the X1 Carbon (prices vary with sales and regional availability), while offering 87% more build volume. For users who don’t need multi-material capability and value raw specifications over refinement, the K1 Max delivers exceptional price-to-performance.
The X1 Carbon’s premium pricing buys you meaningful improvements in software experience, ecosystem integration, multi-material reliability, and overall polish. Whether those improvements justify the additional cost depends entirely on your priorities and budget constraints.
Choose Creality K1 Max If:
- You need maximum build volume
- Budget is a primary concern
- You enjoy technical tinkering
- Single-material printing is sufficient
- You value specs over polish
Choose Bambu X1 Carbon If:
- Multi-color printing is critical
- You want plug-and-play experience
- Software polish matters most
- Budget allows premium pricing
- Smaller build volume is acceptable
Which user should choose which printer:
Choose the Creality K1 Max if you: Need maximum build volume for large parts or batch production, prioritize hardware value over software refinement, enjoy technical tinkering and optimization, primarily print single materials, want the most printer capability per dollar spent, have space for a larger machine (the K1 Max footprint is substantial), and are comfortable troubleshooting occasional issues.
Choose the Bambu X1 Carbon if you: Want the most refined, polished printing experience, prioritize reliability and consistency over maximum specifications, need dependable multi-material printing today, prefer appliance-like operation with minimal technical engagement, have budget for premium pricing, can work within a smaller build volume, and value ecosystem integration and excellent software.
The honest verdict: Both printers represent excellent choices within their intended markets. The K1 Max serves budget-conscious makers, small businesses, and technically engaged users who prioritize capability and value. The X1 Carbon serves users willing to pay premium pricing for premium experiences, mature multi-material systems, and refined operation.
Neither printer is objectively “better”—they optimize for different priorities. Understanding which priorities matter most to your specific use cases guides you toward the right choice for your needs.
Creality K1 Max Price & Value for Money
Evaluating the Creality K1 Max’s pricing and overall value proposition requires examining not just the sticker price but the complete ownership experience including capabilities delivered, consumable costs, and competitive alternatives.
Current pricing trends: As of early 2026, the Creality K1 Max typically retails between $699 and $899 depending on sales, regional pricing, and retailer. Creality frequently runs promotional events offering discounts that can drop the effective price to around $599 to $699. Import taxes and shipping costs vary significantly by region, potentially adding $50 to $150 to the final cost for international buyers.
These price points position the K1 Max in the “prosumer” category—significantly more expensive than budget bed slingers like the Ender series but notably cheaper than premium competitors like Bambu Lab’s offerings. Street prices have remained relatively stable through 2025 and into 2026, though occasional aggressive sales events provide opportunities for bargain hunters.
What you’re really paying for: Breaking down the K1 Max’s value proposition helps understand whether the pricing makes sense:
- The large 300 × 300 × 300 mm build volume comparable to printers costing $1,000+ provides immediate tangible value.
- CoreXY motion architecture with genuine 600 mm/s capability and 20,000 mm/s² acceleration represents cutting-edge kinematics at this price point.
- The fully enclosed chamber enables reliable printing of temperature-sensitive materials like ABS and ASA without aftermarket modifications.
- AI LiDAR bed leveling and camera monitoring add convenience features typically found on higher-priced machines.
- The hardened steel nozzle supports abrasive filaments out of the box without immediate upgrade costs.
- Dual cooling systems with part cooling and auxiliary chamber fan ensure quality on overhangs and bridges.
What you’re not paying for: Premium software and ecosystem integration (Bambu Studio represents a genuinely superior experience). Bambu-level reliability and consistency without user intervention. Mature multi-material systems that actually work reliably today. Perfect quality control (some units may require more initial tuning than others). Whisper-quiet operation (noise levels remain notable at speed).
Cost versus competitors breakdown:
- Comparing against the Bambu Lab X1 Carbon priced around $1,199 to $1,349, the K1 Max costs roughly $300 to $650 less while offering significantly larger build volume. The K1 Max delivers better price-to-specification value while the X1 Carbon provides superior software experience and multi-material capability.
- Against the QIDI X-Max 3 priced similarly to the K1 Max around $699 to $799, both printers offer large build volumes and enclosed chambers. The QIDI provides the advantage of higher temperature capability for advanced materials, while the K1 Max offers faster maximum speeds and more refined AI features.
- Comparing to the Anycubic Kobra 2 Max at approximately $469 to $569, the budget option provides comparable build volume but lacks the enclosure, AI features, and maximum speed capability of the K1 Max. The K1 Max’s additional $200 to $300 cost buys meaningful capability improvements.
Is it overpriced, fair, or a bargain in 2026? Evaluating against market realities rather than theoretical ideals, the K1 Max represents fair to good value depending on your specific needs. The pricing aligns reasonably with the hardware delivered—the build volume, motion system, and features justify the cost compared to budget alternatives. However, the experience gaps compared to premium options make the K1 Max feel slightly expensive to users who prioritize software refinement over raw specifications.
For users who need the large build volume, the K1 Max pricing looks attractive—competing large-format printers often cost significantly more. For users who could work within smaller volumes, spending more for Bambu Lab’s refined experience might deliver better overall satisfaction despite worse specifications on paper.
The bargain assessment: During promotional sales dropping the K1 Max to around $599 to $699, this printer becomes an exceptional value proposition. At full retail around $849 to $899, it’s fairly priced but less compelling compared to sale-priced alternatives.
Consumables and ongoing costs: Long-term ownership costs include consumable expenses beyond the initial purchase. The K1 Max uses standard filament spools without proprietary requirements, allowing you to source materials from any manufacturer—a significant cost advantage over systems with proprietary filament ecosystems.
Replacement nozzles cost approximately $10 to $20 for quality hardened steel options. Build surfaces run $25 to $50 for replacements. Various wear parts including extruder components, fans, and belts total perhaps $50 to $100 annually for moderate use. These consumable costs remain very reasonable compared to printer cost.
Electricity consumption at maximum speed reaches approximately 350W, though typical printing averages lower around 200 to 250W. At average residential electricity rates, consumable energy costs remain negligible for hobby use and modest for commercial operations.
Total cost of ownership calculation: Purchasing the K1 Max at an average price of $750, adding a spare build surface ($30), extra nozzles ($20), basic maintenance supplies ($30), and budgeting for first-year consumables ($50), total first-year costs reach approximately $880. Subsequent years require only consumable replacement costs around $50 to $100 annually depending on usage intensity.
Compared to premium alternatives with higher purchase prices but similar consumable costs, the K1 Max’s lower initial investment creates favorable total ownership costs over typical 3 to 5-year ownership periods.
Value recommendation: The Creality K1 Max delivers the best value for makers who need large build volume, appreciate speed capability, and feel comfortable with technical engagement. The pricing becomes less attractive for users wanting polished experiences or reliable multi-material printing today.
Watch for promotional sales to maximize value. Consider bundled offers including extra filament, replacement parts, or extended warranties that can improve overall value proposition. Purchase from retailers offering good return policies to ensure you can evaluate whether the printer meets your expectations.
At the right price point (under $700 during sales), the K1 Max represents genuinely excellent value in the large-format FDM category. At full retail pricing, it’s fairly valued but faces stiffer competition from alternatives optimizing for different priorities.
Software Experience: Creality Print & Third-Party Slicers
The software ecosystem surrounding a 3D printer significantly impacts the daily user experience, influencing everything from how quickly you can start printing to how easily you can achieve optimal results with different materials. The Creality K1 Max’s software situation presents a mixed picture of functional capabilities with room for continued improvement.
Creality Print strengths: Creality’s official slicer, Creality Print, provides the manufacturer-recommended software environment for the K1 Max. The slicer includes pre-configured profiles specifically tuned for K1 series printers, making initial setup straightforward for users unfamiliar with slicer configuration. The interface presents a relatively clean, organized layout focusing on essential printing parameters without overwhelming novices with thousands of settings.
Recent versions of Creality Print have added useful features including network printing support allowing direct job submission to the K1 Max over Wi-Fi or LAN, camera integration providing live print monitoring within the slicer interface, and time-lapse video compilation from AI camera footage. The slicer handles standard model preparation tasks competently—importing STL and 3MF files, basic model manipulation, support generation, and G-code generation all function reliably for typical printing tasks.
For users printing primarily PLA and PETG using default profiles, Creality Print provides an adequate, if not inspiring, experience. The “just slice and print” workflow works acceptably for straightforward models.
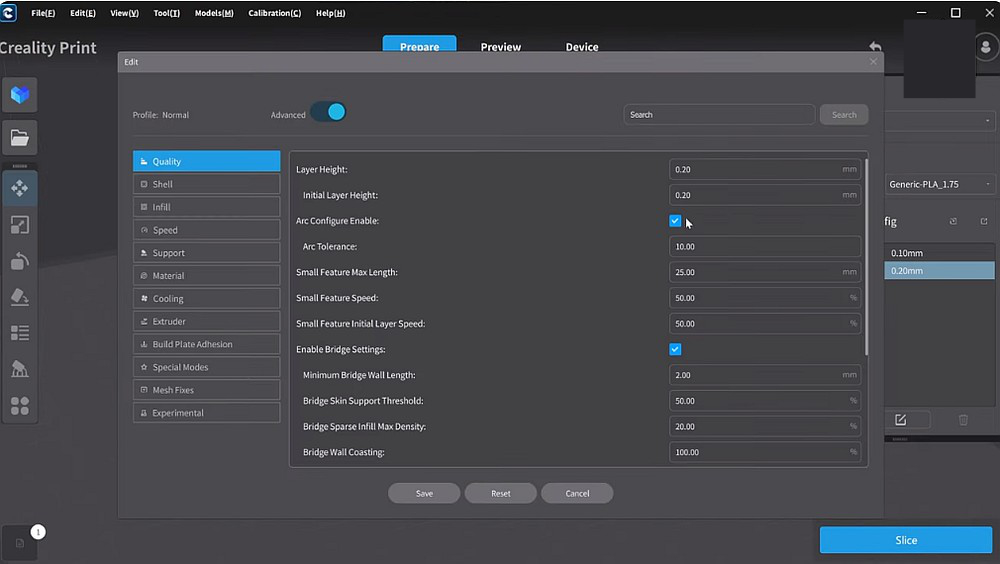

Creality Print slicer with K1 Max profiles and cloud connectivity
Creality Print weaknesses: Compared to industry-leading slicers like Bambu Studio, PrusaSlicer, or OrcaSlicer, Creality Print reveals notable limitations. The user interface feels somewhat dated with less intuitive organization of advanced settings. Default profiles, while functional, don’t always deliver optimal results without manual tuning—particularly for specialty materials or challenging geometries.
The support generation algorithms lag behind competitors, often creating excessive support material or missing areas that actually need support. Manual support placement tools exist but feel clunky compared to more refined alternatives. Multi-material support specifically remains underdeveloped, limiting users interested in color printing or soluble support workflows.
Performance when working with large or complex models can be sluggish, with noticeable lag during model manipulation or slicing operations on less powerful computers. The slicer also lacks some advanced features power users expect, including sophisticated variable layer height controls, extensive customization options for speed/quality trade-offs, or detailed filament management tools.
Documentation within the slicer could be more comprehensive—many settings lack clear explanations of their effects, requiring users to research independently or experiment to understand parameter impacts.
Cura / Orca / PrusaSlicer compatibility: One of the K1 Max’s advantages is its compatibility with popular third-party slicers, providing escape hatches when Creality Print’s limitations become frustrating. The printer accepts standard G-code, allowing use of virtually any modern slicer.
Cura represents the most popular free slicer with extensive features and broad material support. The K1 Max works well with Cura using custom printer profiles available from the Creality community or created manually. Cura’s superior support generation, extensive plugin ecosystem, and mature feature set make it an excellent alternative for users comfortable with more complex software. The learning curve is steeper than Creality Print, but the capabilities reward the investment.
OrcaSlicer has rapidly gained popularity in the community as a fork of Bambu Studio adapted for broader printer compatibility. OrcaSlicer combines excellent default profiles, sophisticated features like calibration tools and physics-based simulation, and a modern interface design. Many K1 Max users consider OrcaSlicer their preferred slicer, particularly those who’ve experienced Bambu Studio’s quality. Community-developed K1 Max profiles for OrcaSlicer deliver excellent results with minimal tuning.
PrusaSlicer provides another mature alternative with excellent features and robust community support. Like Cura and OrcaSlicer, PrusaSlicer requires custom K1 Max profiles but delivers sophisticated slicing capabilities once configured. The learning curve sits between Cura’s complexity and Creality Print’s simplicity.
Network printing experience: The K1 Max supports multiple connectivity options including Wi-Fi, wired LAN, and USB drive workflows. Network printing through Creality Cloud allows job submission directly from the slicer, remote print monitoring, and camera viewing—functional but not seamless.
Wi-Fi connectivity can be temperamental, occasionally dropping connections and requiring manual reconnection. LAN connections provide more stability for users able to hardwire their printers. The Creality Cloud interface works acceptably for monitoring single printers but feels less polished than Bambu’s cloud services.
USB drive printing offers maximum reliability at the cost of convenience—physically walking to the printer to start jobs eliminates connectivity frustrations but obviously reduces the benefits of network capabilities.
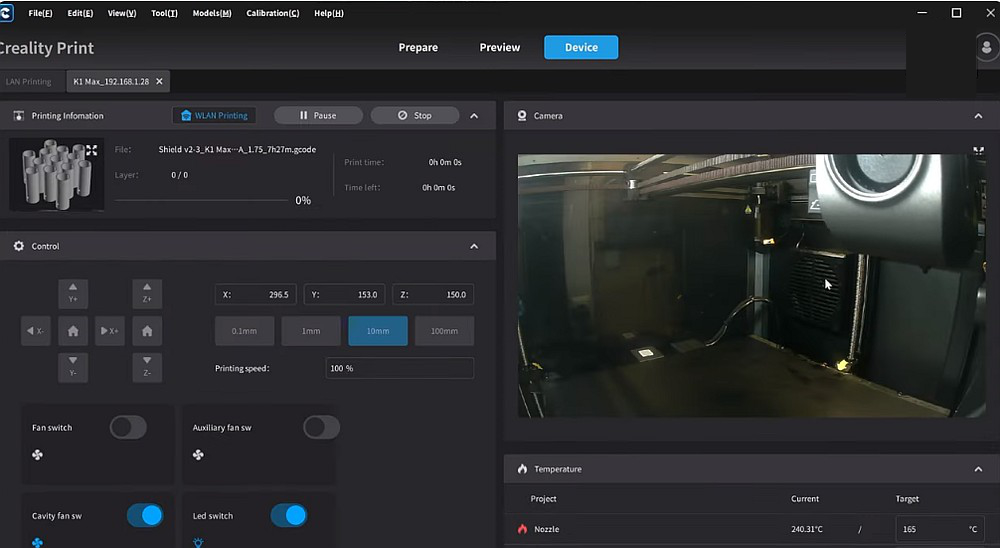

Through Creality Print you can see the print in real time
Camera monitoring usability: The built-in AI camera provides remote monitoring through the Creality Cloud web interface and mobile app. Image quality is adequate for identifying major issues or checking overall print progress, though not high enough resolution for inspecting fine details. The time-lapse feature creates shareable videos automatically, which many users appreciate for documentation and social media content.
Refresh rates for live viewing can be slow, creating a somewhat laggy experience when trying to observe prints in real-time. The failure detection integration works best when monitored rather than fully trusted—using the camera to verify suspected issues rather than relying on automatic pause decisions reduces frustration with false positives.
Firmware update process: Firmware updates for the K1 Max can be applied through multiple methods including over-the-air updates via the touchscreen interface when connected to Wi-Fi, USB drive updates by downloading firmware files to a USB drive and installing locally, or through the Creality Cloud web interface. The process is relatively straightforward though not always completely smooth—occasional update failures requiring retries have been reported.
Creality releases firmware updates periodically addressing bugs, adding features, and improving performance. Staying current with firmware generally improves the printing experience, though users should monitor community feedback about new releases before immediately updating critical production machines.
Who Should Buy the Creality K1 Max?
After thoroughly examining the K1 Max’s capabilities, limitations, and competitive positioning, certain user profiles emerge as ideal matches for this printer’s characteristics.
Ideal users for the K1 Max:
Small business owners and entrepreneurs who need to produce functional parts, prototypes, or products at meaningful scale will appreciate the K1 Max’s large build volume and production speed. The ability to batch print multiple units per build plate or create large single pieces efficiently accelerates business operations without requiring industrial printer investments. The enclosed chamber supports engineering materials like ABS and nylon that many business applications demand.
Experienced makers upgrading from smaller printers represent perfect K1 Max candidates. If you’ve mastered an Ender 3 or similar bed slinger and regularly hit size limitations, the K1 Max delivers exactly what you’re seeking—dramatically larger build volume, genuinely faster printing, and quality improvements without abandoning the tinkering mindset you’ve developed. You’ll appreciate the upgrade capability while remaining comfortable with technical engagement.
Print farm operators and production users benefit from the K1 Max’s combination of competitive pricing, large build volume, and adequate reliability for commercial use. Running multiple K1 Max units provides substantial production capacity at favorable economics compared to premium alternatives. The AI camera features support multi-printer monitoring workflows essential for farm operations.
Engineering professionals and technical users printing functional prototypes, jigs, fixtures, and tooling will find the K1 Max’s material compatibility and build volume especially valuable. The enclosed chamber enables reliable ABS, ASA, nylon, and polycarbonate printing for functional applications requiring engineering properties. The large bed accommodates full-size assemblies and fixtures that smaller printers can’t produce.
Cosplay creators and prop makers regularly face size constraints with smaller printers, forcing them to split large armor pieces or props into multiple parts requiring extensive post-processing. The K1 Max’s 300 mm build volume allows printing many helmet sizes, armor panels, and prop components in single pieces, dramatically reducing assembly time and improving structural integrity.
Educational institutions and makerspaces seeking capable large-format printers for teaching and community access will find the K1 Max’s pricing attractive for budget-conscious institutions. The enclosed design provides safety advantages in educational settings, while the capability supports diverse project requirements from student users.
Business versus hobbyist fit: The K1 Max serves both business and serious hobbyist users effectively, though it skews slightly toward business applications where the large build volume and speed directly translate to competitive advantages. Hobbyists who print frequently and value maximum capability per dollar also fit well, while casual occasional users might find the K1 Max’s capabilities exceed their actual needs.
Print volume use cases that favor the K1 Max: Users regularly printing parts larger than 200 mm in any dimension benefit immensely from the 300 mm build volume. Specific applications include large mechanical assemblies and functional parts, architectural models at meaningful scale, cosplay armor and props, batch production of multiple identical items, large decorative items and art pieces, educational demonstration models, and tooling and fixtures for manufacturing.
If you rarely print anything exceeding 200 mm and don’t batch produce multiple items, the K1 Max’s large volume may represent unnecessary capacity and footprint.
Speed-focused versus quality-focused users: The K1 Max optimizes for users who value speed as a primary factor—makers who want to complete prints quickly, businesses where time-to-market matters, operations where printer throughput limits capacity. If speed isn’t particularly important to your workflow, premium printers optimizing for absolute quality consistency might serve you better despite smaller build volumes.
That said, the K1 Max delivers good quality alongside speed—you’re not sacrificing quality for speed but rather getting both at a favorable price point.
Technical comfort level required: Successful K1 Max ownership correlates with technical comfort. Ideal users should feel confident troubleshooting basic issues independently, comfortable adjusting slicer settings and tuning profiles, willing to research solutions and engage with community resources, able to perform routine maintenance following documentation, and accepting that occasional quirks require patient problem-solving rather than frustration.
If these characteristics describe your approach to technology, the K1 Max will feel like a powerful tool that responds well to your engagement. If they don’t describe you, consider whether you’re ready to develop these skills or would be happier with more hand-holding alternatives.
Who Should Skip the K1 Max?
Just as important as identifying ideal users is recognizing who should seriously consider alternatives to the Creality K1 Max. This printer isn’t the right choice for everyone, and understanding its limitations prevents disappointing purchases.
Users needing polished multi-color printing today: If multi-material printing represents your primary use case—whether for colorful miniatures, multi-material functional parts, or dissolvable support structures—the K1 Max currently isn’t your best option. The CFS multi-material system remains in development with compatibility uncertainties and limited reliability compared to Bambu Lab’s mature AMS system. Users who occasionally want single-material printing but need excellent multi-material capability should explore Bambu Lab alternatives despite higher costs and smaller build volumes.
Absolute beginners with no 3D printing experience: The K1 Max assumes baseline 3D printing knowledge and comfort with technical troubleshooting. Complete beginners—people purchasing their very first 3D printer with no prior exposure to the technology—will find the learning curve steeper than necessary. The printer can work for motivated beginners willing to invest significant learning time, but gentler entry points exist for those wanting to start printing successfully within hours rather than days.
Bambu Lab P1S or even quality bed slingers with extensive documentation and beginner-focused communities provide more appropriate first printer experiences. Consider the K1 Max as an excellent second or third printer after mastering fundamentals.
Noise-sensitive environments: The K1 Max is definitively not a quiet printer. At maximum speeds, noise levels approach vacuum cleaner territory—perfectly acceptable in workshops, garages, or dedicated spaces, but potentially disruptive in living spaces, bedrooms, or shared apartments. If the printer must occupy quiet spaces or operate during hours when noise matters, this characteristic represents a genuine limitation.
Users in noise-sensitive situations should either plan alternative printer locations or consider quieter alternatives. There’s no realistic way to make the K1 Max whisper-quiet without sacrificing the speed that’s central to its value proposition.
People expecting Bambu-level automation and refinement: If you’re drawn to the K1 Max primarily because it’s cheaper than Bambu Lab alternatives while offering larger build volume, carefully examine whether you’re actually okay with the trade-offs involved. The K1 Max saves money partly by delivering less refined software experiences, less consistent operation without user intervention, more troubleshooting and profile tuning requirement, and generally more hands-on engagement throughout ownership.
These trade-offs don’t make the K1 Max a bad printer—they make it a different category of tool targeting users who value specifications and value over polish and automation. If you’re genuinely excited by tinkering and optimization, great! If you really want the “appliance experience” but are trying to save money, you’ll likely end up frustrated.
Users requiring maximum consistency with minimal intervention: Some applications demand extremely predictable, repeatable results with minimal quality variation between prints—small businesses producing customer-facing products, educational institutions where every student print must succeed, or operations where failed prints create significant problems beyond wasted filament and time.
The K1 Max delivers good consistency, but not the absolute maximum available in the market. If your application truly requires best-in-class consistency and you can’t tolerate occasional troubleshooting or optimization requirements, premium alternatives optimizing for reliability over specifications may serve you better despite higher costs.
People with severe space constraints: The K1 Max occupies significant space both in footprint (approximately 435 × 462 × 526 mm) and operationally (you need clearance for the door opening, filament spool access, and maintenance access). Users with severely limited workshop space or those hoping to tuck the printer into tight spaces may find the size impractical.
Smaller CoreXY printers or traditional bed slingers with more compact footprints might fit constrained spaces better while still delivering capable printing.
Users exclusively printing small, detailed miniatures: While the K1 Max certainly can print miniatures and detailed models successfully, its sweet spot lies in larger functional parts and production printing. If you exclusively or primarily print miniatures and tabletop gaming models that rarely exceed 100 mm, you’re not fully utilizing the K1 Max’s large build volume advantage. Smaller printers with potentially better detail resolution at slower speeds might actually serve dedicated miniature printing better.
Budget-constrained buyers on extremely tight budgets: While the K1 Max delivers excellent value for its capability, it still represents a $600 to $900 investment depending on purchase timing. Buyers with absolutely minimal budgets—perhaps $300 to $400 maximum—should explore proven budget bed slingers that deliver basic printing capability at lower cost. The K1 Max’s advanced features justify its pricing for users who’ll utilize them, but they represent unnecessary expense if budget constraints are severe and basic capability suffices.
Anyone unable to dedicate time to learning and optimization: The K1 Max rewards user engagement but requires time investment to unlock its full potential. Users who simply can’t dedicate hours to learning slicer settings, tuning profiles, and occasionally troubleshooting issues should acknowledge this limitation honestly. If your schedule genuinely prevents meaningful learning time investment, either adjust expectations about initial results or consider alternatives with gentler learning curves.
Final Verdict: Is the Creality K1 Max Still Worth Buying?
🎯 THE FINAL CALL
After months of testing and community feedback, here’s our definitive recommendation:
After comprehensive examination of the Creality K1 Max across real-world usage, competitive comparisons, and long-term reliability assessment, we can deliver clear recommendations based on the printer’s genuine strengths and honest limitations.
Honest strengths that justify the K1 Max purchase:
- The 300 × 300 × 300 mm build volume delivers genuine utility that smaller printers simply can’t match, enabling single-piece printing of large parts and efficient batch production of multiple components. This substantial build volume at prosumer pricing represents exceptional value for size-focused applications.
- Genuine high-speed capability with the CoreXY motion system, 600 mm/s maximum speed, and 20,000 mm/s² acceleration translates to meaningfully faster print completion compared to traditional bed slingers—not just marketing specifications but actual time savings on real projects.
- The fully enclosed chamber enables reliable printing of engineering materials like ABS, ASA, nylon, and polycarbonate that demand stable elevated temperatures. This capability expands material options significantly compared to open-frame budget printers.
- Print quality consistently exceeds expectations for the price point, producing results competitive with printers costing significantly more when properly tuned. The combination of CoreXY kinematics and input shaping delivers clean surfaces with minimal artifacts.
- AI features including LiDAR bed leveling and camera monitoring provide genuine utility despite occasional inconsistencies. The automation reduces manual intervention requirements compared to traditional printers.
- Active community support and parts availability ensure long-term ownership viability with readily available troubleshooting resources, upgrade options, and replacement components.
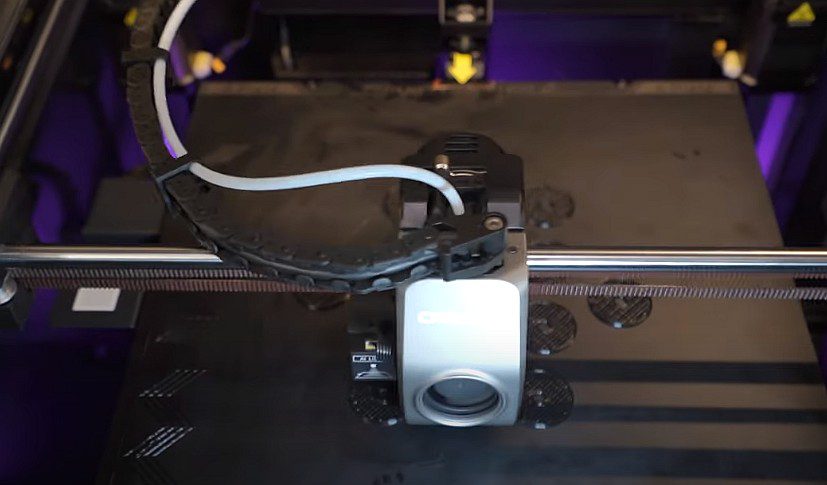

Honest weaknesses buyers should acknowledge:
- Software and firmware experiences lag behind market leaders like Bambu Lab, requiring more user involvement to achieve optimal results. Creality Print suffices but doesn’t inspire, while firmware quirks occasionally frustrate.
- Multi-material capability remains underdeveloped with CFS system compatibility and reliability concerns making this a poor choice for users who prioritize color printing today.
- Noise levels at maximum speed are substantial, limiting placement options in noise-sensitive environments without dedicated workshop spaces.
- The learning curve challenges absolute beginners, requiring technical comfort and troubleshooting willingness that not all users possess.
- Quality control variability means some units may require more initial setup and tuning than others, creating inconsistent out-of-box experiences.
Strengths
Massive build volume
Genuine high speed
Great price-to-performance
Enclosed for engineering materials
Weaknesses
Noisy at full speed
CFS still immature
Software less polished
Learning curve exists
Value
Exceptional under $750
Fair at retail price
Best for large parts
Production capable
How the K1 Max stacks up in 2026: The competitive landscape in early 2026 includes numerous capable CoreXY printers spanning budget to premium pricing. The K1 Max occupies a compelling middle ground—delivering premium specifications at prosumer pricing while accepting some refinement compromises.
Against premium alternatives like Bambu Lab’s offerings, the K1 Max saves money and provides larger build volume while sacrificing software polish and multi-material maturity. Against budget alternatives, it delivers genuinely superior speed, build volume, and capability while costing more.
The K1 Max remains highly competitive and arguably class-leading in the “large build volume, high speed, prosumer pricing” category. No direct competitor offers clearly superior value for users prioritizing these specific attributes.
📋 Clear Buy / Wait / Skip Recommendation:
✅ BUY NOW if:
- You need large build volume
- Budget under $800
- Technical comfort exists
- Single-material focus
⏳ WAIT if:
- CFS maturity matters
- Expecting price drops
- Firmware improvements needed
- Building skills first
❌ SKIP if:
- Multi-color critical today
- Complete beginner
- Noise-sensitive environment
- Want plug-and-play
🚀 READY TO UPGRADE?
The Creality K1 Max delivers professional capability at prosumer pricing.
AMAZON PRIME DEAL
Fast Shipping & Returns
OFFICIAL STORE
Bundles & Kits
Prices fluctuate daily. These links show current pricing and availability.
Creality K1 Max FAQ
Q: Is the K1 Max good for ABS printing?
✅ Yes, excellent. The fully enclosed chamber maintains stable temperatures ABS requires, preventing warping on large parts. Use 95-100°C bed, 240-260°C hotend.
Q: Does it support carbon fiber filaments?
✅ Yes. Ships with hardened steel nozzle for abrasives like PLA-CF, PETG-CF, PA-CF. Monitor extruder gear wear with extensive use.
Q: How loud is the K1 Max really?
🔊 55-65 dB at max speed (like conversation volume). Noisy during acceleration, quieter at lower speeds. Use foam pads and proper location.
Q: K1 vs K1 Max vs K1C – which to buy?
📏 K1 Max for maximum build volume. K1 for budget speed, K1C for enhanced rigidity in standard size. Most users needing large parts choose K1 Max.
Q: Is it good for print farms?
🏭 Yes, excellent value for farms. Large volume enables batch production, competitive pricing allows multiple units, AI camera aids monitoring.
Is the K1 Max good for ABS printing? Yes, the Creality K1 Max excels at ABS printing thanks to its fully enclosed chamber that maintains the stable elevated temperatures ABS requires. The enclosure prevents warping on large parts while the dual cooling system handles overhangs effectively. Testing with ABS produced excellent results with strong layer adhesion, minimal warping even on corners, and clean surface finish. The 100°C heated bed provides sufficient temperature for ABS adhesion. For best results, run the bed at 95-100°C, set the hotend to 240-260°C depending on your specific ABS brand, enable the chamber auxiliary fan conservatively, and allow the first few layers to print at reduced speed for solid adhesion.
Does the K1 Max support carbon fiber filaments? Yes, the K1 Max ships with a hardened steel nozzle specifically designed to handle abrasive materials including carbon fiber-reinforced filaments like PLA-CF, PETG-CF, PA-CF, and similar composites. The hardened nozzle resists wear from abrasive particles that would quickly damage standard brass nozzles. The enclosed chamber helps with nylon-based carbon fiber materials that benefit from elevated ambient temperatures. When printing carbon fiber materials, monitor extruder gear wear if running extensive abrasive filament as the gears themselves can eventually show wear patterns. Most users report hundreds of hours of successful carbon fiber printing without component replacement.
Can you upgrade the K1 Max extruder? The K1 Max uses a proprietary dual-gear direct drive extruder design that works well for most applications. While third-party upgraded extruders aren’t as readily available as for older Creality printers due to the K1’s newer architecture, the stock extruder generally performs adequately for typical materials. Some users have successfully modified extruder gear assemblies with hardened versions for extended abrasive material use. The more common upgrades focus on nozzles—many users experiment with different nozzle types including larger diameters for faster prints, smaller diameters for fine details, or specialized nozzles like plated copper for improved heat transfer. Always verify compatibility before attempting extruder modifications.
Is the K1 Max good for print farms? The Creality K1 Max works well in small to medium print farm operations thanks to its large build volume enabling efficient batch production, competitive pricing allowing multiple unit purchases compared to premium alternatives, AI camera monitoring supporting remote supervision of multiple printers, reasonable reliability for commercial use when properly maintained, and readily available parts for quick repairs minimizing downtime. Print farm operators should plan for occasional firmware quirks requiring restarts, implement redundant connectivity options beyond Wi-Fi for reliability, maintain spare parts inventory for quick repairs, develop standardized maintenance schedules across units, and use third-party farm management software for operations beyond a few printers. Multiple K1 Max units provide substantial production capacity at favorable economics.
K1 Max versus K1 versus K1C—which should I buy? The K1, K1 Max, and K1C represent three variants of Creality’s CoreXY series with key differences:
- K1 (Standard model): 220 × 220 × 250 mm build volume, no AI camera or LiDAR, lower pricing around $499-$599, suitable for users wanting speed capability without maximum size.
- K1 Max (reviewed here): 300 × 300 × 300 mm build volume, AI camera and LiDAR features, pricing around $699-$899, best for users needing maximum build volume with AI features.
- K1C (Carbon model): Similar to K1 base size, carbon fiber composite frame construction, enhanced rigidity, pricing between K1 and K1 Max, targets users wanting improved frame performance without maximum size.
Choose K1 for budget-conscious speed printing within moderate build volume. Choose K1 Max for maximum build volume and AI features justifying higher cost. Choose K1C for enhanced mechanical performance in standard size format. Most users serious about large parts should prioritize the K1 Max’s build volume advantage.
What’s the best build surface for the K1 Max? The included flexible magnetic PEI build surface works well for most materials and represents the best starting point. For specific materials, consider these alternatives: textured PEI provides excellent adhesion for PETG and ABS with easy part removal when cooled, smooth PEI delivers glossy bottom surfaces ideal for aesthetic parts, glass beds offer perfectly flat surfaces for dimensional accuracy on large parts, and specialty surfaces like garolite work well for specific materials like nylon. The stock PEI surface handles PLA, PETG, ABS, ASA, and TPU successfully when properly cleaned. Clean the surface regularly with isopropyl alcohol and avoid touching the print surface with bare hands to maintain adhesion.
How loud is the K1 Max really? At maximum speeds, the K1 Max produces approximately 55-65 decibels depending on the specific print movements—comparable to normal conversation or background music volume. During aggressive acceleration moves and direction changes, noise can spike higher briefly. The sound character includes stepper motor whine from high-speed movements, fan noise from part cooling and auxiliary fans, and minor vibration transmission to whatever surface the printer sits on. Noise bothers some users significantly while others find it acceptable background noise. Mitigation strategies include placing the printer on foam dampening pads, using the rubber feet properly installed, reducing print speeds when noise matters more than speed, and locating the printer away from living spaces when possible. The K1 Max will never be whisper-quiet given its high-speed mission.
Does the K1 Max require special maintenance? The K1 Max requires regular but not excessive maintenance to sustain performance. Monthly tasks include cleaning the build surface, checking belt tension, lubricating linear rails, and verifying bed leveling accuracy. Quarterly maintenance involves thorough cleaning of the chamber, complete lubrication of all moving parts, inspection of wear components, and checking electrical connections. The enclosed design protects internal components from dust accumulation better than open printers. Most users report 30 minutes monthly for basic maintenance and perhaps 90 minutes quarterly for thorough servicing. This represents typical maintenance for CoreXY printers—neither excessive nor minimal.
Can the K1 Max print TPU and flexible filaments? Yes, the K1 Max’s direct drive extruder handles flexible filaments like TPU successfully. The short distance between the extruder gears and hotend provides the positive filament control necessary for soft materials. Print TPU at reduced speeds around 30-50 mm/s for reliable results, increase retraction distance slightly to prevent stringing, ensure filament path is clear with minimal friction, and use appropriate hotend temperatures for your specific TPU (usually 220-250°C). The K1 Max won’t match the extreme flexibility printing capability of printers specifically optimized for TPU, but it handles standard flexible filaments successfully for most applications.
What’s the actual usable build volume considering clips and clearance? While the specified 300 × 300 × 300 mm build volume represents the theoretical maximum, practical usable volume is slightly less. The bed clips typically reduce usable X and Y dimensions by approximately 5-10 mm depending on clip placement, leaving effectively 290 × 290 mm for most prints. The Z-axis full 300 mm height is genuinely usable when printing directly on the bed. For practical purposes, plan designs around 290 × 290 × 300 mm as comfortably achievable dimensions. This still represents substantial volume compared to smaller printers and accommodates the large parts that justify purchasing the K1 Max.
📝 Final Thoughts
The Creality K1 Max isn’t perfect, but perfection isn’t the goal. The goal is delivering maximum capability and value for users who appreciate what the K1 Max does well and can work around what it doesn’t. For that specific user profile—technically comfortable makers, small businesses needing production capacity, experienced enthusiasts upgrading from smaller printers—this remains one of the best large-format CoreXY printers you can buy in 2026.
Most users who understand what they’re buying end up satisfied. Mismatches occur when expectations don’t align with reality. Purchase from retailers with good return policies to ensure you can evaluate whether the K1 Max aligns with your specific needs.
Disclosure: This review contains affiliate links. We may earn a commission at no extra cost to you if you make a purchase through our links. This helps support our testing and review work.
© 2026 3D Printer Review. All content based on hands-on testing and community feedback. Specifications and pricing subject to change.