


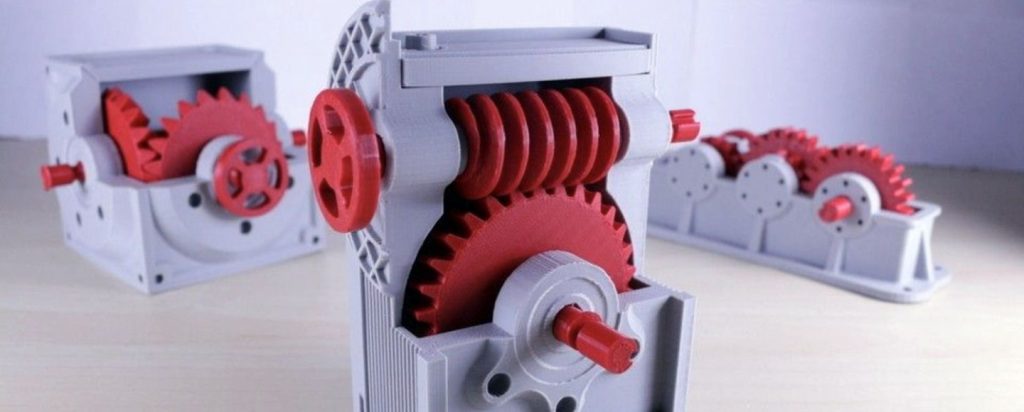
So, you’ve downloaded that awesome gearbox design, or you’re about to design a custom bracket to finally fix that wobbly shelf. You hit “slice,” but then a doubt creeps in: will this 3D printed part actually hold up?
Printing a decorative statue is one thing. Printing a functional, load-bearing mechanical part is a whole different ball game. It needs to fit perfectly, bear stress, and not melt or snap when you use it. That’s why picking the right tool for the job is non-negotiable.
This guide cuts through the hype to help you find the best 3D printer for mechanical parts, whether you’re a beginner making your first functional print or a seasoned pro needing production reliability. We’ll talk machines, materials, and the key features that actually matter for making parts that work.
🛠️ For the Makers & Engineers: This isn’t about the prettiest benchy. This is about dimensional accuracy, layer adhesion, and material strength. If you’re printing parts that need to last in the real world, you’re in the right place.
Quick Comparison: Best 3D Printers for Machine Parts at a Glance
Not sure where to start? This table compares our top contenders for printing strong, functional components. Use it as a starting point to see which printers balance the features you need.
| 3D Printer | Build Volume | Max Nozzle Temp | Enclosure | Best For | Check Price |
|---|---|---|---|---|---|
| Bambu Lab H2S | 320×320×340mm | 350°C | Full, Heated | Industrial-scale production | View on Bambu |
| Bambu Lab P2S | 256×256×256mm | 300°C | Full | Fast iteration cycles | View on Bambu |
| Original Prusa XL | 360×360×360mm | 300°C+ | Optional | Large assemblies | Check Amazon |
| Prusa Core One | 250×220×270mm | 300°C+ | Optional | Precision + Speed | Check Amazon |
| Formlabs Form 4 | Resin Format | N/A | Full | Ultra-precise small parts | View on Formlabs |
| Raise3D Pro3 Plus HS | 300×300×605mm | 300°C+ | Full, Heated | Production-grade parts | View on Raise3D |
| Ultimaker S7 | 330×240×300mm | 300°C+ | Optional | Engineering workflows | View on Ultimaker |
🔍 Pro Tip: The “best 3D printer for mechanical parts for beginner” isn’t always the cheapest. Look for one that can grow with you into materials like ABS or PETG, which are essential for stronger parts. Reliability now saves headaches later.
Ready to dive into the details? Let’s break down our top picks to find your perfect match for creating the best mechanical 3D prints.
Best 3D Printers for Mechanical Parts: Our Hands-On Picks
Now let’s get into the specifics. We’ve tested and researched these machines based on what truly matters for functional parts: accuracy, reliability, and material capability. Whether you’re looking for a workhorse for your workshop or a precision tool for engineering prototypes, one of these is likely your perfect match.
🎯 How We Chose These Printers
We prioritized machines that consistently deliver where it counts for mechanical 3D prints:
- Dimensional Accuracy: Will parts fit together without sanding or forcing?
- Frame Rigidity: Does it feel solid, or does it wobble during prints?
- Hotend Performance: Can it handle the best 3D printer filament for mechanical parts like ABS, Nylon, or PC?
- Thermal Control: Does it have (or support) an enclosure to prevent warping?
- Community & Support: Can you find help when you need it?
🔹 Bambu Lab H2S: The Industrial Powerhouse
Best For: Serious makers and engineering teams who need to print large, strong parts in advanced materials.
Think of the H2S as the “heavy-duty truck” of desktop 3D printing. It’s built for serious work, bridging the gap between hobbyist machines and true industrial printers. If you’re regularly printing parts that see real stress or heat, this machine deserves your attention.
Why It’s a Top Contender for Mechanical Parts:
- Big Build Volume: At 320×320×340mm, you can print large assemblies or multiple smaller parts in one go.
- High-Temp Superpowers: With a 350°C hotend, it handles tough materials like Polycarbonate (PC) and Nylon-CF that most desktop printers struggle with.
- Active Chamber Heating: The heated enclosure keeps temperatures stable, which is critical for stopping materials like ABS from warping and cracking.
- Built Tough: Comes with a hardened steel nozzle ready for abrasive carbon-fiber filaments right out of the box.
💪 Real-World Use: This is the printer you want for functional prototypes that need to survive testing, custom tooling for your workshop, or production runs of strong, durable components.
The Bottom Line:
Pros
- Handles industrial-grade materials
- Massive build area
- Excellent thermal management
- Great for batch production
Cons
- Big investment for hobbyists
- Large footprint needs space
- Learning curve for advanced materials
Who Should Buy It: Engineers, product developers, or dedicated makers who need to print with the best 3D printing material for mechanical parts regularly. If you’re mostly printing PLA, this is overkill.
🔹 Bambu Lab P2S: The Speedy Workhorse
Best For: Engineers and makers who want fast, reliable prints in engineering materials without breaking the bank.
If the H2S is the heavy-duty truck, think of the P2S as the speedy delivery van. It takes Bambu Lab’s famous speed and reliability and packs it into an enclosed design perfect for rapid prototyping and functional parts. This is where speed meets substance for mechanical printing.
Why It’s Great for Mechanical Iteration:
- Enclosed & Ready: Comes with a full enclosure, so you can print ABS, ASA, and PETG reliably from day one—no DIY hacks needed.
- Need for Speed: With CoreXY motion, it prints up to 500mm/s. That means faster design-test-improve cycles for your prototypes.
- “Just Works” Calibration: Automatic bed leveling and calibration means less time tweaking and more time printing.
- Compact Power: A 256mm cube build volume fits most components and small assemblies perfectly.
⚡ Perfect For: This could be the best 3D printer for mechanical parts for beginner engineers who value speed and ease. It removes the guesswork from printing sturdy materials.
The Bottom Line:
Pros
- Unbeatable speed for functional parts
- Fully enclosed out of the box
- Extremely user-friendly
- Great price for an enclosed printer
Cons
- Build volume limits very large parts
- Not for extreme high-temp materials (like PEEK)
- Chamber is heated passively, not actively
Who Should Buy It: Designers and engineers who want to iterate quickly without sacrificing material quality. If your workflow screams “print, test, adjust, repeat,” this is your machine.
Want speed and reliability for engineering materials?
🔹 Original Prusa XL: The Assembly Master
Best For: Printing large mechanical assemblies or complex parts with multiple materials.
Ever needed to print a big part that just won’t fit on your printer? Or dreamed of printing assemblies with both rigid and flexible materials? The Prusa XL is built for these exact challenges. It’s the Swiss Army knife for complex mechanical 3D prints.
Why It Excels for Complex Parts:
- Massive Build Plate: At 360mm cubed, it eats large brackets, housings, and full assemblies for breakfast.
- Multi-Tool Magic: The optional 5-toolhead system lets you print with soluble supports (for crazy internal channels) or mix materials in one print.
- Next-Level Bed Leveling: Uses a load cell sensor for perfect first layers across the entire huge print surface.
- Prusa Reliability: Comes from a company famous for machines that just keep working, print after print.
🧩 Game Changer: The multi-material system lets you create best mechanical 3D prints with features that are impossible on single-extruder machines, like overhangs on overhangs using dissolvable supports.
The Bottom Line:
Pros
- Huge build volume for big parts
- Multi-material opens new design possibilities
- Exceptional Prusa reliability & support
- Innovative, precise bed leveling
Cons
- Very expensive with multiple toolheads
- Slower than CoreXY competitors
- No heated chamber (enclosure is separate)
- Tool changes add time to prints
Who Should Buy It: Engineering teams, advanced makers, and anyone who regularly needs to print large or incredibly complex multi-material components. It’s a serious tool for serious projects.
Need to print large assemblies or complex multi-material parts?
🔹 Prusa Core One: Precision Meets Speed
Best For: Makers and engineers who want Prusa’s legendary reliability in a fast CoreXY package.
The Core One is Prusa answering the call for speed. It takes everything they’ve learned about making reliable printers and puts it into a modern CoreXY frame. It’s for people who love the “Prusa experience” but don’t want to wait all day for their functional parts to finish.
Why It’s a Solid Choice for Mechanical Parts:
- CoreXY Speed: Gets you faster print times while maintaining the accuracy needed for fitting parts.
- Prusa Proven: Uses their reliable Nextruder and excellent software, so you get consistent results.
- Great with Engineering Materials: Handles everything from PETG to Nylon, especially with the optional enclosure.
- Open-Source Goodness: Fully hackable if you’re into tuning and tweaking.
⚙️ For the Tinkerer: This is a fantastic 3D printer for machine parts if you value open-source flexibility but also want a machine that works well right out of the box.
The Bottom Line:
Pros
- Fast printing without sacrificing quality
- Prusa’s excellent customer support
- Open-source for customization
- Strong community for help and mods
Cons
- Enclosure is a separate purchase
- More expensive than some CoreXY rivals
- Smaller build volume than the XL
- Newer platform with fewer community mods
Who Should Buy It: Prusa fans who need more speed, or anyone looking for a reliable, open-source CoreXY printer from a trusted brand. It’s a “safe bet” in the fast printer category.
Want Prusa reliability with modern CoreXY speed?
🔹 Formlabs Form 4: The Precision Specialist
Best For: Ultra-detailed small parts, tight-tolerance assemblies, and applications where surface finish is critical.
Okay, let’s talk resin. While FDM is the go-to for strong parts, resin printing has a special place for mechanical parts that demand insane detail. The Form 4 is the pinnacle of desktop resin tech, perfect for tiny gears, fluidics, or any part where ±0.05mm makes or breaks your design.
Why It’s in a League of Its Own for Detail:
- Microscopic Precision: 50-micron XY resolution captures details FDM printers can only dream of.
- Tight Tolerances: Holds ±0.025mm, meaning parts fit together perfectly, often without any post-processing.
- Engineering Resins: Offers specialized “Tough” and “Rigid” resins that bridge the gap between standard resin and FDM strength.
- Fast for Resin: Its Low Force Display tech means quicker prints with less stress on delicate features.
⚠️ Reality Check: This is NOT your general-purpose 3D printer for mechanical parts. It’s a specialist. The best 3D printing material for mechanical parts here is often a tough resin, but it won’t match the impact strength or heat resistance of FDM Nylon or PC.
The Bottom Line:
Pros
- Unbeatable detail and surface finish
- Extremely tight tolerances
- Great for small, complex geometries
- Wide range of specialty resins
Cons
- High initial and material cost
- Messy post-processing (washing, curing)
- Parts can be brittle compared to FDM
- Small build volume limits part size
Who Should Buy It: Engineers, jewelers, or dentists needing microscopic detail. It’s perfect for precise jigs, master patterns for molding, or complex mechanisms where fit is everything.
Need micron-level precision for small components?
🔹 Raise3D Pro3 Plus HS: The Production Workhorse
Best For: Small workshops and businesses that need reliable, consistent parts printing day in and day out.
This is the printer that doesn’t take days off. The Pro3 Plus HS is built like a tank for manufacturing environments, designed to run 24/7 with minimal fuss. If you’re making parts that need to be identical every single time, this machine delivers factory-floor reliability to your workshop.
Why It’s Built for Serious Production:
- Tall Boy Build Volume: The 300×300×605mm volume is perfect for tall, slender parts or stacking many small components vertically.
- IDEX Dual Extrusion: Two independent print heads can print two identical parts at once (doubling output) or use soluble supports for complex internal geometries.
- True Heated Chamber: Actively heated to 65°C for perfect ABS, ASA, and Nylon prints with zero warping.
- Professional Software: Raise3D’s ideaMaker software is optimized for creating strong, reliable mechanical 3D prints.
🏭 Shop Floor Ready: This is arguably one of the best 3D printers for machine parts in a professional setting. It’s not a hobbyist toy—it’s a tool designed to earn its keep.
The Bottom Line:
Pros
- Exceptional reliability for continuous use
- IDEX system doubles productivity
- Excellent Z-height for tall parts
- Professional-grade support network
Cons
- Professional-tier pricing (big investment)
- Large footprint needs dedicated space
- Overkill for occasional hobby use
- Steeper learning curve than consumer machines
Who Should Buy It: Small manufacturers, engineering firms, or anyone running a print farm for functional parts. If downtime costs you money, this printer is worth the investment.
Need production-grade reliability for your workshop?
🔹 Ultimaker S7: The Professional’s Choice
Best For: Engineering departments and design studios that need seamless integration with professional workflows.
The S7 is the office-friendly workhorse. It’s designed to fit into an engineering team’s existing tools and processes, with validated materials and network management that make it a team player rather than a solo act.
Why It Fits Professional Workflows:
- No-Contamination Dual Extrusion: The print head lifts when switching materials, so you don’t get colors or materials mixing where they shouldn’t.
- Validated Materials Library: Access to 200+ materials with pre-tested profiles takes the guesswork out of getting strong, dimensionally accurate parts.
- Network Ready: Built for teams, with remote monitoring and management through Ultimaker Digital Factory.
- Swappable Print Cores: Switch from a fine-detail nozzle to an abrasive-material nozzle in seconds, minimizing downtime.
🏢 Team Player: This is the best 3D printer for mechanical parts in a collaborative environment. When multiple people need reliable parts and you can’t have one expert managing the printer all day.
The Bottom Line:
Pros
- Exceptional dual-extrusion quality
- Huge library of validated materials
- Perfect for team/office environments
- Excellent workflow integration
Cons
- Premium professional pricing
- Heated chamber is an optional extra
- Not the fastest printer available
- Material validation adds some complexity
Who Should Buy It: Engineering teams, universities, or professional studios where multiple people use the printer and need consistent, reliable results with minimal training.
Need a reliable team printer for your engineering department?
Best Budget 3D Printer for Mechanical Parts
Sovol SV06 Plus: The Value Champion
Best For: Makers on a tight budget who are willing to put in some time to get great results.
Let’s be real: not everyone has $1,500+ for a printer. The SV06 Plus proves you don’t need to spend a fortune to make functional parts. It’s the “I can work with this” option that delivers surprising capability if you’re willing to meet it halfway.
What You Get for the Money:
- Huge Build Volume: 300×300×340mm—larger than printers costing twice as much!
- All-Metal Hotend: Hits 300°C, so it can technically print ABS, PETG, and other engineering materials.
- Direct Drive: Good for flexible materials like TPU.
- Auto Bed Leveling: Takes the pain out of getting that first layer right.
🎯 The Catch (Be Honest): There’s no enclosure. Printing ABS or Nylon reliably will require a DIY solution (like the classic IKEA Lack table enclosure). It’s also not as fast or “fire-and-forget” as the pricier options. You’ll be more involved in calibration and maintenance.
The Upgrade Path to Greatness:
The beauty of the SV06 Plus is its potential. For about $100 in upgrades, you can turn it into a seriously capable machine:
- +$50: DIY enclosure (IKEA Lack tables + acrylic)
- +$15: Hardened steel nozzle for abrasive filaments
- +$35: Better cooling fan or bed insulation
Suddenly, you’ve got a capable ABS/Nylon printer for under $500 total.
Who Should Buy It: Beginners on a budget, students, or tinkerers who don’t mind modding their printer. It’s perfect for PETG parts, large jigs, and learning the ropes of mechanical printing.
💰 Best Value for Money
Get capable mechanical printing without breaking the bank.
Check Latest Price & Availability
Note: Prices fluctuate frequently for budget printers
Now that we’ve covered the machines, let’s talk about the other half of the equation: materials. Because even the best printer can’t make strong parts with the wrong filament.
Filament Face-Off: Best 3D Printer Filament for Mechanical Parts
Think of your printer as the oven and filament as the ingredients. You can have the best oven in the world, but if you use the wrong ingredients, your cake (or gear, or bracket) will fail. Let’s break down the most common “ingredients” for best mechanical 3D prints.
📚 Quick Rule of Thumb: The best 3D printing material for mechanical parts depends on your specific needs: Strength? Look at Nylon or PC. Heat Resistance? ABS, ASA, or PC. Easy to print with decent properties? PETG is your friend.
Material Showdown: At a Glance
| Material | Best For | Strength | Heat Resistance | Print Difficulty | Requires Enclosure? |
|---|---|---|---|---|---|
| PLA / PLA+ | Prototypes, jigs, non-load parts | Medium | Poor (<60°C) | Easy | No |
| PETG | Light-duty parts, outdoor use | Good | Good (~80°C) | Medium | No |
| ABS | Durable parts, automotive | Very Good | Very Good (~100°C) | Hard | YES |
| ASA | Outdoor parts, UV exposure | Very Good | Very Good (~100°C) | Hard | YES |
| Nylon (PA) | Wear parts, flexible components | Excellent | Good (~90°C) | Very Hard | YES |
| Polycarbonate (PC) | High-impact parts, engineering | Outstanding | Excellent (>110°C) | Expert | YES (Heated) |
PLA: The “Beginner” Material (That Can Sometimes Work)
Let’s clear this up: Regular PLA is like balsa wood—stiff but brittle. It snaps under impact. However, PLA+ (or “Pro PLA”) formulas have gotten much better, adding some flexibility and strength.
✅ Use PLA/PLA+ for:
- Assembly jigs and fixtures
- Prototypes for checking fit
- Non-structural enclosures
- Parts that will NEVER get warm
❌ Avoid PLA for:
- Parts in cars (summer heat!)
- Load-bearing brackets
- Gears that see real stress
- Anything outdoors long-term
🔥 The PLA Heat Problem: PLA softens around 60°C (140°F). That’s cooler than a car dashboard on a sunny day. If there’s any chance your part will get warm, choose a different material.
PETG: The “Goldilocks” Filament
PETG is where most makers should start for functional parts. It’s stronger than PLA, handles moderate heat, and prints much more easily than ABS. It’s the perfect balance for many applications.
- Think of it as: The tough, reliable all-rounder
- Strength: Good impact resistance, doesn’t snap easily
- Heat Resistance: Can handle up to 80°C (176°F)
- Printability: Medium difficulty—needs a bit more care than PLA but way easier than ABS
Perfect uses: Custom brackets, protective cases, light-duty gears, tool handles, and any part that needs to be tougher than PLA but doesn’t require extreme heat resistance.
🎯 Our Recommendation for Beginners
If you’re looking for the best 3D printer filament for mechanical parts to start with, get comfortable with PETG. It will handle 80% of your functional printing needs without the headache of an enclosure.
ABS vs ASA: The Sibling Rivalry
These two are often compared because they’re so similar. Both need an enclosed printer and offer great strength and heat resistance. Here’s how to choose:
🏭 ABS
The Classic
- + Slightly easier to print
- + Better impact resistance
- + Can be smoothed with acetone
- – Smells when printing
- – Yellows in sunlight
Choose ABS for: Car interior parts, durable housings, anything that needs to take impacts.
☀️ ASA
The Outdoor Version
- + UV resistant (won’t yellow)
- + Better layer adhesion
- + Less warping than ABS
- – Slightly more expensive
- – Still needs ventilation
Choose ASA for: Outdoor fixtures, garden tools, drone parts, anything in sunlight.
⚠️ Important: You MUST have an enclosed printer for ABS/ASA. The stable, warm air inside prevents the layers from cooling too fast and cracking. Don’t try this without an enclosure!
Nylon: The Tough, Flexible Workhorse
Nylon (also called Polyamide or PA) is what you use when you need a part to bend, not break. It’s incredibly durable and resistant to wear, making it perfect for parts that rub together or absorb shock.
🎯 Two Main Types:
Standard Nylon (PA6, PA12)
- Excellent flexibility
- Great wear resistance
- Absorbs moisture from air (store dry!)
- Can be tricky to print
Carbon Fiber Nylon (PA-CF)
- More rigid, less flexible
- Better dimensional stability
- Less warping during printing
- Needs hardened steel nozzle
Use Nylon for: Gears, bushings, snap-fit components, drone arms, and any part that needs to survive repeated stress.
💧 Keep it DRY: Nylon absorbs water from the air like a sponge. Wet nylon prints terribly (bubbles, weak layers). Store it in a dry box or sealed bag with desiccant, and consider drying it in a food dehydrator before printing.
Polycarbonate (PC): The Heavy-Duty Champion
When you need the strongest, most heat-resistant material you can print on a desktop, Polycarbonate is often the answer. It’s what safety glasses and bulletproof windows are made of.
- Superpower: Incredible impact resistance—it bends and deforms rather than shattering.
- Heat Resistance: Can handle over 110°C (230°F) without deforming.
- The Catch: It’s the hardest common material to print. You need:
- A printer that can hit 300°C+ at the nozzle
- An actively heated enclosure (60°C+)
- A perfectly dry filament (even more critical than nylon)
- Patience for fine-tuning
Use PC for: High-stress brackets, automotive engine bay components, tooling that sees high heat, or any part where failure is not an option.
⚡ Expert Level Material
Polycarbonate is not for beginners. If you’re working up to it, master ABS and Nylon first. But when you need maximum performance, it’s the best 3D printing material for mechanical parts that demand ultimate strength and heat resistance.
Now that you know your materials, let’s talk about what features actually matter in a printer for these tough filaments.
What Makes a Great 3D Printer for Machine Parts?
Not all printer features matter equally when you’re making functional components. A fancy touchscreen won’t make your gears mesh better. Let’s focus on what actually matters for creating durable, accurate mechanical 3D prints.
🎯 The Core Idea: For mechanical parts, you need consistency and control. Your printer should produce the same accurate part on print #1 and print #100, and it should handle materials that can withstand real-world use.
📋 Your Mechanical Printer Checklist
🔥 Must-Haves
- All-Metal Hotend (300°C+)
- Rigid Frame Construction
- Enclosure or Heated Chamber
- Reliable Extrusion System
👍 Strongly Recommended
- Hardened Steel Nozzle
- Auto Bed Leveling
- Direct Drive Extruder
- Linear Rails (not wheels)
✨ Nice-to-Haves
- Dual Extrusion
- Network Connectivity
- High Flow Hotend
- Filament Runout Sensor
🔥 All-Metal Hotend (300°C+) – The Engine
Think of this as your printer’s engine. A basic hotend with a PTFE tube inside can’t handle temperatures above 240°C without releasing toxic fumes. An all-metal hotend has no plastic inside, so it can safely reach the 250-300°C+ needed for engineering materials.
- Why it matters: ABS needs ~250°C, Nylon ~260°C, Polycarbonate needs 280-310°C
- Look for: Titanium heat breaks and high-quality heating elements
- Budget tip: Many budget printers can be upgraded with an all-metal hotend for $30-50
Temperature Targets
PLA: 200-220°C
PETG: 230-250°C
ABS/Nylon: 250-270°C
PC: 280-310°C
🏗️ Rigid Frame & Linear Rails – The Foundation
Wobble is the enemy of precision. A flimsy frame means vibration, which means inconsistent layers and parts that don’t fit together perfectly.
Good Frame Design
- Material: Thick aluminum or steel extrusions
- Construction: Proper triangulation and bracing
- Weight: Heavier is usually better (less vibration)
- Examples: Prusa’s steel frame, Voron’s aluminum profile construction
Motion Systems Compared
- Linear Rails: Most precise, most expensive, smooth motion
- Linear Rods + Bearings: Good precision, common in mid-range printers
- V-Slot Wheels: Least precise, can develop play over time, but cheapest
🤔 The Reality: For most hobbyists, linear rods are perfectly fine. Linear rails are worth it if you’re chasing maximum precision or running a print farm where maintenance time costs money.
🌡️ Enclosure & Active Heating – The Climate Control
This is the #1 reason people struggle with ABS, ASA, and Nylon. These materials shrink as they cool, causing corners to lift (warping) and layers to separate.
Passive Enclosure
A box around your printer that keeps drafts out and traps heat from the bed.
Good for: ABS, ASA, PETG
Temperature: 35-45°C inside
Active Heated Chamber
Has its own heater to maintain a specific temperature (usually 50-70°C).
Needed for: Nylon, Polycarbonate
Temperature: 60-70°C+ inside
DIY Enclosure
IKEA Lack tables, acrylic panels, and some sealant. Costs ~$50-100.
Works for: ABS, ASA
Pro Tip: Add a small space heater for active heating
⚠️ Non-Negotiable: If you plan to print ABS, ASA, or Nylon regularly, you need an enclosure. It’s not optional. Trying without one leads to failed prints, wasted filament, and frustration.
⚙️ Reliable Extrusion System – The Heartbeat
Consistent extrusion means consistent layer lines, which means stronger parts. Here’s what to look for:
Direct Drive vs. Bowden
Direct Drive: The extruder motor sits right on the print head. Better for flexible materials (TPU) and more responsive extrusion control.
Bowden: The motor is on the frame, with a long tube to the hotend. Lighter print head allows faster movement, but can struggle with flexible filaments.
For mechanical parts: Direct drive is generally preferred for better control with engineering materials.
Dual-Gear Extruders
Two gears grip the filament instead of one gear pressing against a bearing. This provides:
- Better grip (less slipping)
- More consistent extrusion force
- Ability to push filament harder when needed
Many modern printers now come with dual-gear extruders as standard. If yours doesn’t, it’s often a worthwhile upgrade.
🎯 Bed Leveling Accuracy – The First Impression
A perfect first layer is critical for part adhesion and dimensional accuracy. Manual leveling works, but automatic bed leveling (ABL) is a game-changer for consistency.
Types of Auto Bed Leveling
BLTouch/CRTouch
Physical probe that touches the bed at multiple points. Most common and reliable.
Strain Gauge
Measures pressure when nozzle touches bed. Very accurate, used on Prusa XL.
Inductive/ Capacitive
Senses metal bed without touching. Only works with certain bed surfaces.
🔧 Pro Tip: Even with ABL, you still need a reasonably level bed. ABL compensates for small variations (0.2-0.3mm), not a dramatically tilted build plate. Do a manual level first, then let ABL handle the fine details.
🛡️ Hardened Steel Nozzle – The Protective Gear
Brass nozzles are standard because they conduct heat well. But they wear out fast when printing with abrasive materials.
Abrasive materials include:
- Carbon fiber filled filaments (PA-CF, PETG-CF, PLA-CF)
- Glass fiber filled filaments
- Glow-in-the-dark filaments
- Metal-filled filaments
A worn nozzle loses its precise opening diameter, which ruins dimensional accuracy. A hardened steel nozzle costs $10-20 and lasts essentially forever with these materials.
Nozzle Lifespan
Brass Nozzle
~500g of CF filament
Hardened Steel
Years of use
Ready to Choose Your Best 3D Printer for Mechanical Parts?
Remember: The “best” printer is the one that matches YOUR specific needs, materials, and budget.
Now that you know what features matter, let’s talk about some common mistakes people make when printing mechanical parts—so you can avoid them!
Oops! Common Mistakes When Printing Mechanical Parts
We’ve all been there—hours into a print, only to find a cracked bracket or gears that don’t mesh. Learning from others’ mistakes is cheaper than learning from your own filament graveyard. Here are the most common pitfalls and how to avoid them.
💀 The “I Learned This the Hard Way” Section – Every mistake here comes from real experience (and sometimes, tears). Save yourself the headache!
🔥 Mistake #1: Using PLA for Parts That Get Warm
The Problem: PLA becomes soft and deforms around 60°C (140°F). That’s cooler than a car dashboard on a sunny day or a light fixture.
The Fix: If there’s ANY chance your part will encounter heat:
- Use PETG for moderate heat (up to 80°C)
- Use ABS or ASA for higher heat (100°C+)
- Use Polycarbonate for extreme heat (110°C+)
🧱 Mistake #2: Ignoring Print Orientation
Layer lines are the weakest point in any 3D print. Stress running perpendicular to layers will cause them to separate.
Weak Orientation
Force pulls layers apart
Strong Orientation
Force runs along layers
Rule of thumb: Orient parts so that stress forces run parallel to the layer lines, not perpendicular. For brackets, this often means printing them standing up rather than lying flat.
⚡ Mistake #3: Printing Too Fast for Strength
That 150mm/s speed demo looks cool, but mechanical parts need proper layer adhesion. Too fast = weak bonds between layers.
Recommended Speeds for Strength:
- First Layer: 20-30mm/s (for good bed adhesion)
- Outer Walls: 30-40mm/s (for accuracy)
- Inner Walls/Infill: 40-60mm/s
- Engineering Materials (ABS/Nylon/PC): 30-50mm/s max
Remember: A part that takes 6 hours but works is better than one that takes 2 hours and breaks.
Speed vs. Strength Trade-off
30mm/s
Strong
60mm/s
Good
150mm/s
Weak
⚠️ Mistake #4: Underestimating the Enclosure
“I’ll just add a brim and slow it down” doesn’t fix the laws of physics. ABS and Nylon need stable, warm air to prevent warping and layer separation.
No Enclosure
Cracking, warping, failed prints
DIY Enclosure
Works for ABS, okay for Nylon
Heated Chamber
Needed for PC, ideal for Nylon
The bottom line: If you’re serious about printing engineering materials, budget for an enclosure. It’s not optional equipment.
📏 Mistake #5: Wrong Infill for the Job
15% infill is fine for a decorative statue, but mechanical parts need more internal structure.
| Application | Minimum Infill | Recommended Pattern | Wall Count |
|---|---|---|---|
| Light-duty brackets | 25-30% | Gyroid or Grid | 3-4 walls |
| Load-bearing parts | 40-50% | Cubic or Gyroid | 4-5 walls |
| High-impact components | 50%+ | Cubic Subdivision | 5-6 walls |
| Gears & moving parts | 100% (solid) | N/A | 4-6 walls |
Pro tip: Increasing wall count often adds more strength than increasing infill percentage. More walls = more continuous material around the outside of your part.
🎓 Learning Opportunity: Every failed print teaches you something. The key is to learn from small, quick test prints before committing to a 20-hour monster print. Print calibration cubes, overhang tests, and small brackets first!
Now let’s answer some frequently asked questions about printing mechanical parts.
FAQs: Your Mechanical Printing Questions Answered
You’ve got questions, we’ve got answers. Here are the most common questions we hear about printing functional parts.
For pure impact strength: Polycarbonate (PC) is the champion. It’s what bullet-resistant windows are made of, and it can withstand tremendous force without shattering.
For a balance of properties: Carbon Fiber Nylon (PA-CF) offers excellent strength, stiffness, and heat resistance while being easier to print than PC.
For most applications: ABS or PETG provide plenty of strength for 80% of projects and are much easier to work with.
Remember: The “strongest” filament also needs the right printer (high temp, enclosure) and proper print settings to reach its potential.
Short answer: Yes, absolutely.
For ABS: You need at minimum a passive enclosure (a box that traps heat). Without it, corners will lift (warp) and layers may separate due to uneven cooling.
For Nylon: You really want an actively heated chamber (maintains 60-70°C). Nylon is even more prone to warping and needs that consistent temperature throughout the print.
The exception: Very small parts (less than 2 inches) might work without an enclosure, but results will be inconsistent. For reliable mechanical parts, an enclosure isn’t optional—it’s essential equipment.
Absolutely, yes! Modern desktop printers are capable of producing parts that replace machined components in many applications.
Real-world examples:
- Custom brackets and mounts for machinery
- Gears and pulleys for low-to-medium load applications
- Jigs and fixtures for manufacturing
- Prototypes that undergo functional testing
- Replacement parts for tools and appliances
The keys to success:
- Choose the right material for the application (not everything should be PLA!)
- Design with 3D printing in mind (appropriate wall thickness, orientation, tolerances)
- Use a printer capable of the materials you need
- Dial in your print settings for strength, not just speed
We regularly print functional parts that see daily use in workshops, robotics, and product development.
For well-calibrated printers: ±0.1mm to ±0.2mm is typical and achievable.
For premium, dialed-in printers: ±0.05mm on ideal parts and features.
Factors that affect tolerance:
- Material: PETG and ABS hold dimensions better than PLA (which can creep over time)
- Printer calibration: Belt tension, esteps, flow rate all matter
- Feature size: Small holes tend to print undersized, small posts oversized
- Orientation: Dimensions parallel to the build plate are more accurate than Z-height
Design tip: Always design with at least 0.2mm clearance for moving parts. For press-fit parts, do test prints to dial in the exact clearance your printer/material combo needs.
It depends on what you need:
✅ Worth it for:
- Dimensional stability: Much less warping than plain material
- Stiffness: Adds rigidity (parts flex less)
- Heat resistance: Higher heat deflection temperature
- Weight: Slightly lighter than plain material
❌ Not worth it for:
- Impact resistance: Often more brittle than plain material
- Cost-sensitive projects: 2-3x the price of regular filament
- Beginner projects: Requires hardened nozzle, careful handling
- Flexible parts: Reduces flexibility dramatically
Bottom line: Carbon fiber filaments excel for jigs, fixtures, and structural components where precise dimensions and stiffness matter most. For general-purpose brackets and parts that need to survive impact, plain ABS or PETG often works better.
🤔 Still have questions? Join the conversation! Every situation is unique, and the 3D printing community is incredibly helpful. Don’t hesitate to ask specific questions in forums or maker spaces.
Final Verdict: Which 3D Printer Should YOU Choose?
After all this analysis, let’s get down to brass tacks. Here’s our straight-shooting recommendation based on different needs and budgets.
🏆 Best Overall Pick: Bambu Lab H2S
Why it wins: It gives you industrial material capability (PC, Nylon-CF) in a desktop package without the usual headaches. The active heated chamber, large build volume, and Bambu’s excellent software make it the complete package.
- ✅ Handles the toughest engineering materials
- ✅ Massive build volume for big parts
- ✅ “Just works” reliability
- ✅ Excellent for both prototyping and production
Choose this if: You’re serious about mechanical parts, value your time, and want one printer that can do it all.
Premium investment, professional results
👨🔬 Best for Engineering Teams
Prusa XL (with multi-tool)
When you need large assemblies or complex multi-material parts, nothing else compares. Prusa’s reliability and the XL’s massive build volume make it perfect for engineering departments.
- ✅ Huge 360mm cube build volume
- ✅ Multi-material capability
- ✅ Prusa’s legendary support
- ✅ Ideal for complex assemblies
🚀 Best for Speed + Precision
Bambu Lab P2S
Need to iterate quickly? The P2S combines Bambu’s blistering speed with an enclosed design that handles engineering materials. Perfect for rapid prototyping cycles.
- ✅ Incredible print speeds
- ✅ Fully enclosed out of the box
- ✅ Great for ABS, ASA, PETG
- ✅ Automated calibration
💰 Best Budget Option
Sovol SV06 Plus
Proof that you don’t need to spend a fortune. With some DIY upgrades (enclosure, hardened nozzle), this printer can handle serious mechanical parts for under $500 total.
- ✅ Huge build volume for the price
- ✅ All-metal hotend capable of 300°C
- ✅ Great platform for modifications
- ✅ Perfect for learning and growing
⚠️ Remember This Before You Buy
The best 3D printer for mechanical parts for you depends on:
- Your materials: Will you mostly print PETG, or do you need Nylon/PC capability?
- Your budget: Be honest about what you can spend, including filament and upgrades.
- Your patience level: Are you a “set it and forget it” person or a tinkerer?
- Your space: Do you have room for a large printer with an enclosure?
- Your community: Is there good support for the printer you’re considering?
No printer is perfect for everyone. The right choice is the one that fits your specific needs, workflow, and budget.
Ready to Start Your Mechanical Printing Journey?
You’ve got the knowledge. Now it’s time to take action. Whether you’re making custom brackets for your workshop, prototyping a new product, or creating replacement parts, the right 3D printer will be your most valuable tool.
Not Sure Which Printer Fits Your Needs?
Take our quick quiz to get a personalized recommendation based on your specific requirements.
🎁 Free Bonus: Get our “Mechanical Parts Printing Checklist” delivered to your inbox—includes print settings, material profiles, and troubleshooting guides for perfect parts every time.
Share Your Success!
We’d love to see what you create! Tag your best mechanical 3D prints with #3DTechMechanical on social media for a chance to be featured.
Happy printing, and may your layers always adhere! 🛠️✨
Article last updated: [Current Date] | Topics: Best 3D Printer for Mechanical Parts, 3D Printer for Machine Parts, Best Mechanical 3D Prints, 3D Printing Materials