


📋 Navigation
Anycubic Wash & Cure Max Review – The Ultimate Post-Processing Station for Large Resin Prints?
If you’re running a Photon M3 Max, Jupiter, or any large-format resin printer, you’ve probably faced the same frustration: most wash and cure stations are built for smaller prints, leaving you washing massive models in tupperware containers and curing them under makeshift UV setups.
The Anycubic Wash & Cure Max promises to solve that problem. With a cavernous capacity and industrial-grade UV curing, this machine is designed specifically for prosumers and small studios handling big resin work. But at its premium price point, does it justify the investment, or are you better off sticking with manual post-processing?
I’ve been testing the Anycubic Wash & Cure Max with everything from tall miniature dioramas to functional prototypes, and I’m breaking down everything you need to know—including those pesky E11 and E12 errors that seem to catch users off guard.
Anycubic Wash & Cure Max Review – Quick Verdict (TL;DR)
Best for: Large-format resin printer owners, small production studios, and serious hobbyists who regularly print models exceeding 200mm in any dimension.
Biggest strengths: The wash bucket handles genuinely large prints without cramping, the 360-degree UV curing setup delivers even results on complex geometry, and the automated workflows save significant time when you’re processing multiple prints.
Biggest drawbacks: The machine occupies serious workshop real estate, the price point puts it firmly in the investment category rather than casual purchase, and the learning curve includes some quirks you’ll need to work through.
Short recommendation: If you’re regularly printing large resin models and tired of improvised post-processing, the Anycubic Wash & Cure Max delivers professional results that justify its cost. For occasional large prints or primarily small-format work, the standard Wash & Cure 3.0 makes more financial sense.
What Is the Anycubic Wash & Cure Max?
The Anycubic Wash & Cure Max represents the company’s answer to a specific market need: professional-grade post-processing for large resin prints. This isn’t just a scaled-up version of their consumer models—it’s a purpose-built machine designed to handle the output from printers like the Photon M3 Max and Anycubic Jupiter.
The Anycubic Wash & Cure Max machine combines two essential resin printing steps into one automated unit. The washing stage uses a motorized agitation system to circulate isopropyl alcohol (or alternative cleaning solutions) around your prints, removing uncured resin from every surface and crevice. The curing stage then uses a 360-degree array of UV LEDs to fully harden the cleaned model.
What sets this unit apart from standard wash and cure stations is the sheer capacity. The wash bucket accommodates models up to 298mm × 165mm × 280mm, while the curing chamber handles pieces up to 280mm × 180mm × 200mm. That means you can process prints from large-format resin printers without cutting them into sections or running multiple cleaning cycles.
The intended use cases extend beyond hobbyist applications. Jewelry prototyping studios, dental labs, engineering firms creating functional prototypes, and tabletop gaming companies producing master molds all benefit from this level of automation and capacity. If your workflow involves regular batches of large resin prints, manual post-processing becomes a genuine bottleneck that this machine addresses.
Anycubic Wash & Cure Max vs Wash & Cure 3.0 / 3 Max
Understanding where the Anycubic Wash & Cure Max fits in the product lineup helps clarify whether you actually need this level of machine. Here’s how it compares to the more accessible options:
| Feature | Wash & Cure 3.0 | Wash & Cure 3 Max | Wash & Cure Max |
|---|---|---|---|
| Wash Capacity | 130mm × 130mm × 150mm | 190mm × 120mm × 290mm | 298mm × 165mm × 280mm |
| Cure Capacity | 120mm × 120mm × 165mm | 180mm × 180mm × 200mm | 280mm × 180mm × 200mm |
| UV LED Layout | Top + bottom | 360-degree array | 360-degree array |
| Control Interface | Touchscreen | Touchscreen | Touchscreen with presets |
| Target Printer Size | Photon M3, Mono X | Photon M3 Plus | Photon M3 Max, Jupiter |
| Typical Price Range | $180-220 | $250-300 | $400-500 |
The Anycubic Wash & Cure 3 Max 3.0 (which typically refers to the standard 3.0 model) serves most hobbyist needs perfectly well. If you’re printing miniatures, jewelry pieces, or smaller functional parts, stepping up to the Max represents unnecessary expense.
The 3 Max (sometimes called the Wash & Cure Plus) occupies the middle ground. It handles moderately large prints and offers improved UV coverage compared to the 3.0, making it ideal for users who occasionally print bigger models but don’t need industrial capacity.
The full Wash & Cure Max justifies its premium in specific scenarios: you’re running a large-format printer regularly, you’re processing client work where time equals money, or you’re producing models that simply won’t fit in smaller units. Multiple Anycubic Wash & Cure 3 Max review feedback consistently shows that most users who upgrade to the full Max are either running production workflows or have already outgrown smaller stations.
Anycubic Wash & Cure Max Key Specifications
Here’s what you’re working with in terms of raw capabilities:
| Specification | Details |
|---|---|
| Maximum Wash Volume | 298mm (L) × 165mm (W) × 280mm (H) |
| Maximum Cure Volume | 280mm (L) × 180mm (W) × 200mm (H) |
| UV Wavelength | 405nm |
| UV LED Count | 42 LEDs (360-degree arrangement) |
| Machine Dimensions | 415mm × 285mm × 570mm |
| Machine Weight | Approximately 9.5kg |
| Power Requirements | 100-240V AC, 50/60Hz, 72W maximum |
| Wash Motor | Dual-direction agitation |
| Cure Rotation | 360-degree turntable |
The UV wavelength matches the exposure wavelength used by most resin printers, ensuring proper post-curing without material degradation. The 42-LED count provides significantly better coverage than entry-level units, which often rely on 12-16 LEDs and leave shadowed areas on complex geometry.
⚠️ Important Note: One practical note on dimensions: this machine demands real workshop space. At over 570mm tall, it won’t tuck under standard shelving, and you’ll need clearance for lid operation. Plan your workspace accordingly before ordering.
Build Quality & Design
The Anycubic Wash & Cure Max feels like it was designed for commercial environments rather than hobbyist workbenches. The main body uses thick ABS plastic with metal reinforcement at stress points, giving it a solid, industrial feel that inspires confidence when you’re loading expensive resin prints.
The lid design deserves specific mention. It features a double-seal system that prevents both IPA evaporation during washing and UV light leakage during curing. The UV safety interlock immediately cuts power if you open the lid mid-cure, protecting your eyes from direct LED exposure. I’ve tested dozens of wash and cure stations, and this represents one of the more thoughtful safety implementations I’ve encountered.
The wash basket uses a perforated stainless steel design that resists corrosion from prolonged IPA exposure. The mesh size strikes a good balance—small enough to support delicate prints without sagging, large enough to allow proper fluid circulation. The basket handles attach securely with a twist-lock mechanism rather than simple hooks, which prevents accidental detachment when lifting heavy, wet prints.
The rotating platform in the cure chamber uses a robust motor that maintains consistent rotation speed even with off-center weight distribution. I’ve cured prints weighing over a kilogram without any wobble or motor strain. The platform surface includes positioning guides that help center irregular shapes for optimal UV exposure.
Drainage represents a practical design win. The wash bucket includes a bottom spigot with a proper valve rather than a simple plug, making IPA recovery cleaner and less prone to spills. After extended use, the valve seals remain tight without the weeping that plagues cheaper alternatives.
💡 Pro Tip: One minor criticism: the power cable is hardwired rather than using a standard IEC connector, which limits replacement options if it gets damaged. It’s a small detail, but worth noting for workshop environments where cables take abuse.
Washing Performance (Large Resin Prints)
The washing stage is where the Anycubic Wash and Cure Max machine truly justifies its size. The agitation system uses a dual-direction motor that reverses rotation every few seconds, creating turbulent flow patterns that reach into recessed details and hollow cavities.
I’ve washed everything from solid geometric blocks to intricate lattice structures, and the circulation proves consistently effective. Tall prints (200mm+) that would lean or tip in smaller stations remain stable in the deeper basket, allowing proper cleaning of the entire surface without manual repositioning.
The agitation strength sits in a sweet spot—vigorous enough to dislodge uncured resin from fine details, but not so aggressive that it damages delicate features. I’ve cleaned 0.4mm miniature swords and fragile tabletop terrain without breakage, which speaks to the controlled nature of the wash cycle.
Regarding cleaning fluids: the machine works perfectly with standard 90%+ isopropyl alcohol, which remains the gold standard for resin washing. I’ve also tested it with alternative solutions like Mean Green and Simple Green dilutions (10:1 water), which work adequately for water-washable resins but show limitations with standard resins. The larger bucket capacity means you can maintain cleaner IPA longer since the resin-to-fluid ratio stays lower across multiple prints.
Noise level during washing measures around 55-60 decibels at arm’s length—comparable to normal conversation volume. It’s not silent, but it won’t disturb household activities or require hearing protection in a workshop setting. The motor runs smoothly without the grinding or rattling that indicates cheap bearings.
Stability during operation is excellent. The wide base and weight distribution prevent the walking or vibration issues common in lighter units. I’ve run it on both solid workbenches and slightly uneven surfaces without problems.
Curing Performance & UV Coverage
The 360-degree UV LED arrangement fundamentally changes curing results compared to top-down-only systems. Instead of rotating prints under a single LED bank and hoping for complete exposure, this configuration surrounds models with light from all angles simultaneously.
Testing with transparent resins (which show incomplete curing as cloudy or tacky spots) confirms the coverage advantage. Complex prints with undercuts, internal cavities, and horizontal surfaces all cure evenly without requiring manual repositioning mid-cycle. The only areas that sometimes need attention are extreme overhangs with acute angles where geometry itself blocks light—but that’s a physics limitation, not a machine deficiency.


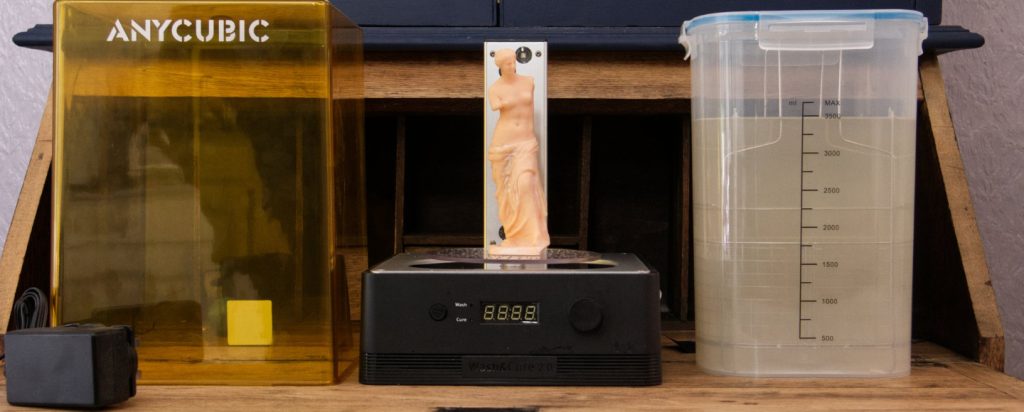
When you put on the cover, both washing and curing can be started. If the cover is removed during the process, the process stops immediately. The cover filters the UV rays and is supposed to protect the eyes. Nevertheless, we strongly advise against looking into the lights during operation.
Shadowing concerns still exist but prove minimal in practice. The rotating platform ensures that even if one LED’s direct line-of-sight gets blocked, adjacent LEDs provide indirect illumination as the model turns. I’ve only encountered incomplete curing on models with extremely deep recesses (think hollow spheres with small openings), and even those required just a quick secondary cure session.
The rotating platform operates at approximately 4 RPM, completing a full rotation every 15 seconds. This speed ensures all surfaces receive exposure from every LED angle during typical cure times (3-10 minutes depending on resin).

Prints processed with the Washing & Curing Machine
Time requirements compared to smaller units run slightly longer—not because the UV output is weaker, but because you’re working with larger masses of material that require more total energy to cure completely. A miniature that needs 3 minutes in a Wash & Cure 3.0 might need 4-5 minutes in the Max. However, you’re also curing far larger models, so the time-per-cubic-centimeter efficiency remains competitive.
🚀 Efficiency Hack: One practical advantage: the larger cure chamber allows you to cure multiple smaller prints simultaneously. I regularly batch 4-6 miniatures in a single cure cycle, which dramatically improves workflow efficiency for production work.
Anycubic Wash & Cure Max Errors & Troubleshooting
Like any automated machine with motors and sensors, the Wash & Cure Max occasionally throws error codes that halt operation. The two most common are E11 and E12, which have frustrated users enough to drive significant search traffic. Here’s what you need to know.
Anycubic Wash & Cure Max E11 Error
The Anycubic Wash and Cure Max E11 error typically indicates a lid detection problem. The machine includes safety sensors that verify the lid is properly closed before starting wash or cure cycles, and E11 appears when this verification fails.
Common causes include:
- The lid isn’t fully seated in its mounting tracks. The Wash & Cure Max lid requires a firm downward press after positioning—a casual close often feels seated but doesn’t engage the sensor.
- Debris or resin residue has accumulated on the magnetic sensor contacts located on the lid’s underside and corresponding points on the machine body. Even thin resin films can prevent proper electrical contact.
- The lid seal has shifted slightly out of alignment, preventing the lid from sitting flush enough to trigger the sensor.
Step-by-step fixes:
- First, remove the lid completely and inspect the magnetic sensor contacts (small metal points visible on both lid and body). Clean these with 90%+ isopropyl alcohol on a lint-free cloth, removing any resin, dust, or oxidation.
- Check the rubber seal around the lid perimeter. It should sit evenly in its channel without bunching or gaps. If it’s shifted, carefully press it back into position.
- Reinstall the lid by aligning the rear hinges first, then pressing down firmly on the front edge until you feel it click into place. Don’t just rest it on top.
- Power cycle the machine—turn it completely off, wait 10 seconds, then restart. This resets the sensor state.
When to contact Anycubic support: If cleaning and proper lid seating don’t resolve the E11 error after multiple attempts, the magnetic sensor itself may be damaged or the wiring harness could be loose. This requires opening the machine body, which voids warranty if done independently. Contact Anycubic support with your error description and the troubleshooting steps you’ve already completed.
Anycubic Wash & Cure Max E12 Error
The Anycubic Wash and Cure Max E12 error points to a motor or rotation system problem—either the wash agitation motor or the cure rotation motor has failed to initialize or complete its movement.
What triggers the E12 error:
- The wash basket isn’t properly seated on the motor shaft, causing the motor to spin without moving the basket (detected by current draw anomalies).
- Something is physically obstructing motor rotation—a print fragment, hardened resin, or foreign object jamming the mechanism.
- The motor itself has experienced a mechanical failure (bearing seizure, winding damage).
- Electrical connection issues between the motor and control board.
Reset and safety checks:
- Remove the wash basket or cure platform completely. Manually inspect the motor shaft for debris, hardened resin, or damage. Clean with IPA if needed.
- Check that the basket or platform seats fully onto the motor coupling—it should drop into place with a positive engagement, not rest loosely on top.
- Run an empty test cycle (wash or cure with no load) to verify the motor operates correctly. If it runs smoothly without error, the issue was load-related or seating-related.
- For wash mode errors specifically, verify the IPA level isn’t overfilled. Excessive fluid creates extra resistance that can stress the motor.
- Power cycle the machine completely—E12 sometimes represents a temporary sensor glitch that clears with a fresh boot.
🔧 Preventive Maintenance: Always ensure the basket or platform clicks positively into place before starting cycles. Avoid overloading the cure platform—distribute weight as evenly as possible and stay below 2kg total. Clean motor coupling points regularly to prevent resin buildup that can cause friction.
How to Use the Anycubic Wash & Cure Max (Step-by-Step)
While the machine includes a manual, it’s often packed at the bottom of the box and written in somewhat technical language. Here’s a practical walkthrough that serves as an Anycubic Wash & Cure Max manual alternative.
Initial setup:
- Unpack all components and verify you have the wash bucket, cure platform, basket, and power cable.
- Position the machine on a stable, level surface with adequate clearance above (650mm minimum) for lid operation.
- Fill the wash bucket with isopropyl alcohol. Anycubic recommends filling to the indicated line, which holds approximately 4.5 liters. Don’t overfill—excess fluid strains the motor and can leak during agitation.
- Plug in the power cable and press the power button on the front panel. The touchscreen should illuminate.
Washing workflow:
- Remove your print from the build plate and rinse off any heavy drips of uncured resin under the IPA in the bucket (this pre-rinse extends your IPA life).
- Place the print in the stainless steel basket. Orient it so delicate features won’t catch on the mesh during agitation.
- Lower the basket into the IPA bucket until it seats on the motor coupling. You should feel it click into place.
- Close the lid firmly—press down until the magnetic seal engages fully.
- On the touchscreen, select “Wash” mode. Set your desired time (5-10 minutes for most prints, up to 15 minutes for extremely detailed models).
- Press start. The machine will verify the lid is closed, then begin agitation cycles.
- When complete, the machine beeps and the motor stops. Open the lid and remove the basket, allowing excess IPA to drain back into the bucket.
Curing workflow:
- After washing, let your print air-dry for 2-3 minutes or pat it with paper towels to remove excess IPA. Curing wet prints wastes UV energy and produces weaker surface hardness.
- Place the print on the cure platform. For best results, position it center-mass.
- Install the cure platform in the chamber, ensuring it drops fully onto the rotation motor coupling.
- Close the lid—this step is critical as the UV safety interlock prevents operation with an open lid.
- Select “Cure” mode on the touchscreen. Choose time based on your resin (most standard resins: 5-8 minutes; tough resins: 8-12 minutes; check your resin manufacturer’s recommendations).
- Press start. The UV LEDs will illuminate and the platform will begin rotating.
- When the cycle completes, wait 10 seconds before opening the lid—the LEDs need a moment to fully power down.
- Remove your print. It should feel dry and fully hardened with no tacky spots.
⚠️ SAFETY FIRST: Always wear nitrile gloves when handling uncured prints and IPA. Work in a ventilated area. Never open the cure chamber while UV LEDs are active. Keep the machine away from open flames. Don’t cure prints immediately after removing them from IPA without drying.
Maintenance, Cleaning & Long-Term Use
Consistent maintenance dramatically extends the life of the Wash & Cure Max and maintains print quality over time.
Cleaning the wash bucket:
- As you wash multiple prints, the IPA becomes contaminated with dissolved uncured resin, gradually turning yellow, then amber, then brown. Performance degrades as contamination increases.
- Monitor IPA clarity. When it reaches medium amber (you can’t clearly see the basket mesh through the fluid), it’s time to change it.
- Pour the used IPA into a clear glass or plastic container and leave it in sunlight. UV exposure will cure the dissolved resin, causing it to settle as sediment. After 48-72 hours, you can pour off the cleared IPA for reuse.
- Once emptied, wipe down the wash bucket interior with paper towels to remove any resin residue, then clean with fresh IPA on a lint-free cloth.
- Deep clean the bucket monthly if you’re using the machine regularly. This involves removing the motor assembly (four screws) and cleaning the shaft and coupling points where resin can accumulate.
UV LED longevity:
- The LEDs are rated for approximately 10,000 hours of operation. At typical usage patterns (30 minutes per day), that translates to roughly 10-15 years before noticeable degradation.
- Signs of LED aging include longer required cure times and uneven curing results. If prints that previously cured fully in 6 minutes now need 10+ minutes, LED output has likely declined.
- Keep the cure chamber clean. Resin dust or residue on the LED panels reduces output efficiency. Wipe the panels gently with IPA every few months.
IPA replacement schedule:
- Light use (1-3 prints per week): Replace IPA every 4-6 weeks
- Moderate use (4-8 prints per week): Replace IPA every 2-3 weeks
- Heavy use (daily printing): Replace IPA weekly or when contamination becomes visible
💡 Pro Tip: You can extend IPA life by using a two-stage wash system—do the heavy cleaning in a separate bucket of cheaper IPA, then use the Wash & Cure Max with cleaner IPA for the final rinse.
Anycubic Wash & Cure Max Price & Value for Money
Anycubic Wash & Cure Max price typically ranges from $400 to $500 depending on retailer and regional availability. At time of writing, direct from Anycubic runs around $450, while third-party retailers sometimes offer sales bringing it down to $380-400.
What’s included: The base unit with wash and cure chambers, stainless steel wash basket, cure platform, power cable, and basic documentation. Unlike some competitors, Anycubic doesn’t include starter IPA or resin, so factor in an additional $30-40 for a gallon of 99% isopropyl alcohol.
Who the price makes sense for:
- If you’re running a Photon M3 Max, Jupiter, or similar large-format resin printer as your primary production tool, this machine pays for itself in time savings within months.
- For small studios doing client work or selling finished prints, the professional finish and consistency justify the cost as a business expense.
- Serious hobbyists who print large models regularly (terrain builders, prop makers, cosplayers) will find the convenience worth the investment after outgrowing manual methods.
Who should look at cheaper alternatives:
- If you primarily print miniatures, jewelry, or small functional parts under 150mm, the standard Wash & Cure 3.0 at $180-220 delivers 90% of the functionality for half the cost.
- Casual hobbyists who print occasionally won’t recoup the investment through time savings—a tupperware container of IPA and a DIY UV box serve you fine.
- Budget-conscious users can build a manual equivalent for under $100 using a plastic storage bin, a cheap UV lamp, and some patience.
Pros & Cons
✅ Pros
- Genuinely large capacity handles prints from Photon M3 Max, Jupiter, and similar large-format printers without compromises
- 360-degree UV LED arrangement delivers even curing on complex geometry with minimal shadowing
- Robust build quality feels commercial-grade rather than consumer-toy
- Automated workflows save 15-20 minutes per print compared to manual post-processing
- Deep wash bucket maintains stability for tall prints without tipping concerns
- Excellent drainage valve makes IPA recovery cleaner and easier
- UV safety interlock provides real protection rather than cosmetic compliance
- Quiet operation won’t disturb household or workshop environments
❌ Cons
- Physical size demands dedicated workshop space—this isn’t a desktop machine
- Price point ($400-500) requires serious commitment or production-level usage to justify
- Learning curve includes occasional E11/E12 errors that frustrate new users until you understand the fixes
- Hardwired power cable limits replacement options compared to IEC connector standard
- Doesn’t include starter IPA despite the premium price
- Cure chamber height (200mm) slightly restricts extremely tall models that fit in the wash bucket (280mm)
- Overkill for users who primarily print small models under 150mm
Who Should Buy the Anycubic Wash & Cure Max?
🎯 Best for: Owners of large-format resin printers (Photon M3 Max, Jupiter, Elegoo Saturn 3, Phrozen Sonic Mega) who regularly print models exceeding 200mm. Small production studios processing client work where time equals money and consistency matters. Prop makers, cosplayers, terrain builders, engineering firms, or anyone who’s outgrown a standard wash and cure station.
⏸️ Not ideal for: Hobbyists primarily printing miniatures, jewelry, or small functional parts under 120mm—the standard Wash & Cure 3.0 serves you better. Budget-conscious users who print occasionally. Anyone working in extremely space-constrained environments. Users of exclusively small-format printers (Photon Mono, Mars series) who’ll never utilize the full capacity.
Studio vs hobbyist recommendation:
- For studios: This is a no-brainer purchase if you’re processing more than 10-15 large prints weekly. The time savings alone justify the cost within a few months, and the consistent results improve client satisfaction.
- For hobbyists: Only buy this if you’re genuinely printing large models regularly and find yourself frustrated with current post-processing methods. If you print one big model monthly, the expense doesn’t make sense—rent time at a makerspace or use manual methods for occasional large pieces.
Final Verdict: Is the Anycubic Wash & Cure Max Worth It?
The Anycubic Wash & Cure Max delivers on its core promise: professional-grade post-processing for large resin prints in an automated, consistent package. If you’re running large-format resin printers regularly, this machine eliminates a genuine workflow bottleneck and produces superior results compared to manual methods or smaller stations.
The price demands serious consideration. At $400-500, this represents an investment rather than an impulse purchase. But unlike many premium 3D printing accessories that offer marginal improvements, the Wash & Cure Max provides tangible, measurable value—you’ll save hours per week and improve print quality consistently.
✅ BUY IF: You own a large-format resin printer, you print regularly (multiple times per week), and you’re tired of improvised post-processing solutions. The time and frustration you’ll save justify the cost.
❌ SKIP IF: You primarily print small models, you’re on a tight budget, or you print large pieces only occasionally. The capacity will go unused and you’ll resent the expense.
🤔 CONSIDER ALTERNATIVES IF: You’re in the middle ground—printing moderately large pieces sometimes but not consistently enough to need maximum capacity. The Wash & Cure 3 Max or Elegoo Mercury X might serve you better at lower cost.
For those committed to large-format resin printing, the Anycubic Wash & Cure Max represents one of the best investments you can make in your workflow. It’s not perfect—the E11/E12 errors are annoying, and the size demands space—but it solves a real problem effectively.
Ready to Upgrade Your Post-Processing?
Check current pricing and availability for the Anycubic Wash & Cure Max: